概要
tf-openposeを用いて骨格推定をして、その後3d-pose-estimatorを用いて3D姿勢推定をする一連の流れを解説します。また、それとともにハマった点とその解決方法を備忘録代わりに共有します。
tf-openposeについて
tf-openposeを用いれば手軽に骨格推定を行うことが可能です。

tf-openposeのインストール
git clone https://github.com/ildoonet/tf-pose-estimation
cd tf-pose-estimation
pip install -r requirements.txt
swigというC/C++で書かれたライブラリを多言語で利用できるようにするツールをインストールします。
brew install swig
次に学習済みのグラフをダウンロードします。
cd models/graph/cmu
bash download.sh
最後に
cd ~/tf-pose-estimation/tf_pose/pafprocess/
swig -python -c++ pafprocess.i && python3 setup.py build_ext --inplace
を実行してください。以上でtf-openposeのsettingは完了です。
tf-openposeの実行
cd ~/tf-pose-estimation
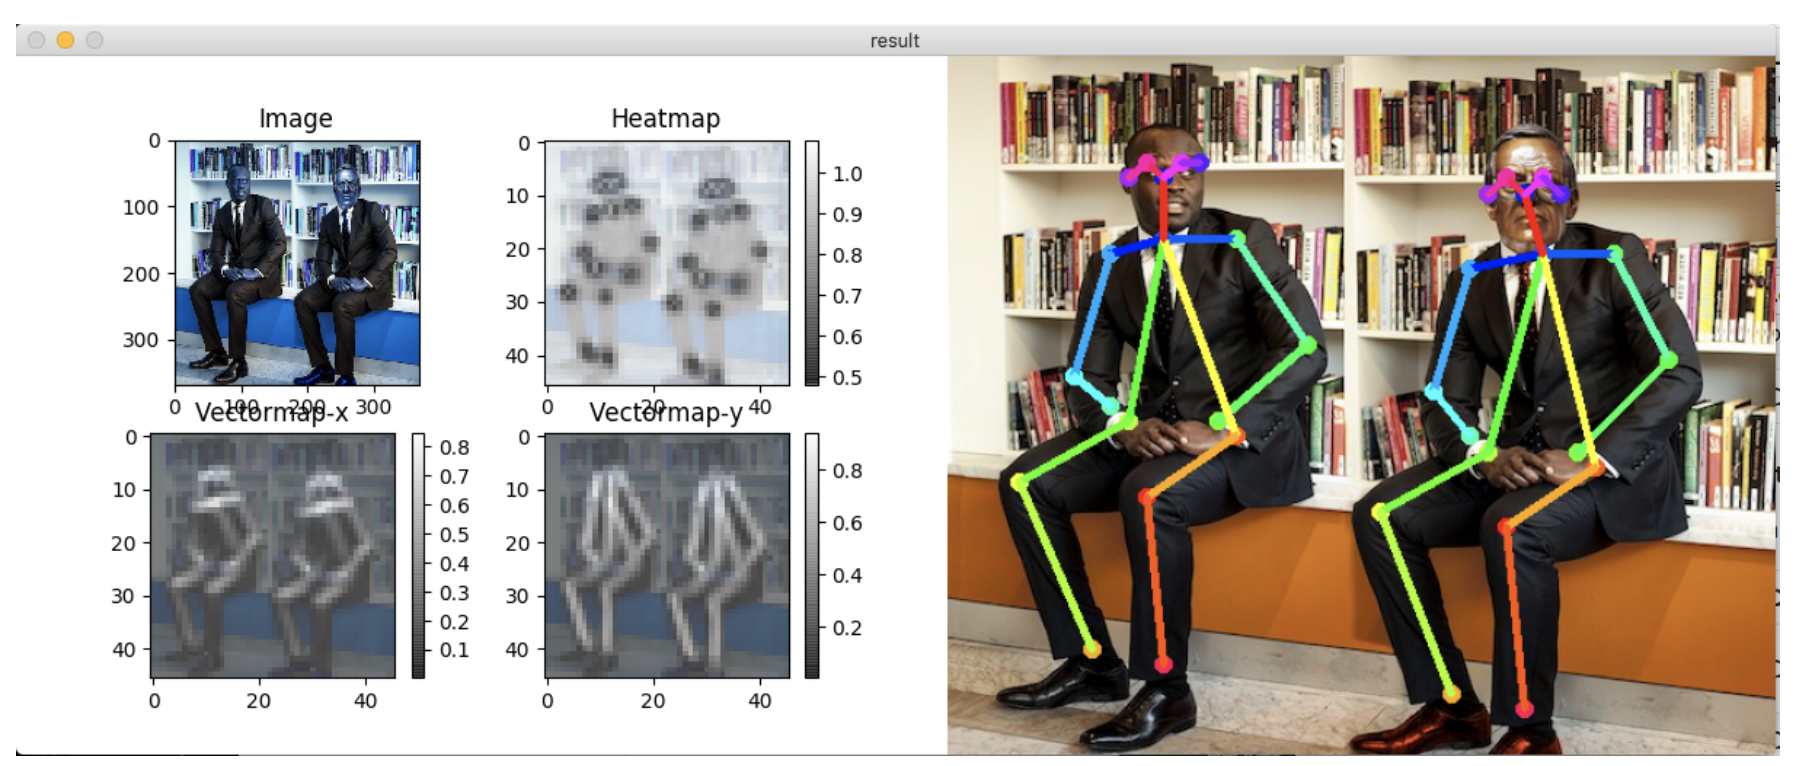
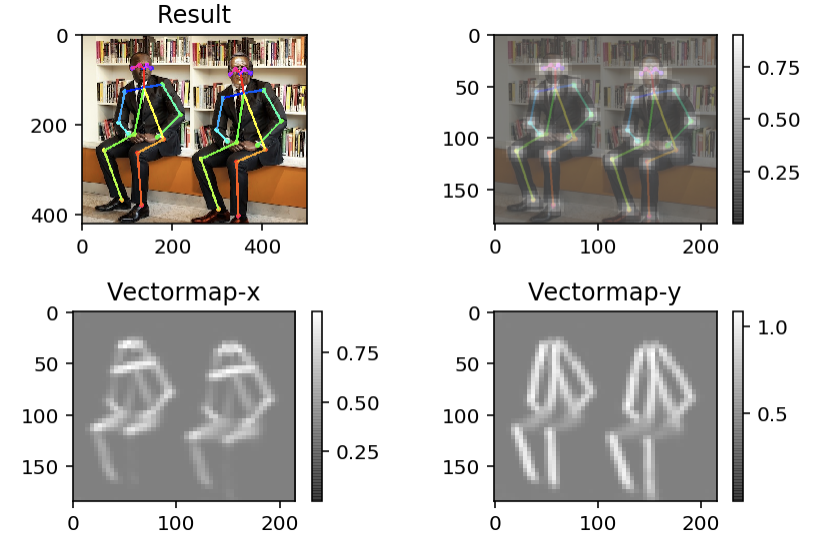
python run.py --model=mobilenet_thin --resize=432x368 --image=images/p2.jpg
3D Pose Estimation
openposeを用いて画像から二次元の骨格情報を抽出することができました。これを3d-pose-estimationと組み合わせることで3次元空間での姿勢推定をすることが可能です。

この姿勢情報をunityなどと連携させることで3Dモデルを動画の人間の動きをトレースして動かすといったことが可能になります。
3D Pose Estimationのインストール
3D Pose Estimationは以前は先ほどクローンしてきた gitリポジトリ tf-pose-estimation に組み込まれていましたが現在は削除されています。これを利用するため(邪道であり、開発者様の意向に背いている気がしますが...)masterではなくbranchにあるコードを引用することにします。
まずはディレクトリを移動してブランチの一覧を取得します。
cd ~/tf-pose-estimation
git branch -r
一覧は以下です。
  origin/HEAD -> origin/master
  origin/dev/architecture-mobilenet-v2
  origin/devel
  origin/master
  origin/package
このうち、devel branchに切り替えてディレクトリを移動します。
git checkout devel
cd src
このsrcフォルダの中にあるliftingフォルダをクリップボードにコピーします。デスクトップなどにliftingフォルダを一度移すのでも構いません。
liftingフォルダをコピー(移動)することができたら、再びmasterに戻ります。
cd ~/tf-pose-estimation
git checkout master
次に、tf-pose-estimationフォルダの中にliftingフォルダをペーストしてください。
最後に仕上げです。run.pyの中身を以下のように書き換えてください(新しい.pyファイルを作っても良いです)。
import argparse
import logging
import sys
import time

import cv2
import numpy as np
import matplotlib.pyplot as plt

from tf_pose import common
from tf_pose.estimator import TfPoseEstimator
from tf_pose.networks import get_graph_path, model_wh

from lifting.prob_model import Prob3dPose
from lifting.draw import plot_pose

logger = logging.getLogger('TfPoseEstimator')
logger.setLevel(logging.DEBUG)
ch = logging.StreamHandler()
ch.setLevel(logging.DEBUG)
formatter = logging.Formatter('[%(asctime)s] [%(name)s] [%(levelname)s] %(message)s')
ch.setFormatter(formatter)
logger.addHandler(ch)


if __name__ == '__main__':
    parser = argparse.ArgumentParser(description='tf-pose-estimation run')
    parser.add_argument('--image', type=str, default='./images/p1.jpg')
    parser.add_argument('--resolution', type=str, default='432x368', help='network input resolution. default=432x368')
    parser.add_argument('--model', type=str, default='mobilenet_thin', help='cmu / mobilenet_thin')
    parser.add_argument('--scales', type=str, default='[None]', help='for multiple scales, eg. [1.0, (1.1, 0.05)]')
    args = parser.parse_args()
    scales = ast.literal_eval(args.scales)

    w, h = model_wh(args.resolution)
    e = TfPoseEstimator(get_graph_path(args.model), target_size=(w, h))

    # estimate human poses from a single image !
    image = common.read_imgfile(args.image, None, None)
    # image = cv2.fastNlMeansDenoisingColored(image, None, 10, 10, 7, 21)
    t = time.time()
    humans = e.inference(image, scales=scales)
    elapsed = time.time() - t

    logger.info('inference image: %s in %.4f seconds.' % (args.image, elapsed))

    image = TfPoseEstimator.draw_humans(image, humans, imgcopy=False)

    logger.info('3d lifting initialization.')
    poseLifting = Prob3dPose('./lifting/models/prob_model_params.mat')

    image_h, image_w = image.shape[:2]
    standard_w = 640
    standard_h = 480

    pose_2d_mpiis = []
    visibilities = []
    for human in humans:
        pose_2d_mpii, visibility = common.MPIIPart.from_coco(human)
        pose_2d_mpiis.append([(int(x * standard_w + 0.5), int(y * standard_h + 0.5)) for x, y in pose_2d_mpii])
        visibilities.append(visibility)

    pose_2d_mpiis = np.array(pose_2d_mpiis)
    visibilities = np.array(visibilities)
    transformed_pose2d, weights = poseLifting.transform_joints(pose_2d_mpiis, visibilities)
    pose_3d = poseLifting.compute_3d(transformed_pose2d, weights)

    for i, single_3d in enumerate(pose_3d):
        plot_pose(single_3d)
    plt.show()
    pass
3D Pose Estimationの実行
python run.py --model=mobilenet_thin --resize=432x368 --image=images/p2.jpg
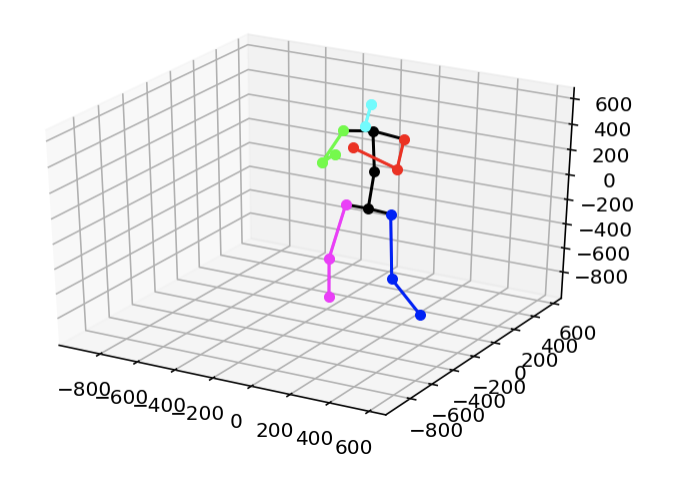
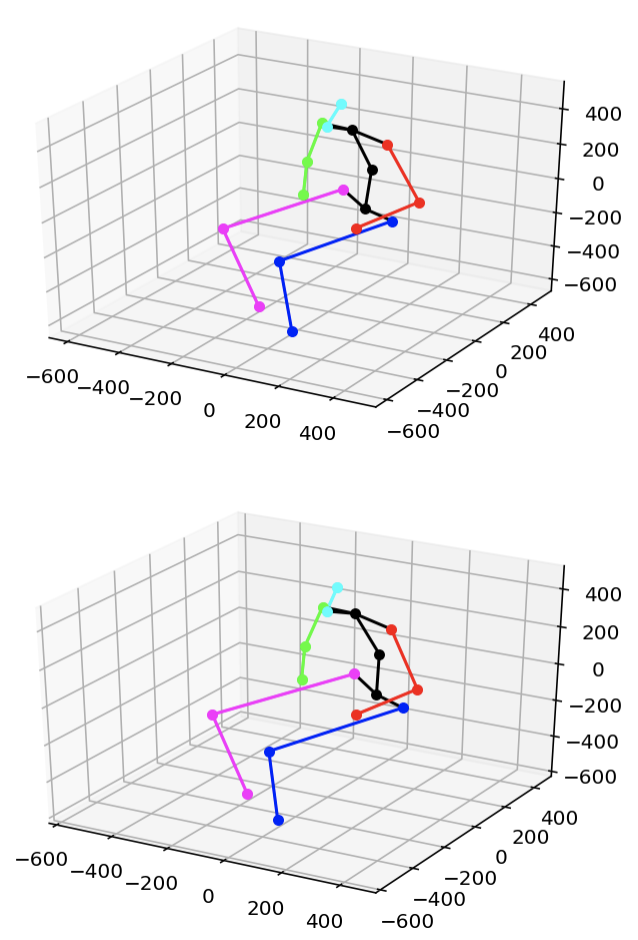
上記のコマンドを出力すれば以下の3d骨格プロットが得られます。人間が2人座っている画像の骨格を抽出したのでプロット画像も二つ出力されます。

骨格情報はpose_3dに入っています。サイズとともに出力すれば、
(2, 3, 17)
[[[  71.48704986  -58.26023795 -320.11229876 -183.15640429  216.8238699
    -11.48274567    4.4091282    82.49019393   39.70915699   -2.9661351
     27.84004239  205.97311297  362.78178305  171.281097   -122.7005334
   -202.29460299 -130.81136751]
  [ 113.24948881  194.50322367 -142.71512489 -148.85424371   31.99573068
   -302.24754322 -251.21557536  133.0771608    75.74529577  -14.18464889
     21.06375219    9.19473249  -60.88986293 -124.23290074  164.22177682
    206.25643283   58.97202917]
  [ -96.65909433  -58.91258719 -197.41306904 -613.05761654  -84.34510465
   -211.71201318 -647.53588523  126.09740822  363.46207416  413.2905669
    528.89131252  358.09240553  112.7854445   -58.77230858  318.24367281
     58.29690181  -41.64239587]]

 [[  91.95496863  -31.66337898 -316.19207754 -184.66998433  227.81491288
    -12.584797    -14.16200051   93.84625488   42.73471689   -2.67287331
     12.31833787  206.851387    344.64506511  164.43221306 -119.26256458
   -197.9342645  -122.32756546]
  [ 139.42261847  219.89602532 -162.84033638 -181.27356255   58.94920292
   -336.55624415 -283.76607766  149.11535314   83.52183789   -7.40499281
     30.51344165   14.21467296  -69.95918306 -120.88036364  172.58527775
    200.78417873   49.94852315]
  [-101.36476255  -62.85719618 -176.51123952 -564.96819735  -93.23573586
   -195.51713744 -604.7114395   113.59787852  344.77517494  387.22147932
    498.07333475  339.10907614  105.01815399  -57.24477445  296.2909129
     49.35912406  -34.22891739]]]
となっています。(人数, 三次元, 部位座標)という内訳です。部位座標はindexを0~16として
0 尻(尾てい骨)
1 右尻(右足付け根)
2 右ひざ
3 右足首
4 左尻(左足付け根)
5 左ひざ
6 左足首
7 脊椎
8 胸
9 首/鼻
10 頭
11 左肩
12 左ひじ
13 左手首
14 右肩
15 右ひじ
16 右手首
になっています。
本記事は以上です!お疲れ様でした!
参考URL
https://qiita.com/keel/items/0d64167850566586d22a
https://qiita.com/mdo4nt6n/items/d9523aff14dd9fb70c37
参考github
https://github.com/DenisTome/Lifting-from-the-Deep-release
https://github.com/ildoonet/tf-pose-estimation
