説明
今更ですが、ことりん(Kotlin) はプログラム言語です。
なので、Kotlin を使用して様々なコードを書いていきますね。コードを書くと当然必要になってくるのは ユニットテスト ですね。
Java であれば JUnit や TestNG、JavaScript であれば Jasmine だったり Mocha だったりするようにそれぞれのプログラム言語には何かしらのユニットテストフレームワークが大体あります。
Kotlin でももちろんあります。次のようなものが現在よく使われています。
- KotlinTest
- Spek
- JUnit
Kotlin でも Java 同様に JUnit が利用できます。
KotlinTest は、Scala のテストフレームワークである ScalaTest の影響を受けて開発されているようです。
Spek は Kotlin 開発元の JetBrains により開発が進められています。
この中から Spek を使ったテストの準備と実施を行ってみます。
前提
次の環境で作業しています。
| 項目 | 内容 |
|---|---|
| OS | MacOS |
| JDK | 1.8.0_152 |
| Gradle | 4.3.1 |
| Kotlin | 1.2.10 |
| IDE | IntelliJ IDEA |
後述の手順で IntelliJ に Spek プラグインをインストールしてのテスト実施を行ってみます。
手順
1. build.gradle
ビルドツールはMaven でも Gradle でも実施可能ですが、ここでは Gradle を使用してプロジェクトを構成します。
1.1. build.gradle - buildscript
Spek は JUnit のテストエンジンを使用して実装されています。そのため、buildsccript の中で依存するライブラリとして JUnit を追加する必要があります。
buildscript {
    repositories {
        jcenter()
        mavenCentral()
    }
    dependencies {
        classpath 'org.junit.platform:junit-platform-gradle-plugin:1.0.0'
    }
}
1.2. spek テストエンジンの組み込み
JUnitプラットフォームに Spek テストエンジンを組み込みます。
junitPlatform {
    filters {
        engines {
            include 'spek'
        }
    }
}

repositories {
    maven { url "http://dl.bintray.com/jetbrains/spek" }
}
1.3. 依存ライブラリの追加
実行時に必要になるライブラリを追加します。
dependencies {
    testCompile 'org.jetbrains.kotlin:kotlin-test'
    testCompile('org.jetbrains.spek:spek-api:1.1.5') {
        exclude group: 'org.jetbrains.kotlin'
    }
    testRuntime('org.jetbrains.spek:spek-junit-platform-engine:1.1.5')  {
        exclude group: 'org.junit.platform'
        exclude group: 'org.jetbrains.kotlin'
    }
}
1.4. プラグインの追加
最後に プラグインを追加します。
apply plugin: 'org.junit.platform.gradle.plugin'
apply plugin: 'kotlin'
apply plugin: 'application'
2. サンプルソースコード
テスト対象のテストコードを作成します。
簡単な四則演算を行う関数を定義します。
fun add(x: Int, y: Int): Int = x + y

fun subtract(x: Int, y: Int): Int = x - y

fun multiple(x: Int, y: Int): Int = x * y

fun divide(x: Int, y: Int): Int = x / y

fun remainder(x: Int, y: Int): Int = x % y
3. Spek テストコード
四則演算の関数をテストする Spek のテストコードを作成します。
3.1. サンプルテストソースコード
object SimpleCalcSpec: Spek({
    describe("com.shinyay.sample.spek.SimpleCalcを用いた四則演算") {
        beforeGroup { println("テスト対象を示すグループ:describe の事前処理") }
        afterGroup { println("テスト対象を示すグループ:describe の事後処理") }

        context("足し算を実施する関数:add を利用する場合") {
            beforeGroup { println("特定の条件を示すグループ:足し算context の事前処理") }
            afterGroup { println("特定の条件を示すグループ:足し算context の事後処理") }

            beforeEachTest { println("add 関数の各テストの事前処理") }
            afterEachTest { println("add 関数の各テストの事後処理") }
            on("add 関数の単純呼び出し") {
                it("1 + 2") {
                    assertEquals(3, add(1, 2))
                }
                it("11 + 22") {
                    assertEquals(33, add(11, 22))
                }
            }
            on("add 関数の再帰呼び出し") {
                it("1 + 2 + 3") {
                    assertEquals(6, add(1, add(2,3)))
                }
            }
        }
        context("割り算を実施する関数:subtract を利用する場合") {
            beforeGroup { println("特定の条件を示すグループ:割り算context の事前処理") }
            afterGroup { println("特定の条件を示すグループ:割り算context の事後処理") }

            beforeEachTest { println("subtract 関数の各テストの事前処理") }
            afterEachTest { println("subtract 関数の各テストの事後処理") }
            on("subtract 関数の単純呼び出し") {
                it("5 - 2") {
                    assertEquals(3, subtract(5, 2))
                }
                it("4 - 7") {
                    assertEquals(-3, subtract(4,7))
                }
            }
            on("add 関数の再帰呼び出し") {
                it("10 - 9 - 8") {
                    assertEquals(-7, subtract(subtract(10,9),8))
                }
            }
        }

    }
})
3.2. Spek テストコード 基本構成
Spek のテストコードは、Spek という名前からも想像できるようにモジュールの仕様(Specification)を明確にし正しいことを検証する事を目的として作成します。
RSpec や Mocha のようなイメージです。
基本的な構成は以下のようになります。
- Spek クラスを継承
- グループを作成(describe / given / context / on)
- テスト内容の記述、アサーション
3.3. グループ
グループとして定義できる単位に describe, given, context, on と複数あります。
これらを使い分け、組み合わせて仕様が明確になるようにテストコードを記述していきます。
ただし、組み合わせたり入れ子にしたりする必要はなく列挙していくのみでも構いません。
私は以下のように使い分けています。
| グループ | 使い方 |
|---|---|
| describe | テスト対象のクラスやオブジェクトを明記 |
| context | テストを行う条件を明記 |
| given | 通常使わない。context の条件の子条件がある場合に使用 |
| on | 実施する対象関数や処理内容を明記 |
3.4. テスト内容/アサーション
it に実施するテストを記述します。
ただし、Spek には アサーションライブラリは含まれません。別途追加する必要があります。
今回は kotlin-test を追加・使用しています。
その他にも以下のようなものがあります。
- HamKrest
- Kluent
- Expekt
AssertJ を使われている方も見かけます。
4. Gradle タスクで実行
Gradle タスクでテストを実行してみます。
verification - junitPlatformTest タスクを実行します。
15:08:12: Executing task 'junitPlatformTest'...

:02-spek:compileKotlin
:02-spek:compileJava NO-SOURCE
:02-spek:copyMainKotlinClasses
:02-spek:processResources NO-SOURCE
:02-spek:classes UP-TO-DATE
:02-spek:compileTestKotlin
:02-spek:compileTestJava NO-SOURCE
:02-spek:copyTestKotlinClasses
:02-spek:processTestResources NO-SOURCE
:02-spek:testClasses UP-TO-DATE
:02-spek:junitPlatformTest
テスト対象を示すグループ:describe の事前処理
特定の条件を示すグループ:足し算context の事前処理
add 関数の各テストの事前処理
add 関数の各テストの事後処理
add 関数の各テストの事前処理
add 関数の各テストの事後処理
特定の条件を示すグループ:足し算context の事後処理
特定の条件を示すグループ:割り算context の事前処理
subtract 関数の各テストの事前処理
subtract 関数の各テストの事後処理
subtract 関数の各テストの事前処理
subtract 関数の各テストの事後処理
特定の条件を示すグループ:割り算context の事後処理
テスト対象を示すグループ:describe の事後処理

Test run finished after 96 ms
[         9 containers found      ]
[         0 containers skipped    ]
[         9 containers started    ]
[         0 containers aborted    ]
[         9 containers successful ]
[         0 containers failed     ]
[         6 tests found           ]
[         0 tests skipped         ]
[         6 tests started         ]
[         0 tests aborted         ]
[         6 tests successful      ]
[         0 tests failed          ]


BUILD SUCCESSFUL

Total time: 2.984 secs
15:08:15: Task execution finished 'junitPlatformTest'.
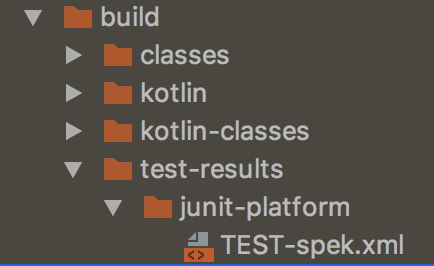
build/test-results ディレクトリには結果のXMLが出力されています。
5. IntelliJ Spek プラグインで実行
IntelliJ に Spek プラグインを導入して Spek を実行してみます。
5.1. Spek プラグインのインストール
IntelliJ のメニューから、
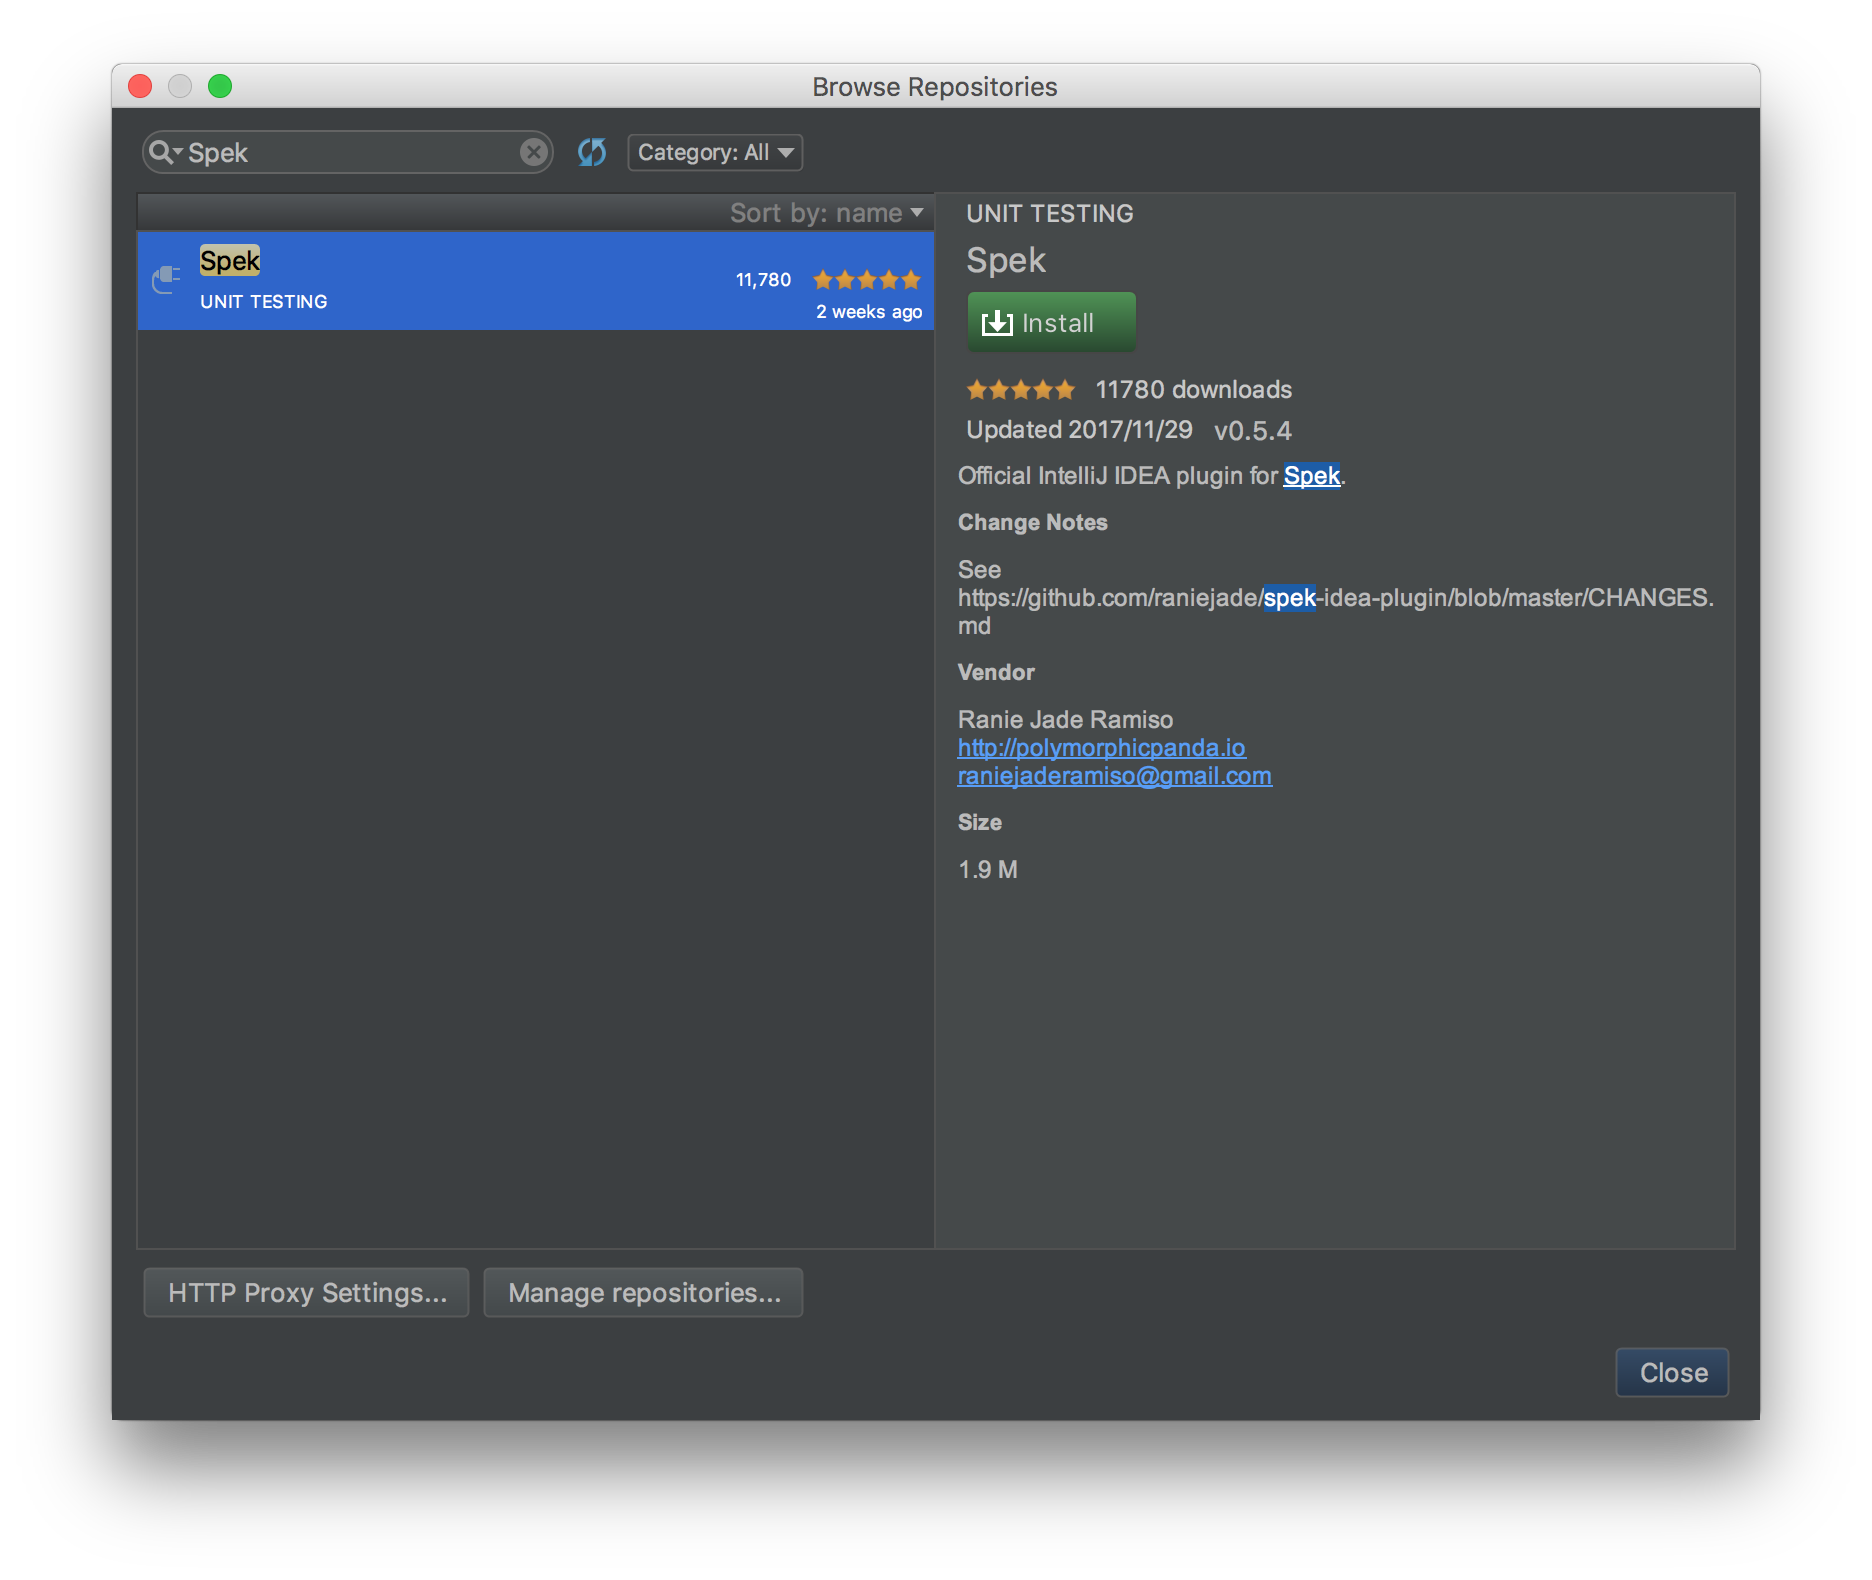
「IntelliJ IDEA > Preferences... > Plugins > Browse Repositories...」 を選択します。
表示される画面で、検索フィールドに Spek と入力すると Spek プラグインが表示されます。
Install をクリックして導入します。
5.2. Spek プラグイン構成
プラグインを導入後、テスト構成を行います。
IntelliJ のメニューから、
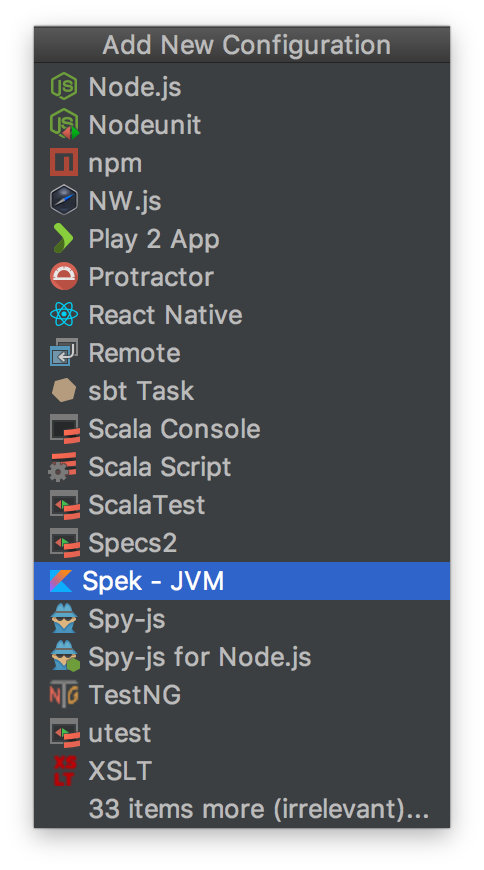
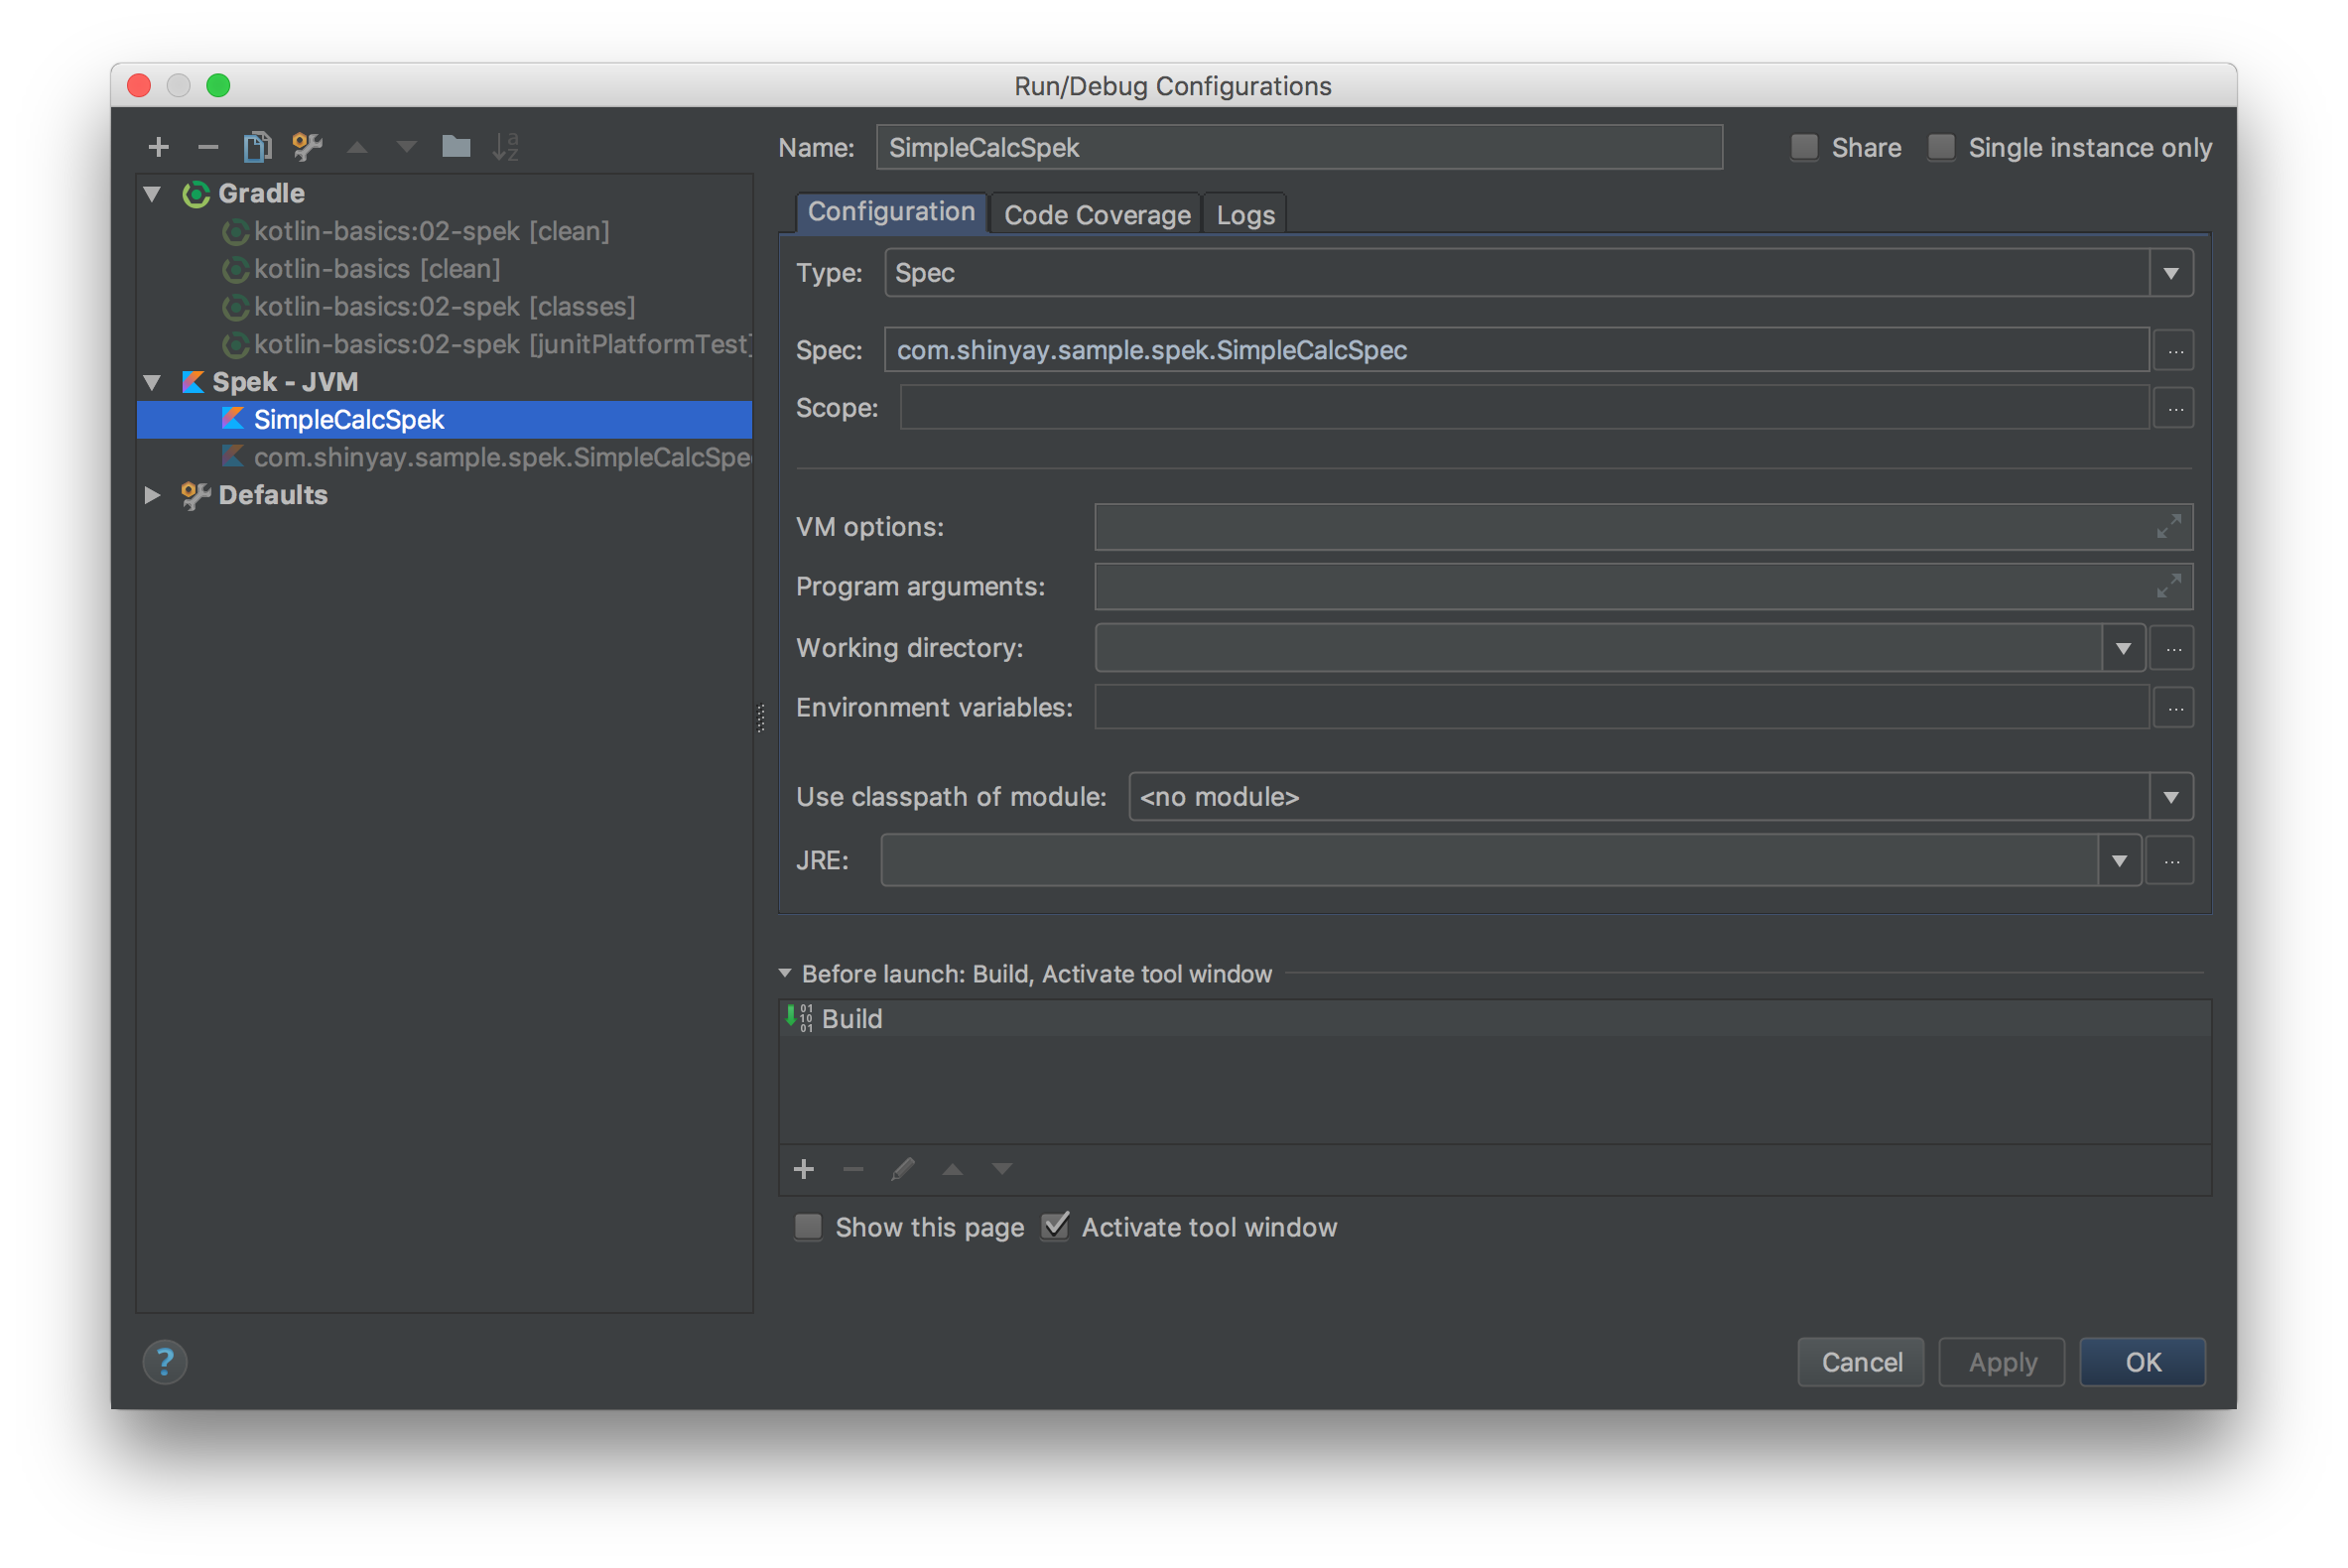
「Run > Edit Configurations...」を選択します。
左上の + をクリックし、Spek を選択します。
Spec にテストコードを設定します。
5.3. Spek プラグインで実行
メニューの Run からテストを実行します。
以下のように各グループが階層化されてテスト内容が表示されます。
まとめ
Kotlin のユニットテストの実施方法もその他の言語と違和感なく実施することが確認できました。
いずれにしても、ユニットテストは大事ですよね。


