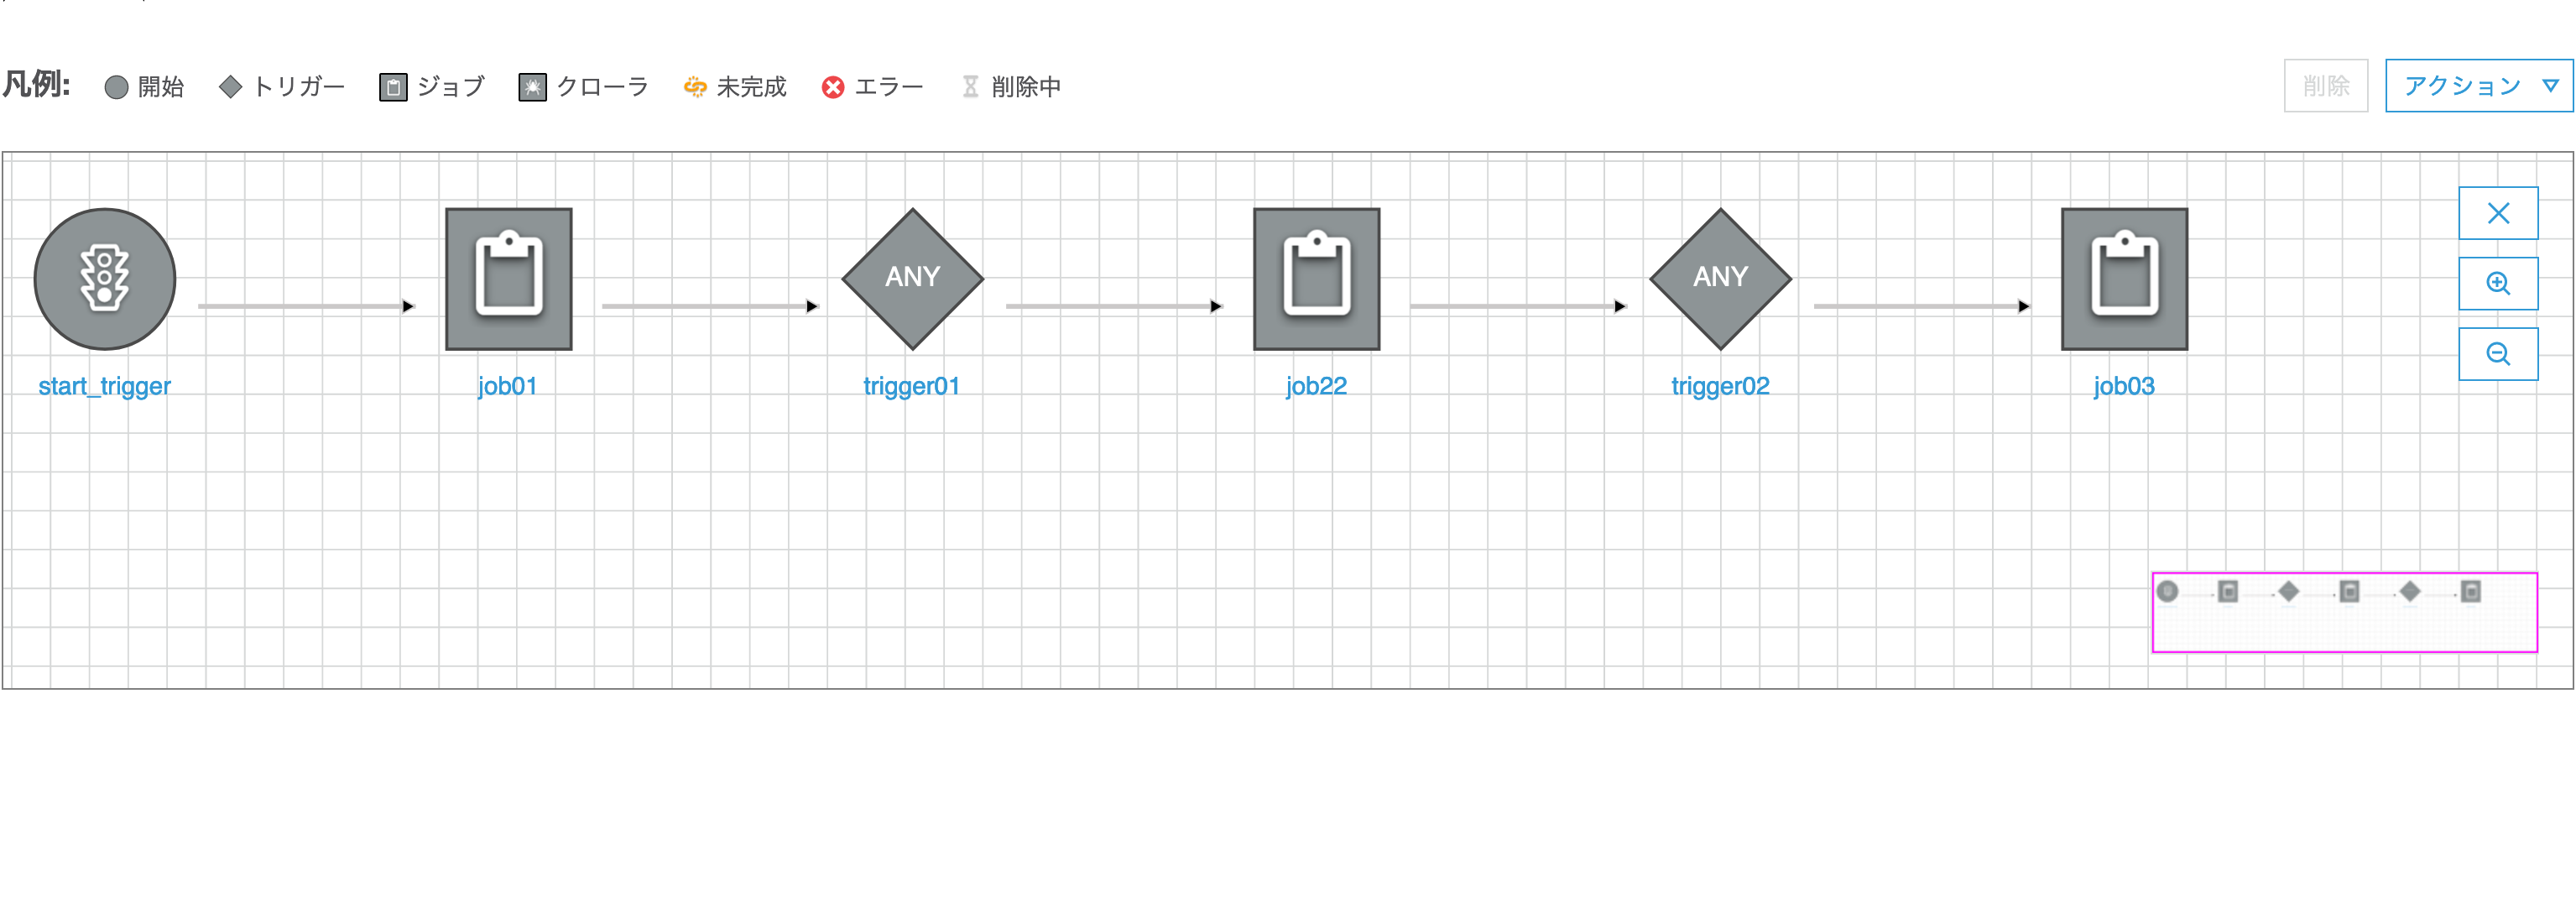
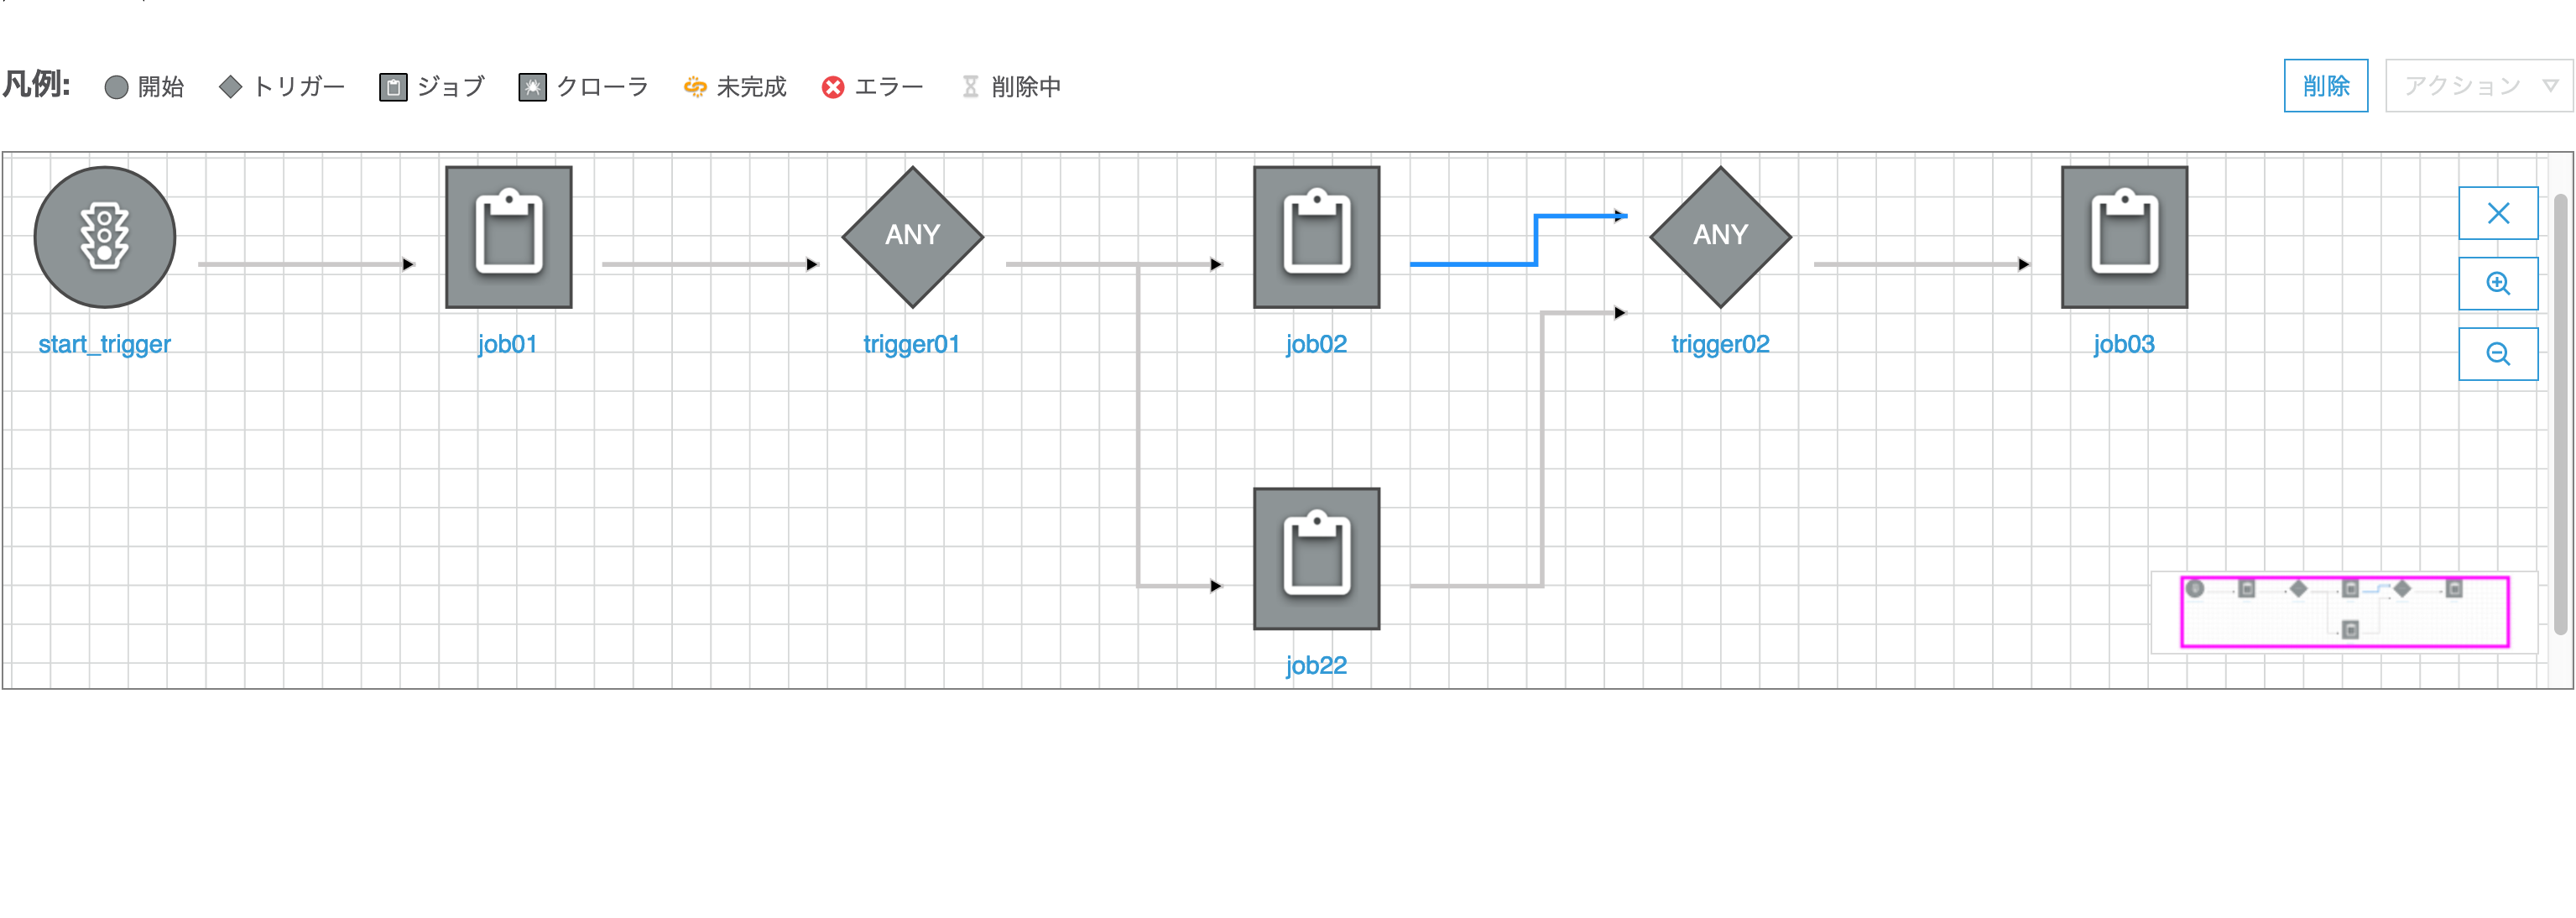
2
1

Delete article

Deleted articles cannot be recovered.

Draft of this article would be also deleted.

Are you sure you want to delete this article?

More than 3 years have passed since last update.

AWS Glue コンソールを使用してワークフローのジョブを変更する

Posted at

はじめに

以下のようなワークフローがあります
Screenshot_2020-06-04 AWS Glue Console.png
このうち、job02job22に変更してみます。

ジョブの変更

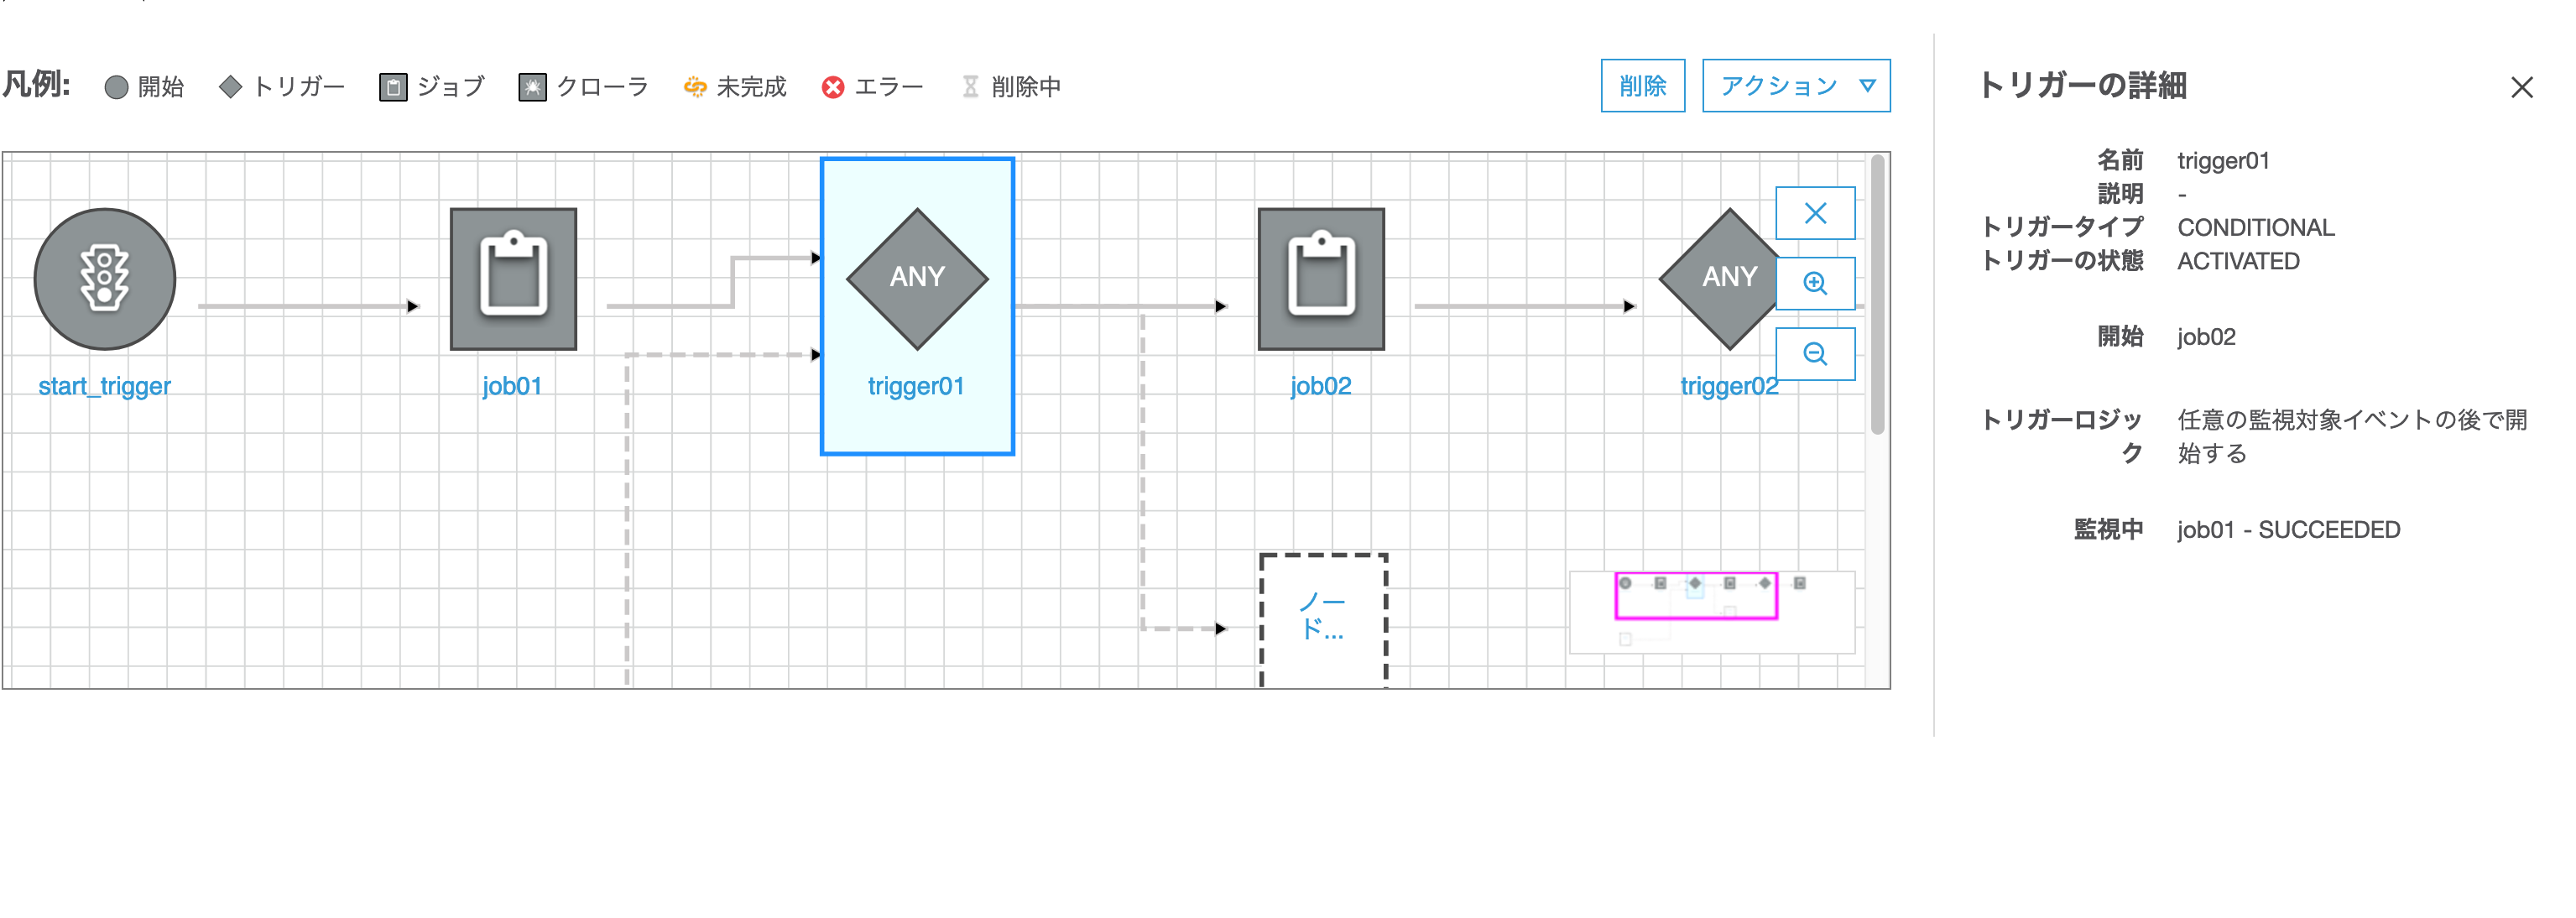
1)変更対象となる旧ジョブ(job02)のトリガー元(trigger01)を選択、表示された点線の矩形をクリック
Screenshot_2020-06-04 AWS Glue Console(1).png
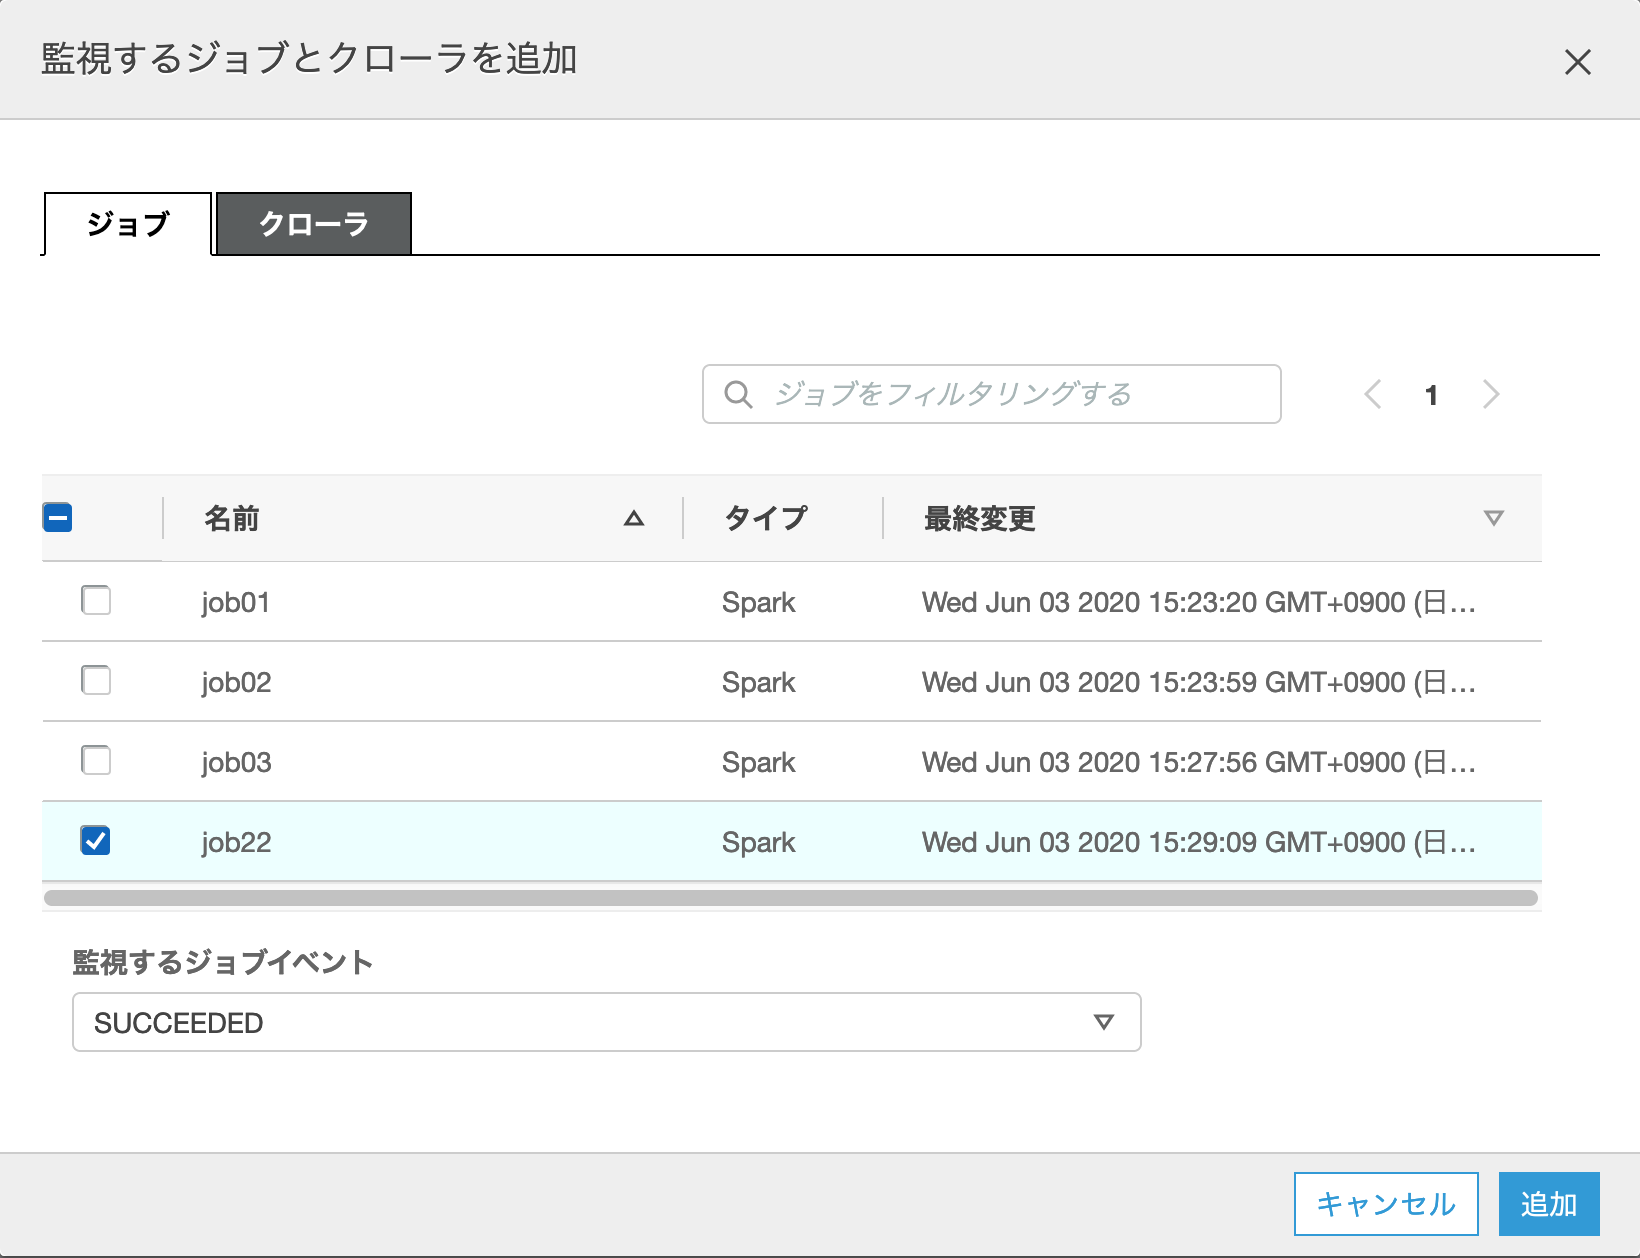
2)ダイアログが起動されるので、変更後の新ジョブ(job22)を選択して「追加」ボタンを押下
Screenshot_2020-06-04 AWS Glue Console(2).png
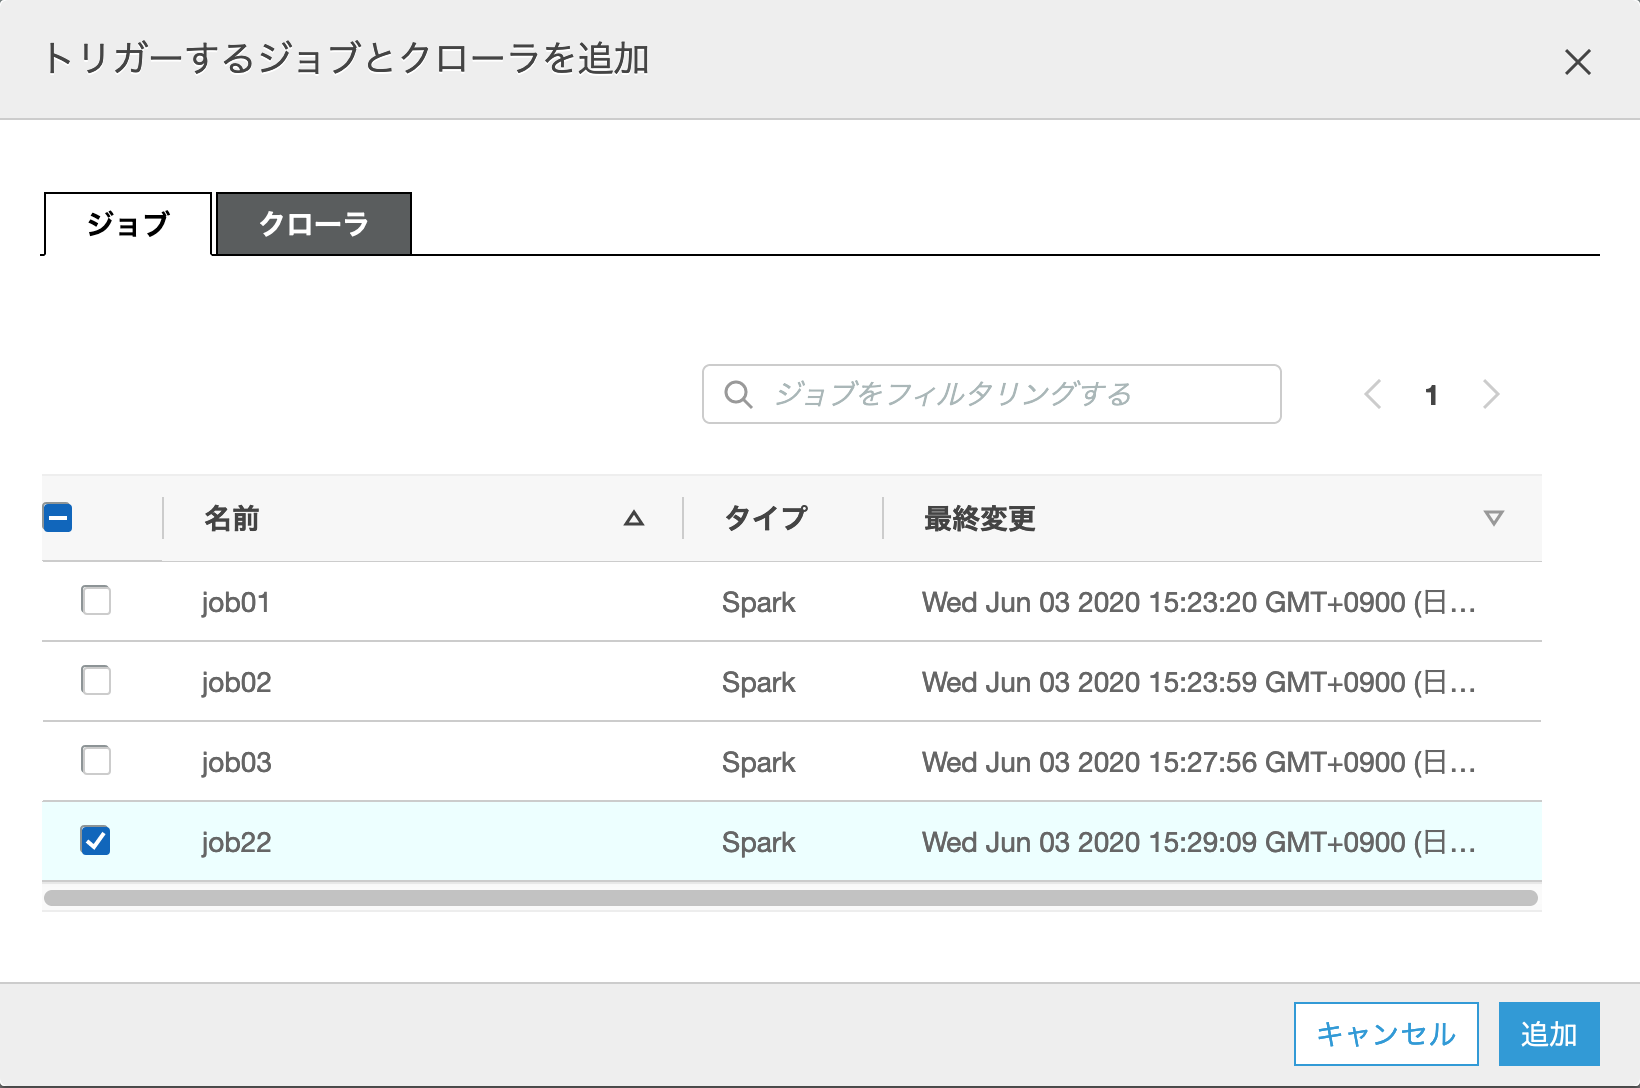
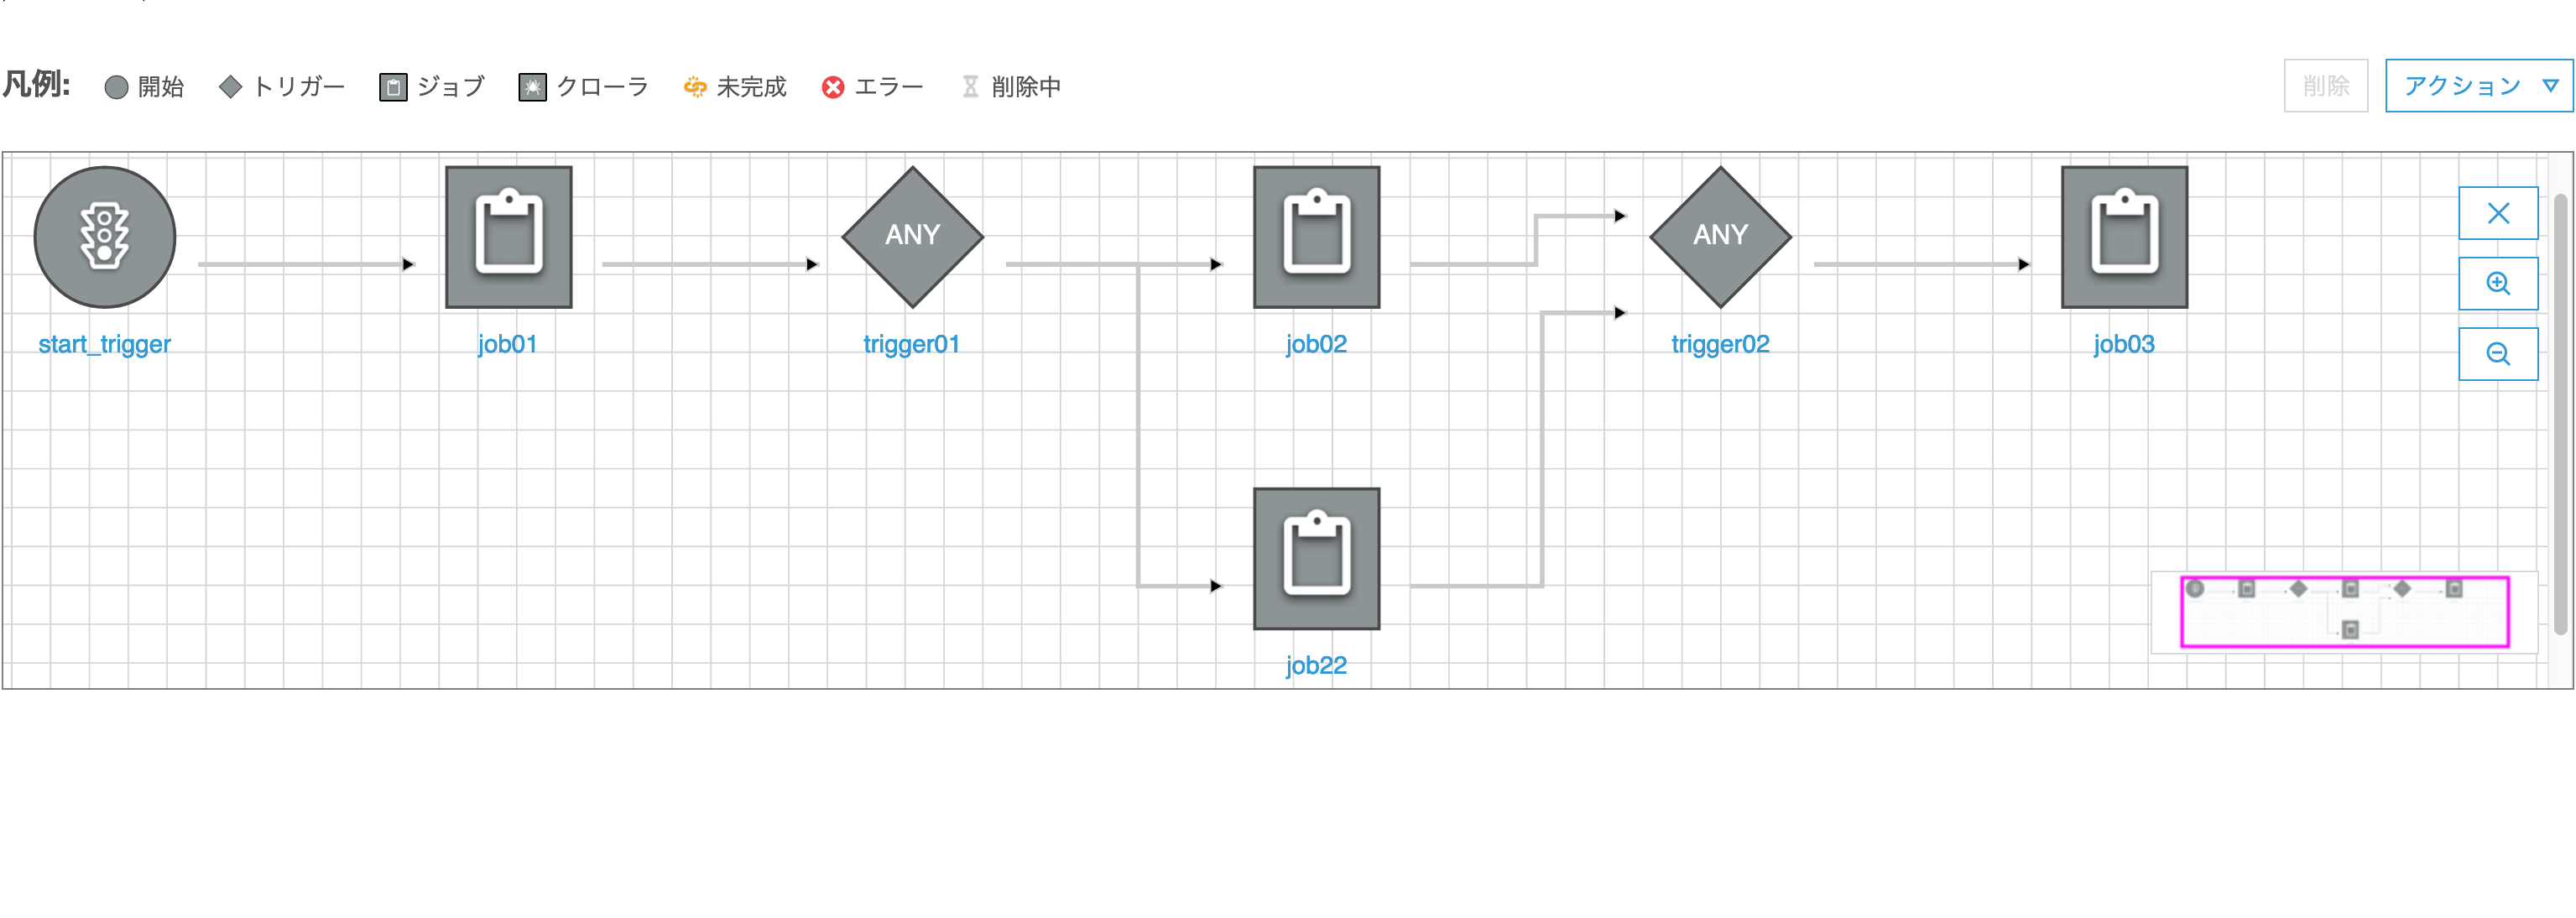
これでtrigger01からjob22への処理フローが新たに追加されました
Screenshot_2020-06-04 AWS Glue Console(3).png
3)続いて旧ジョブ(job02)の呼び出し先となるトリガー(trigger02)を選択し、「アクション」>「監視するジョブ/クローラを追加」をクリック
Screenshot_2020-06-04 AWS Glue Console(5).png
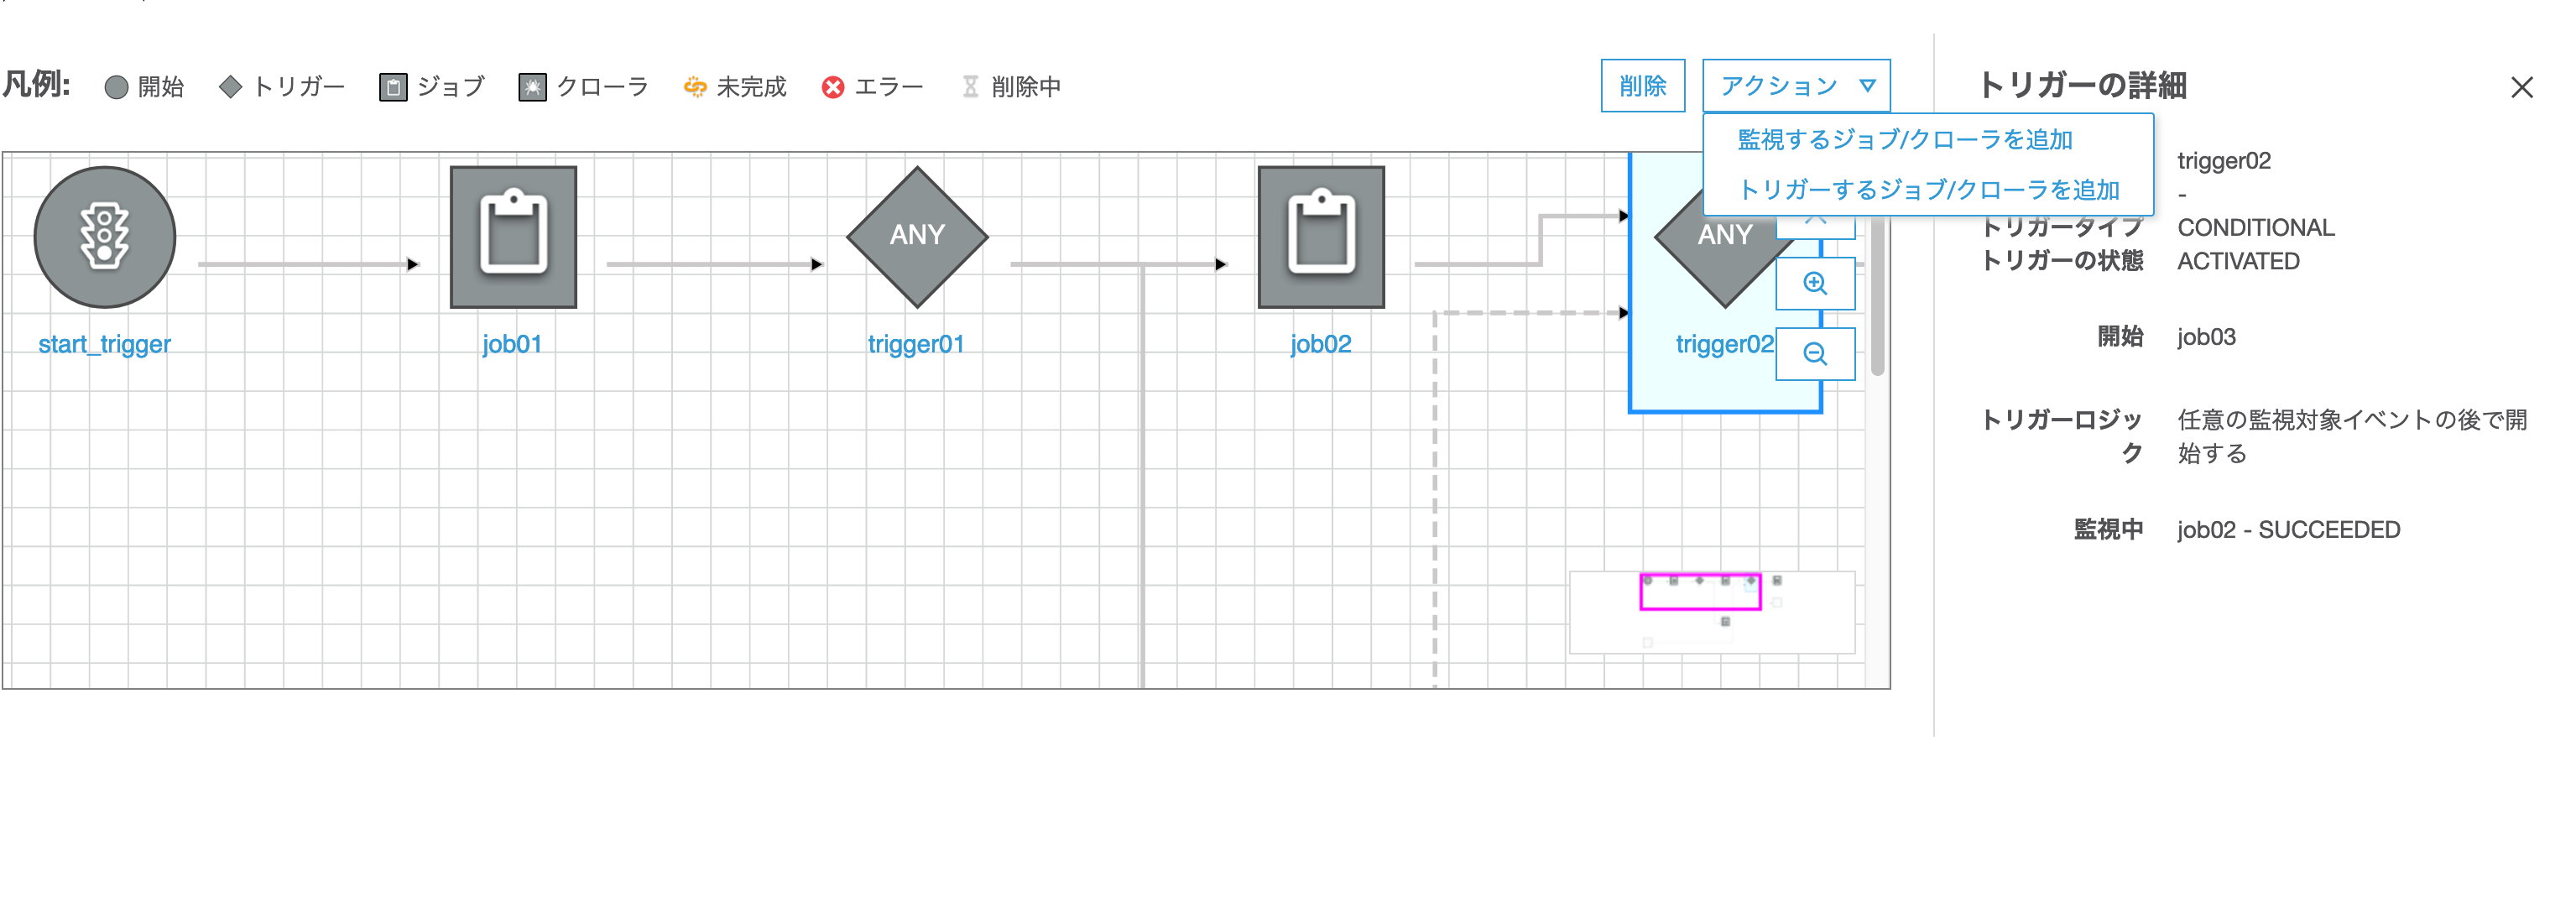
4)ダイアログが起動されるので、新ジョブ(job22)を選択して「追加」ボタンを押下
Screenshot_2020-06-04 AWS Glue Console(6).png
これでjob22からtrigger02への処理フローが新たに追加されました
Screenshot_2020-06-04 AWS Glue Console(7).png
5)あとは不要となるjob02からtrigger02への処理(矢印)を選択して「削除」ボタンを押下
Screenshot_2020-06-04 AWS Glue Console(8).png
6)同様にtrigger01からjob02への処理(矢印)を選択して「削除」ボタンを押下
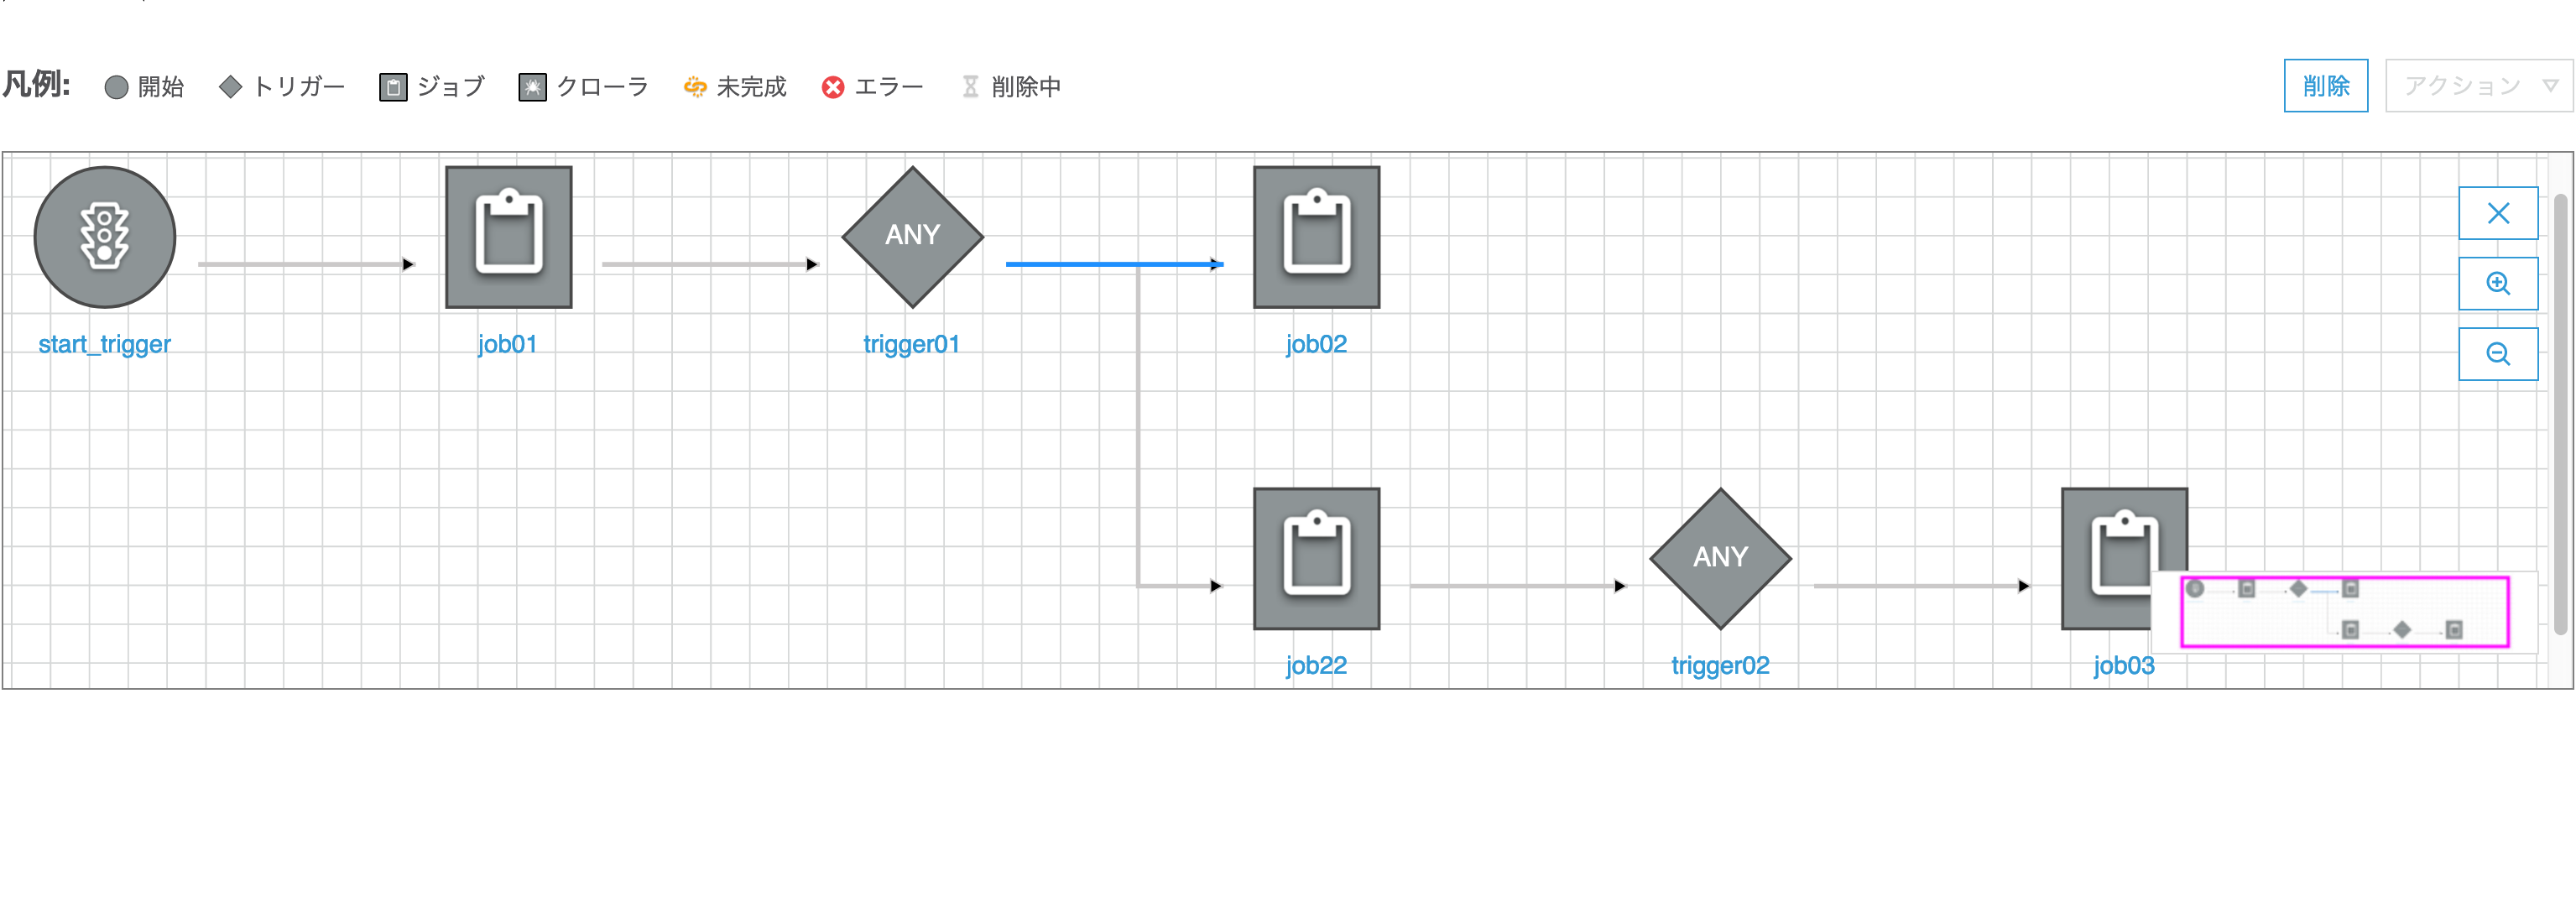
Screenshot_2020-06-04 AWS Glue Console(9).png
これで無事job02job22に変更したワークフローが完成しました
Screenshot_2020-06-04 AWS Glue Console(10).png

2
1
0

Register as a new user and use Qiita more conveniently

  1. You get articles that match your needs
  2. You can efficiently read back useful information
  3. You can use dark theme
What you can do with signing up
2
1

Delete article

Deleted articles cannot be recovered.

Draft of this article would be also deleted.

Are you sure you want to delete this article?