概要
前回は、Robotiumについての概要や特徴について説明しました。
今回は、Androidテストプロジェクトを作成し、Robotiumを導入してみたいと思います。
今回は少し長くなるため、前編と後編に分けたいと思います。
前編:Robotiumテストプロジェクトの作成
後編:テストクラスの作成
環境
下記環境にて進めていきます。
Eclipse 4.3(kepler)
Android SDK 4.2.2(Jelly Bean)
Robotium 5.0.1
テスト対象となるAndroidプロジェクトの用意
テスト対象のAndroidプロジェクトを作成します。
作成するプロジェクトは、アクティビティを2つ持ち、1つ目のアクティビティから、2つ目のアクティビティへ遷移するようにします。
1つ目のアクティビティ
package com.example.testactivity;

import android.os.Bundle;
import android.app.Activity;
import android.content.Intent;
import android.view.Menu;
import android.view.View;
import android.view.View.OnClickListener;
import android.widget.Button;

public class MainActivity extends Activity {
    @Override
    protected void onCreate(Bundle savedInstanceState) {
        super.onCreate(savedInstanceState);
        setContentView(R.layout.activity_main);

        Button btn = (Button)findViewById(R.id.button1);
        btn.setOnClickListener(new OnClickListener() {
            @Override
            public void onClick(View view) {
                Intent intent = new Intent(getApplicationContext(),
                        SubActivity.class);
                startActivity(intent);
            }
        });
    }

    @Override
    public boolean onCreateOptionsMenu(Menu menu) {
        // Inflate the menu; this adds items to the action bar if it is present.
        getMenuInflater().inflate(R.menu.main, menu);
        return true;
    }
}
<FrameLayout xmlns:android="http://schemas.android.com/apk/res/android"
    xmlns:tools="http://schemas.android.com/tools"
    android:layout_width="match_parent"
    android:layout_height="match_parent"
    android:paddingBottom="@dimen/activity_vertical_margin"
    android:paddingLeft="@dimen/activity_horizontal_margin"
    android:paddingRight="@dimen/activity_horizontal_margin"
    android:paddingTop="@dimen/activity_vertical_margin"
    tools:context=".MainActivity" >

    <TextView
        android:id="@+id/textView1"
        android:layout_width="match_parent"
        android:layout_height="wrap_content"
        android:layout_gravity="top"
        android:gravity="center_horizontal"
        android:scrollHorizontally="false"
        android:text="1つ目のActivity" />

    <Button
        android:id="@+id/button1"
        android:layout_width="match_parent"
        android:layout_height="wrap_content"
        android:layout_gravity="center_vertical"
        android:layout_marginTop="36dp"
        android:text="2つ目のActivityへ" />

</FrameLayout>
2つ目のアクティビティ
package com.example.testactivity;

import android.os.Bundle;
import android.app.Activity;
import android.content.Intent;
import android.view.Menu;
import android.view.View;
import android.view.View.OnClickListener;
import android.widget.Button;

public class SubActivity extends Activity {
    @Override
    protected void onCreate(Bundle savedInstanceState) {
        super.onCreate(savedInstanceState);
        setContentView(R.layout.activity_sub);

        Button btn = (Button)findViewById(R.id.button1);
        btn.setOnClickListener(new OnClickListener() {
            @Override
            public void onClick(View view) {
                Intent intent = new Intent(getApplicationContext(),
                        MainActivity.class);
                startActivity(intent);
            }
        });
    }

    @Override
    public boolean onCreateOptionsMenu(Menu menu) {
        // Inflate the menu; this adds items to the action bar if it is present.
        getMenuInflater().inflate(R.menu.main, menu);
        return true;
    }
}
<FrameLayout xmlns:android="http://schemas.android.com/apk/res/android"
    xmlns:tools="http://schemas.android.com/tools"
    android:layout_width="match_parent"
    android:layout_height="match_parent"
    android:paddingBottom="@dimen/activity_vertical_margin"
    android:paddingLeft="@dimen/activity_horizontal_margin"
    android:paddingRight="@dimen/activity_horizontal_margin"
    android:paddingTop="@dimen/activity_vertical_margin"
    tools:context=".MainActivity" >

    <TextView
        android:id="@+id/textView1"
        android:layout_width="match_parent"
        android:layout_height="wrap_content"
        android:layout_gravity="top"
        android:gravity="center_horizontal"
        android:scrollHorizontally="false"
        android:text="2つ目のActivity" />

    <Button
        android:id="@+id/button1"
        android:layout_width="match_parent"
        android:layout_height="wrap_content"
        android:layout_gravity="center_vertical"
        android:layout_marginTop="36dp"
        android:text="1つ目のActivityへ" />

</FrameLayout>
Androidテストプロジェクトの作成
先ほど作成したAndroidプロジェクトに対する、Androidテストプロジェクトを作成します。
プロジェクトの作成
[ファイル]>[新規]>[その他]を選択します。
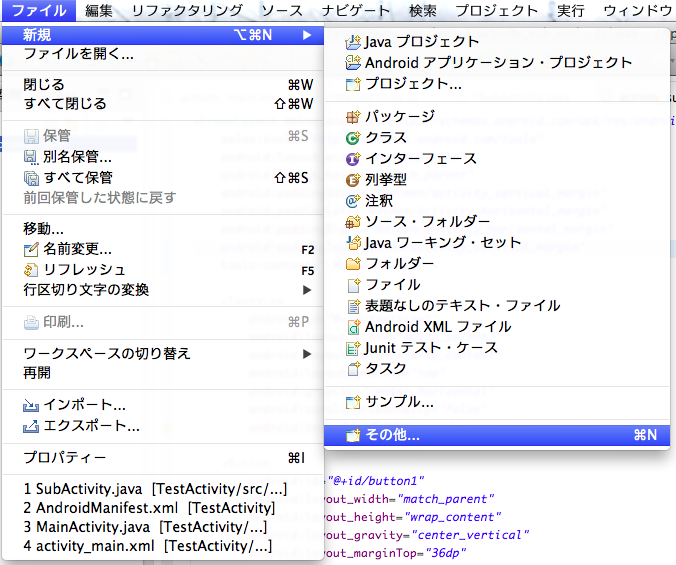
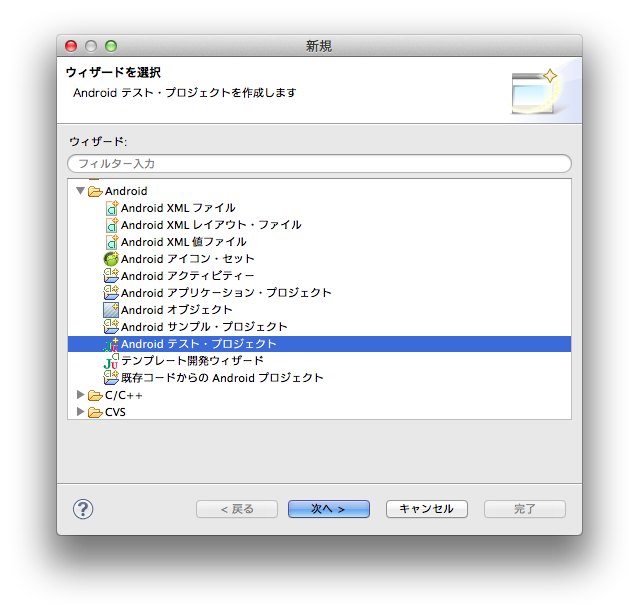
[Android]>[Android テスト・プロジェクト]を選択し[次へ]を選択します。
プロジェクト名は任意ですが、ここでは、「SampleRobotiumProject」とします。
入力後、[次へ]ボタンを押下します。

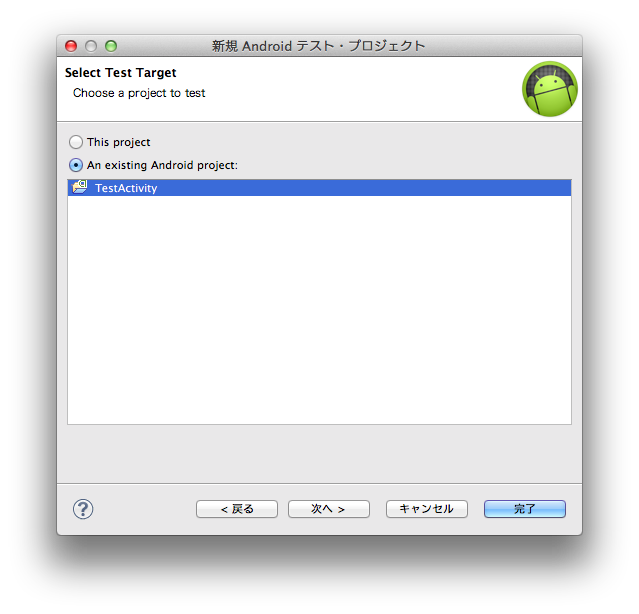
[an existing android project]選択します。
一覧から、今回テスト対象となるTestActivityプロジェクトを選択し[次へ]ボタンを押下します。
ビルド・ターゲットを選択し[完了]ボタンを押下します。
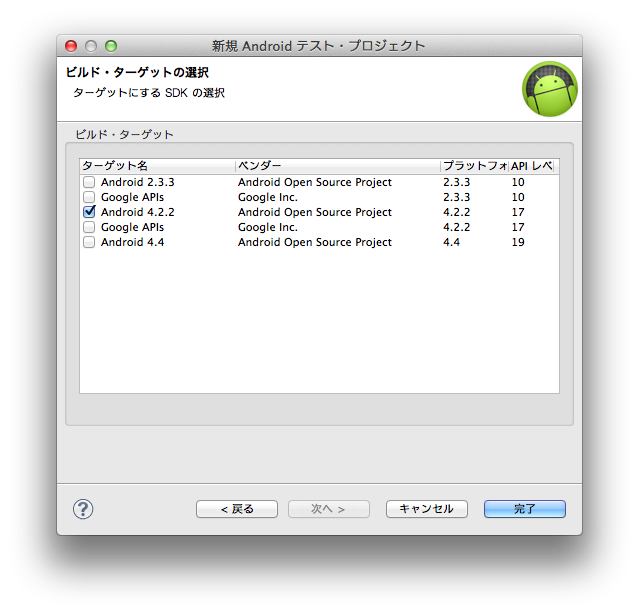
以上でAndroidテストプロジェクトの作成が完了です。
次は作成したAndroidテストプロジェクトにRobotiumライブラリを導入します。
Robotiumライブラリの導入
先ほど作成したAndroidテストプロジェクトにRobotiumライブラリを導入します。
Robotiumライブラリ、javadocのダウンロード
Robotium公式サイトより、ダウンロードします。
ライブラリのダウンロード
Robotium公式サイト左の[Feautured]>[Downloads]>[robotium-solo-5.0.1.jar]のリンクを選択した先からダウンロードします。
javadocのダウンロード
Robotium公式サイト左の[Feautured]>[Downloads]>[robotium-solo-5.0.1-javadoc.jar]のリンクを選択した先からダウンロードします。
注)javadocは必須ではありません。
Androidテストプロジェクトへの導入
先ほどダウンロードしたRobotiumライブラリを実際にAndroidテストプロジェクトに導入します。
Robotiumライブラリの配置
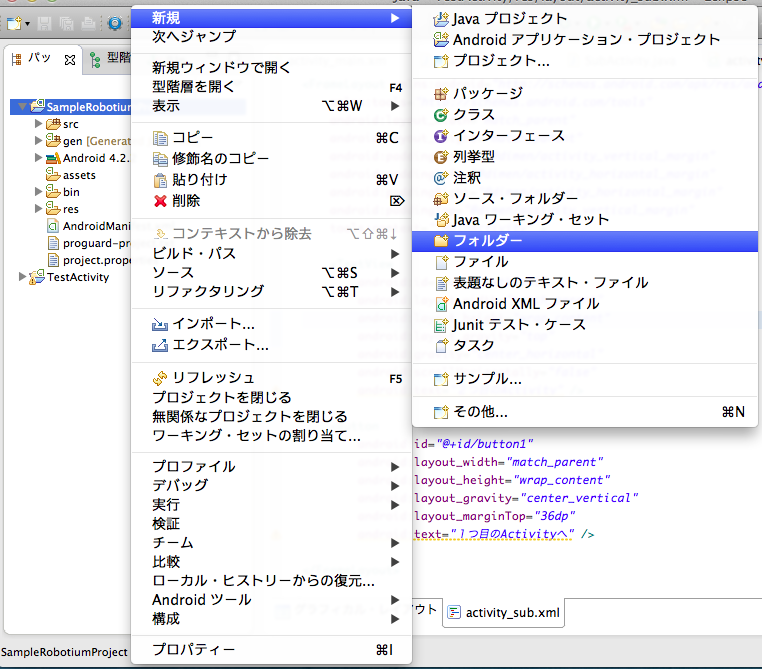
まずはRobotiumライブラリを配置するフォルダを作成します。
パッケージ・エクスプローラのSampleRobotiumProjectを右クリック、[新規]>[フォルダ]を選択してください。
名称は任意ですが、ここでは「RobotiumLib」とします。
フォルダを作成したら、先ほどダウンロードした「robotium-solo-5.0.1.jar」「robotium-solo-5.0.1-javadoc.jar」を作成したフォルダにコピーします。
ビルドパス、javadocの設定
Robotiumライブラリをコピーしたら、次はビルドパスの設定です。
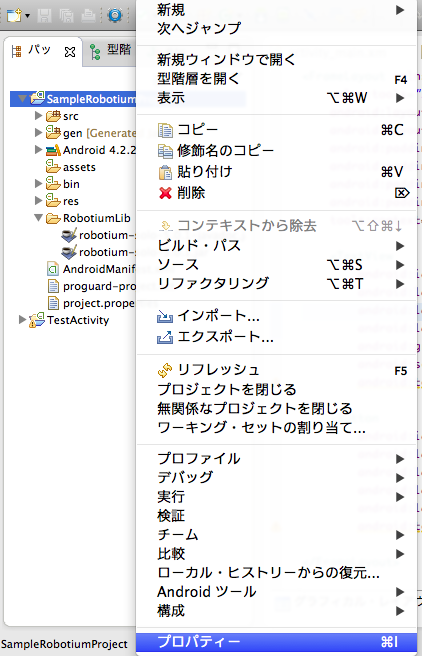
パッケージ・エクスプローラのSampleRobotiumProjectを右クリック、[プロパティ]を選択してください。
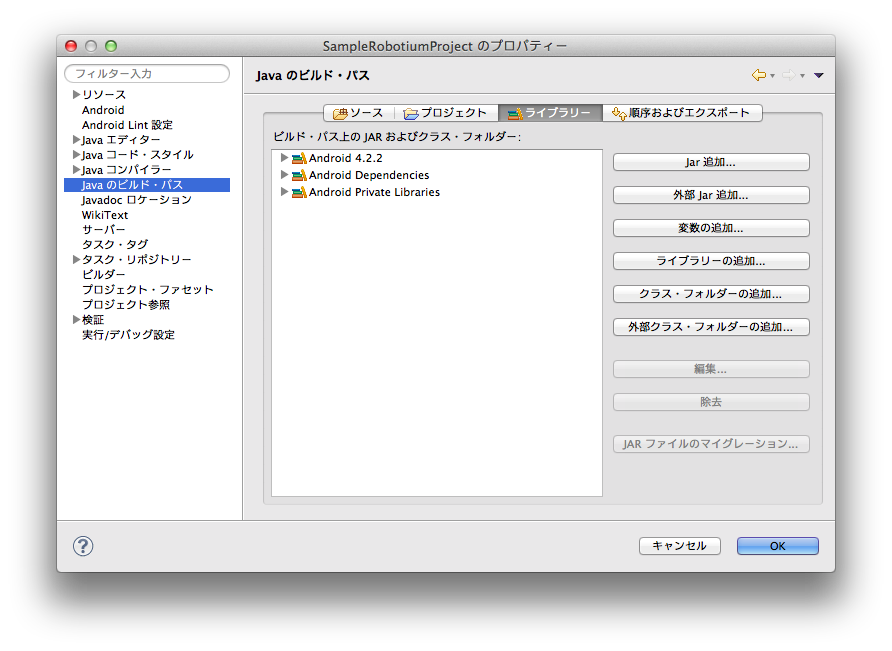
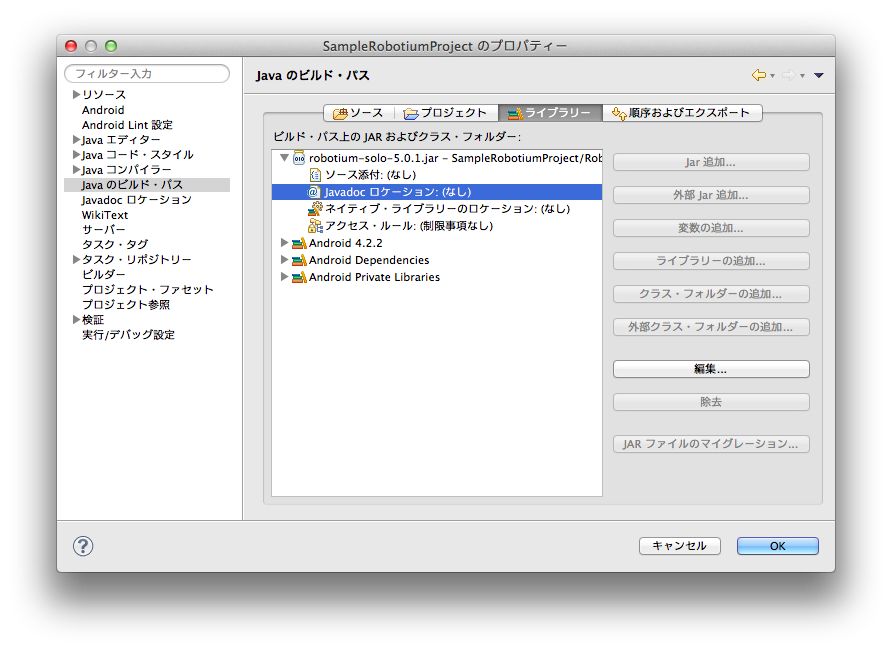
プロパティ画面にて、[Javaのビルドパス]>[ライブラリ]>[Jar追加]を押下します。
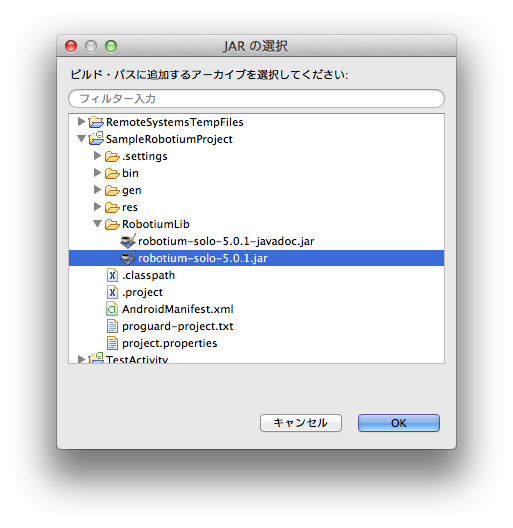
Jarの選択画面にて、先ほど配置した「robotium-solo-5.0.1.jar」を選択し、[OK]を押下します。
追加したJarファイルの項目を展開し、[Javadocロケーション]を選択、[編集]を押下します。
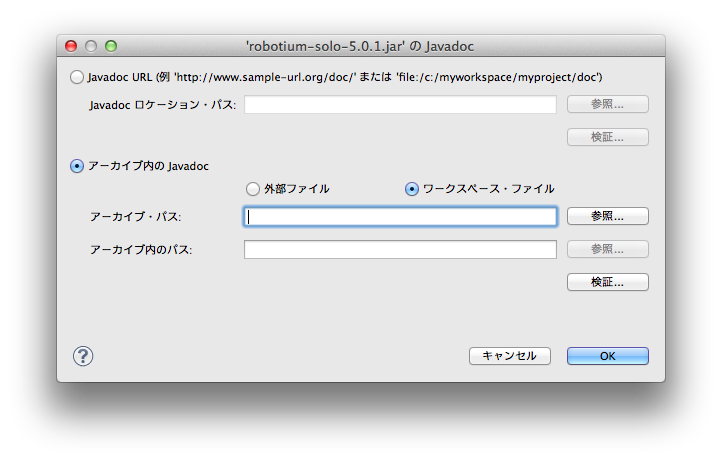
ダイアログにて、[アーカイブ内のJavadoc]>[ワークスペース・ファイル]を選択し、[参照]を押下します。
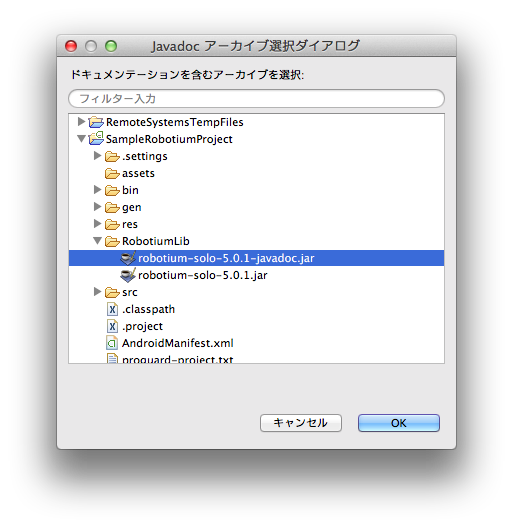
Jarの選択画面にて、先ほど配置した「robotium-solo-5.0.1-javadoc.jar」を選択し、[OK]を押下します。
Javaのビルドパス画面にて、[順序およびエクスポート]を選択、一覧の「robotium-solo-5.0.1.jar」にチェックします。
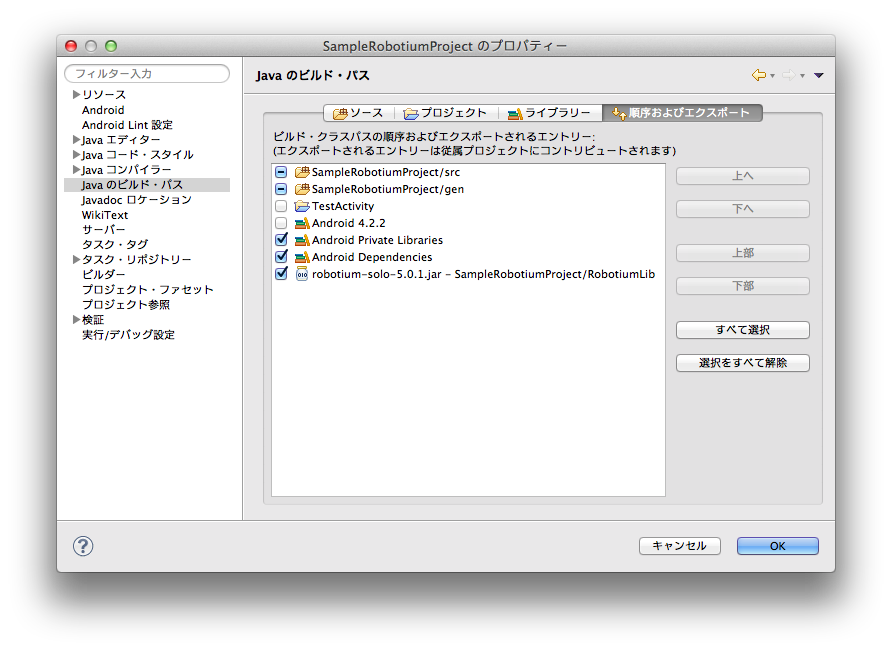
以上で、ビルドパスの設定は完了です。
後編は、テストクラスの作成とテストプロジェクトの実行について説明します。