全体の流れ
AWSアカウント利用及びCode Commitの環境構築の手順
1.オーナー側設定
AWSでチーム開発する際のIAMによるアカウント設定方法
2.開発メンバー側設定
AWSのCode Commitが使用できる環境を構築する
※オーナーとはチームで権限を持っている人で、
それ以外のメンバーは開発メンバー側設定のみで問題ないです。
AWSアカウント利用及びCode Commitの環境構築の手順
オーナー側設定
AWSでチーム開発する際のIAMによるアカウント設定方法
1. AWSオーナーアカウント作成、サインイン
2. 開発メンバー用のグループ作成
ログイン後、サービスからIAMを選択する

ユーザーグループを選択する

グループを作成を選択する
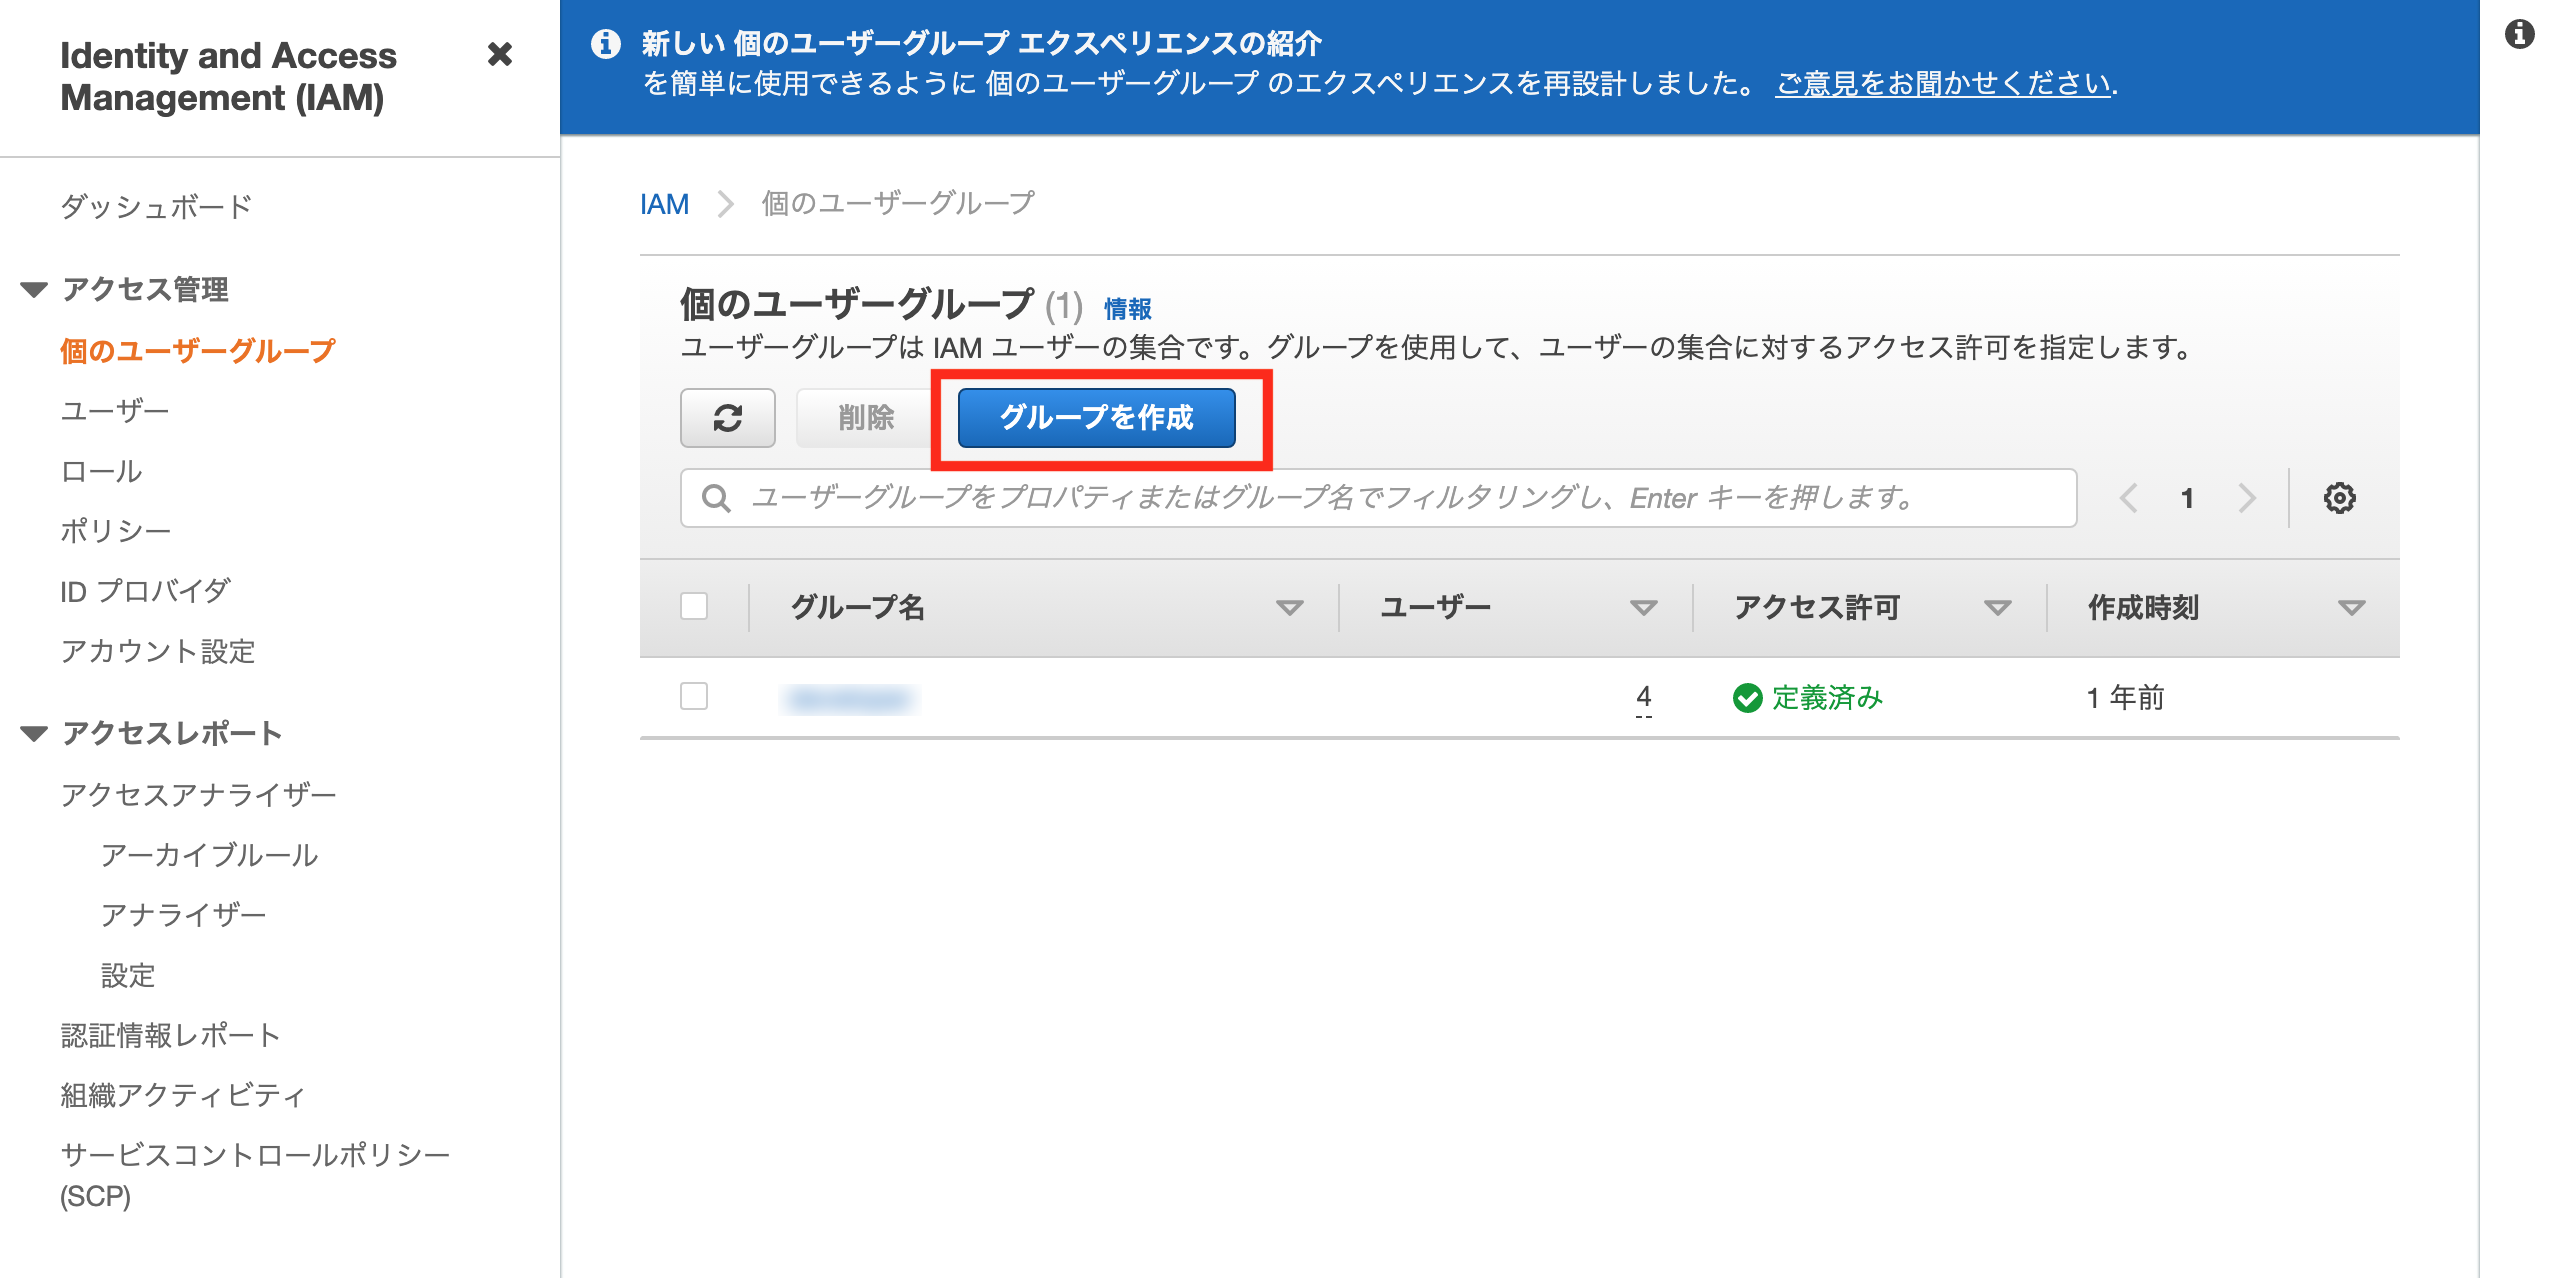
PowerUserAccessポリシーをアタッチする(チェックする)

任意の名前を入力する

3. 開発メンバーのアカウント作成
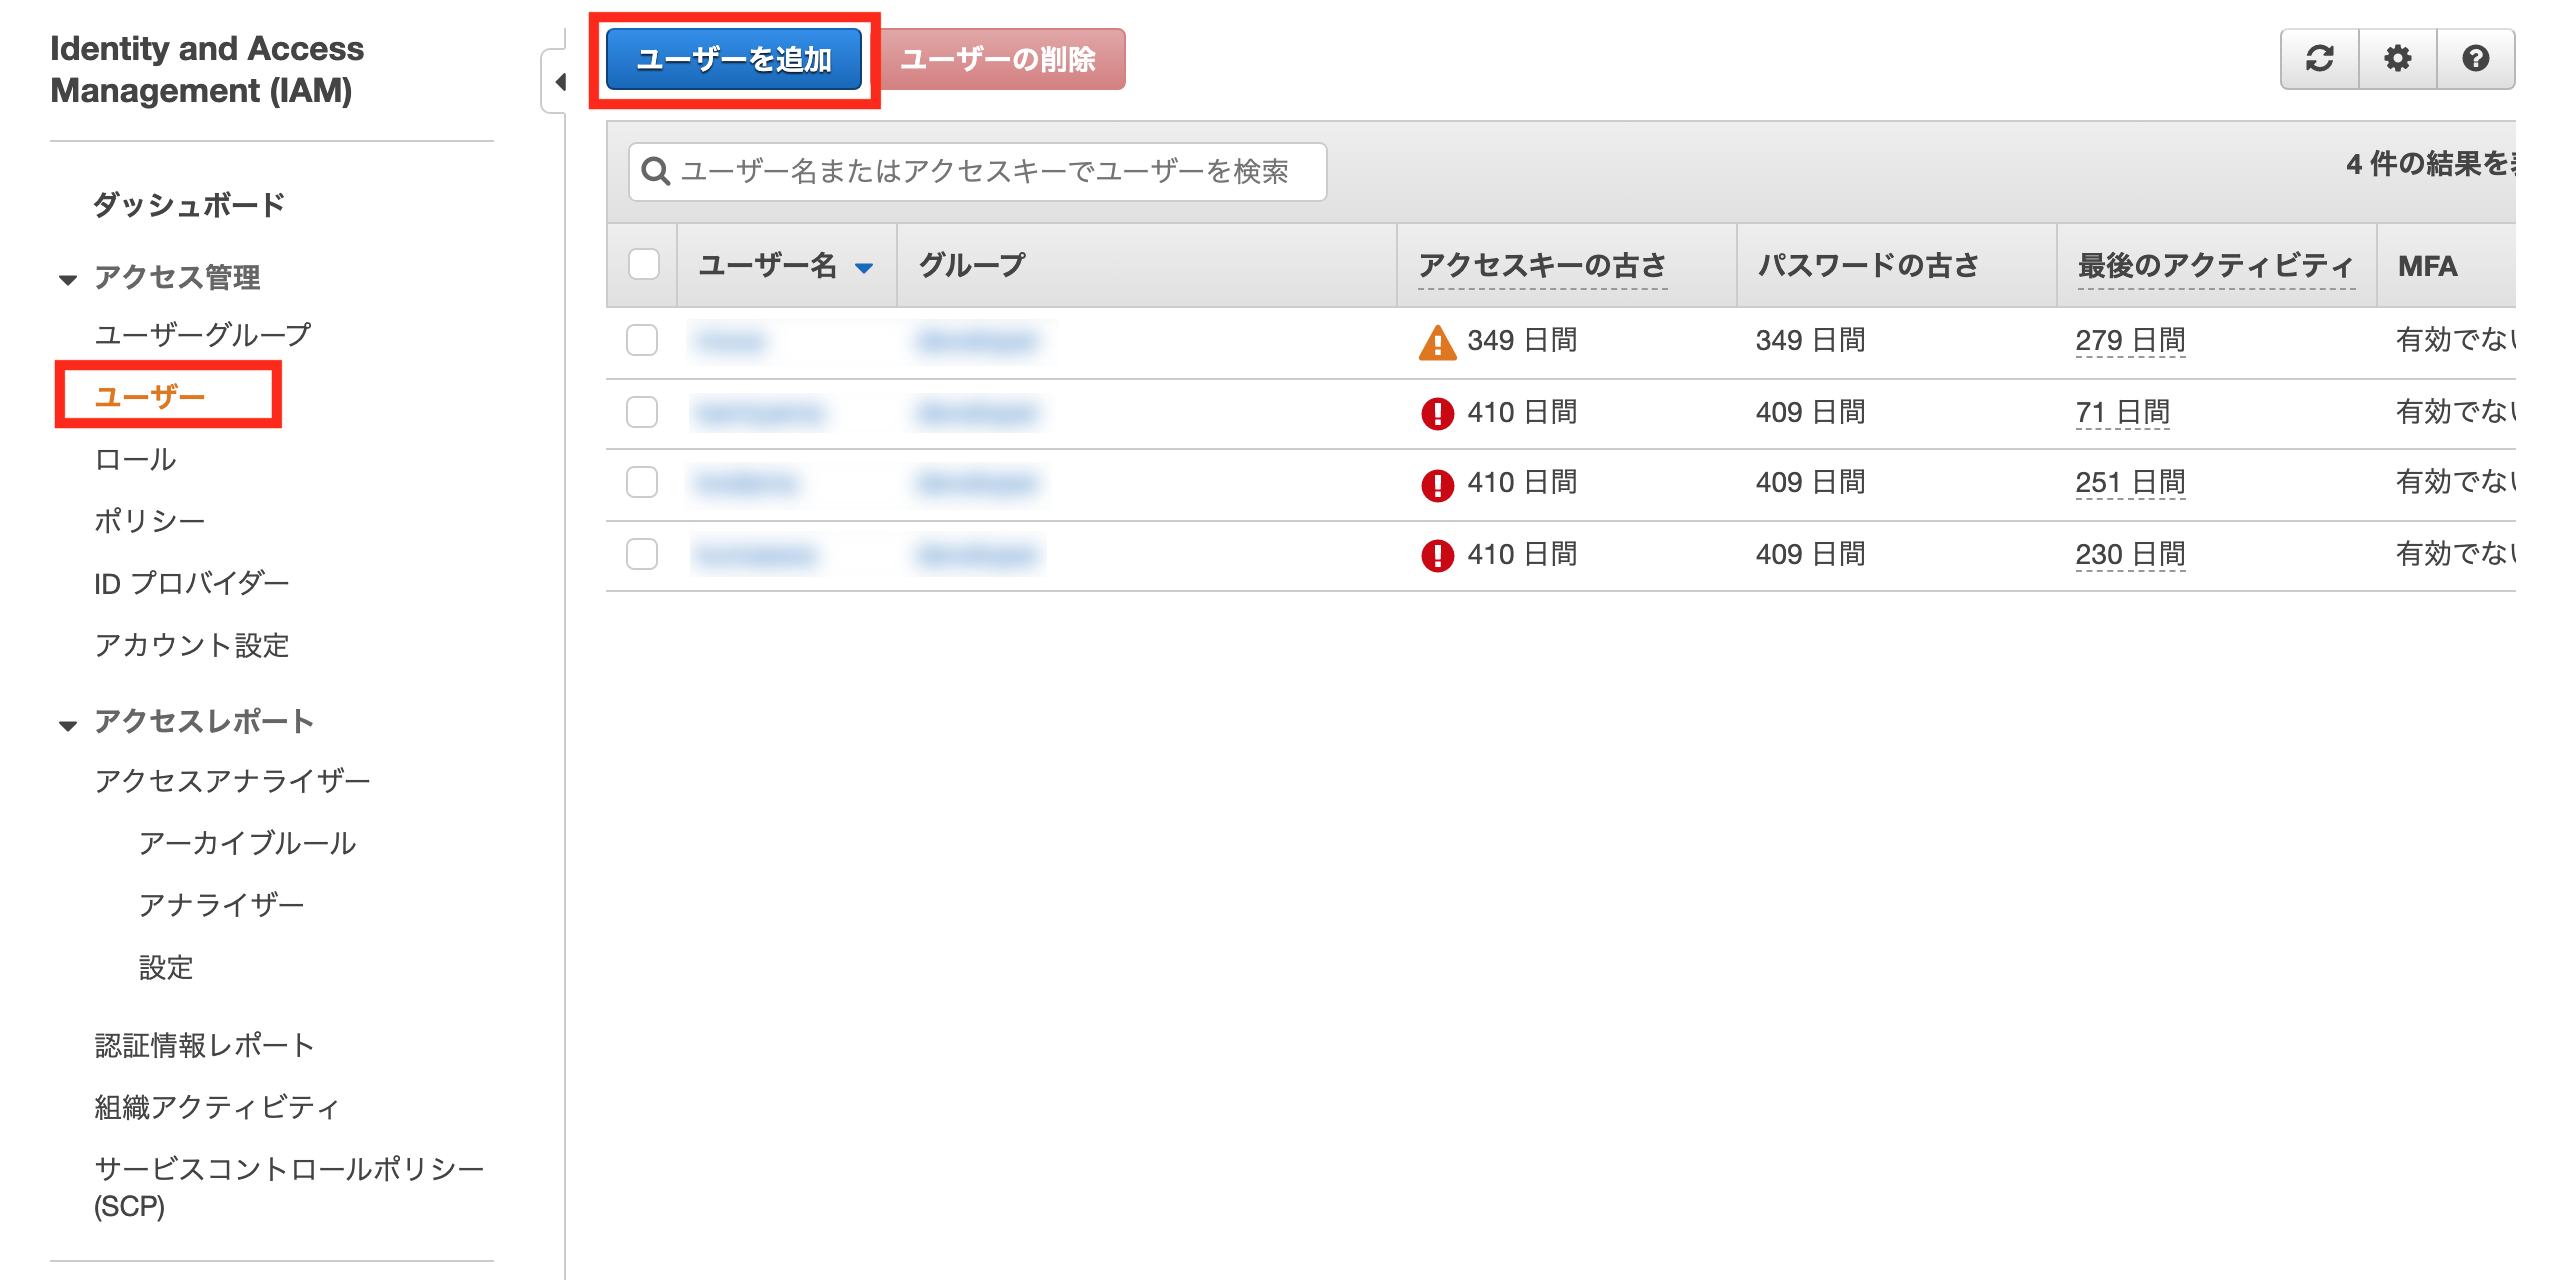
ユーザーからユーザーを追加を選択する
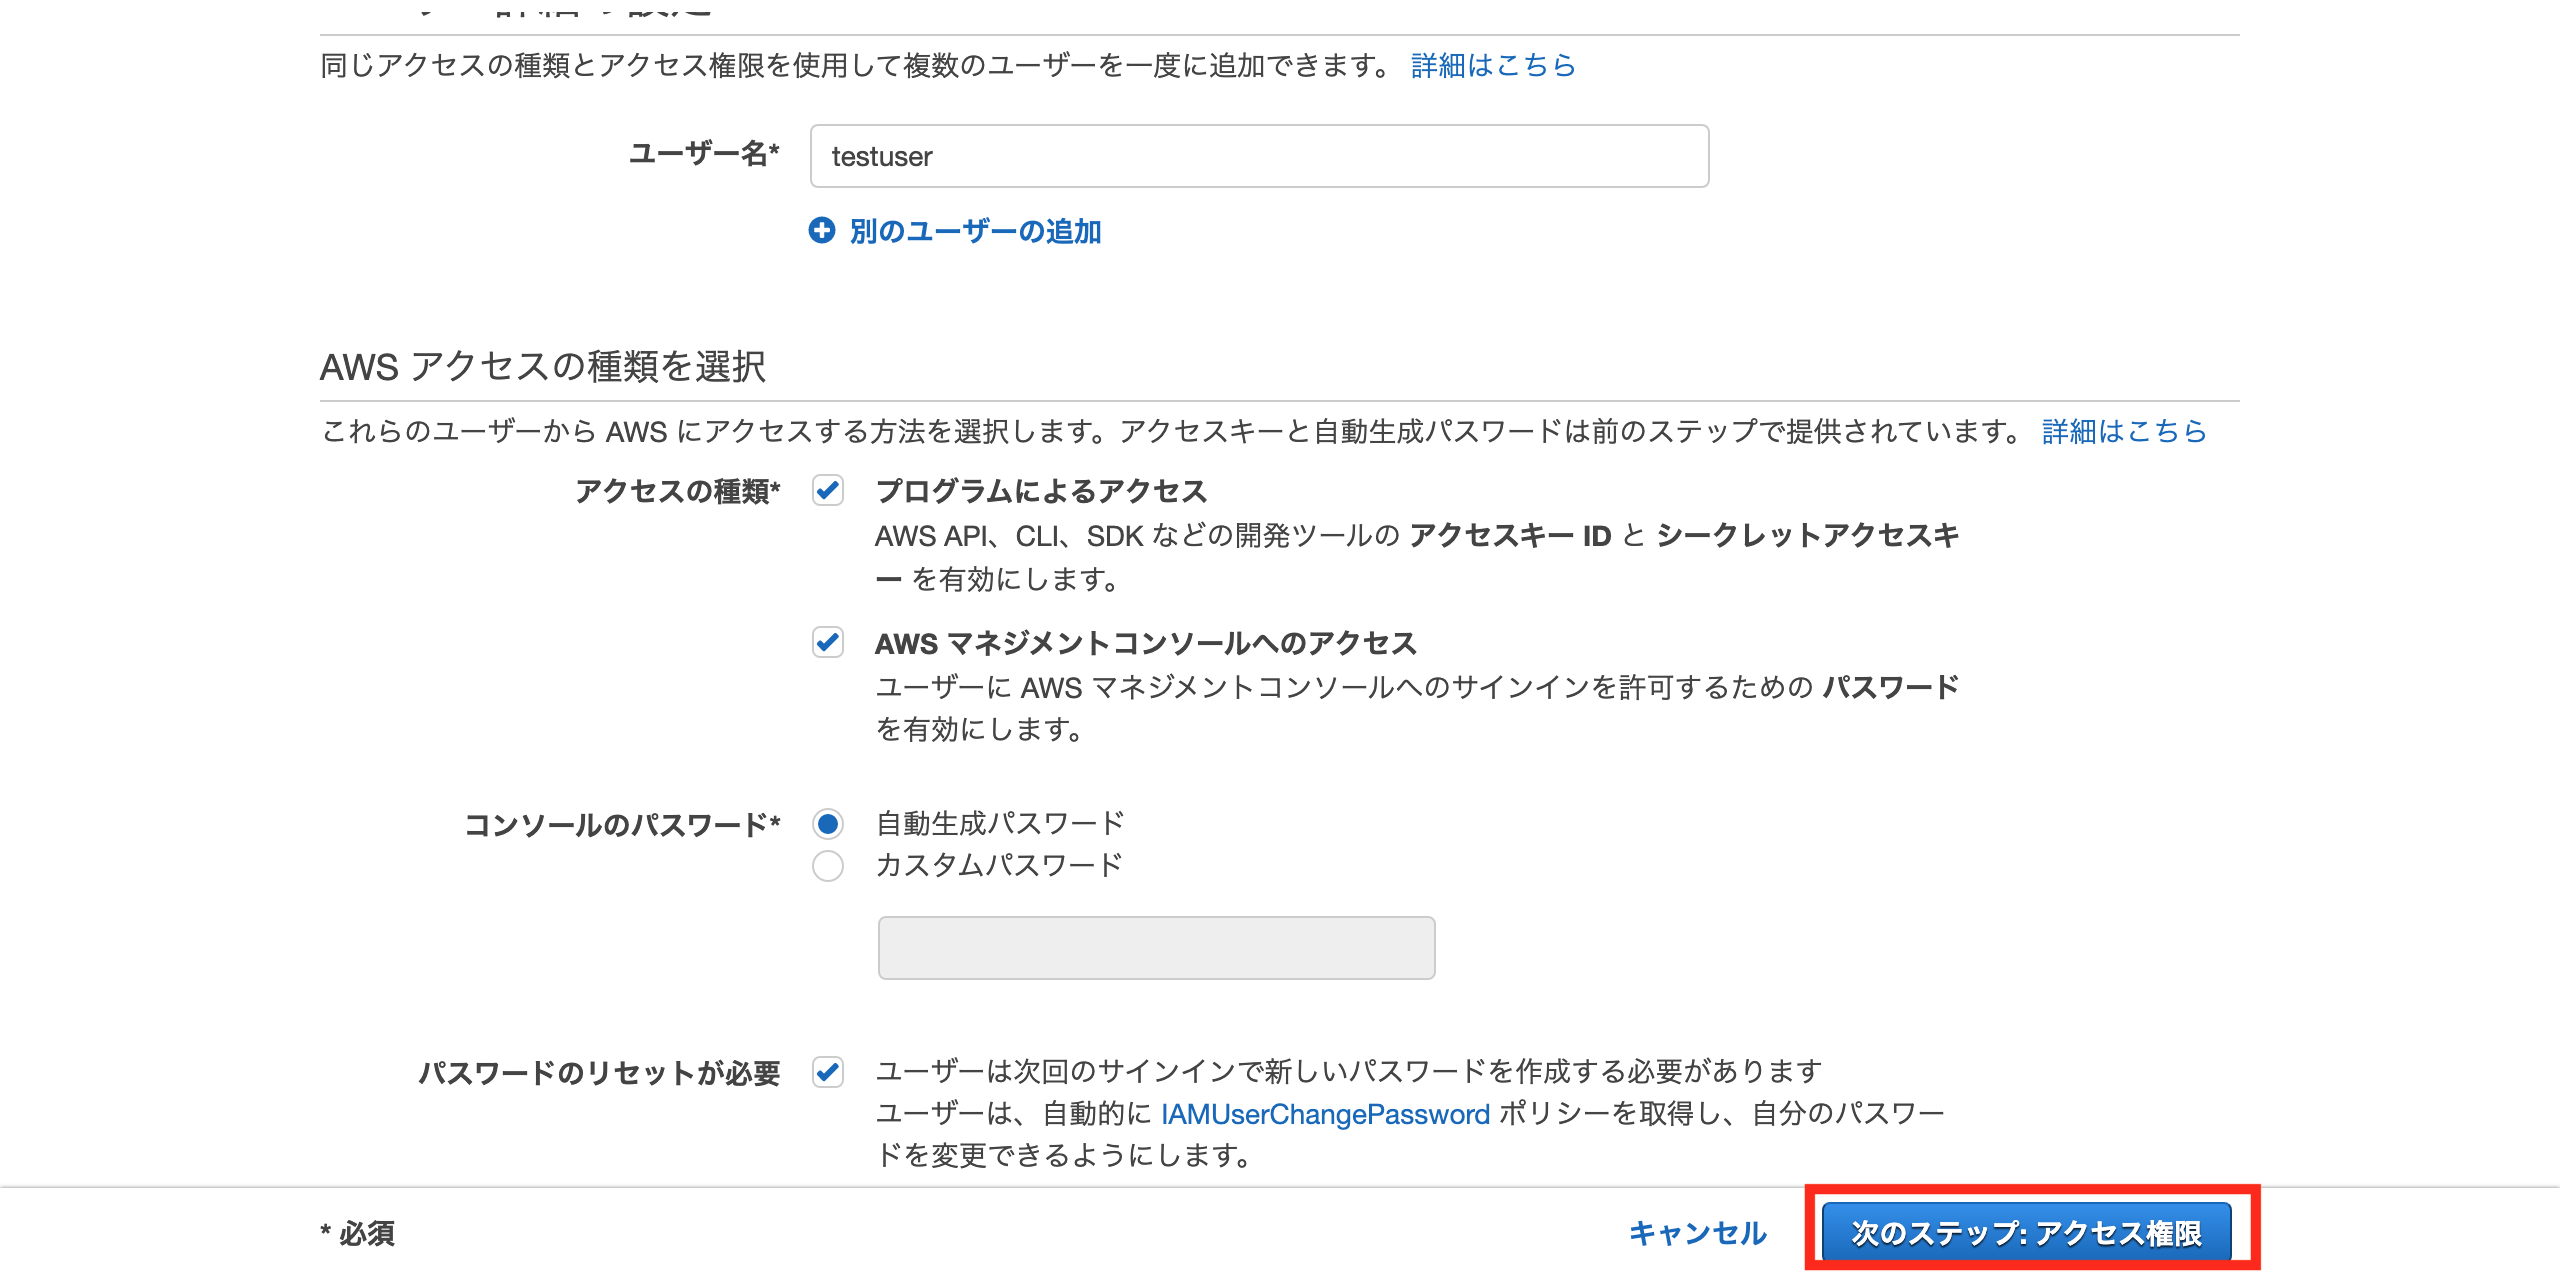
任意のユーザー名入力と
アクセスの種類、自動生成パスワード、パスワードのリセットが必要にチェックする
ユーザーをグループに追加する

アクセスキーID、シークレットアクセスキー、初期パスワードが生成されるので
開発メンバーに教える

4. ロール作成

ユースケースはEC2を選択する

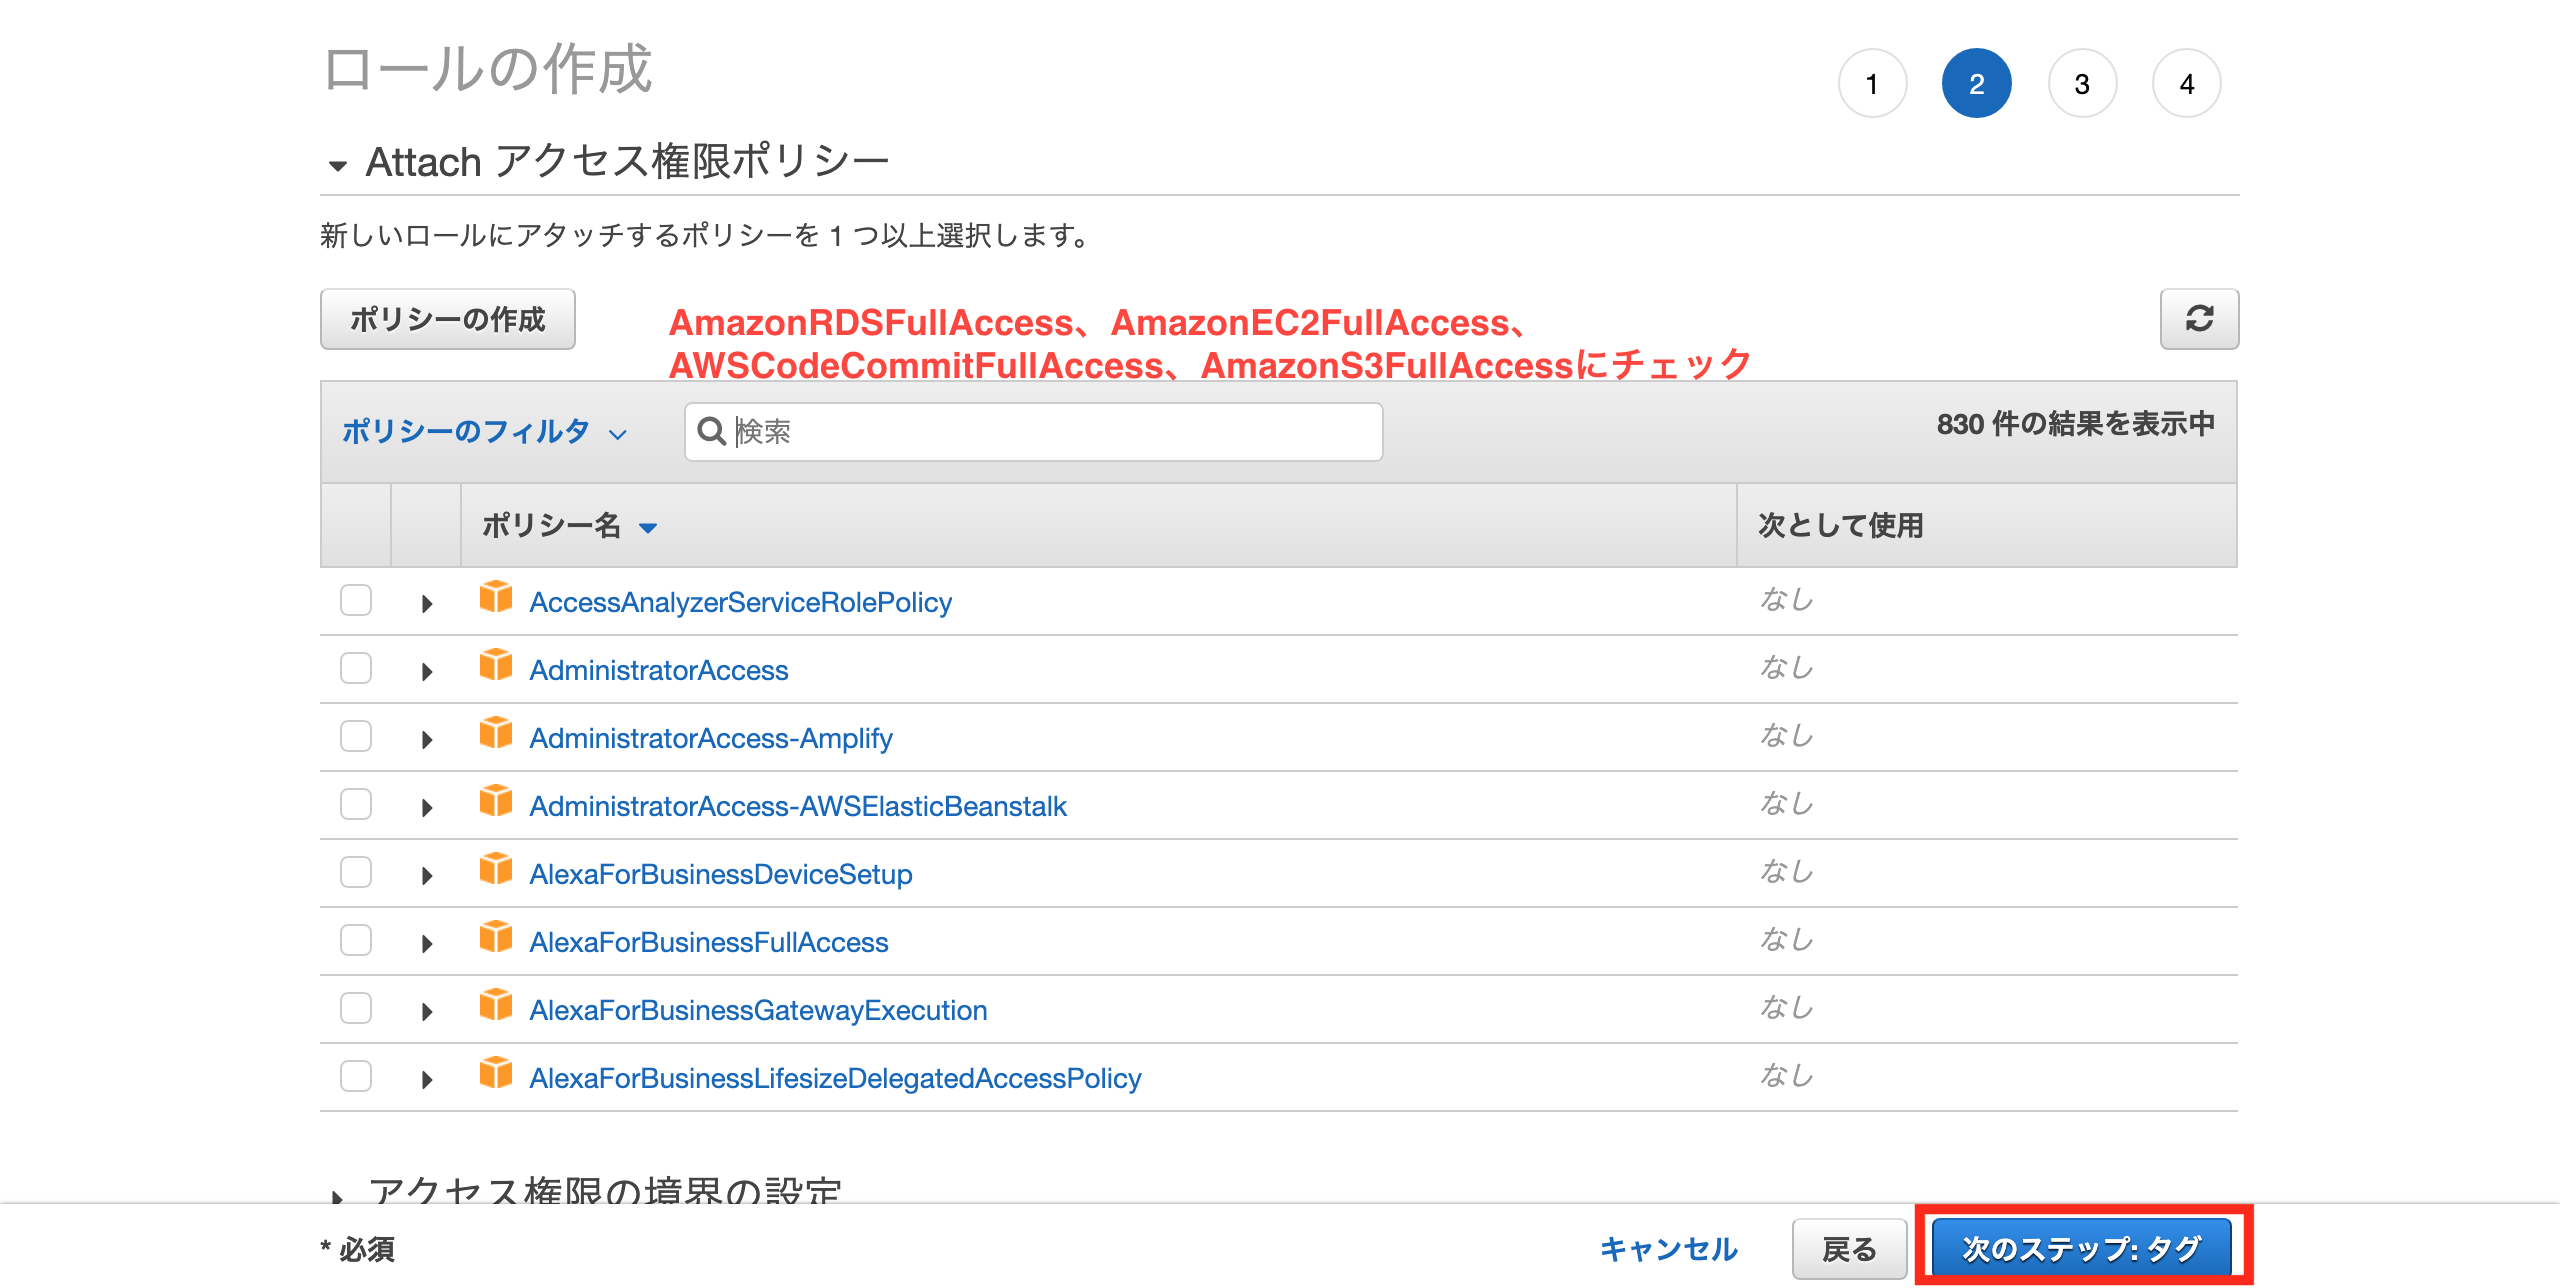
アクセス権限ポリシーで最低限必要項目
(AmazonRDSFullAccess、AmazonEC2FullAccess、
AWSCodeCommitFullAccess、AmazonS3FullAccess)にチェックする
任意のロール名を入力する

開発メンバー側設定
AWSのCode Commitが使用できる環境を構築する
※すでにAWSアカウントの情報を入手していることを前提
1.IAMユーザーでサインイン
配布されたサインインURLにアクセスし、
配布されたユーザー名、パスワードを入力する

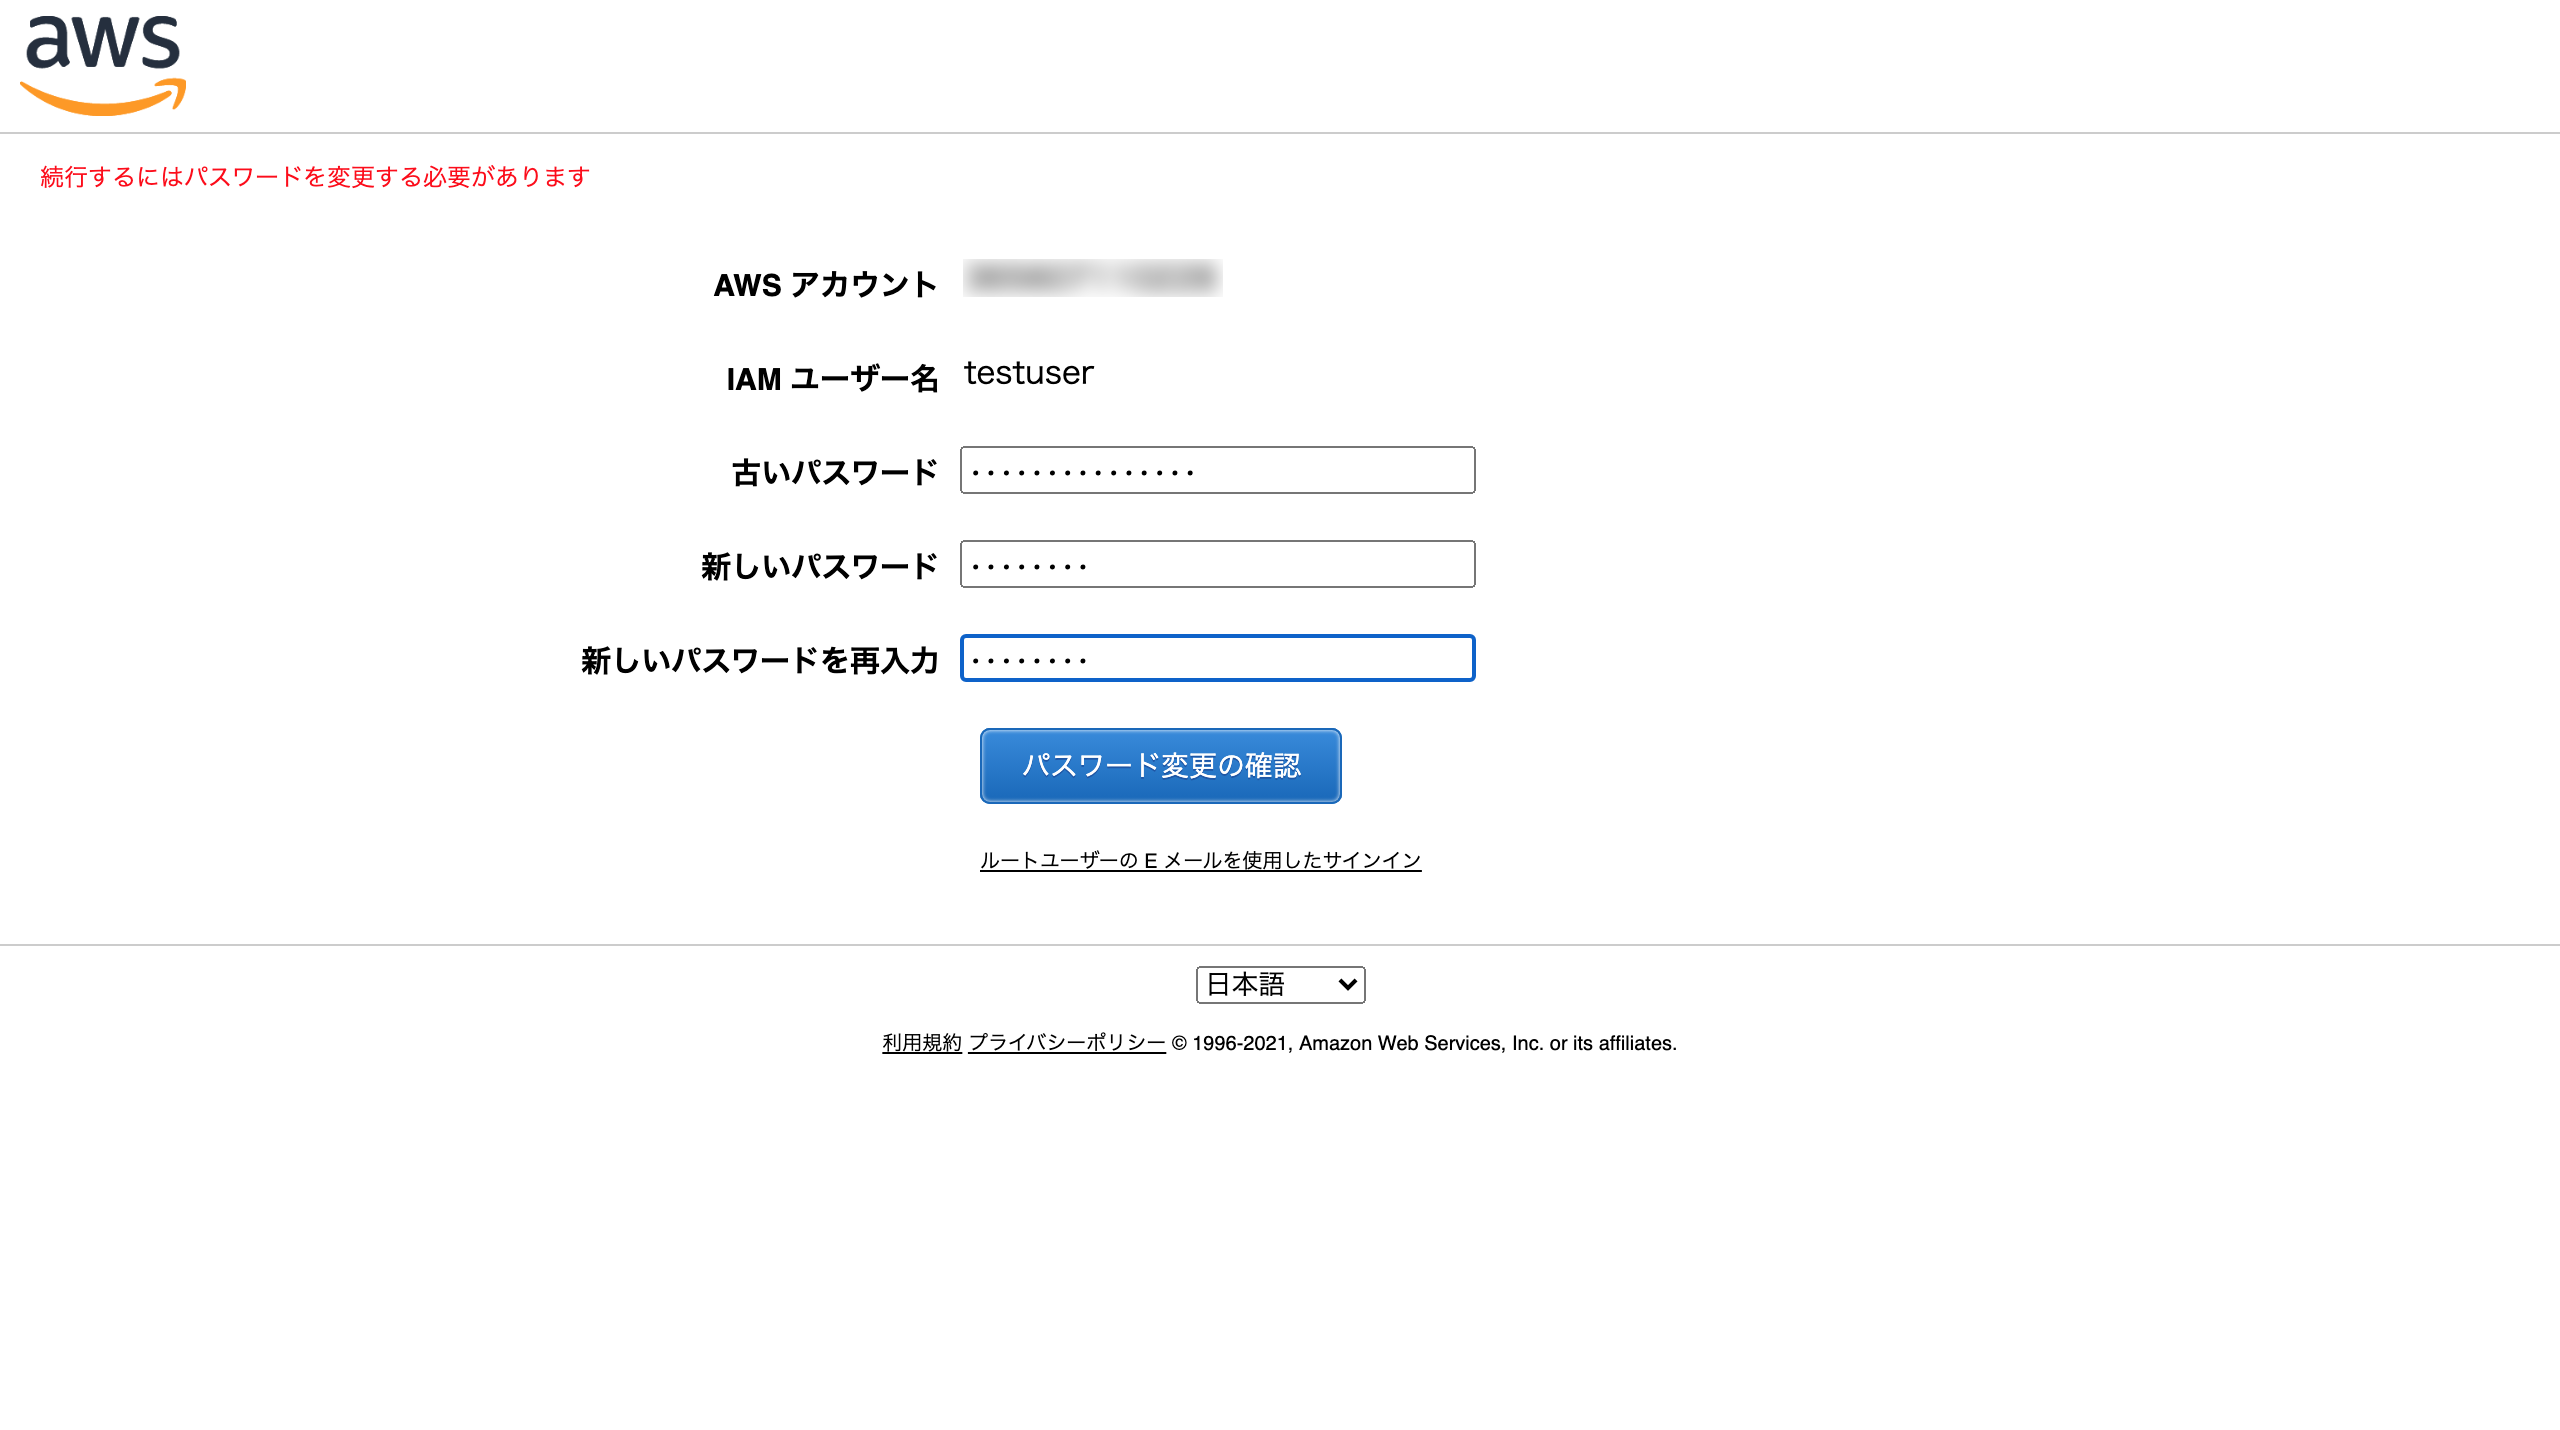
2.パスワード変更
パスワードの変更画面に切り替わるので、
古いパスワード(配布された初期パスワード)を入力し新しいパスワードに変更する
3. ロールの切り替え
右上のユーザー名からロールの切り替えを選択する

配布されたアカウントとロール名(オーナーに聞く)を入力する
ロールの切り替えが終了し、ご自身のユーザーに戻る

4. AWS CLI バージョン 2 のインストール
以下リンクの手順からインストール
https://docs.aws.amazon.com/ja_jp/cli/latest/userguide/install-cliv2-mac.html
5. Gitのインストール(Homebrewを使う方法)
※Homebrewはインストール済みであること
Homebrewをインストールしていない方は以下リンクを参考に
https://brew.sh/index_ja
Gitインストール
$ brew install git
Gitのバーション確認
$ git --version
6. ローカル端末にCode Commit接続設定
Gitの設定内容の確認とユーザーネーム, メールアドレスが表示されるか確認
$ git config -l
ユーザーネーム、メールアドレスの入力
※ユーザーネーム, メールアドレスが表示されなかった場合、以下2つを実行
$ git config --global user.name [“ユーザーネーム”]
$ git config --global user.email [メールアドレス]
AWSアクセスキーとシークレットキーの登録
$ aws configure
該当する情報を順番に入力
AWS Access Key ID [None]: 配布されたAccess key番号
AWS Secret Access Key ID [None]: 配布されたSecret Access key番号
Default region name ID [None]: ap-northeast-1
Default output format [None]: json
AWS profileの作成
$ vi ~/.aws/config
「i」ボタンを押して以下を追記
[profile ロール名]
region = ap-northeast-1
output = json
role_arn = arn:aws:iam::[オーナーアカウントID]:role/[ご自身のロール]
source_profile = default
「ESC」ボタンを押して「:wq」を入力してconfigファイルを閉じる
Gitの設定
$ git config --global credential.helper '!aws --profile lcs-dev codecommit credential-helper $@'
$ git config --global credential.UseHttpPath true
環境変数の設定
Linuxの環境が「bash」の場合、下記のコマンドを実行
$ echo export AWS_DEFAULT_PROFILE=lcs-dev >> ~/.bash_profile
$ source ~/.bash_profil
Linuxの環境が「zsh」の場合、下記のコマンドを実行
$ echo export AWS_DEFAULT_PROFILE=lcs-dev >> ~/.zshrc
$ source ~/.zshrc
Credentialの設定
credential.helper=osxkeychainが記載されているファイルを確認する
$ git config -l --show-origin
(例) file:/usr/local/etc/gitconfig credential.helper=osxkeychain
上記で見つけたファイルのcredential.helperをコメントアウトする
(該当する文章の前に「#」をつける)
$ vi /usr/local/etc/gitconfig
[credential]
        #helper = osxkeychain  ・・・コメントアウト
Code Commitでリポジトリをクローンする
※リポジトリが作成されている前提
リポジトリがない場合はリポジトリを作成
上記でコピーしたURLのクローンを貼り付け
$ git clone [URL]
補足
クローン時以下エラー文が出たときの対処法
An error occurred (InvalidClientTokenId) when calling the AssumeRole operation: The security token included in the request is invalid.
$ vi ~/.aws/credentials
アクセスキー、シークレットキー記載
[default]
aws_access_key_id = [アクセスキー]
aws_secret_access_key = [シークレットキー]


