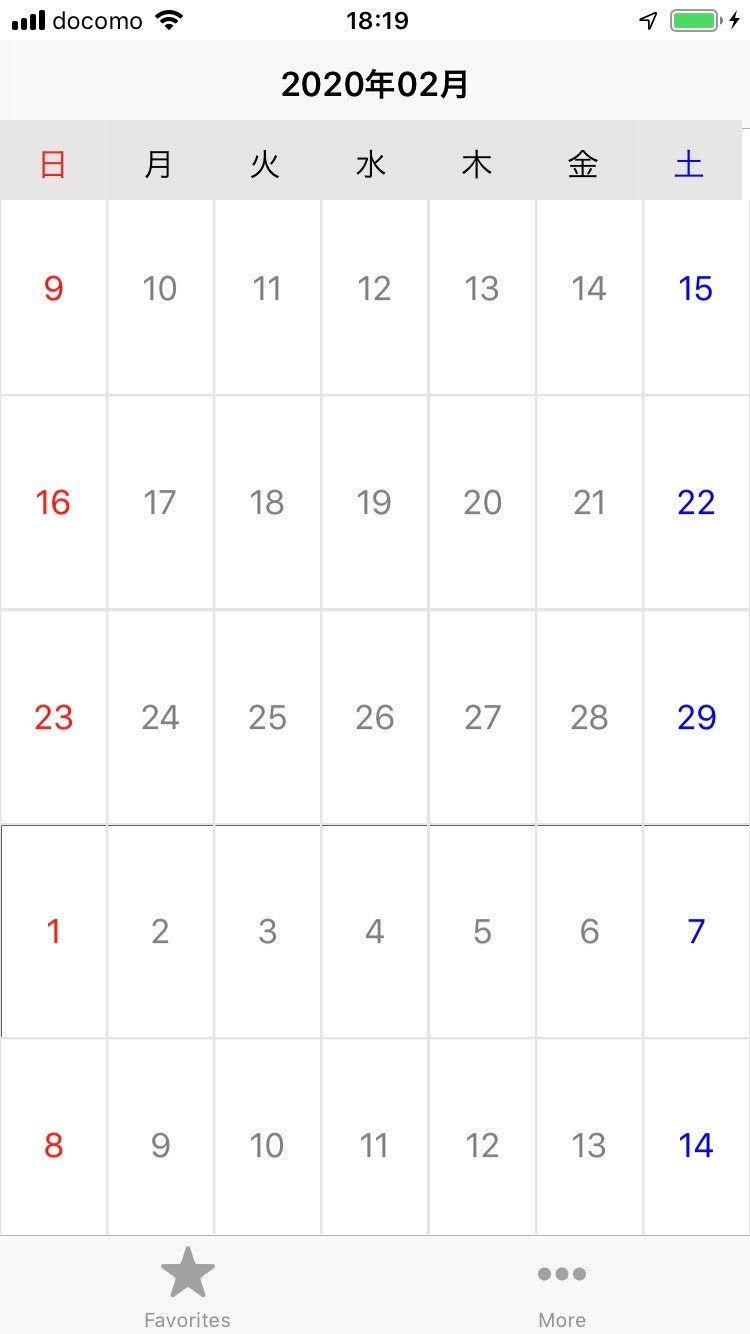
連続型カレンダーを実装してみたの投稿を手直ししてみました。
当日からの表示、ボーダーラインの設定、曜日ヘッダーの表示等参考になればと思います。
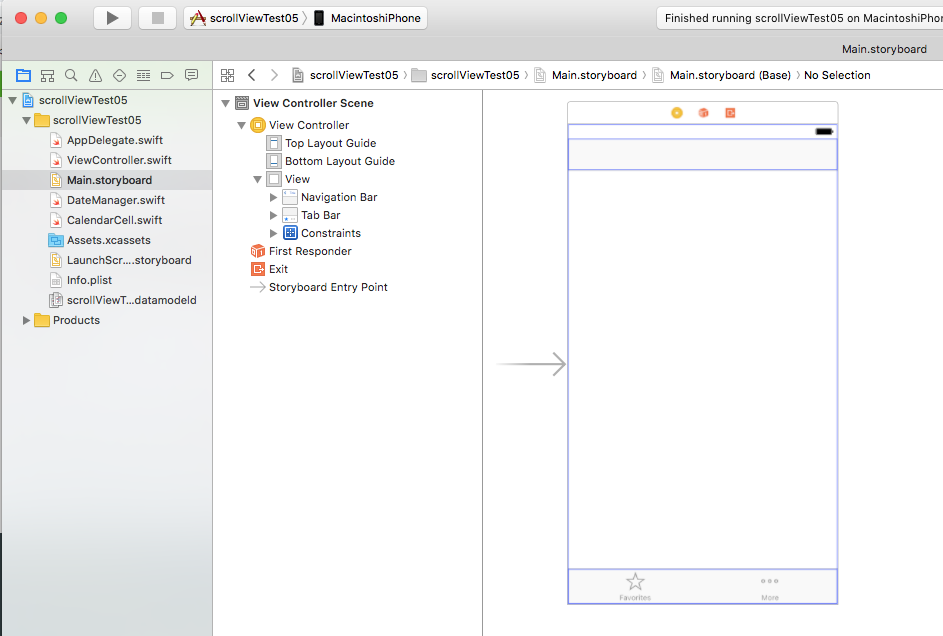
ViewControllerを下記のように変更してみました。
import UIKit
extension UIView {

    enum BorderPosition {
        case Top
        case Right
        case Bottom
        case Left
    }

    func border(borderWidth: CGFloat, borderColor: UIColor?, borderRadius: CGFloat?) {
        self.layer.borderWidth = borderWidth
        self.layer.borderColor = borderColor?.cgColor
        if let _ = borderRadius {
            self.layer.cornerRadius = borderRadius!
        }
        self.layer.masksToBounds = true
    }

    func border(positions: [BorderPosition], borderWidth: CGFloat, borderColor: UIColor?) {

        let topLine = CALayer()
        let leftLine = CALayer()
        let bottomLine = CALayer()
        let rightLine = CALayer()

        self.layer.sublayers = nil
        self.layer.masksToBounds = true

        if let _ = borderColor {
            topLine.backgroundColor = borderColor!.cgColor
            leftLine.backgroundColor = borderColor!.cgColor
            bottomLine.backgroundColor = borderColor!.cgColor
            rightLine.backgroundColor = borderColor!.cgColor
        } else {
            topLine.backgroundColor = UIColor.blue.cgColor
            leftLine.backgroundColor = UIColor.blue.cgColor
            bottomLine.backgroundColor = UIColor.blue.cgColor
            rightLine.backgroundColor = UIColor.blue.cgColor
        }

        if positions.contains(.Top) {
            topLine.frame = CGRect(x:0.0, y:0.0, width:self.frame.width, height:borderWidth)
            self.layer.addSublayer(topLine)
        }
        if positions.contains(.Left) {
            leftLine.frame = CGRect(x:0.0,y: 0.0, width:borderWidth,height: self.frame.height)
            self.layer.addSublayer(leftLine)
        }
        if positions.contains(.Bottom) {
            bottomLine.frame = CGRect(x:0.0,y: self.frame.height - borderWidth, width:self.frame.width, height:borderWidth)
            self.layer.addSublayer(bottomLine)
        }
        if positions.contains(.Right) {
            rightLine.frame = CGRect(x:self.frame.width - borderWidth, y:0.0,width: borderWidth, height:self.frame.height)
            self.layer.addSublayer(rightLine)
        }

    }

    @IBInspectable
    var borderWidth: CGFloat {
        get {
            return self.layer.borderWidth
        }
        set {
            self.layer.borderWidth = newValue
        }
    }

    @IBInspectable
    var borderColor: UIColor? {
        get {
            if let _ = self.layer.borderColor {
                return UIColor(cgColor: self.layer.borderColor!)
            }
            return nil
        }
        set {
            self.layer.borderColor = newValue?.cgColor
        }
    }

    @IBInspectable
    var cornerRadius: CGFloat {
        get {
            return self.layer.cornerRadius
        }
        set {
            self.layer.cornerRadius = newValue
        }
    }

}


class ViewController: UIViewController ,UICollectionViewDelegate,UICollectionViewDataSource,UICollectionViewDelegateFlowLayout{

    private var weekCollectView:UICollectionView!

    private var myCollectView:UICollectionView!
    //セルの余白
    let cellMargin:CGFloat = 0.0
    //1週間に何日あるか(行数)
    let daysPerWeek:Int = 7

    let dateManager = DateManager()
    var startDate:Date!
    var endDate:Date!

    var elapsedDays:Int = 0

    //表示する年月のラベル
    private var monthLabel:UILabel!
    @IBOutlet weak var naviTitle: UINavigationItem!

    override func viewDidLoad() {
        super.viewDidLoad()

        self.naviTitle.title = getToday(format:"yyyy年MM月")


        let date = Date()

        var components = NSCalendar.current.dateComponents([.year ,.month, .day], from:date)
        components.day = 1
        components.month = 10
        components.year = 2015
        startDate = NSCalendar.current.date(from: components)
        components.day = 31
        components.month = 12
        components.year = 2040
        endDate = NSCalendar.current.date(from: components)

        //https://qiita.com/shinsakujazzbass/items/119081ed1d232e048b96
        let date2 = Date()
        elapsedDays = Calendar.current.dateComponents([.day], from: startDate!, to: date2).day!


        let barHeight = UIApplication.shared.statusBarFrame.size.height
        let width = self.view.frame.width
        let height = self.view.frame.height-50
        let layout = UICollectionViewFlowLayout()
        layout.sectionInset = UIEdgeInsetsMake(0,0,0,0)

        //labelを配列化しループで表示する
        let yobiname = ["日","月","火","水","木","金","土"]
        let week_label = [UILabel(), UILabel(), UILabel(),UILabel(), UILabel(), UILabel(),UILabel()]
        for i in 0...6 {
            // 横に並べる様に配置
            week_label[i].frame = CGRect(x: Int(width / 7) * i, y: 10 + 50, width: Int(width / 7), height: 44)
            week_label[i].backgroundColor = UIColor(red: 0.9, green: 0.9, blue: 0.9, alpha: 1.0)
            week_label[i].textAlignment = NSTextAlignment.center // 横揃えの設定
            week_label[i].text = yobiname[i] // テキストの設定
            if(i == 0){
                week_label[i].textColor = UIColor.red
            }
            if(i == 6){
                week_label[i].textColor = UIColor.blue
            }
            self.view.addSubview(week_label[i])

        }

        //コレクションビューを設置していくよ
        myCollectView = UICollectionView(frame: self.view.frame, collectionViewLayout: layout)
        myCollectView.frame = CGRect(x:0,y:barHeight + 80,width:width,height:height - barHeight - 80)
        myCollectView.register(CalendarCell.self, forCellWithReuseIdentifier: "collectCell")
        myCollectView.delegate = self
        myCollectView.dataSource = self
        //myCollectView.backgroundColor = .gray
        myCollectView.backgroundColor = UIColor(red: 0.9, green: 0.9, blue: 0.9, alpha: 1.0)
        //myCollectView.backgroundColor = UIColor(red:255/255,green:255/255,blue:250/255,alpha:0.5)

        monthLabel = UILabel()
        monthLabel.frame = CGRect(x:0,y:150,width:width,height:100)
        monthLabel.center = CGPoint(x:width / 2,y:50)
        monthLabel.textAlignment = .center
        self.view.addSubview(monthLabel)

        print("viewDidLoad")
        self.view.addSubview(myCollectView)


    }

    //当日cellへ移動処理表示後のUIViewControllerのライフサイクルのviewDidAppear
    //にてscrollToItemを利用してスクロールとanimated: false指定で処理。
    override func viewDidAppear(_ animated: Bool) {
        super.viewDidAppear(animated)
        print("aaaaaaaaaaaaaaaaa")
        let indexPath = IndexPath(item: elapsedDays + 5, section: 0)
        myCollectView.scrollToItem(at: indexPath, at: .centeredVertically, animated: false)
        //myCollectView.scrollToItem(at: IndexPath(row: 100, section: 0), at: .left, animated: false)
        //myCollectView.reloadData()
    }

    //https://www.ajinohiraki.info/entry/2018/09/17/012022
    //上記にて日付けをStringへ変換する関数
    func getToday(format:String = "yyyy/MM/dd HH:mm:ss") -> String {
        let now = Date()
        let formatter = DateFormatter()
        formatter.dateFormat = format
        return formatter.string(from: now as Date)
    }

    //セクションの数
    func numberOfSections(in collectionView: UICollectionView) -> Int {
        return 1
    }

    //レイアウト調整 行間余白
    func collectionView(_ collectionView:UICollectionView,layout collectionViewLayout:UICollectionViewLayout,minimumLineSpacingForSectionAt section:Int) -> CGFloat{
        return cellMargin
    }

    //レイアウト調整 列間余白
    func collectionView(_ collectionView:UICollectionView,layout collectionViewLayout:UICollectionViewLayout,minimumInteritemSpacingForSectionAt section:Int) -> CGFloat{
        return cellMargin
    }


    //セルのサイズを設定
    func collectionView(_ collectionView:UICollectionView,layout collectionViewLayout:UICollectionViewLayout,sizeForItemAt indexPath:IndexPath) -> CGSize{
        let numberOfMargin:CGFloat = 8.0
        let width:CGFloat = (collectionView.frame.size.width - cellMargin * numberOfMargin) / CGFloat(daysPerWeek)
        let height:CGFloat = width * 2.0
        return CGSize(width:width,height:height)
    }

    //選択した時
    func collectionView(_ collectionView: UICollectionView, didSelectItemAt indexPath: IndexPath) {
        print(indexPath)

    }

    //セルの総数
    func collectionView(_ collectionView: UICollectionView, numberOfItemsInSection section: Int) -> Int {
        return dateManager.cellCount(startDate:startDate,endDate:endDate)
    }

    //セルの設定
    func collectionView(_ collectionView: UICollectionView, cellForItemAt indexPath: IndexPath) -> UICollectionViewCell {

        let cell:CalendarCell = collectionView.dequeueReusableCell(withReuseIdentifier:"collectCell",for:indexPath as IndexPath) as! CalendarCell
        //cellのborder色設定例
        cell.layer.borderWidth = 0.7
        cell.layer.borderColor = UIColor(red: 0.9, green: 0.9, blue: 0.9, alpha: 1.0).cgColor
        cell.backgroundColor = UIColor.white
        //土曜日は赤 日曜日は青 にテキストカラーを変更する
        if(indexPath.row % 7 == 0){
            cell.textLabel.textColor = UIColor.red
        }else if(indexPath.row % 7 == 6){
            cell.textLabel.textColor = UIColor.blue
        }else{
            cell.textLabel.textColor = UIColor.gray
        }
        cell.tag = Int(dateManager.monthTag(row:indexPath.row,startDate:startDate))!
        //セルの日付を取得し
        cell.textLabel.text = dateManager.conversionDateFormat(row:indexPath.row,startDate:startDate)

        //セルの日付を取得
        let day = Int(dateManager.conversionDateFormat(row:indexPath.row,startDate:startDate!))!
        if(day == 1){
            cell.textLabel.border(positions:[.Top,.Left],borderWidth:1,borderColor:UIColor.black)
        }else if(day <= 7){
            cell.textLabel.border(positions:[.Top],borderWidth:1,borderColor:UIColor.black)
        }else{
            cell.textLabel.border(positions:[.Top],borderWidth:0,borderColor:UIColor.white)
        }
        return cell
    }


    func scrollViewDidScroll(_ scrollView: UIScrollView) {
        let visibleCell = myCollectView.visibleCells.filter{
            return myCollectView.bounds.contains($0.frame)
        }

        var visibleCellTag = Array<Int>()
        if(visibleCell != []){
            visibleCellTag = visibleCell.map{$0.tag}
            //月は奇数か偶数か 割り切れるものだけを取り出す
            let even = visibleCellTag.filter{
                return $0 % 2 == 0
            }
            let odd = visibleCellTag.filter{
                return $0 % 2 != 0
            }
            //oddかevenの多い方を返す
            let month = even.count >= odd.count ? even[0] : odd[0]

            //桁数によって分岐
            let digit = numberOfDigit(month: month)
            if(digit == 5){
                self.naviTitle.title = String(month / 10) + "年" + String(month % 10) + "月"
                //monthLabel.text = String(month / 10) + "年" + String(month % 10) + "月"
            }else if(digit == 6){
                self.naviTitle.title = String(month / 100) + "年" + String(month % 100) + "月"
                //monthLabel.text = String(month / 100) + "年" + String(month % 100) + "月"
            }
        }
    }

    func numberOfDigit(month:Int) -> Int{
        var num = month
        var cnt = 1
        while(num / 10 != 0){
            cnt = cnt + 1
            num = num / 10
        }
        return cnt

    }
    override func didReceiveMemoryWarning() {
        super.didReceiveMemoryWarning()
    }
}