やりたいこと
お家にファイルサーバを構築して、iPhone・Android・Windows・Macからアクセスできるようにしたい。
Raspberry Piを持っているからsambaを入れてファイルサーバとして運用し、ポータブルHDDをUSB接続してファイル置き場にしたい。
dockerでやりたい。
注意書き
この投稿にはセキュリティに関する設定(ファイアウォール・ユーザ認証・パーミッション等)が不足しています。
いつかやる。
環境
$ uname -a
Linux raspberrypi 4.14.79-v7+ #1159 SMP Sun Nov 4 17:50:20 GMT 2018 armv7l GNU/Linux
構築手順
Raspberry Piをファイルサーバ化していきます。
Raspberry Piにsshするまでの手順は省略します。
dockerとdocker-composeのインストール
普段はVMで環境を作ったり消したりしていますが、Raspberry Piは実機なので環境をできるだけきれいに保ちたいため、dockerをインストールすることにします。
docker-composeは、コンテナ作成時のオプションが後から確認できることと、単純に使ってみたかったので、インストールしてみます。
$ sudo curl -fsSL https://get.docker.com/ | sh

$ docker --version
Docker version 18.09.0, build 4d60db4
$ sudo pip install docker-compose

$ docker-compose --version
docker-compose version 1.23.2, build 1110ad0
外部ディスクの追加
外付けHDD(USB接続)への給電を安定にするため、下記の設定を追記
# 下記を末尾に追記
safe_mode_gpio=4
max_usb_current=1
再起動して設定を反映
$ sudo reboot
再起動後、外付けHDDをUSB接続して、デバイスが認識できたことを確認
$ sudo fdisk -l
# 省略
Disk /dev/sda: 596.2 GiB, 640135028224 bytes, 1250263727 sectors
Units: sectors of 1 * 512 = 512 bytes
Sector size (logical/physical): 512 bytes / 512 bytes
I/O size (minimum/optimal): 512 bytes / 512 bytes
Disklabel type: dos
Disk identifier: 0xdcca2088

Device     Boot Start        End    Sectors   Size Id Type
/dev/sda1          64 1250258624 1250258561 596.2G  7 HPFS/NTFS/exFAT
無事認識されました。
$ sudo fdisk -l /dev/sda1
Disk /dev/sda1: 596.2 GiB, 640132383232 bytes, 1250258561 sectors
Units: sectors of 1 * 512 = 512 bytes
Sector size (logical/physical): 512 bytes / 512 bytes
I/O size (minimum/optimal): 512 bytes / 512 bytes
Disklabel type: dos
Disk identifier: 0x73736572

Device      Boot      Start        End    Sectors   Size Id Type
/dev/sda1p1      1920221984 3736432267 1816210284   866G 72 unknown
/dev/sda1p2      1936028192 3889681299 1953653108 931.6G 6c unknown
/dev/sda1p3               0          0          0     0B  0 Empty
/dev/sda1p4        27722122   27722568        447 223.5K  0 Empty

Partition table entries are not in disk order.
ですがすでにパーティションが区切られ、ファイルシステムもRaspberry Piが認識できるものではないようです。
初期化したほうが良さそうです。
パーティションの初期化
fdiskコマンドを使って既存のパーティションを削除します
$ sudo fdisk /dev/sda

Welcome to fdisk (util-linux 2.29.2).
Changes will remain in memory only, until you decide to write them.
Be careful before using the write command.


Command (m for help): d
Partition number (1-4, default 4):

Partition 4 has been deleted.

Command (m for help): d
Partition number (1-3, default 3):

Partition 3 has been deleted.

Command (m for help): d
Partition number (1,2, default 2):

Partition 2 has been deleted.

Command (m for help): d
Selected partition 1
Partition 1 has been deleted.
Command (m for help): p
Disk /dev/sda1: 596.2 GiB, 640132383232 bytes, 1250258561 sectors
Units: sectors of 1 * 512 = 512 bytes
Sector size (logical/physical): 512 bytes / 512 bytes
I/O size (minimum/optimal): 512 bytes / 512 bytes
Disklabel type: dos
Disk identifier: 0x73736572
パーティションが削除されました。
パーティションの設定
将来のストレージ容量不足時の拡張性を考慮して、論理ボリュームにします。
論理ボリュームの構築は簡略に記載します。
まず、パーティションを作成します。
$ sudo fdisk /dev/sda
Command (m for help): n
Partition type
   p   primary (0 primary, 0 extended, 4 free)
   e   extended (container for logical partitions)
Select (default p):

Using default response p.
Partition number (1-4, default 1):
First sector (2048-1250258560, default 2048):
Last sector, +sectors or +size{K,M,G,T,P} (2048-1250258560, default 1250258560):

Created a new partition 1 of type 'Linux' and of size 596.2 GiB.
次に、パーティションタイプをLVMに設定します。
Command (m for help): t
Partition type (type L to list all types): 8e
Changed type of partition 'Linux' to 'Linux LVM'.

Command (m for help): p
Disk /dev/sda: 596.2 GiB, 640135028224 bytes, 1250263727 sectors
Units: sectors of 1 * 512 = 512 bytes
Sector size (logical/physical): 512 bytes / 512 bytes
I/O size (minimum/optimal): 512 bytes / 512 bytes
Disklabel type: dos
Disk identifier: 0xdcca2088

Device     Boot Start        End    Sectors   Size Id Type
/dev/sda1        2048 1250263726 1250261679 596.2G 8e Linux LVM
ここでこれまでの変更を保存して終了します。
Command (m for help): w
論理ボリュームの作成
lvmコマンドをインストールします。
$ apt install lvm2
物理ボリュームの作成
$ sudo pvcreate /dev/sda1
Physical volume "/dev/sda1" successfully created.

$ sudo pvs
  PV         VG Fmt  Attr PSize   PFree
  /dev/sda1     lvm2 ---  596.17g 596.17g
ボリュームグループの作成
$ sudo vgcreate -s 32M VG01 /dev/sda1

$ sudo vgs
  VG   #PV #LV #SN Attr   VSize   VFree
  VG01   1   0   0 wz--n- 596.16g 596.16g
論理ボリュームの作成
$ sudo lvcreate -l 100%FREE -n LV01 VG01

$ sudo lvs
  LV   VG   Attr       LSize   Pool Origin Data%  Meta%  Move Log Cpy%Sync Convert
  LV01 VG01 -wi-a----- 596.16g
ファイルシステム
複数なOSでも書き込み・読み込みができるように今回はexFATを利用します。
まず必要なパッケージをインストールします
$ sudo apt install exfat-fuse exfat-utils
先程作成したLVをexFATファイルシステムで整地します。
 $ sudo mkfs.exfat /dev/mapper/VG01-LV01
mkexfatfs 1.2.5
Creating... done.
Flushing... done.
File system created successfully.
マウント
作成したLVをマウントします。
マウントポイントの作成
$ sudo mkdir /mnt/lv
fstabの修正
# 省略
/dev/mapper/VG01-LV01 /mnt/lv exfat defaults 0 2 # この行を追記
マウント
$ sudo mount -a
FUSE exfat 1.2.5
ディスクの確認
$ df -h
ファイルシス          サイズ  使用  残り 使用% マウント位置
/dev/root                28G  3.0G   24G   12% /
devtmpfs                460M     0  460M    0% /dev
tmpfs                   464M     0  464M    0% /dev/shm
tmpfs                   464M   13M  452M    3% /run
tmpfs                   5.0M  4.0K  5.0M    1% /run/lock
tmpfs                   464M     0  464M    0% /sys/fs/cgroup
/dev/mmcblk0p6           68M   23M   46M   33% /boot
tmpfs                    93M     0   93M    0% /run/user/1000
/dev/mapper/VG01-LV01   597G   20M  597G    1% /mnt/lv # ここが追加された
これでファイルサーバとして運用するストレージの用意が完了しました。
sambaの構築
dockerで構築します。
まずファイルサーバとして公開するディレクトリを作成します。
mkdir -p /mnt/lv/samba/share
docker imageはdperson/sambaのrpiタグのイメージを使います。
dperson/sambaのdocker-compose.ymlを参考に作成しました。
version: '3.4'

services:
  samba:
    image: "dperson/samba:rpi"
    container_name: samba
    environment:
       TZ: 'Asia/Tokyo'
    networks:
      - default
    ports:
      - "137:137/udp"
      - "138:138/udp"
      - "139:139/tcp"
      - "445:445/tcp"
    tmpfs:
      - /tmp
    restart: unless-stopped
    stdin_open: true
    tty: true
    volumes:
      - /mnt/lv/samba/share:/mnt:z
    command: '-s "share;/mnt;yes;no;yes;all;none;*;samba on Raspberry Pi"'

networks:
    default:
コンテナを起動します
$ docker-compose up -d
コンテナのステータスを確認します
$ docker-compose ps
Name               Command               State                                  Ports
---------------------------------------------------------------------------------------------------------------------
samba   samba.sh -s share;/mnt;yes ...   Up      0.0.0.0:137->137/udp, 0.0.0.0:138->138/udp, 0.0.0.0:139->139/tcp,
                                                 0.0.0.0:445->445/tcp
これでコンテナ上にsambaを構築することができました。
ファイルサーバにアクセスする
構築したファイルサーバ(NAS)にアクセスしてみます。
Windows
エクスプローラーでRaspberry PiのIPアドレスを入力してアクセスしてみます

共有フォルダのshare(docker-compose.ymlで定義)が見えています。
試しに新しいフォルダーを作成してみます。

問題なく作成できました。
フォルダ名変更も、フォルダ削除もできるので、Windowsで問題なくCURDな操作ができました。
iPhone
NASに接続するアプリは FE File Explorer: File Manager を使用しました。
 NASにアクセスしてフォルダを参照することができました。
試したところ、フォルダやファイルの作成もできたので、ファイルシステムをexFATにした甲斐がありました。
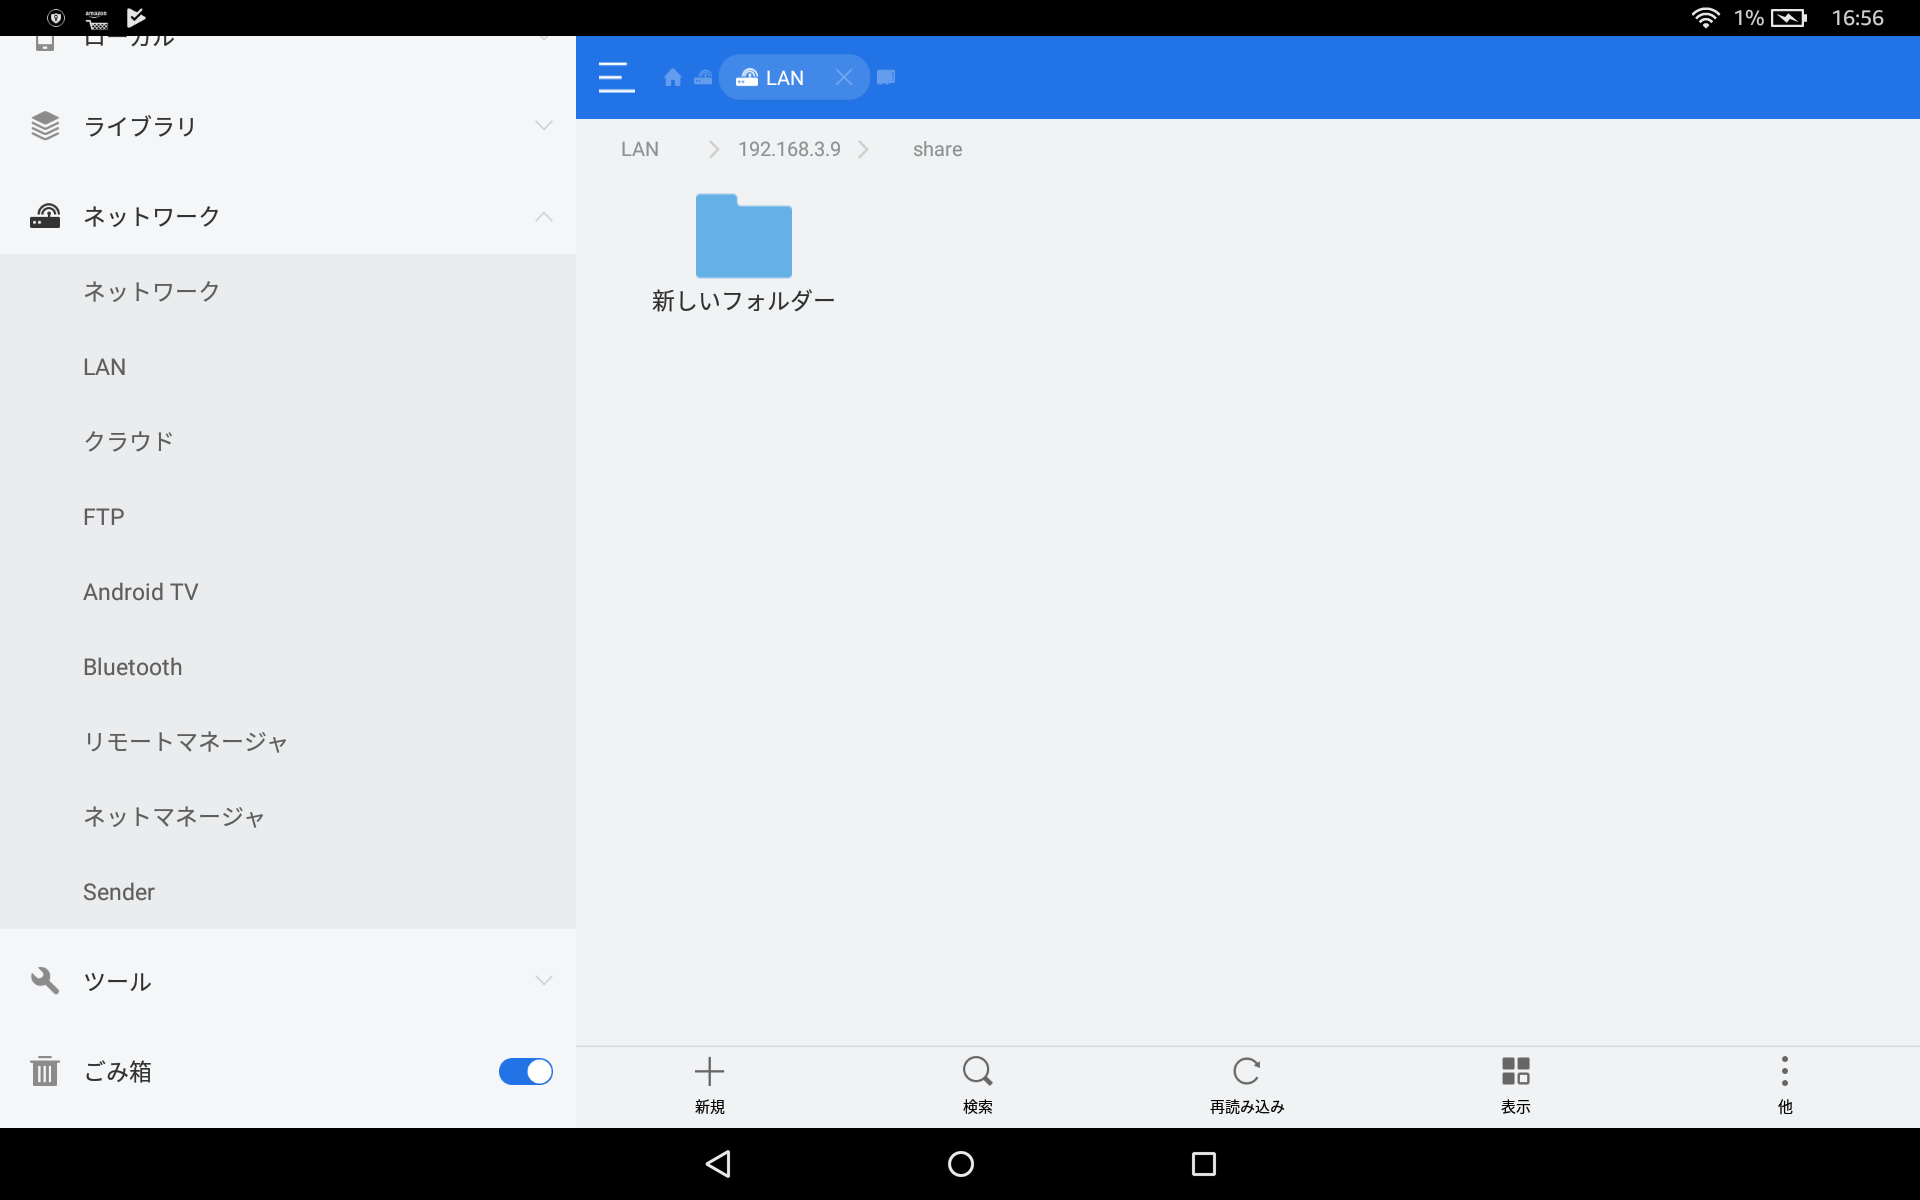
Android
Androidといっても、Kindle Fire HD10ですが…。NASに接続するためのアプリは ES ファイルエクスプローラー を使いました。
ちゃんと接続・表示されファイルの更新や削除、ダウンロードもできました。
以上が、Raspberry Piにdockerコンテナでsambaを構築してファイルサーバ化する手順の説明になります。
おわりに
Raspberry Piの初期セットアップ~dockerでsambaを入れてNAS化までトータルで2日くらいかかってしまいました。
端折っているセキュリティの設定をやろうとすると後何日かかるかわかりません。
モヒカン的ご指摘お待ちしております。
