Azure仮想マシンスケールセットエージェント(Windows)を使って、PowerShellやバッチファイル等の資産をWindows Serverに配置するということをやってみたいと思います。
前提
- Azure DevOps OrganizationとProject作成済み
- Azure Repos作成済み
Windows VMSS作成
-
オーケストレーションモードは[均一]にします。

-
イメージは[Windows Server 2019 Datacenter - x64 Gen2]を選択します。

-
VMSS配置先の仮想ネットワークを選択します。

-
配置先サブネットを変更したい場合は、下の図の編集ボタンを押下します。

-
初期インスタンス数はここでは2にします。(あとでDevOps側で調整します)

-
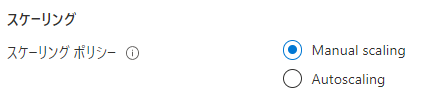
スケーリングポリシーは[Manual scaling]にします。
-
スケールインポリシーはデフォルトにします。

-
管理項目、正常性項目、詳細項目はすべてデフォルトにして作成します。

Service Principal Service Connection作成
-
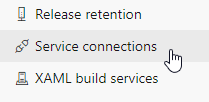
既に存在している場合は作成不要です。Azure DevOpsのProject Settingsから[Service connections]を選択します。
-
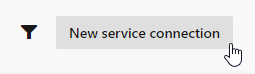
[New service connection]を選択します。
-
[Azure Resource Manager]を選択します。

-
[Service principal (automatic)]を選択します。

-
[Subscription]を選択、[Service connection name]を入力します。

Agent pools作成
-
Azure DevOpsのProject Settingsから[Agent pools]を選択します。

-
[Add pool]を選択します。

-
Pool typeに[Azure virtual machine scale set]を選択します。

-
先ほど作成したService Principal Service Connectionを選択します。

-
先ほど作成したWindows VMSSを選択し、Pool名を入力します。

-
Pool optionsは要件に合わせて設定します。

Library作成
-
PipelinesのLibraryを選択します。

-
[+ Variable group]を選択します。

-
[+ Add]を選択します。(Key Vaultからシークレットを取ってくることもできます。Key Vault使った方がより安全ですね)

-
デプロイ先のWindows OSのログインユーザーとパスワードを設定します。

Pipelines作成
- azure-pipelines.ymlを以下のように構成します。
trigger:
- main
- dev

variables:
  - group: OS_Variables
  - name: targetVM
    ${{ if eq(variables['Build.SourceBranchName'], 'main') }}:
      value: "192.168.0.4"
    ${{ if eq(variables['Build.SourceBranchName'], 'dev') }}:
      value: "192.168.0.5"

pool:
  name: vmss-win

steps:
- task: WindowsMachineFileCopy@2
  inputs:
    SourcePath: $(Build.SourcesDirectory)
    MachineNames: $(targetVM)
    AdminUserName: $(userVariable)
    AdminPassword: $(passwordVariable)
    TargetPath: 'C:\test'
- 今回main,devの2つブランチがあり、それぞれ異なる環境のVMにコピーすることを想定しています。
- コピー先のVMのIPアドレスはブランチ名を判断してtargetVM変数に格納しています。
- この状態でパイプラインを実行し、C:¥testフォルダーにReposの資産が配置されていれば完了です。
以上