catboostとは?
決定木ベースの勾配ブースティングに基づく機械学習ライブラリ。
最近、kaggleでも使われはじめられており、特徴としては以下のようだ。
1. 回帰、分類の教師あり学習に対応
2. kaggleで主流のxgboostとlightGBMと比較しても高い精度、学習速度を誇る
3. GPU、マルチGPUに対応
4. 幅広い言語対応(Python、R、C/C++)
自身はkaggleの教師あり学習コンペはlightGBMを使っていたが、
性能が良いということなので一度触ってみる。
インストール
自分がPythonユーザであるためPythonでの導入方法を記す。
ただ、pipが既にインストールされていればかなり簡単。
必要なパッケージのインストール
# 必須パッケージ
 pip install numpy
 pip install six
 pip install catboost

# オプションパッケージ
 pip install ipywidgets
※ conda, sourceインストールについては以下を参照
データセット
catboostではサンプルデータとして、Titanicやamazonのデータが活用できる。
今回はkaggleにアップされているコールセンターに関するデータセットを利用する。これは契約を解約するユーザの属性がまとまっている。
https://www.kaggle.com/blastchar/telco-customer-churn
実装
以下で前処理から学習までを行っていく。
データの読み込み
import gc
import pandas as pd

data = pd.read_csv("../inputs/WA_Fn-UseC_-Telco-Customer-Churn.csv")

# strで読み込まれてしまうので、floatに変換
data.TotalCharges = data.TotalCharges.convert_objects(convert_numeric=True)

# 文字列を数値に変換
data.Churn = data.Churn.apply(lambda x : int(0) if x == "No" else int(1))
データの分割
X = data.drop(['customerID', 'Churn'], axis=1)
y = data.Churn
from sklearn.model_selection import train_test_split
X_train, X_test, y_train, y_test = train_test_split(X, y, test_size=0.2, random_state=0)
トレーニング
読み込ませるデータセットの作成
from catboost import Pool
import numpy as np

# カテゴリのカラムのみを抽出
categorical_features_indices = np.where(X.dtypes != np.float)[0]

# データセットの作成。Poolで説明変数、目的変数、
# カラムのデータ型を指定できる
train_pool = Pool(X_train, y_train, cat_features=categorical_features_indices)
validate_pool = Pool(X_test, y_test, cat_features=categorical_features_indices)
モデルのインスタンス作成
# 分類用のインスタンスを作成
from catboost import CatBoostClassifier
model = CatBoostClassifier(custom_loss=['Accuracy'],
                           random_seed=42)

# CatBoost, CatBoostRegressorも存在するが損失関数が異なるだけ
# CatBoostClassifierの損失関数はlog_lossデフォルト
学習開始
model.fit(train_pool,
eval_set=validate_pool, # 検証用データ
early_stopping_rounds=10, # 10回以上精度が改善しなければ中止
use_best_model=True, # 最も精度が高かったモデルを使用するかの設定
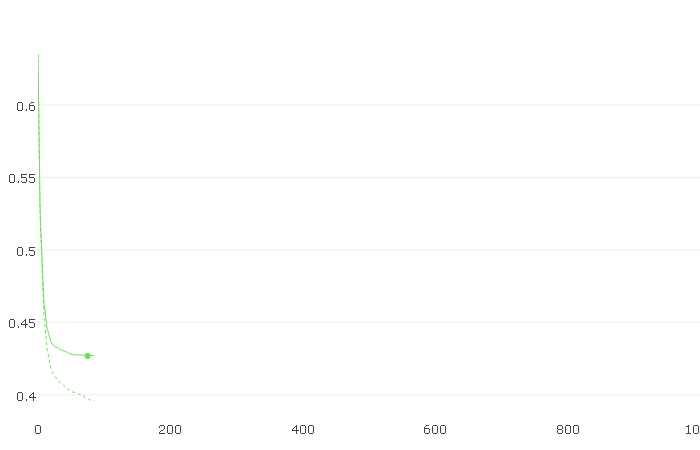
plot=True) # 誤差の推移を描画するか否かの設定
※ plotをTrueにしていると、以下のような画面が表示されます。
パラメータチューニング
params = {
    'depth' : 6,                  # 木の深さ
    'learning_rate' : 0.16,       # 学習率
    'early_stopping_rounds' : 10,
    'iterations' : 200,
    'custom_loss' :['Accuracy'],
    'random_seed' :42
}
# パラメータを指定した場合は、以下のようにインスタンスに適用させる
model = CatBoostClassifier(**params)
model.fit(train_pool, eval_set=validate_pool)
クロスバリデーション
from catboost import cv
cv_params = model.get_params()
cv_data = cv(pool=Pool(X, y, cat_features=categorical_features_indices),
             params=cv_params,
             plot=True,
             nfold=10,
             early_stopping_rounds=10
)
以下のコマンドで精度などを確認できる。
精度の偏差
print('Best validation accuracy score: {:.2f}±{:.2f} on step {}'.format(
    np.max(cv_data['test-Accuracy-mean']),
    cv_data['test-Accuracy-std'][np.argmax(cv_data['test-Accuracy-mean'])],
    np.argmax(cv_data['test-Accuracy-mean'])
))
特徴量の重要度
feature_importances = model.get_feature_importance(train_pool)
feature_names = X_train.columns
for score, name in sorted(zip(feature_importances, feature_names), reverse=True):
    print('{}: {}'.format(name, score))
まとめ
使いやすいライブラリです。学習させたモデルをC++やPythonに簡単に
エクスポートできますし、実用に耐えられるのではないでしょうか。
パラメータチューニングを深堀りして、精度の変化は今後見ていきたいです。