概要
Android と OpenCV 4.0.1 のまとまった情報がなかったので、まとめてみました。
Android 開発の経験がある前提で、記載します。
OpenCV の用意
- 4.0.1 の Android pack をダウンロードします。
- 適当な場所に解凍します。
Android
-
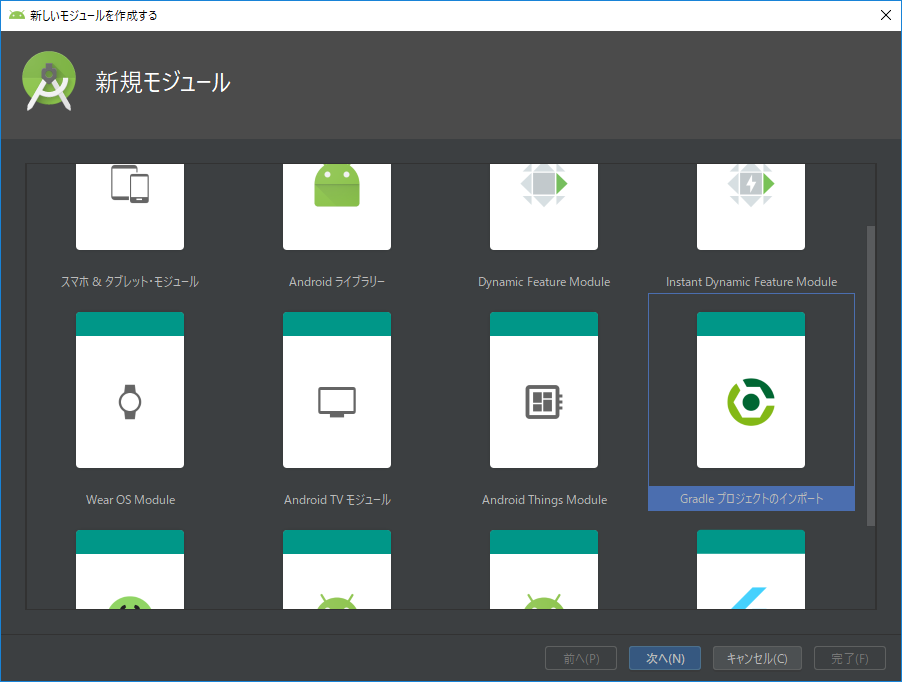
モジュールをソースからインポートする
Android プロジェクトで、プロジェクトを選択して、右クリックで「新規→モジュール」を選択します。

-
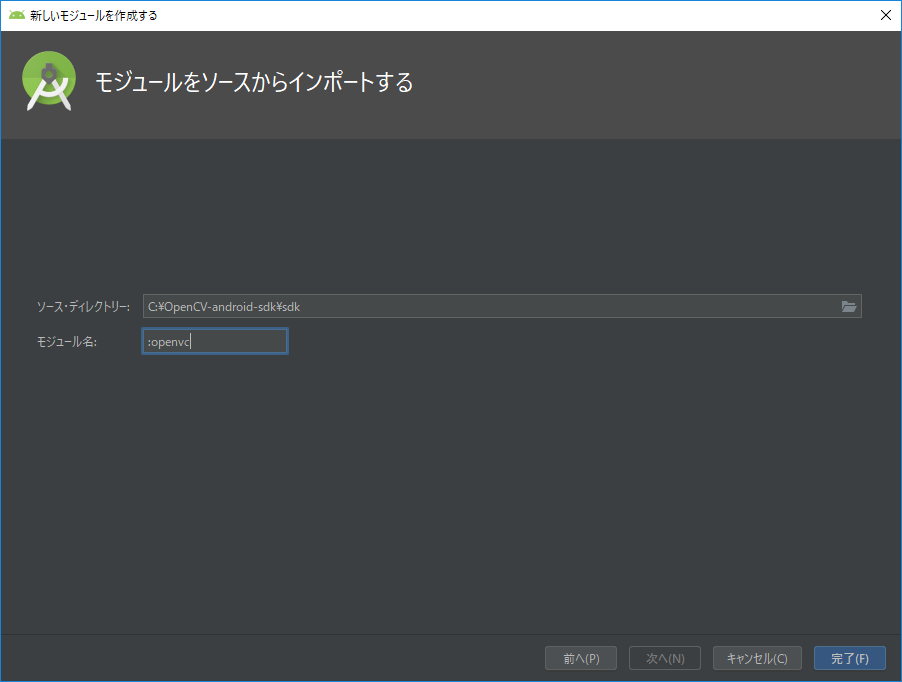
ソース・ディレクトリー/モジュール名
ソース・ディレクトリー:
C:\OpenCV-android-sdk\sdk など解凍したディレクトリーを入力します。
ここで、注意するのが他のサイトだと「C:\OpenCV-android-sdk\sdk\java」になっていますが、「C:\OpenCV-android-sdk\sdk」が正しくなります。モジュール名:
opencv など入力します。
-

- opencv の build.gradle を編集
compileSdkVersion が古いバージョンになっている可能性がありますので、アプリケーションのバージョンと合わせてください。
- モジュール依存関係を追加
プロジェクトを選択して、右クリックで「モジュール設定を開く」を選択します。
依存関係タブを選択して、先ほど入力したモジュール名を選びます。

- 顔認識に必要なファイルをコピー
解凍した中から「haarcascade_frontalface_alt.xml」をassetsなどにコピーする。
C:\OpenCV-android-sdk\sdk\etc\haarcascades
準備は、上記で完了です。
後は、実装していきます。
顔認識した顔に枠線を付けて、ImageViewに表示します。
assetsに顔が入った画像がある前提で、記載します。
    private static final String FILE_NAME = "haarcascade_frontalface_alt.xml";

    private BaseLoaderCallback onLoaderCallback = new BaseLoaderCallback(this) {
        @Override
        public void onManagerConnected(int status) {
            super.onManagerConnected(status);

            // haarcascade_frontalface_alt.xml をコピー
            File file = new File(getFilesDir().getPath() + File.separator + FILE_NAME);
            if (!file.exists()) {
                try (InputStream inputStream = getAssets().open(FILE_NAME);
                        FileOutputStream fileOutputStream = new FileOutputStream(file, false)) {
                    byte[] buffer = new byte[1024];
                    int read;
                    while ((read = inputStream.read(buffer)) != -1) {
                        fileOutputStream.write(buffer, 0, read);
                    }
                } catch (IOException e) {
                    e.printStackTrace();
                }
            }
            CascadeClassifier cascadeClassifier = new CascadeClassifier(file.getAbsolutePath());

            try (InputStream inputStream = getAssets().open("image.jpg")) {
                Bitmap bitmap = BitmapFactory.decodeStream(inputStream);

                Mat mat = new Mat();
                Utils.bitmapToMat(bitmap, mat);

                MatOfRect matOfRect = new MatOfRect();
                cascadeClassifier.detectMultiScale(mat, matOfRect);

                if (matOfRect.toArray().length > 0) {
                    for (Rect rect : matOfRect.toArray()) {
                        Imgproc.rectangle(mat, new Point(rect.x, rect.y),
                                new Point(rect.x + rect.width, rect.y + rect.height),
                                new Scalar(0, 255, 0), 5);
                    }
                    Utils.matToBitmap(mat, bitmap);
                }

                ImageView imageView = findViewById(R.id.imageView);
                imageView.setImageBitmap(bitmap);
            } catch (IOException e) {
                e.printStackTrace();
            }
        }
    };

    @Override
    protected void onCreate(Bundle savedInstanceState) {
        super.onCreate(savedInstanceState);
        setContentView(R.layout.activity_main);
        Toolbar toolbar = findViewById(R.id.toolbar);
        setSupportActionBar(toolbar);

        FloatingActionButton fab = findViewById(R.id.fab);
        fab.setOnClickListener(new View.OnClickListener() {
            @Override
            public void onClick(View view) {
                Snackbar.make(view, "Replace with your own action", Snackbar.LENGTH_LONG)
                        .setAction("Action", null).show();
            }
        });

        if (!OpenCVLoader.initDebug()) {
            OpenCVLoader.initAsync(OpenCVLoader.OPENCV_VERSION, getApplicationContext(),
                    onLoaderCallback);
        } else {
            onLoaderCallback.onManagerConnected(LoaderCallbackInterface.SUCCESS);
        }
    }
}
古いOpenCVの記事だと*.soをコピーするなどが書かれていますが、インポートするだけで問題ありません。