PHPフレームワーク、いままでまともに付き合ったことがないのですが、いまなら Laravel だろうということで、とりあえずルーティングまわり少しさわってみた話です。
まずは環境構築
If you're developing on a Mac and Docker Desktop is already installed, you can use a simple terminal command to create a new Laravel project.
Macで開発していて、Dockerデスクトップがすでにインストールされている場合は、簡単なターミナルコマンドを使用して新しいLaravelプロジェクトを作成できます。(Google翻訳まま)
環境構築(?)終了!簡単!
↑のリンクにもありますが、一応コマンドだけ
% cd ~/workspace
% curl -s https://laravel.build/example-app | bash
% cd example-app
% ./vendor/bin/sail up
example-app のところは何でもOK (指定した名称のディレクトリがカレントディレクトリに作成される)
本日時点だとバージョンは以下
- PHP : 8.0.0
- Laravel : 8.18.1
数分待つとアクセス可能に
http://localhost/

コンテナは何が立ち上がってる?
ほうほう、mysql と redis もいるんすね(今回使ってないけど。。)
% docker ps --format "table {{.ID}}\t{{.Image}}\t{{.Names}}\t{{.Ports}}"
CONTAINER ID        IMAGE                    NAMES                        PORTS
f0b77d88072b        sail-8.0/app             example-app_laravel.test_1   0.0.0.0:80->80/tcp, 8000/tcp
740d3fc055e9        mysql:8.0                example-app_mysql_1          0.0.0.0:3306->3306/tcp, 33060/tcp
85ca0521fd6b        mailhog/mailhog:latest   example-app_mailhog_1        0.0.0.0:1025->1025/tcp, 0.0.0.0:8025->8025/tcp
734ce5fbbf76        redis:alpine             example-app_redis_1          0.0.0.0:6379->6379/tcp
作成されたプロジェクトディレクトリ(example-app)の中を見てみる
% tree example-app -L 1
example-app
├── .editorconfig
├── .env <-- '動作環境に関する設定情報'
├── .env.example
├── .gitattributes
├── .gitignore
├── .styleci.yml
├── README.md
├── app <-- 'アプリの主なプログラム置き場 (Controllersなど)'
├── artisan <-- 'Laravelの職人'
├── bootstrap <-- 'アプリケーション実行時に最初に行われる処理群'
├── composer.json
├── composer.lock
├── config <-- '設定関連ファイル'
├── database <-- 'DB関連ファイル'
├── docker-compose.yml
├── package.json
├── phpunit.xml
├── public <-- '外部公開用ディレクトリ'
├── resources <-- 'リソース関連、css, js, view など)'
├── routes <-- 'ルーティング(リクエストマッピングなど)の設定'
├── server.php
├── storage <-- 'ファイル保存場所、ログなど'
├── tests
├── vendor <-- 'フレームワーク本体'
└── webpack.mix.js
ルーティング(リクエストマッピング)
なにはともあれリクエストマッピング
web用のルーティングは routes/web.php に記述されている
Route::get('/', function () {
    return view('welcome');
});
↑の場合、GETで / にアクセスされた場合、view は resources/views/welcome.blade.php を返す
(Blade は Laravel のテンプレートエンジン)
Route でHTTPメソッドが各種対応されていて、リダイレクトなどなど他にもいろいろ使い方ある
Route::get($path, $callback);
Route::post($path, $callback);
Route::put($path, $callback);
Route::patch($path, $callback);
Route::delete($path, $callback);
Route::options($path, $callback);
エンドポイントを追加してみる
Route::get('/sample', function () {
    return view('sample');
});
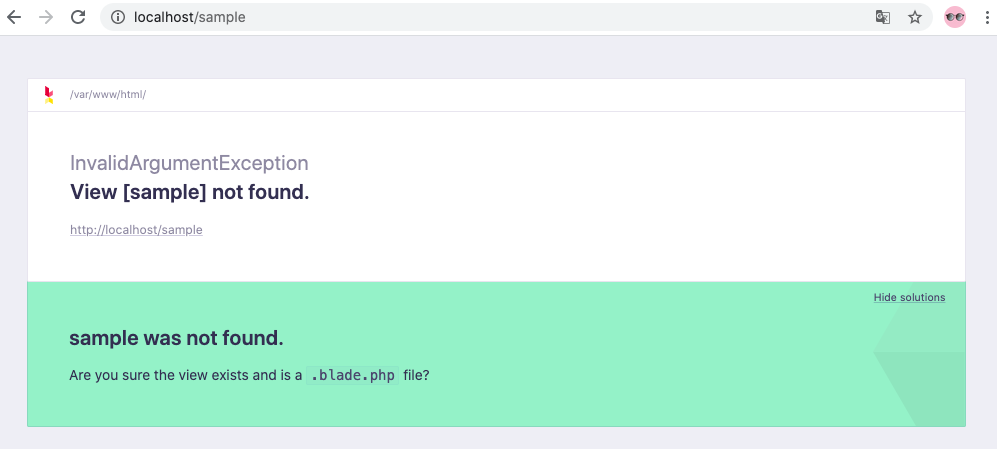
アクセスしてみる
http://localhost/sample

うむ、まだ view を作っていないので作る
<!DOCTYPE html>
<html lang="ja">
<head>
    <meta charset="utf-8" />
    <title>sample</title>
</head>
<body>
<main>
    <p>This is sample page.</p>
</main>
</body>
</html>
これでもう一度アクセスしてみる

飾り気なし男前なページだけど😂
コントローラを使うように変更
routes/web.php が view 返すのもアレなのでコントローラから返すようにする
コントローラは先程出てきた職人(artisan)が作ってくれる
% php artisan make:controller SampleController
これで SampleController が以下の状態で生成される
class SampleController extends Controller
{
    //
}
SampleController に function sampleAction を追加
class SampleController extends Controller
{
    public function sampleAction()
    {
        return view('sample');
    }
}
先ほど routes/web.php に定義した '/sample' のルートを以下に変更
Route::get('/sample', 'SampleController@sampleAction')->name('sample.sampleAction');
このままだと SampleController を見つけられないとエラーになるので、RouteServiceProvider.php を変更する (コメントアウトをはずす)
// protected $namespace = 'App\\Http\\Controllers';
// ↓
protected $namespace = 'App\\Http\\Controllers';
これで先ほどと同じ動きになる (routes/web.php が役割に専念できる)
パスパラメータの受け方
http://localhost/user/55 のようなユーザIDを受け取る場合を試してみる
先ほどと同じように、UserController を作成して show メソッドを作っておく
% php artisan make:controller UserController
class UserController extends Controller
{
    public function show(int $id)
    {
        return view('user.show', ['id' => $id]);
    }
}
ルート追加
Route::get('/user/{id}', 'UserController@show')->name('user.show');
view を作成
<!DOCTYPE html>
<html lang="ja">
<head>
    <meta charset="utf-8" />
    <title>user.show</title>
</head>
<body>
<main>
    <p>The user ID specified is {{ $id }}.</p>
</main>
</body>
</html>
http://localhost/user/55

送ったパラメータを view まで引き渡せていることがわかる
ルートの一覧
artisan でルート一覧を確認できる
% php artisan route:list
+--------+----------+-----------+---------------------+----------------------------------------------------+------------+
| Domain | Method   | URI       | Name                | Action                                             | Middleware |
+--------+----------+-----------+---------------------+----------------------------------------------------+------------+
|        | GET|HEAD | /         | welcome             | Closure                                            | web        |
|        | GET|HEAD | api/user  |                     | Closure                                            | api        |
|        |          |           |                     |                                                    | auth:api   |
|        | GET|HEAD | sample    | sample.sampleAction | App\Http\Controllers\SampleController@sampleAction | web        |
|        | GET|HEAD | user/{id} | user.show           | App\Http\Controllers\UserController@show           | web        |
+--------+----------+-----------+---------------------+----------------------------------------------------+------------+
RESTコントローラ
RESTコントローラの場合はコントローラ作成時に --resource オプションをつけると、CRUD関連のアクセスを扱えるように以下のクラスが生成される
% php artisan make:controller SampleRestController --resource
class SampleRestController extends Controller
{
    /**
     * Display a listing of the resource.
     *
     * @return \Illuminate\Http\Response
     */
    public function index()
    {
        //
    }

    /**
     * Show the form for creating a new resource.
     *
     * @return \Illuminate\Http\Response
     */
    public function create()
    {
        //
    }

    /**
     * Store a newly created resource in storage.
     *
     * @param  \Illuminate\Http\Request  $request
     * @return \Illuminate\Http\Response
     */
    public function store(Request $request)
    {
        //
    }

    /**
     * Display the specified resource.
     *
     * @param  int  $id
     * @return \Illuminate\Http\Response
     */
    public function show($id)
    {
        //
    }

    /**
     * Show the form for editing the specified resource.
     *
     * @param  int  $id
     * @return \Illuminate\Http\Response
     */
    public function edit($id)
    {
        //
    }

    /**
     * Update the specified resource in storage.
     *
     * @param  \Illuminate\Http\Request  $request
     * @param  int  $id
     * @return \Illuminate\Http\Response
     */
    public function update(Request $request, $id)
    {
        //
    }

    /**
     * Remove the specified resource from storage.
     *
     * @param  int  $id
     * @return \Illuminate\Http\Response
     */
    public function destroy($id)
    {
        //
    }
}
この場合も Route の設定を行うが、以下のように Route::resource を使う
Route::resource('/sample-rest', 'SampleRestController');
この状態でルート一覧を確認すると sample-rest がHTTPメソッドごとにルートできるようになっているのがわかる
% php artisan route:list --name=sample-rest
+--------+-----------+--------------------------------+---------------------+---------------------------------------------------+------------+
| Domain | Method    | URI                            | Name                | Action                                            | Middleware |
+--------+-----------+--------------------------------+---------------------+---------------------------------------------------+------------+
|        | GET|HEAD  | sample-rest                    | sample-rest.index   | App\Http\Controllers\SampleRestController@index   | web        |
|        | POST      | sample-rest                    | sample-rest.store   | App\Http\Controllers\SampleRestController@store   | web        |
|        | GET|HEAD  | sample-rest/create             | sample-rest.create  | App\Http\Controllers\SampleRestController@create  | web        |
|        | GET|HEAD  | sample-rest/{sample_rest}      | sample-rest.show    | App\Http\Controllers\SampleRestController@show    | web        |
|        | PUT|PATCH | sample-rest/{sample_rest}      | sample-rest.update  | App\Http\Controllers\SampleRestController@update  | web        |
|        | DELETE    | sample-rest/{sample_rest}      | sample-rest.destroy | App\Http\Controllers\SampleRestController@destroy | web        |
|        | GET|HEAD  | sample-rest/{sample_rest}/edit | sample-rest.edit    | App\Http\Controllers\SampleRestController@edit    | web        |
+--------+-----------+--------------------------------+---------------------+---------------------------------------------------+------------+
次回アクション
Spring(Java)の @RequestMapping 的なアノテーションも使えるっぽいので、そっちの方が便利だし今度はそっちを試してみようかなと思います。(途中で気になって調べたら出来そうだったので最初からやれば良かった。。)
それから、DBまわりは Laravel に Eloquent ORM というのが入ってるのでそのへんもどのくらい便利なのか、見ていこうかなーという感じです。