内容
Pythonの代表的なWebアプリケーションフレームワークであるFlaskには、組み込みのサーバーで稼働させることができます。
ただし、このサーバーは拡張性の点で本番用途には向かないため、本番用途に適したWSGI準拠のサーバーが必要になります。(Flaskのドキュメントに下記のように記載があります)
While lightweight and easy to use, Flask’s built-in server is not suitable for production as it doesn’t scale well. Some of the options available for properly running Flask in production are documented here.
上記で記載されているように、本番向けのWSGIサーバーには、GunicornやuWSGIなどがあります。
この記事では、Flaskのドキュメントで下記のように例として挙がっているWaitressを使う方法を紹介します。
また、Waitressのワーカースレッド数の変更方法も紹介します。
Flask > Run with a Production Server
Instead, use a production WSGI server. For example, to use Waitress, first install it in the virtual environment:
Flask組み込みサーバー
このようにFlaskアプリを起動すると、組み込みサーバーで稼働することになります。
from flask import Flask

app = Flask(__name__)

@app.route('/', methods=['GET'])
def hello_world():
    return 'Hello, World!'

if __name__ == '__main__':
    app.run(port=8080)
起動時のログに、本番システムで使わないようにとメッセージが出ています。
% python app.py
 * Serving Flask app "app" (lazy loading)
 * Environment: production
   WARNING: This is a development server. Do not use it in a production deployment.
   Use a production WSGI server instead.
 * Debug mode: off
 * Running on http://127.0.0.1:8080/ (Press CTRL+C to quit)
補足ですが、組み込みサーバーはデフォルトではシングルスレッドです。
app.run()の引数に、threaded=Trueを入れると、複数スレッドで処理できるようです。*1
Waitressで稼働
WaitressでFlaskアプリを稼働させるには下記のように、app.run()の代わりに、Watiressのserve()を使えばOKです。*2
from flask import Flask
from waitress import serve  # Waitressをインポート

app = Flask(__name__)

@app.route('/', methods=['GET'])
def hello_world():
    return 'Hello, World!'

if __name__ == '__main__':
    serve(app, host='0.0.0.0', port=8080)  # FlaskアプリをWaitressで稼働させる
アプリを起動してみると、組み込みサーバーのメッセージが表示されなくなりました。
% python app.py
Serving on http://0.0.0.0:8080
Waitressのワーカースレッド数の変更方法
Waitressでは、ワーカースレッドがタスクを処理します。デフォルトは4つです。
When a channel determines the client has sent at least one full valid HTTP request, it schedules a "task" with a "thread dispatcher". The thread dispatcher maintains a fixed pool of worker threads available to do client work (by default, 4 threads).
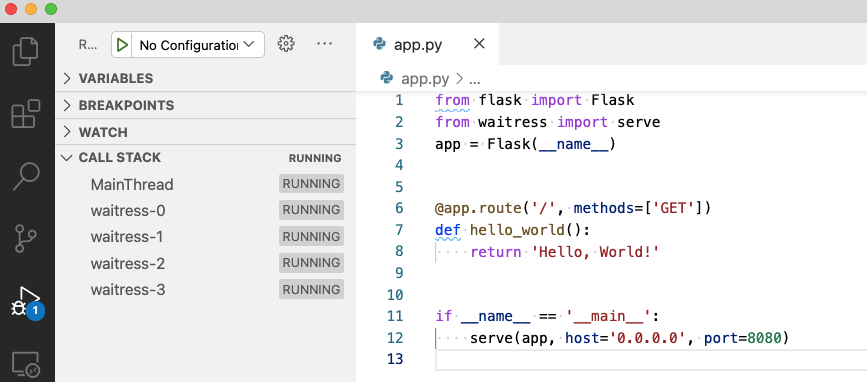
VSCodeのデバッグモードでアプリを起動すると、スレッド数を見ることができます。下記のようにワーカースレッド(waitress-n)が4つあることがわかります。
このスレッド数は、serve()の引数に、threads=nを設定することで、変更することができます。
--threads=INT
Number of threads used to process application logic, default is 4.
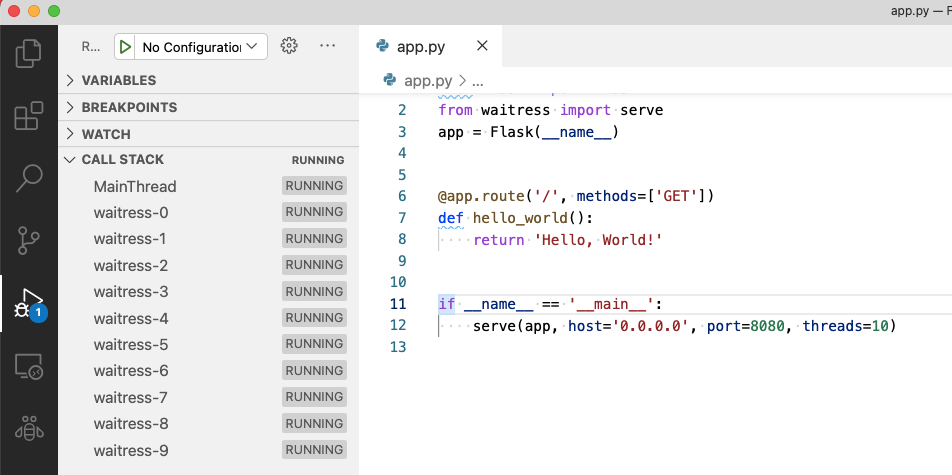
スレッド数を10に変更してみます。
if __name__ == '__main__':
    serve(app, host='0.0.0.0', port=8080, threads=10)
下記のようにスレッド数が10になることが確認できました。
参考文献
本記事では、下記の文献を参考にいたしました。