この記事でやっていること・できていないこと
- できたこと
- A-Frameを使ってサイトのメニューを3D化した。
- A-Frame内で2次元の普通の画像要素を3次元で使うタイミングでできないことがあったので、HTML Shader + html2canvasを使った。
- できてないこと
- 犬の画像をAPIで取得して、それをA-Frame空間内でも表示しようとしたがクロスドメインの関係でできなかった。(https://dog.ceo/api/breeds/image/random)
サンプル
このように3次元空間内にboxを置き、その上にhtmlで作った画像付き要素をのせています。
またクリックをすると、遷移対象のページに飛びます。
↑ こちらから試すことができます。
A-Frame
https://aframe.io/
ほんの数行のhtmlの記述だけで3D画像と空間を表現でき、とても便利です。
例えば下記サンプルコードですぐに複数の図形と3次元空間を表現できます。
<html>
  <head>
    <script src="https://aframe.io/releases/1.0.4/aframe.min.js"></script>
  </head>
  <body>
    <a-scene>
      <a-box position="-1 0.5 -3" rotation="0 45 0" color="#4CC3D9"></a-box>
      <a-sphere position="0 1.25 -5" radius="1.25" color="#EF2D5E"></a-sphere>
      <a-cylinder position="1 0.75 -3" radius="0.5" height="1.5" color="#FFC65D"></a-cylinder>
      <a-plane position="0 0 -4" rotation="-90 0 0" width="4" height="4" color="#7BC8A4"></a-plane>
      <a-sky color="#ECECEC"></a-sky>
    </a-scene>
  </body>
</html>
HTML Shader + html2canvas について
A-Frameの3次元空間内に2次元のDOM要素を加える場合に、どうしてもうまくいかないケースがありました。
本記事では、下記が大変参考になりました。
A-FrameとHTML Shaderで美しい日本語テキストを表示する方法
この記事によると、
HTML Shaderは、その名の通り2次元のDOM要素をマテリアルとして、3次元のA-Frameオブジェクト上に貼り付けることができるコンポーネントで、それは html2canvas というライブラリ上に成り立っているということです。
以降で説明していきますが、そのため上記2つ(HTML Shader + html2canvas)を使えるようにする必要があります。
まず、HTML Shader と html2canvasを読み込む
HTML Shader
https://github.com/mayognaise/aframe-html-shader
このページによると、npmでのインストールに加えて、ブラウザファイルも用意されているようなので手ごろに使う場合は下記を
  <script src="https://aframe.io/releases/0.5.0/aframe.min.js"></script>
  <script src="https://unpkg.com/aframe-html-shader@0.2.0/dist/aframe-html-shader.min.js"></script>
html2canvas
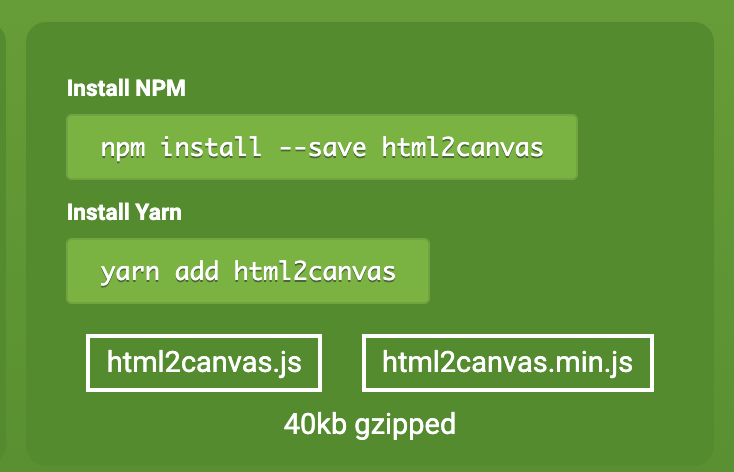
私が少し調べた限りでは、ブラウザファイルは用意されていないようなので、
http://html2canvas.hertzen.com/
このページにいき、html2canvas.min.jsを押しその中身をコピーして、html2canvas.min.js というファイル名で保存します。

今回のフォルダ構成
images
 └── ....
js
 └── html2canvas.min.js
style
 └── style.css
3d-menu.html
ソースコード
<!DOCTYPE html>
<html lang="ja">

<head>
  <title>Hello!!!!</title>
  <meta name="description" content="Hello, WebVR! • A-Frame">
  <script src="https://aframe.io/releases/1.0.4/aframe.min.js"></script>

  <script src="https://unpkg.com/aframe-html-shader@0.2.0/dist/aframe-html-shader.min.js"></script>
  <script src="js/html2canvas.min.js"></script>

  <link rel="stylesheet" href="style/style.css">
</head>

<body>

    <div id="loader">

        <p>loading...</p>
    </div>
    <div id="target1" class="target">
        <img src="imgs/face.png" alt="A-Frame">
        <div class="cf"><h3>感情分析</h3></div>
        <p class="detail">クリックでページに遷移 </p>
    </div>
    <div id="target2" class="target">
        <img v-if="url" v-bind:src="url" alt="A-Frame">
        <div class="cf"><h3>犬の画像を表示</h3><p>立方体クリックで犬の画像を表示します(動かず)</p></div>
        <!-- <p class="detail">640px × 400px</p> -->
    </div>
    <div id="target3" class="target">
        <img src="imgs/gotop.png" alt="A-Frame">
        <div class="cf"><h3>TOPへ</h3></div>
        <p class="detail">クリックでページに遷移 </p>
    </div>
    <div id="target4" class="target">
        <img src="imgs/orc.png" alt="A-Frame">
        <div class="cf"><h3>OCR分析</h3></div>
        <p class="detail">クリックでページに遷移</p>
    </div>
    <div id="target5" class="target">
        <img src="imgs/dog.jpg" alt="A-Frame">
        <div class="cf"><h3>犬画像ページ</h3></div>
        <p class="detail">クリックでページに遷移</p>
    </div>
    <div id="target6" class="target">
        <img src="imgs/jaga.png" alt="A-Frame">
        <div class="cf"><h3>予備</h3></div>

    </div>


<div>
    <a-scene>
        <a-entity  id="aframeApp" >
            <a-box id="areabox1" position="-10  6 -15" width="16" height="10" rotation="0 30 0" material="shader:html;target: #target1;" @click="handlerClick"></a-box>
            <a-box id="areabox2" position=" 0  6 30" width="16" height="10" rotation="0 15 0" material="shader:html;target: #target2;"></a-box>
            <a-box id="areabox3" position=" 18  6 0" width="16" height="10" rotation="0 75 0" material="shader:html;target: #target3;" @click="handlerClick"></a-box>
            <a-box id="areabox4" position="-10 -6 -15" width="16" height="10" rotation="0 30 0" material="shader:html;target: #target4;" @click="handlerClick"></a-box>
            <a-box id="areabox5" position=" 0 -6 30" width="16" height="10" rotation="0 15 0" material="shader:html;target: #target5;" @click="handlerClick"></a-box>
            <a-box id="areabox6" position=" 18 -6 0" width="16" height="10" rotation="0 75 0" material="shader:html;target: #target6;" @click="handlerClick"></a-box>

            <a-box position="-2 0 5" rotation="0 45 0" color="#4CC3D9" @click="getdog"></a-box>
            <a-plane position=" 18 -6 0" width="16" height="10" @click="getdog"></a-plane>
            <a-sky src="https://images.unsplash.com/photo-1557971370-e7298ee473fb?ixlib=rb-1.2.1&ixid=eyJhcHBfaWQiOjEyMDd9&auto=format&fit=crop&w=1600&q=80" rotation="0 45 0"></a-sky>
        </a-entity>

        <a-entity camera wasd-controls look-controls position="-8 0 8"></a-entity>

        <a-entity>
            <a-camera>
              <a-cursor></a-cursor>
            </a-camera>
        </a-entity>

    </a-scene>
</div>


    <script src="https://unpkg.com/vue@latest/dist/vue.min.js"></script>
    <script src="https://unpkg.com/axios/dist/axios.min.js"></script>

    <script>
        // vue.jsの記載

        const app = new Vue({
          el: '#aframeApp',
          data: {
            url:"imgs/logo.png"
          },
          methods: {
              getdog:async function(){
                    const URL = 'https://dog.ceo/api/breeds/image/random';
                    const response = await axios.get(URL);

                    this.message = response.data;
                    this.url = response.data.message;

                    console.log(this.url);
              }


            ,handlerClick: function (event) {
              console.log('handlerClick');
              console.log(event.target.id);
              const boxid = event.target.id;

              if( boxid == 'areabox1' ){
                location.href = 'https://simasima.work/contents/face-emotion.html';
              } else if( boxid == 'areabox4' ){
                this.skyboxSrc = 'https://simasima.work/contents/ocr-read.html';
              } else if( boxid == 'areabox3' ){
                this.skyboxSrc = 'https://simasima.work/contents/dog.html';
              }else if( boxid == 'areabox5' ){
                this.skyboxSrc = 'https://simasima.work/';
              }


            }
            ,
            handlerMouseEnter: function (event) {
              console.log('handlerMouseEnter');
              console.log(event);
              event.target.setAttribute('color', 'blue');
            }
            ,
            handlerMouseLeave: function (event) {
              console.log('handlerMouseLeave');
              console.log(event);
              event.target.setAttribute('color', 'red');
            }
          }
          ,
          mounted() {
            console.log('mounted');
          }
        })

      </script>

</body>

<script>
    var scene = document.querySelector('a-scene');
    var run = function () {
        document.getElementById("loader").classList.add("hidden");
    }

    if (scene.hasLoaded) {
      run();
    } else {
      scene.addEventListener('loaded', run);
    }
</script>


</html>
スタイルシート
* {
    margin: 0;
    padding: 0;
}

# loader {
    width: 100%;
    height: 100%;
    position: fixed;
    z-index: 100000000000;
    background-color: #333;
    color: #fff;
}

# loader>p {
    position: absolute;
    top: 50%;
    margin-top: -0.5em;
    width: 100%;
    text-align: center;
    font-size: 200%;
    font-weight: bold;
}

# loader.hidden {
    display: none;
}

.target {
    position: absolute;
    width: 1600px;
    height: 1000px;
    font-size: 500%;
    background-color: #FFF;
    display: hidden;
    /*z-index: 1;*/
}

.target>img {
    float: left;
    display: block;
    width: 32%;
    padding: 4% 0 4% 4%;
}

.target>div {
    margin-left: 36%;
    width: 52%;
    padding: 4%;
}

.target>.detail {
    padding: 3% 0;
    text-align: center;
    width: 92%;
    color: #fff;
    background-color: rgba(1, 1, 1, 0.6);
    margin: 4%;
}
ちょこっと解説・ポイント
今回はこのページを大変参考にさせて頂きました!
http://vr-lab.voyagegroup.com/entry/2016/11/16/122115
その中で、開発に慣れてなくてつまずいたことを記載しておきます。(初心者な内容もあり)
1. エディターのLive server的な機能でみると画像が崩れる時がある
「コメント部分消しただけなのに全体的になぜか崩れたぞ??」
→ これキャッシュが残ってるからでした。スーパーリロードしましょう。
// Mac版
Cmd + Shift + R

// Windows版
Shift + F5
2. 3次元空間ないのカーソルが出てこない
これを加えましょう。
       <a-entity>
            <a-camera>
              <a-cursor></a-cursor>
            </a-camera>
        </a-entity>
3. カーソルを追加したら達が出なくなった
要素は生き延びていたのですが、要素だけ軒並み非表示になってしまいました。。
おそらく奥行きの問題かと考え、をに変更しました。
4. 角度や場所の指定が難しい
ここは触りながら慣れるしかないですね。。
私もかなり苦労しました。
おわりに
A-Frameはすごいです。
3D空間を作ることに関しては、本当に何も考えることなくできました。
いろんなものが身近になってきていますね。

