この記事は、[初心者さん・学生さん大歓迎!] Xamarin その1 Advent Calendar 2017の23日目の記事です。
高速化の方法
この記事ではListViewのCaching Strategyを指定することで、ListViewを高速化します。詳しく知りたい方はこちらを参照してください。https://developer.xamarin.com/guides/xamarin-forms/user-interface/listview/performance/
ViewCell(MyCell)
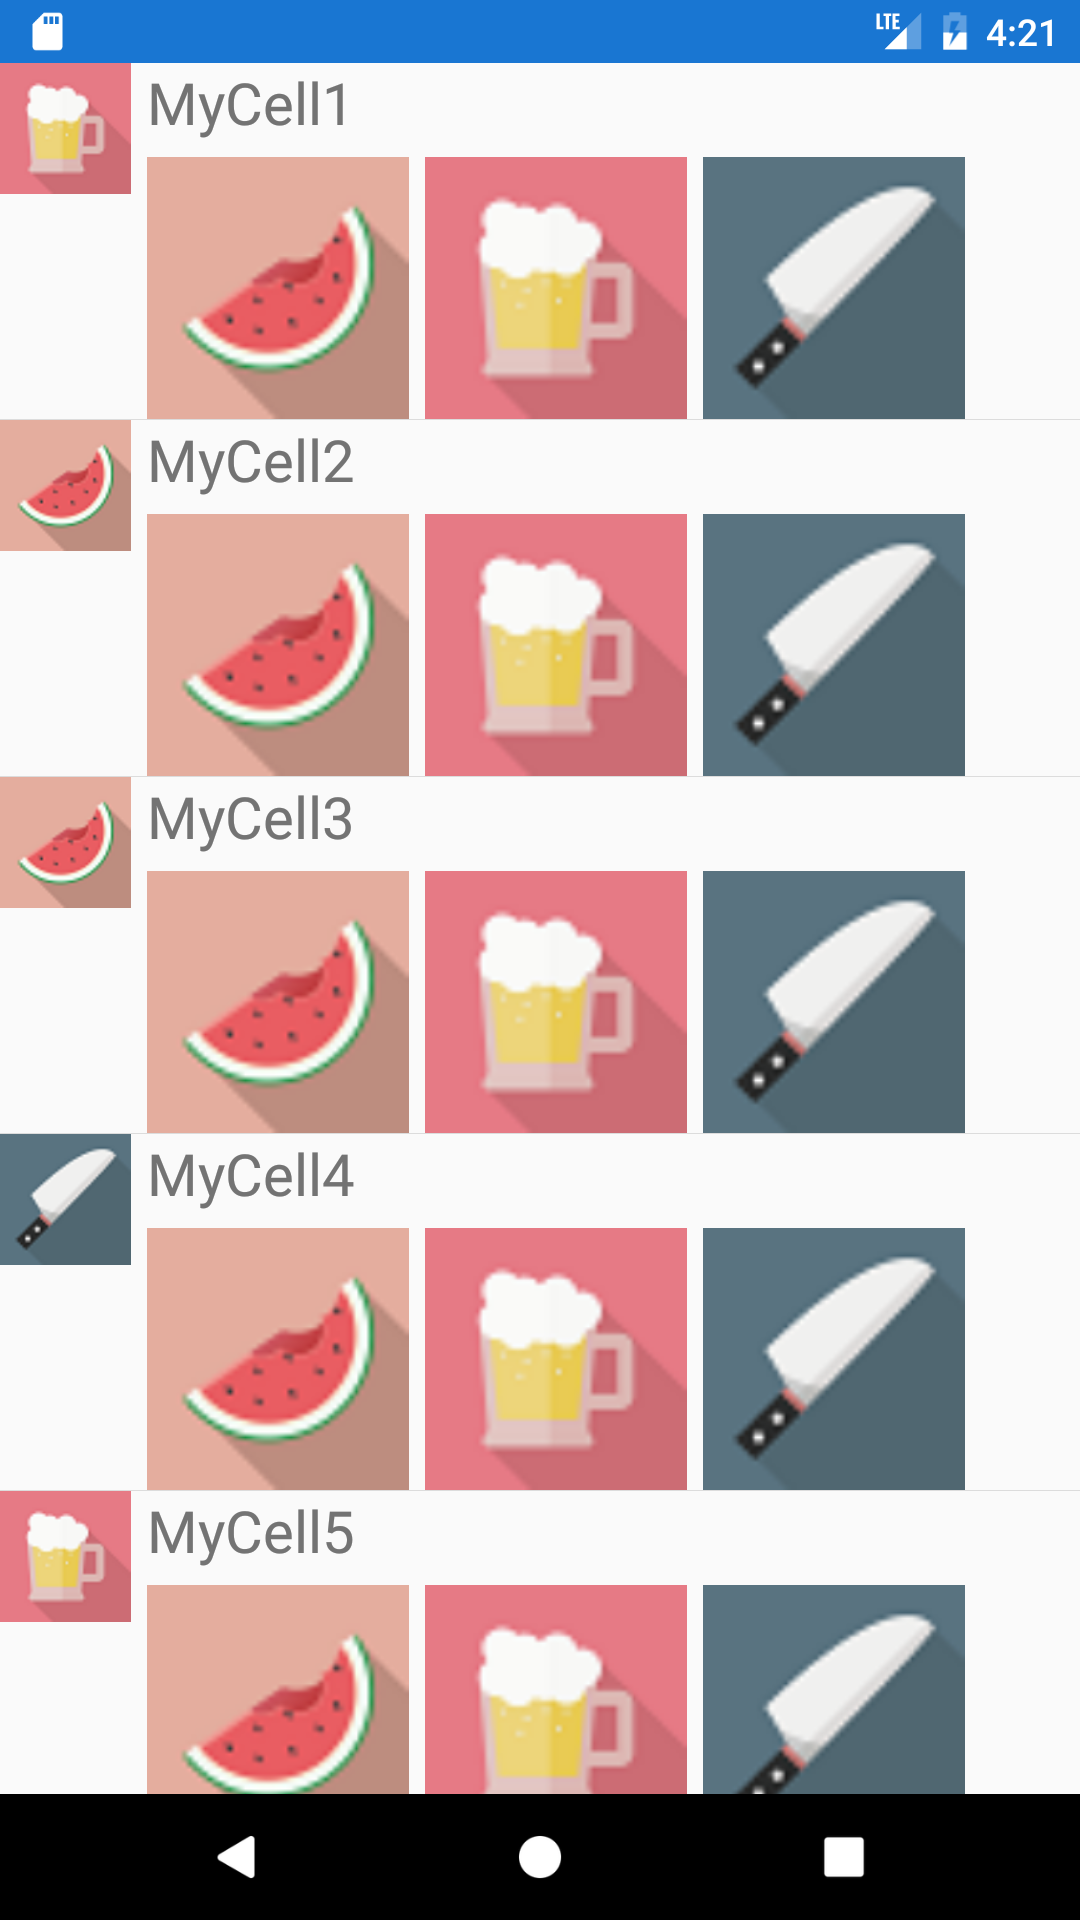
テキスト1つと画像4つで構成されたViewCellです。大きい3枚の画像は常に同じ画像の順で描画し、左上の小さい画像は3枚の画像からランダムに選んだものを描画しています。(画像はFLAT ICON DESIGNからお借りしました)

XAML
<ViewCell
    xmlns="http://xamarin.com/schemas/2014/forms"
    xmlns:x="http://schemas.microsoft.com/winfx/2009/xaml"
    x:Class="ViewCellTest.MyCell">
    <ViewCell.View>
        <StackLayout Orientation="Horizontal">
            <Image
                x:Name="iconImage"
                VerticalOptions="StartAndExpand"
                WidthRequest="50"
                HeightRequest="50"/>
            <StackLayout Orientation="Vertical">
                <Label
                    x:Name="titleLabel"
                    FontSize="Large"/>
                <StackLayout Orientation="Horizontal">
                    <!-- 大きな3つの画像はここでSourceを指定 -->
                    <Image
                        WidthRequest="100"
                        HeightRequest="100"
                        Source="image1.png"/>
                    <Image
                        WidthRequest="100"
                        HeightRequest="100"
                        Source="image2.png"/>
                    <Image
                        WidthRequest="100"
                        HeightRequest="100"
                        Source="image3.png"/>
                </StackLayout>
            </StackLayout>
        </StackLayout>
    </ViewCell.View>
</ViewCell>
コードビハインド
public partial class MyCell : ViewCell
{
    public static readonly BindableProperty IconImageSourceProperty = BindableProperty.Create(
        nameof(IconImageSource),
        typeof(ImageSource),
        typeof(MyCell),
        propertyChanged: (b, o, n) => (b as MyCell).iconImage.Source = n as ImageSource);

    public static readonly BindableProperty TitleProperty = BindableProperty.Create(
        nameof(Title),
        typeof(string),
        typeof(MyCell),
        propertyChanged: (b, o, n) => (b as MyCell).SetTitle(n as string));

    public ImageSource IconImageSource
    {
        get { return (ImageSource)GetValue(IconImageSourceProperty); }
        set { SetValue(IconImageSourceProperty, value); }
    }

    public string Title
    {
        get { return (string)GetValue(TitleProperty); }
        set { SetValue(TitleProperty, value); }
    }

    // このようにメソッドからテキストをセットしてもOK
    private void SetTitle(string title)
    {
        titleLabel.Text = title;
    }

    protected override void OnBindingContextChanged()
    {
        base.OnBindingContextChanged();
        // BindablePropertyのpropertyChangedを使わないなら、ここでコントロールの設定をする
    }

    public MyCell()
    {
        InitializeComponent();
        Console.WriteLine("MyCellが生成されました");
    }
}
BindablePropertyのpropertyChangedかオーバーライドしたOnBindingContextChanged()のどちらかで、XAMLで定義したコントロールのプロパティを設定してあげましょう。
ListViewを表示するページ(MainPage)
MyCellを用いたListViewを表示するMainPageを作ります。コードビハインドはInitializeComponent()以外何も書いていないので、省略します。
MyCellに使うデータクラス
public class CellItem
{
    public ImageSource IconImageSource { get; set; }
    public string Title { get; set; }

    public CellItem(string iconImageName, string title)
    {
        IconImageSource = ImageSource.FromFile(iconImageName);
        Title = title;
    }
}
XAML
ItemsSourceはMainViewModelのItemsとバインドしてます。
<ContentPage
    xmlns="http://xamarin.com/schemas/2014/forms"
    xmlns:x="http://schemas.microsoft.com/winfx/2009/xaml"
    xmlns:local="clr-namespace:ViewCellTest"
    x:Class="ViewCellTest.MainPage">

    <ContentPage.BindingContext>
        <local:MainViewModel/>
    </ContentPage.BindingContext>

    <ListView
        ItemsSource="{Binding Items}"
        HasUnevenRows="True">
        <ListView.ItemTemplate>
            <DataTemplate>
                <local:MyCell
                    IconImageSource="{Binding IconImageSource}"
                    Title="{Binding Title}"/>
            </DataTemplate>
        </ListView.ItemTemplate>
    </ListView>
</ContentPage>
ViewModel
データの生成をコンストラクタでしているだけです。
public class MainViewModel
{
    public ObservableCollection<CellItem> Items { get; set; }

    public MainViewModel()
    {
        var random = new Random();
        // データ生成。画像はimage1.png, image2.png, image3.pngの三枚を用意した
        var data = Enumerable.Range(1, 100)
            .Select(x => new CellItem($"image{random.Next(1, 4)}.png", $"MyCell{x}"));
        Items = new ObservableCollection<CellItem>(data);
    }
}
実行結果

プログラムが完成したので起動してみるとこんな感じになります。
スクロールに画像の読み込みが追いついてませんね。それではこれを高速化していきます。
RecycleElementの指定
<ContentPage
    xmlns="http://xamarin.com/schemas/2014/forms"
    xmlns:x="http://schemas.microsoft.com/winfx/2009/xaml"
    xmlns:local="clr-namespace:ViewCellTest"
    x:Class="ViewCellTest.MainPage">

    <ContentPage.BindingContext>
        <local:MainViewModel/>
    </ContentPage.BindingContext>

    <ListView
        ItemsSource="{Binding Items}"
        HasUnevenRows="True"
        CachingStrategy="RecycleElement"> <!-- 新しく追加 -->
        <ListView.ItemTemplate>
            <DataTemplate>
                <local:MyCell
                    IconImageSource="{Binding IconImageSource}"
                    Title="{Binding Title}"/>
            </DataTemplate>
        </ListView.ItemTemplate>
    </ListView>
</ContentPage>
ListViewにCachingStrategy="RecycleElement"(デフォルトはRetainElement)を指定してあげるだけです。こうすることで、生成されたMyCellクラスのインスタンスを使いまわしながらBindingContextを切り替えてくれるので、MyCell生成にかかるコストを削減でき、読み込みが速くなります。

MyCellのコンストラクタに書いたConsole.WriteLine("MyCellが生成されました");より、初回のMyCellの生成後は、インスタンスが使い回されていることが確認できます。
おわりに
並べて比べて見ると、これだけ差があります。
| RetainElement(デフォルト) | RecycleElement |
|---|---|
 |
 |
今回作成したMyCellではCachingStrategyにRecycleElementを指定することで高速化が出来ましたが、どのようなCellでもRecycleElementで高速化出来るとは限りません。データバインディングの数が20以上などの場合には、デフォルトのRetainElementの方が適しているみたいです。作成したCellに合わせてCachingStrategyを適切に設定する必要があります。