今回は
WifiとBLE(Bluetooth Low Energy)内蔵のRaspberry Pi Zero W がついに来たので早速動作確認した結果を投稿します。
OSからの入れ直しなので初期設定用メモも兼ねてます。
Raspberry Pi Zero Wはどう違うのか
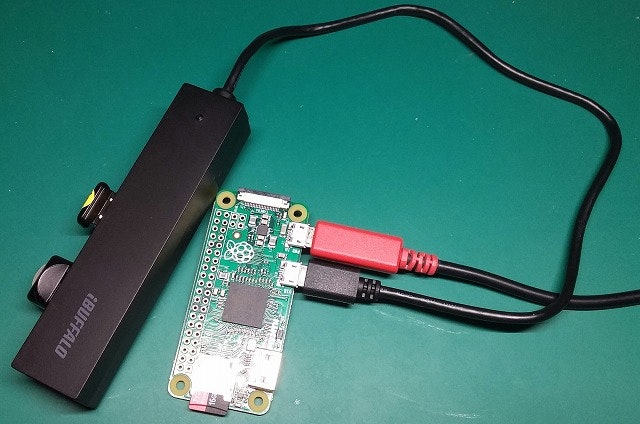
Raspberry Pi Zeroで、WifiとBLEを使用するには USBHUB + wifiドングル + BLE対応bluetoothドングルが必要です。一方のRaspberry Pi Zero W はWifiとBLEは内蔵なのでUSBHUBやドングルなしで実現できます。
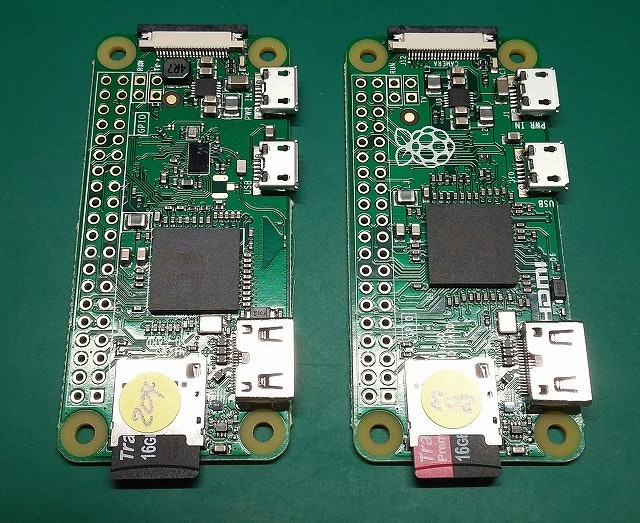
↓左がRaspberry Pi Zero W、右がRaspberry Pi Zero。 サイズは同じ!
↓Raspberry Pi Zeroで WiFi と BLE を使用するにはこんな構成だった
↓Raspberry Pi Zero W だと何もいらない!内蔵!
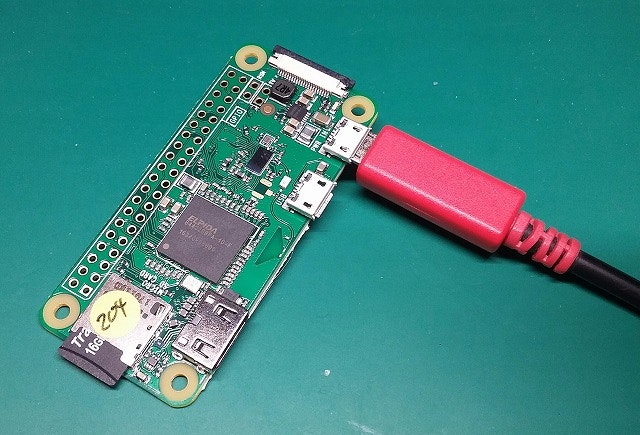
動作検証OK!
Raspberry Pi Zero W でのWifiとBLEの動作検証は問題なくOKでした。
検証は以下の内容です。
※初期設定も兼ねてますので初期設定内容も含まれています。
初期設定の定義
- rootでssh接続を可能にする
- Wifi設定は固定IP
- i2cはEnableにする
- ホスト名とコマンドプロンプトは変更する
手順一覧
- OSダウンロード
- SDカードに書き込み
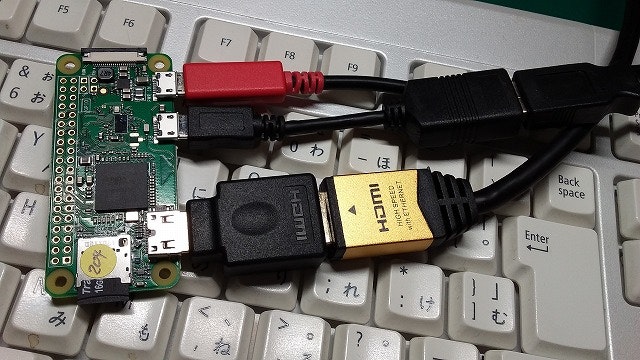
- モニタ(HDMI)とキーボードをつないで起動
- 起動したらログイン
- ユーザをrootに変更
- rootパスワードを設定
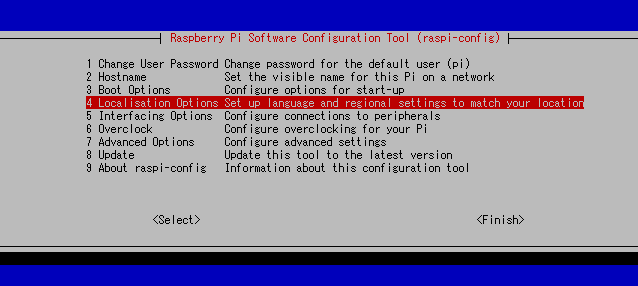
- raspi-config で タイムゾーン、キーボードタイプを変更、sshとi2cをenableにする。
- ssh接続許可設定
- ホスト名とコマンドプロンプト変更
- Wifi設定
- reboot
- sshでログイン確認
- BLE検証
- sdカードのイメージバックアップ
手順詳細
OSダウンロード
Raspberry pi Zero W は Raspbian 2017-03-02版 からサポートしているのでOSから入れ直しになりました。
https://www.raspberrypi.org/downloads/raspbian/
詳しくはリリースノートを参照
http://downloads.raspberrypi.org/raspbian/release_notes.txt
SDカードに書き込み
Win32DiskImager を使用してダウンロードしたOSイメージファイルをSDカードに書きこみます
モニタ(HDMI)とキーボードをつないで起動
起動したらログイン
idは、pi
passwordは、raspberry
ユーザをrootに変更
sudo su -
rootパスワードを設定
passwd
raspi-config で タイムゾーン、キーボードタイプを変更、sshとi2cをenableにする。
変更する箇所は以下のメニューから
4 Localisation Options
┗I2 Change Timezone
┗Asia
┗Tokyo
┗I2 Change Timezone
┗I3 Change Keyboad Layout
┗Generic 105-key (Intl)PC
┗other
┗Japanese
┗Japanese
┗The default for the keyboad layout
┗No compose ky
5 Interfacing Options
┗P2 SSH
┗Enable Yes
5 Interfacing Options
┗P5 I2C
┗Enable Yes
日本語キーボードを有効にするため再起動する
reboot
login:root
password:********先ほど設定したrootのパスワード
ssh接続許可設定
vi /etc/ssh/sshd_config
rootログインを許可(パスワード入力で)する設定に変更する
PermitRootLogin yes
# PermitRootLogin without-password
ホスト名とコマンドプロンプト変更
vi /etc/hostname
以下の内容に変更する
raspberrypi-204
vi /etc/hosts
以下の内容に変更する
127.0.0.1       localhost
::1             localhost ip6-localhost ip6-loopback
ff02::1         ip6-allnodes
ff02::2         ip6-allrouters

127.0.1.1       raspberrypi-204
Wifi設定
vi /etc/wpa_supplicant/wpa_supplicant.conf
以下の内容に変更する
ステルス設定されているアクセスポイントの場合は、scan_ssid=1 を指定する
# country=GB
# ctrl_interface=DIR=/var/run/wpa_supplicant GROUP=netdev
# update_config=1

ctrl_interface=DIR=/var/run/wpa_supplicant GROUP=netdev
update_config=1
network={
    ssid="xxxx"
    proto=WPA2
    key_mgmt=WPA-PSK
    psk="xxxxxxxxx"
    scan_ssid=1
}
vi /etc/network/interfaces
以下の内容に変更する
# interfaces(5) file used by ifup(8) and ifdown(8)

# Please note that this file is written to be used with dhcpcd
# For static IP, consult /etc/dhcpcd.conf and 'man dhcpcd.conf'

# Include files from /etc/network/interfaces.d:
source-directory /etc/network/interfaces.d

auto lo
iface lo inet loopback

iface eth0 inet manual

allow-hotplug wlan0
iface wlan0 inet static
wpa-conf /etc/wpa_supplicant/wpa_supplicant.conf
address 192.168.0.204
network 192.168.0.0
netmask 255.255.255.0
broadcast 192.168.0.255
gateway 192.168.0.1
dns-nameservers 192.168.0.1

# allow-hotplug wlan1
# iface wlan1 inet manual
#    wpa-conf /etc/wpa_supplicant/wpa_supplicant.conf
reboot
設定は以上なので再起動します。
sshでログイン確認
ログインできればWifiはOKということ
rootでログインできることを確認する
BLE検証
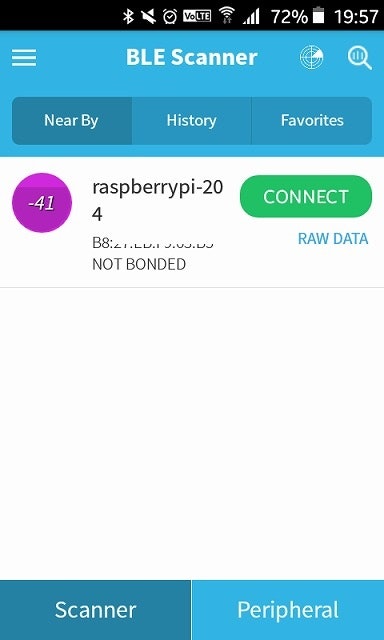
Raspberry Pi Zero W から hciconfig hci0 leadvコマンドでBLE iBeacon信号を送信して、スマホで 送信電波を受信していることを確認した。
※ホスト名とRSSIを確認しただけで、コネクション確認はしていません。
sdカードのイメージバックアップ
検証と設定が完了したので、この設置状態でバックアップとって終了とします。
Raspberry Pi Zero Wの電源を切り、SDカードを抜いてから
Win32DiskImager を使用してSDカード内容をPCのDiskに書きこみます
