9
3

Delete article

Deleted articles cannot be recovered.

Draft of this article would be also deleted.

Are you sure you want to delete this article?

More than 5 years have passed since last update.

Chromeの拡張機能、Autofillを使う

Posted at

#いきさつ
プロジェクトのテスト中に似たようなデータを画面上で沢山作る必要があった。
Autofillは各項目を自動入力したい時に使える。

#Autofillを使うまでの流れ

1. AutofillをChromeに追加する
https://chrome.google.com/webstore/detail/autofill/nlmmgnhgdeffjkdckmikfpnddkbbfkkk

上記のURLからAutofillを追加

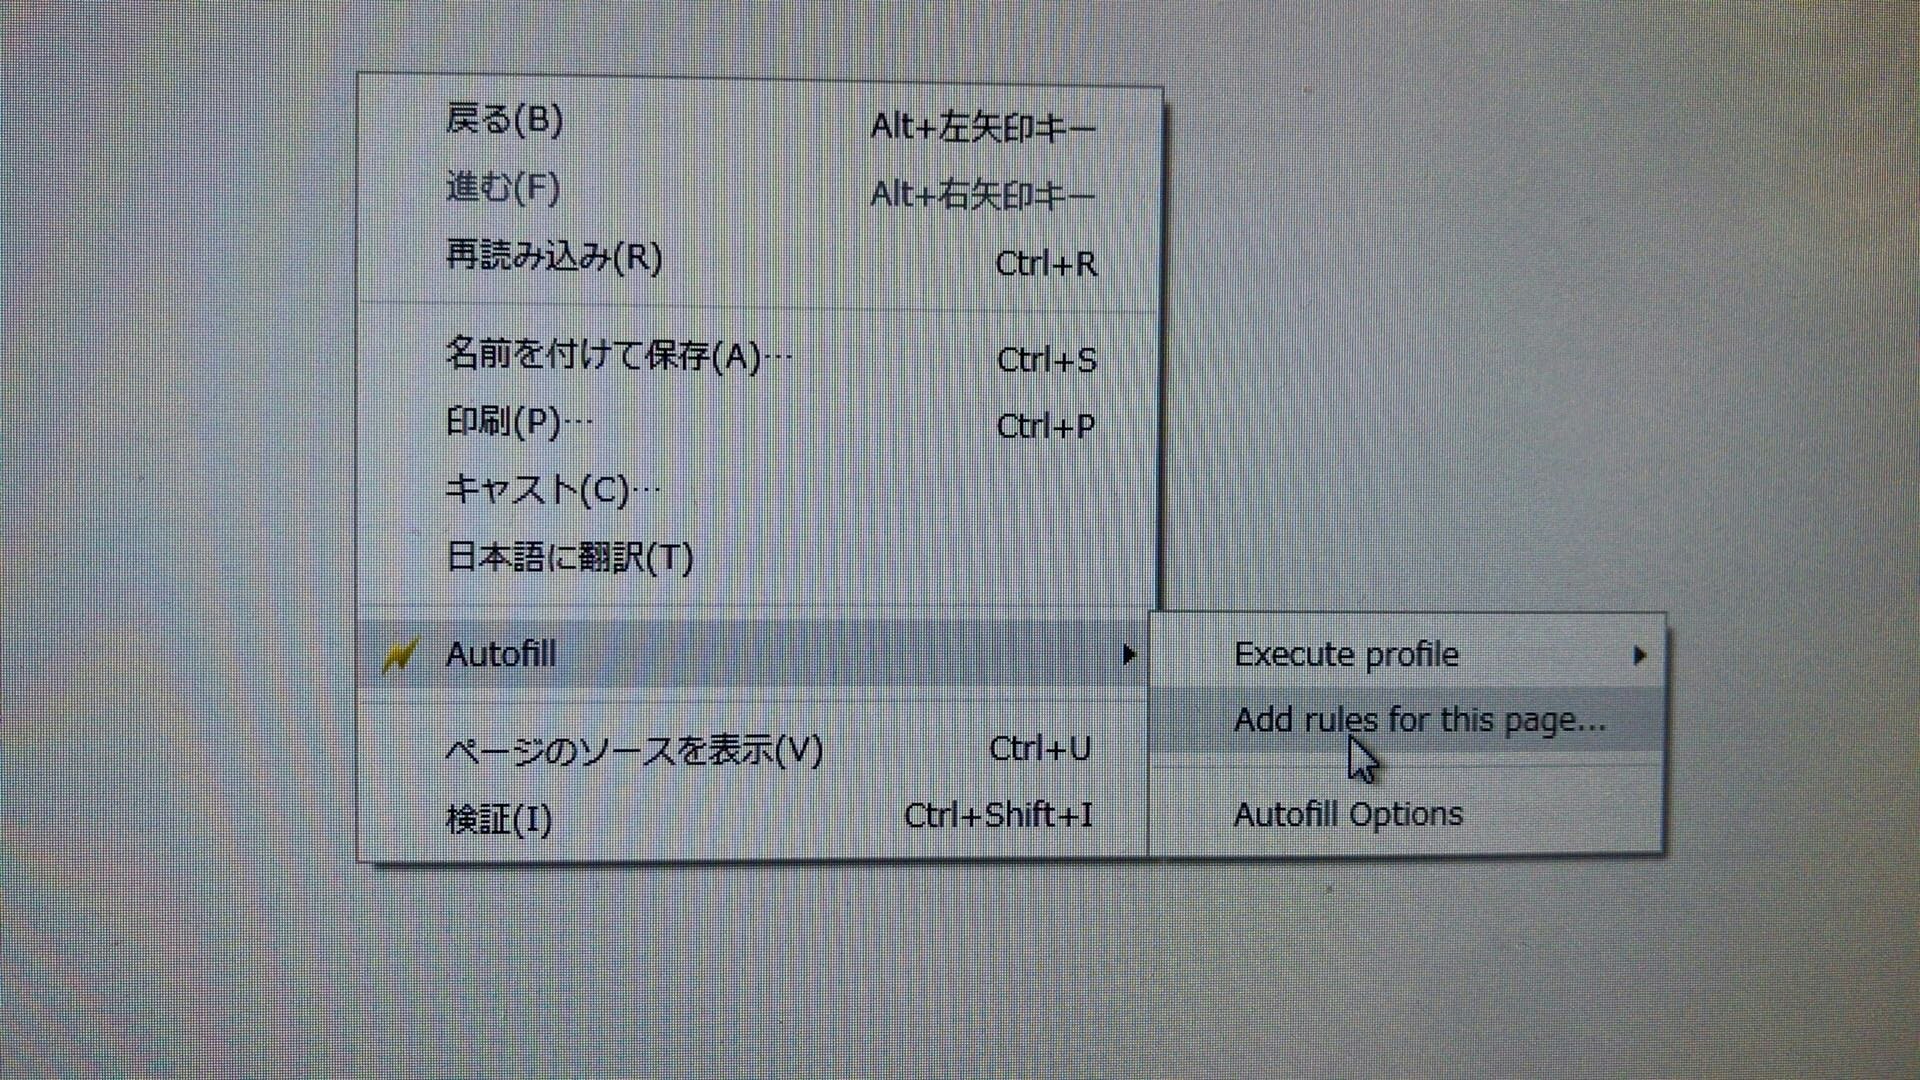
2. 入力情報を保持したい画面で右クリック
iOS の画像 (1).jpg

保持しておきたい情報を全て入力し、
Add rules for this page... をクリック

3. 画面上部にて・・・
1.PNG

画像のようなバーが表示されるので、Choose a Profile のプルダウンメニューから「NEW」を選択

ファイル名を入力

Generate Autofill Rulesをクリック

4. 設定を確認
画面右上の稲妻マークを右クリック

拡張機能を管理

拡張機能のオプションで設定を確認

5. Autofillを使いたくない時
Autofillの設定をもう一つ追加

拡張機能のオプションで追加した設定のデフォルト情報を全て削除

使いたくなくなった画面で右クリック

Excute profileで追加した設定を選択

入力情報が空になる

##あとがき
便利。


9
3
0

Register as a new user and use Qiita more conveniently

  1. You get articles that match your needs
  2. You can efficiently read back useful information
  3. You can use dark theme
What you can do with signing up
9
3

Delete article

Deleted articles cannot be recovered.

Draft of this article would be also deleted.

Are you sure you want to delete this article?