この記事は2018.12時点の知見です。ESPr Developerを使用しています。
https://www.switch-science.com/catalog/2500/
esptoolの用意
- 次のrepositoryをgit cloneします。
https://github.com/espressif/esptool - installします。
python setup.py install
ファームウェアのダウンロード
- 次のURLで
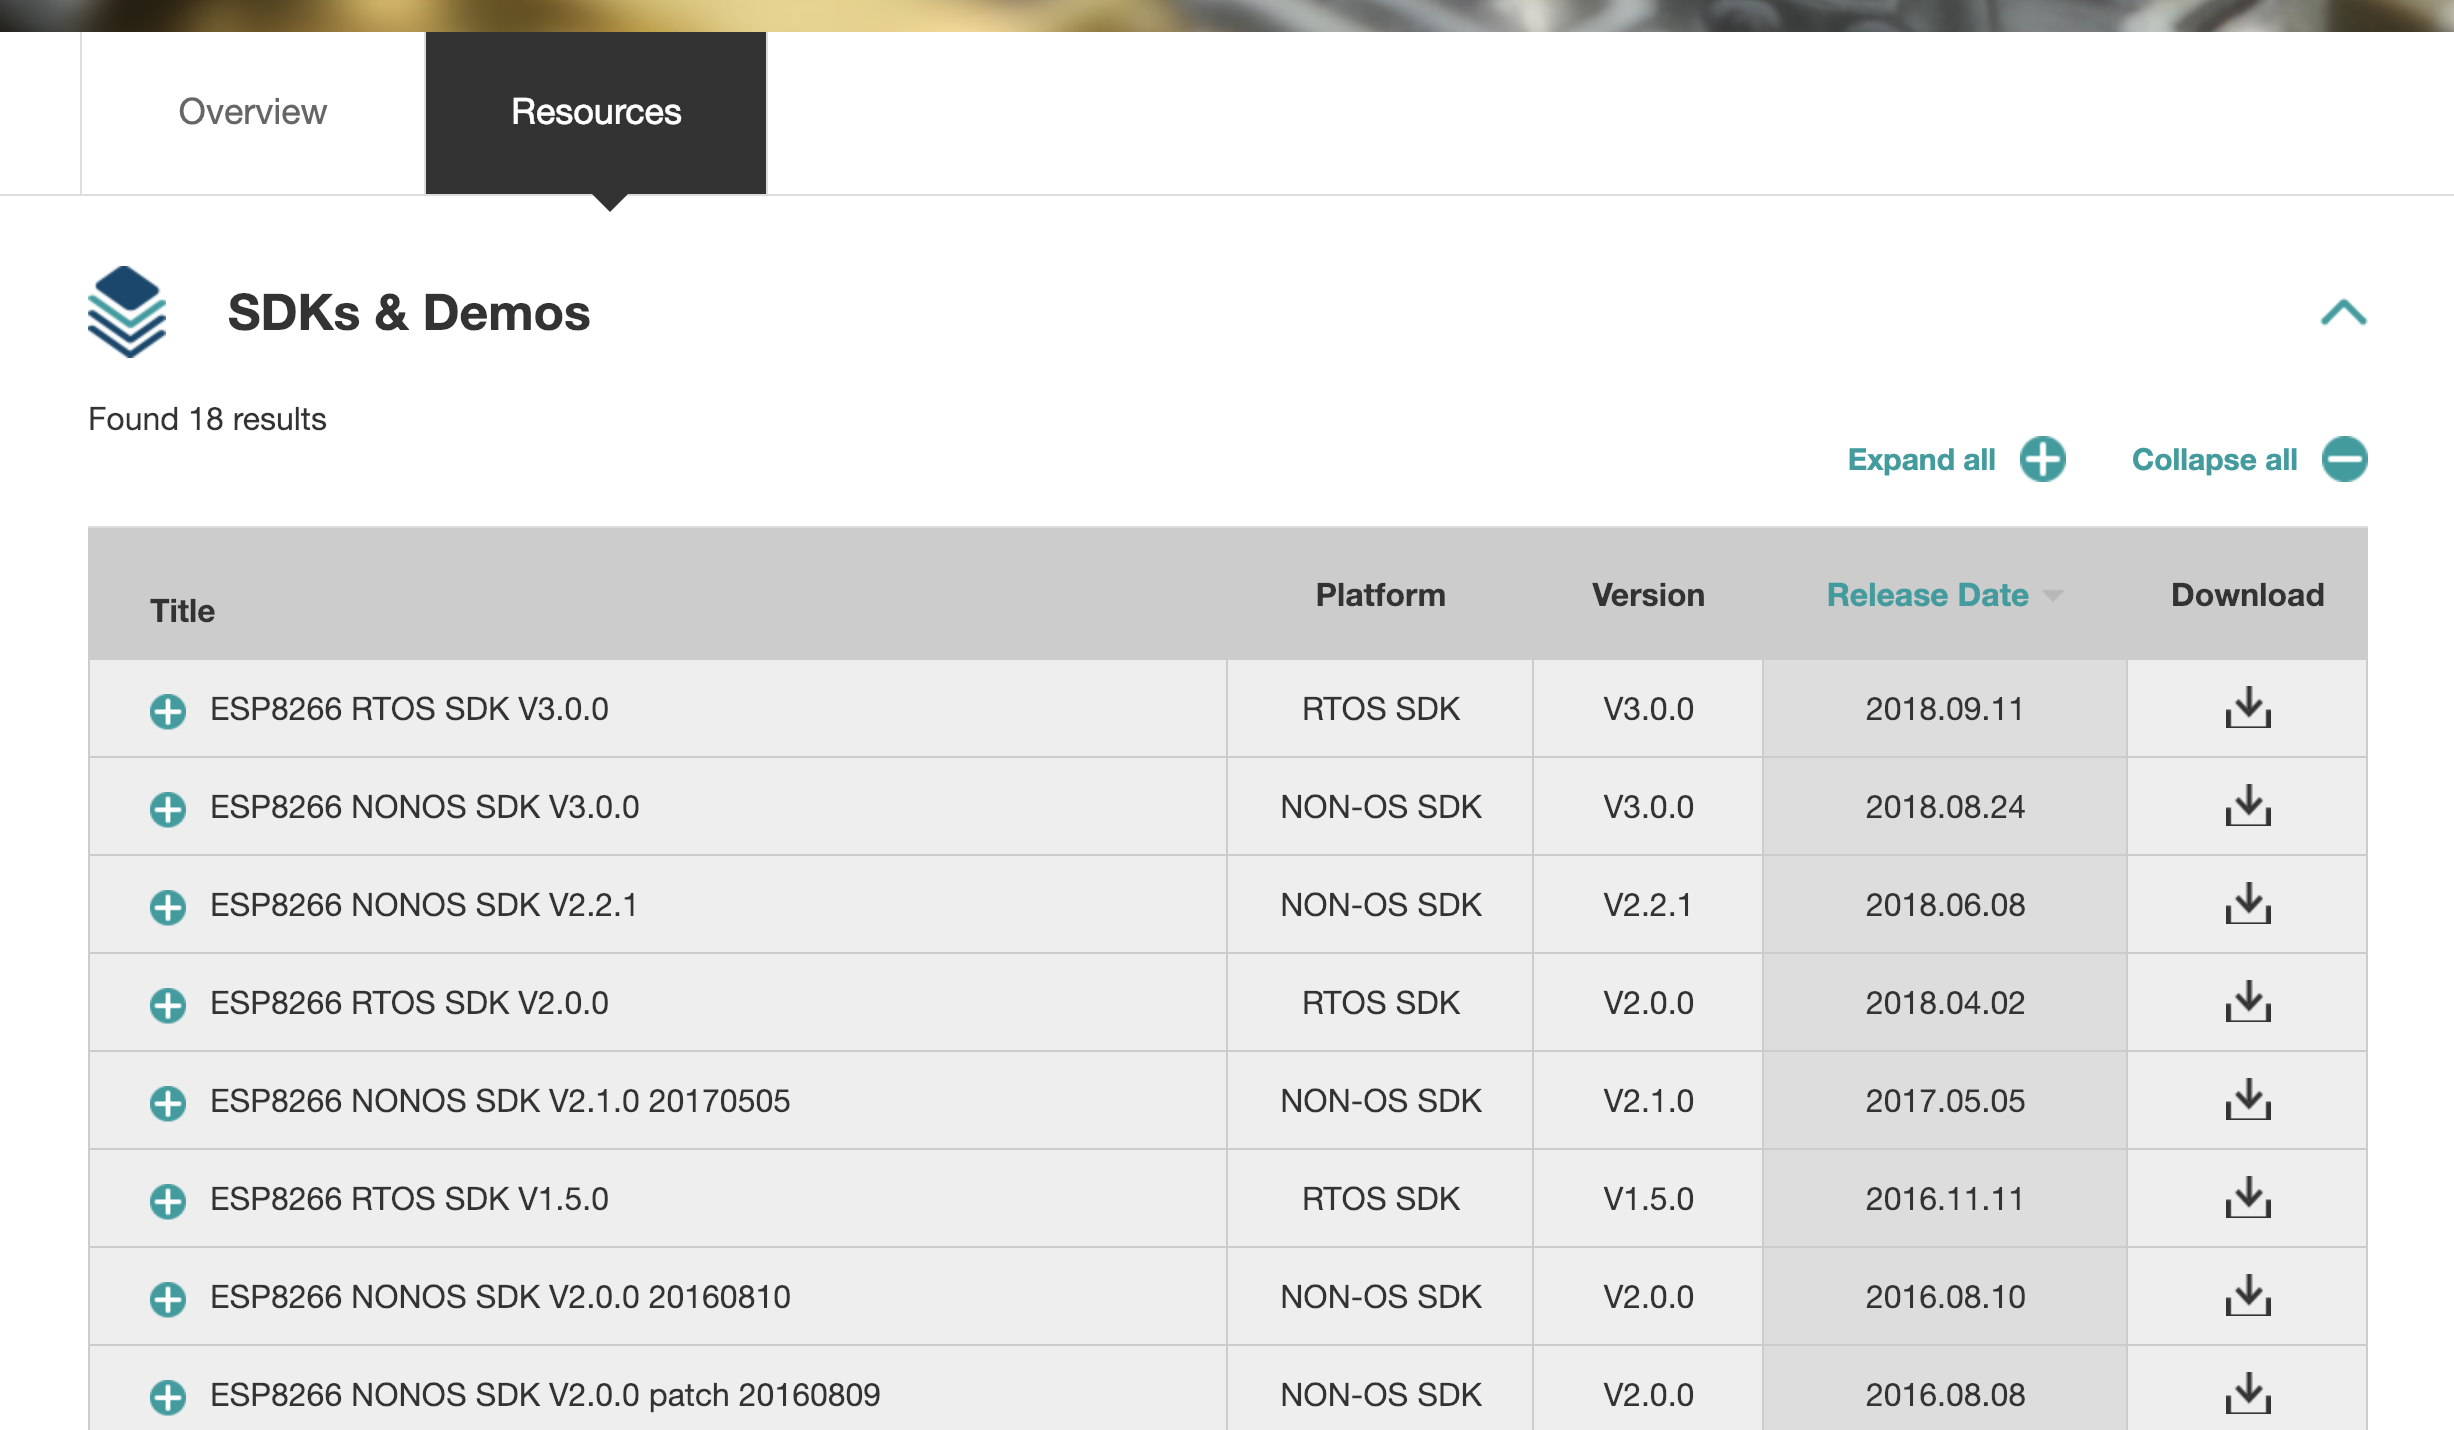
SDKs & Demosをクリックします。
https://www.espressif.com/en/products/hardware/esp8266ex/resources -
ESP8266 NONOS SDK V3.0.0を使ってみたところうまく行かなかったので、ESP8266 NONOS SDK V2.2.1を使うと良いです。
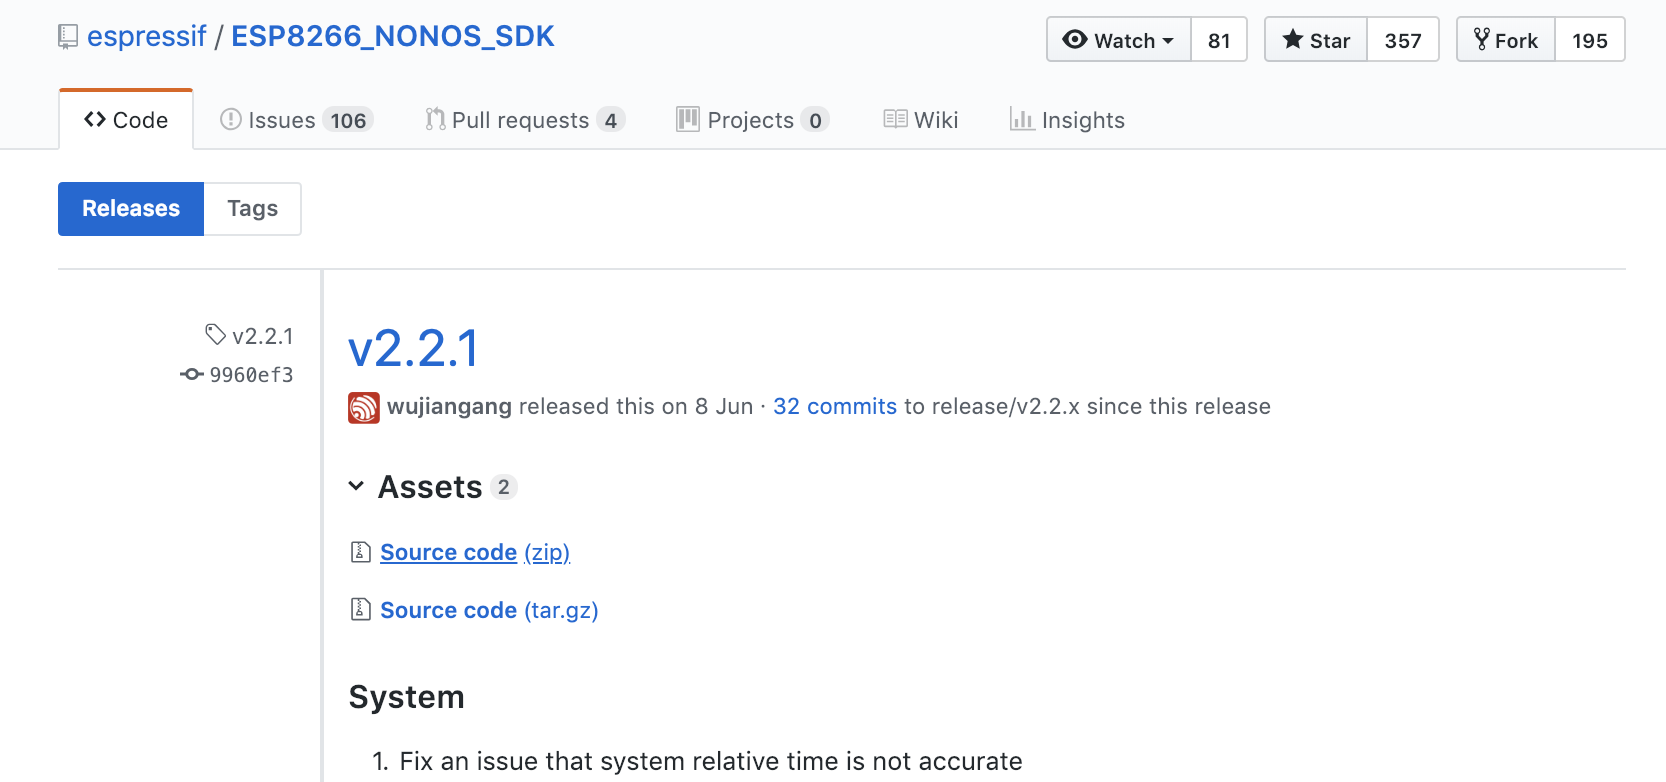
- SourceCodeは
(zip)を選択
ESP8266を接続
- デバイスを接続してArduinoIDEでシリアルポートを確認しておきます(
/dev/cu.usbserial-DN01EI6Iのような文字列)
ファームウェアの書き込み
-
ESP8266_NONOS_SDK-2.2.1/binに移動して次のコマンドを入力します。
ワンライン
esptool.py -p /dev/cu.usbserial-DN01EI6I write_flash 0x00000 boot_v1.7.bin 0x01000 at/1024+1024/user1.2048.new.5.bin 0x3fc000 esp_init_data_default_v08.bin 0xfe000 blank.bin 0x3fe000 blank.bin
読みやすくしたもの
esptool.py -p /dev/cu.usbserial-DN01EI6I write_flash
  0x00000 boot_v1.7.bin
  0x01000 at/1024+1024/user1.2048.new.5.bin
  0x3fc000 esp_init_data_default_v08.bin
  0xfe000 blank.bin
  0x3fe000 blank.bin`
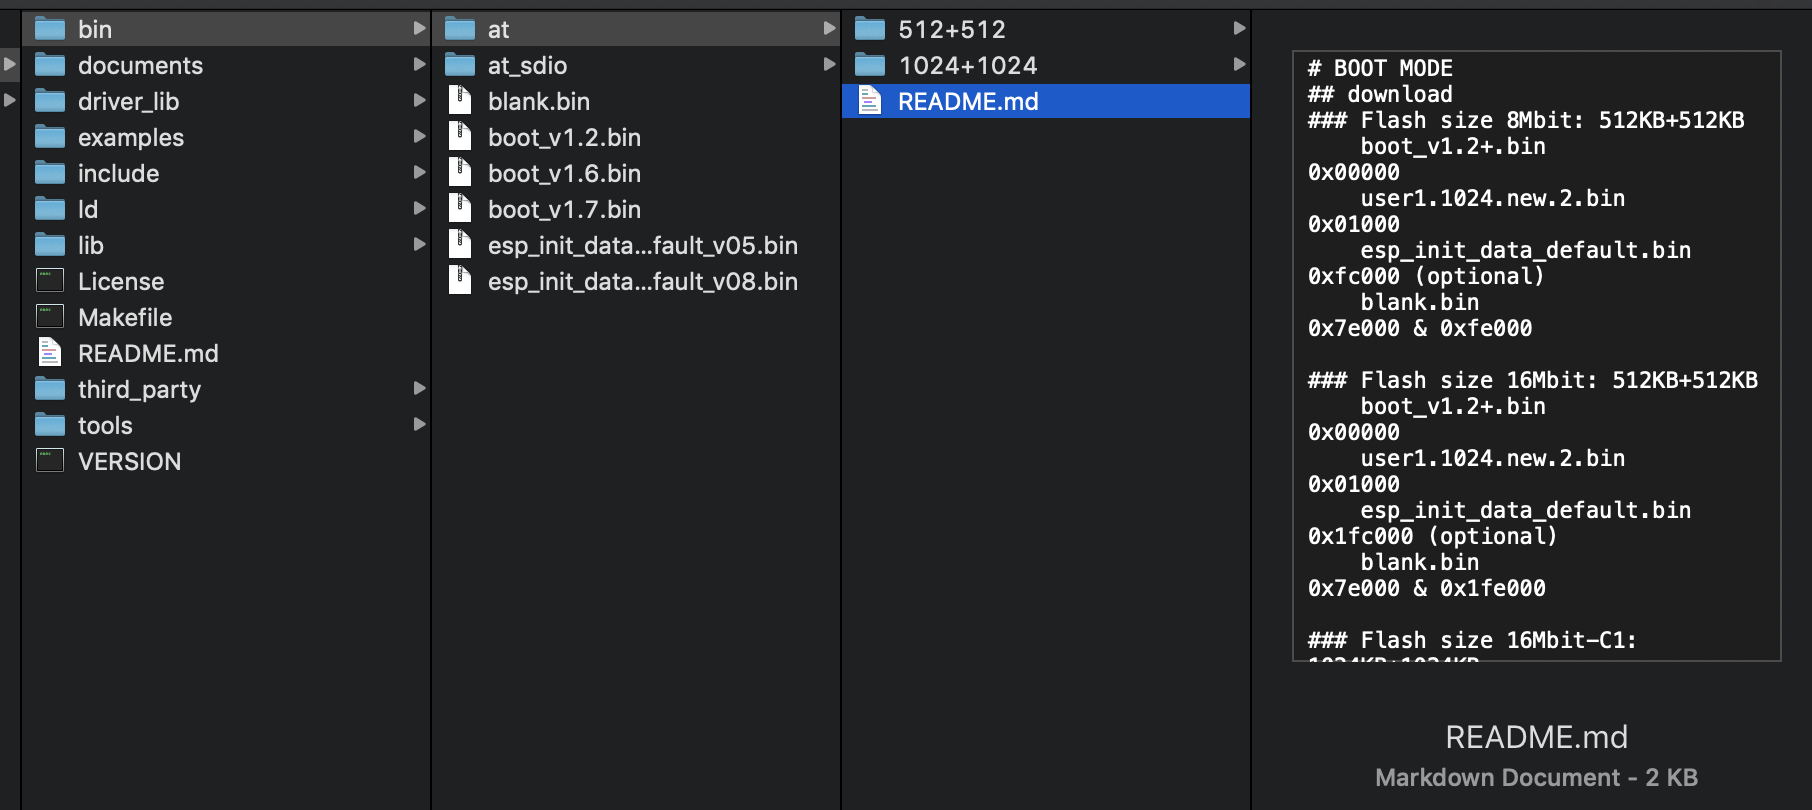
- 書き込み領域を示すアドレスは、
ESP8266_NONOS_SDK-2.2.1/bin/at配下にあるREADME.mdに記載されています。 - 今回使用したESPr Developerは
Rev.3でFlash size: 4MBだったので、Flash size 32Mbit-C1: 1024KB+1024KBに記載されているアドレスを使用しています。
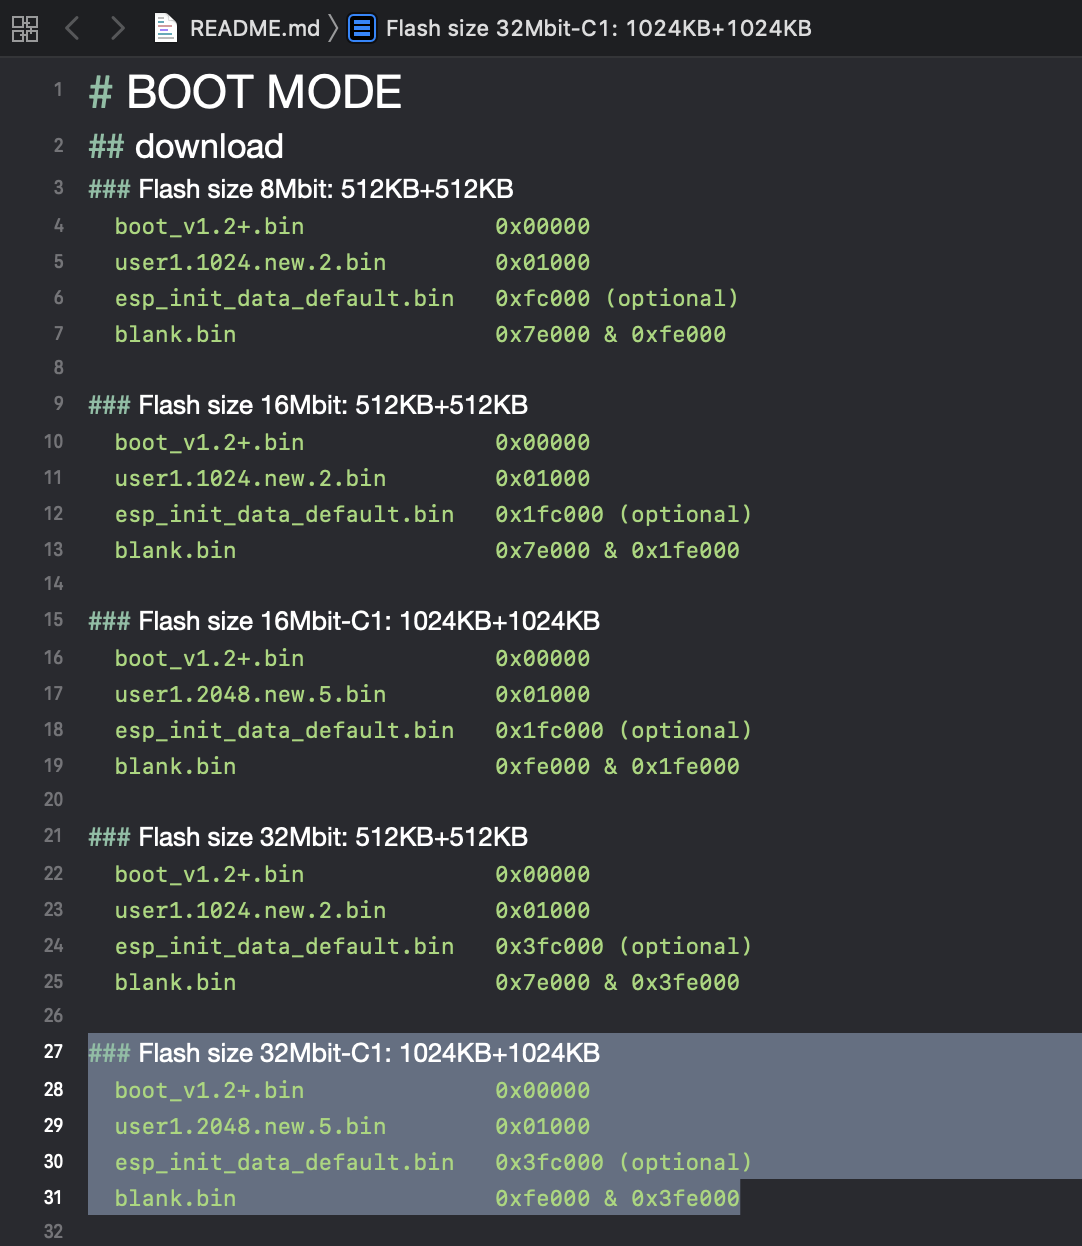
- 別の
Rev.4で試したところ、そちらはFlash size: 2MBでした。その場合はFlash size 16Mbit-C1: 1024KB+1024KBのアドレスを使用してください。
ファームウェア書き込み時のログ
shanonim$ esptool.py -p /dev/cu.usbserial-DN01EI6I write_flash 0x00000 boot_v1.7.bin 0x01000 at/1024+1024/user1.2048.new.5.bin 0x3fc000 esp_init_data_default_v08.bin 0xfe000 blank.bin 0x3fe000 blank.bin
esptool.py v2.6-beta1
Serial port /dev/cu.usbserial-DN01EI6I
Connecting....
Detecting chip type... ESP8266
Chip is ESP8266EX
Features: WiFi
MAC: 18:fe:34:ee:59:91
Uploading stub...
Running stub...
Stub running...
Configuring flash size...
Auto-detected Flash size: 4MB
Flash params set to 0x0040
Compressed 4080 bytes to 2936...
Wrote 4080 bytes (2936 compressed) at 0x00000000 in 0.3 seconds (effective 120.1 kbit/s)...
Hash of data verified.
Compressed 408388 bytes to 293527...
Wrote 408388 bytes (293527 compressed) at 0x00001000 in 26.0 seconds (effective 125.5 kbit/s)...
Hash of data verified.
Compressed 128 bytes to 75...
Wrote 128 bytes (75 compressed) at 0x003fc000 in 0.0 seconds (effective 64.0 kbit/s)...
Hash of data verified.
Compressed 4096 bytes to 26...
Wrote 4096 bytes (26 compressed) at 0x000fe000 in 0.0 seconds (effective 2048.1 kbit/s)...
Hash of data verified.
Compressed 4096 bytes to 26...
Wrote 4096 bytes (26 compressed) at 0x003fe000 in 0.0 seconds (effective 2047.9 kbit/s)...
Hash of data verified.

Leaving...
Hard resetting via RTS pin...
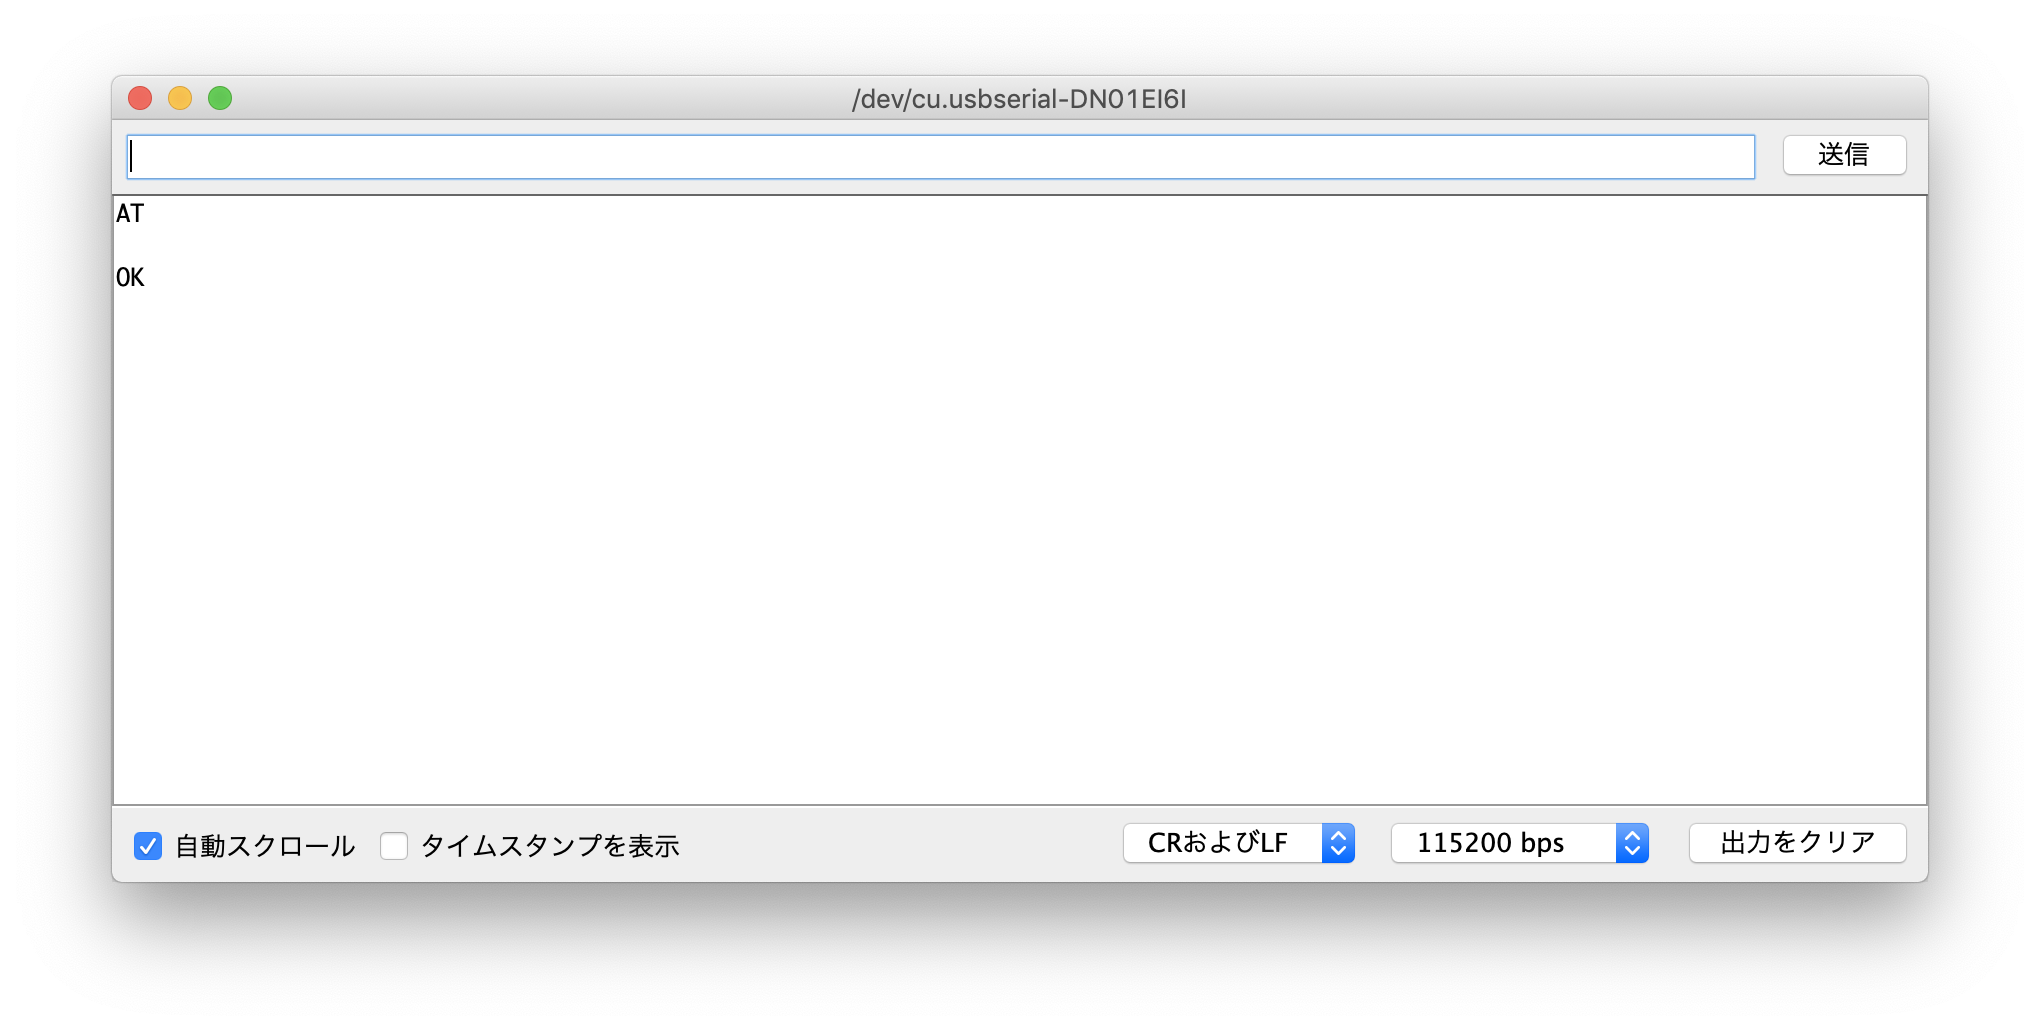
ATコマンドの確認
- ArduinoIDEでシリアルモニタを開いて
ATと入力します。 -
OKと返ってきたら、書き込み完了です。
参考リンク
- ESP-WROOM-02(ESP8266)ファームウェアのアップデート手順
https://qiita.com/dobnezmi/items/ba936fa3695b1dd050ad - ESP-WROOM-02をATモードで使う方法・および周辺情報の解説
https://trac.switch-science.com/wiki/ESP-WROOM-02_AT