
NextAuthは、Next.jsアプリケーションに認証を追加するためのライブラリです。
OAuth、Email、JSON Web Tokens (JWT)など、多くの認証プロトコルをサポートしています。Google、GitHub、Twitterなど、多数のプロバイダから直接サインインできます。
本プロジェクトの構造は以下のようになります。
ソースコードはこちらです
https://github.com/shalXXXX/prisma_jwt
app/
├── api
│   ├── auth
│   │   └── [...nextauth]
│   │       └── route.ts
│   ├── login
│   │   └── route.ts
│   ├── register
│   │   └── route.ts
│   └── type.ts
├── components
│   └── Provider.tsx
├── globals.css
├── layout.tsx
├── options.ts
├── page.tsx
├── signIn
│   ├── SignIn.tsx
│   └── page.tsx
├── signUp
|   ├── SignUp.tsx
|   └── page.tsx
prisma/
├── migrations
├── schema.prisma
├── seed.ts
global/
└── db.ts
middleware.ts
Next.jsプロジェクトの作成
以下のコマンドで新たなNext.jsプロジェクトを作成します。
$ npx create-next-app@latest --experimental-app
プロジェクト名を決めて、その他の項目はデフォルトのままで大丈夫です。
データベースの設定
今回はdockerでpostgresqlサーバを構築して使用します。
以下のようにdocker-compose.ymlを作成してください。
environmentの各項目は.envファイルの中に記述するなどして安全に保存してください。
version: '3.8'

services:
  db:
    image: postgres:13
    volumes:
      - ./data:/var/lib/postgresql/data
    environment:
      POSTGRES_USER: user
      POSTGRES_PASSWORD: password
      POSTGRES_DB: nextjsdb
    ports:
      - 5432:5432
作成したら、dockerコンテナを立ち上げます。
$ docker-compose up -d --build
Prismaの設定
パッケージのインストール
まず、必要なパッケージをインストールします。
$ npm install @prisma/client @auth/prisma-adapter
$ npm install prisma --save-dev
パッケージをインストールしたらprismaの初期化を行います。
$ npx prisma init
接続先DBの設定
prismaを初期化すると.envファイルが作成されるので、DATABASE_URLに先ほど立ち上げたDBの情報を記載します。
DATABASE_URL="postgresql://user:password@localhost:5432/nextjsdb?schema=public"
schema.prismaの作成
schema.prismaを作成します。Next-authとprismaを使用する場合は、公式で作成する項目が決まっています。
@auth/prisma-adapter
// This is your Prisma schema file,
// learn more about it in the docs: https://pris.ly/d/prisma-schema

generator client {
  provider = "prisma-client-js"
  previewFeatures = ["referentialActions"]
}

datasource db {
  provider = "postgresql"
  url      = env("DATABASE_URL")
}

model Account {
  id                 String  @id @default(cuid())
  userId             String
  type               String
  provider           String
  providerAccountId  String
  refresh_token      String?  @db.Text
  access_token       String?  @db.Text
  expires_at         Int?
  token_type         String?
  scope              String?
  id_token           String?  @db.Text
  session_state      String?

  user User @relation(fields: [userId], references: [id], onDelete: Cascade)

  @@unique([provider, providerAccountId])
}

model Session {
  id           String   @id @default(cuid())
  sessionToken String   @unique
  userId       String
  expires      DateTime
  user         User     @relation(fields: [userId], references: [id], onDelete: Cascade)
}


model User {
  id            String    @id @default(cuid())
  name          String?
  email         String?   @unique
  emailVerified DateTime?
  image         String?
  password      String
  accounts      Account[]
  sessions      Session[]
  createdAt     DateTime  @default(now())


  @@map("users")
}

model VerificationToken {
  identifier String
  token      String   @unique
  expires    DateTime

  @@unique([identifier, token])
}
作成したら、マイグレーションを行います。
$ npx prisma migrate dev --name init
seedデータの作成
seed.tsを作成します。
import { Prisma, PrismaClient } from "@prisma/client";
import { hashSync } from "bcryptjs";

const prisma = new PrismaClient();

async function main() {
  await prisma.user.deleteMany();

  const users: Prisma.UserCreateInput[] = [
    {
      email: "test01@test.com",
      name: "testuser01",
      password: hashSync("test01", 8),
    },
    {
      email: "test02@test.com",
      name: "testuser02",
      password: hashSync("test02", 8),
    },
    {
      email: "test03@test.com",
      name: "testuser03",
      password: hashSync("test03", 8),
    },
  ];

  for (const user of users) {
    await prisma.user.create({
      data: user
    });
  }
}

main()
  .then(async () => {
    await prisma.$disconnect()
  })
  .catch(async (e) => {
    console.error(e);
    await prisma.$disconnect();
    process.exit(1);
  })
seed.tsを作成たら、データベースにseedを保存します。そして、prisma studioを立ち上げ、localhost:5555にブラウザから接続すると、seedデータが格納されていることがわかります。
$ npx prisma db seed
$ npx prisma studio

global/db.tsの作成
開発中にnext devコマンドを実行すると、Node.jsのキャッシュがクリアされます。これにより、ホットリロードが行われるたびに新たなPrismaClientインスタンスが初期化され、データベースへの接続が作成されます。PrismaClientインスタンスごとに独自の接続プールが保持されるため、これによりすぐにデータベースの接続が枯渇する可能性があります。
https://www.prisma.io/docs/guides/other/troubleshooting-orm/help-articles/nextjs-prisma-client-dev-practices
そのため、global/db.tsを作成します。
import { PrismaClient } from "@prisma/client";
import "server-only";

const globalForPrisma = global as unknown as { prisma: PrismaClient}

export const prisma =
  globalForPrisma.prisma ||
  new PrismaClient({
    log: ["query"],
  });

if (process.env.NODE_ENV != "production") globalForPrisma.prisma = prisma
これでprismaの設定は完了です。
APIの作成
まず、zodを使ってログイン、ユーザ作成に必要な情報と型を定義します。
import { z } from "zod";

export const zUser = z.object({
  email: z.string(),
  name: z.string(),
  password: z.string(),
});

export const zLogin = z.object({
  email: z.string(),
  password: z.string(),
});

export type User = z.infer<typeof zUser>;
ユーザ作成のためのAPIルートを作成します。
import { NextRequest, NextResponse } from "next/server";
import { zUser } from "../type";
import bcryptjs from "bcryptjs";
import { prisma } from "@/global/db";

export async function POST(req: NextRequest) {
  const data = await req.json();
  const parsedData = zUser.parse(data);
  const hashedPassword = bcryptjs.hashSync(parsedData.password, 8)
  try {
    const user = await prisma.user.create({
      data: {
        email: parsedData.email,
        name: parsedData.name,
        password: hashedPassword,
      }
    })
    return new NextResponse(`{id: ${user.id}, name: ${user.name}}`, { status: 201})
  } catch (error) {
    return new NextResponse(`error: `, {status: 500});
  }
}
ここでは、リクエストで受け取ったパスワードをbcryptjsのhashSyncを使って暗号化しています。
そして、受け取ったデータをもとにDBにユーザを追加しています。
次に、ログインのためのAPIルートを作成します。
import { NextRequest, NextResponse } from "next/server";
import { zLogin } from "../type";
import { prisma } from "@/global/db";
import { compare } from "bcryptjs";
import { sign } from "jsonwebtoken";

export async function POST(req: NextRequest) {
  const data = await req.json();
  const parsedData = zLogin.parse(data);
  const user = await prisma.user.findFirst({
    where: {
      email: parsedData.email,
    }
  });
  if ( user === null) {
    return new NextResponse("user not found", { status: 401 })
  } else {
    const comparePassword = async () => {
      const isMatch = await compare(parsedData.password, user.password)
      if(!isMatch) {
        return new NextResponse("invalid password", { status: 401 })
      }
      return NextResponse.json({id: user.id, name: user.name, email: user.email})
    }
    return await comparePassword();
  }
}
リクエストでemailとpasswordを受け取り、prisma.user.findFirstで受け取ったemailと合致するユーザを探して、compareで保存されているパスワードと受け取ったパスワードを比較します。合致したらステータス200のレスポンスを返します。
next-authの設定
必要なパッケージをインストールします。
$ npm i next-auth
APIルートの作成
next-authのAPIルートは、`api/auth/[...nextauth]/route.tsの中に作成する必要があります。
import { options } from "@/app/options";
import NextAuth from "next-auth/next";

const handler = NextAuth(options);

export { handler as GET, handler as POST}
import { prisma } from "@/global/db";
import { PrismaAdapter } from "@next-auth/prisma-adapter";
import type { NextAuthOptions } from "next-auth";
import CredentialsProvider from "next-auth/providers/credentials";


export const options: NextAuthOptions = {
  adapter: PrismaAdapter(prisma),
  debug: true,
  session: {strategy: "jwt"},
  providers: [
    CredentialsProvider({
      name: "Sign in",
      credentials: {
        email: {
          label: "email",
          type: "Email",
          placeholder: "example",
        },
        password: {label: "password", type: "pasword"}
      },
      async authorize(credentials) {
        const res = await fetch("http://localhost:3000/api/login", {
          method: "POST",
          body: JSON.stringify({
            email: credentials?.email,
            password: credentials?.password
          }),
          headers: {"Content-Type": "application/json"}
        })
        const user = await res.json()
        if (res.ok && user) {
          return {id: user.id, name: user.email, email: user.email, role: "admin"}
        }
        return null
      }
    })
  ],

  callbacks: {
    async jwt({token, user, account, profile}){
      if (user) {
        token.user = user;
        const u = user as any
        token.role = u.role
      }
      if (account) {
        token.accessToken = account.access_token
      }
      return token
    },
    async session({ session, token, user}) {
      token.accessToken
      session.user = token.user as any
      return {
        ...session,
        user: {
          ...session.user,
          role: token.role
        }
      }
    }
  }
}
middlewareの設定
プロジェクトのルートディレクトリ上にmiddleware.tsを作成します。
import { withAuth } from "next-auth/middleware"

export default withAuth(
  {
    callbacks: {
      authorized: ({token}) => {
        return token?.role === "admin"
      }
    },
    pages: {
      signIn: "/signIn",
    },
  }
)

export const config = {
  matcher: ["/((?!signUp|api|signIn).*)"],
}
pagesのsignInで、サインインページを指定しています。
また、configのmatcherで、signUp, api, signInはリダイレクト処理の対象から除外しています。
ログイン画面の作成
app/signIn/SignIn.tsxを作成します。
"use client"
import React, { FormEvent, useState } from "react";
import { useRouter } from "next/navigation";
import { Avatar, Box, Button, Container, CssBaseline, Grid, TextField, Typography } from "@mui/material";

import LockOutlinedIcon from '@mui/icons-material/LockOutlined';
import { signIn } from "next-auth/react";
import Link from "next/link";

function SignIn() {
  const router = useRouter();

  const handleSubmit = async (event: FormEvent<HTMLFormElement>) => {
    event.preventDefault();
    const data = new FormData(event.currentTarget);

    const mail = data.get("userId");
    const password = data.get("password");

    await signIn("credentials", {
      redirect: false,
      email: mail,
      password,
    }).then(res => {
      if (res?.error) {
        console.log(res.error)
      }
      router.push("/")
    }).catch(err =>{
      console.log(err)
    })

  }

  return (
    // 以下略
省略している部分はリポジトリを参照してください。
https://github.com/shalXXXX/prisma_jwt/blob/main/app/signIn/SignIn.tsx
ログインボタンが押された際にhandleSubmitが実行されます。
handleSubmitの中では、next-authのsignInが呼び出されます。
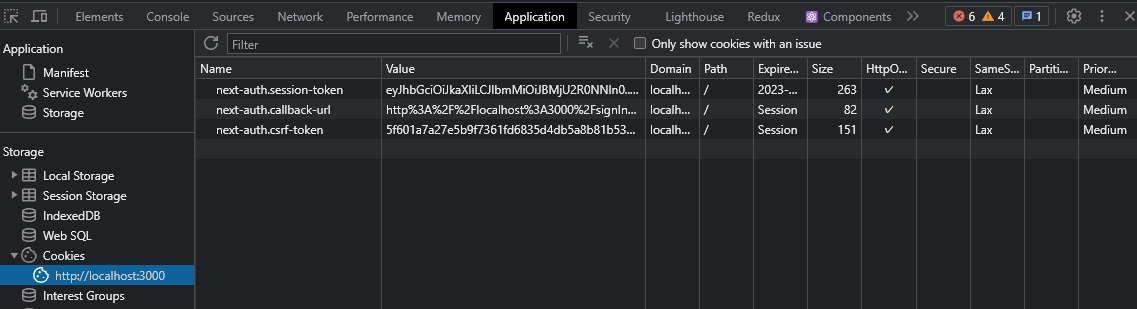
そして、認証が通るとクッキーにトークン等が保存されて別のページにアクセスできるようになります。


まとめ
この記事では、Next.js 13とNext-Authを用いてApp routerを使用したJWT認証とリダイレクト処理の実装方法を見てきました。これにより、ユーザーがセキュアに認証を行い、その後適切な場所にリダイレクトされるアプリケーションを構築することができます。