はじめに
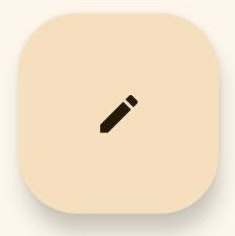
Jetpack Composeには、マテリアルデザインのFAB(フローティングアクションボタン)の種類が4つ存在するので紹介していきます。
まず、FABとはアプリ内の主要な操作を行うことを目的とするボタンです。通常は画面の右下に固定され、ユーザーが最も一般的な経路で操作できるように設計されるべきです。例えばメモアプリの場合、タップすると新規メモを作成できるなどです。
Android Developersの記事を参考にしています。

ボタンを配置
Composable関数内に書くことでFABを配置できます。
基本どこにでも配置できるはずですが、例ではScaffoldのfloatingActionButtonに代入しています。
以下のようにすると、BottomAppBarを避けて画面右下に配置できます。
@OptIn(ExperimentalMaterial3Api::class)
@Composable
fun FloatingActionButtonView() {
    Scaffold(
        floatingActionButton = {
            // 普通のFAB
            FloatingActionButton(
                onClick = {}
            ) {
                Icon(Icons.Filled.Edit, "Floating ActionButton")
            }
        }
    ) { innerPadding ->
        Column(
            modifier = Modifier
                .padding(innerPadding)
        ) {

        }
    }
}
FABの種類
普通サイズのFAB
Iconの引数であるimageVectorに他の値を渡すと、Iconを変更できます。
FloatingActionButton(
    onClick = {}
) {
    Icon(Icons.Filled.Edit, "Floating ActionButton")
}
小さいサイズのFAB
SmallFloatingActionButton(
    onClick = {}
) {
    Icon(Icons.Filled.Edit, "Small floating action button.")
}
大きいサイズのFAB
LargeFloatingActionButton(
    onClick = {}
) {
    Icon(Icons.Filled.Edit, "Large floating action button")
}
拡張FAB
引数にIconとTextを渡すことで、簡単にアイコンと文字が融合したFABを作ることができる。
ExtendedFloatingActionButton(
    onClick = {},
    icon = { Icon(Icons.Filled.Edit, contentDescription = "Extended Floating ActionButton") },
    text = { Text("Extended FAB") }
)
APIサーフェス
以下の機能が用意されています。
・onClick
・containerColor
・contentColor
・shape ⭐おまけ
onClick
引数としてonClickに以下のように書いて代入する。
そうすることでボタンをタップすると、代入した処理が実行される。
FloatingActionButton(
    onClick = {
        print("タップした。")
    }
) {
    Icon(Icons.Filled.Edit, "Floating ActionButton")
}
containerColor
引数としてcontainerColorに以下のように書いて代入する。
そうすることで背景色を変更することができる。
FloatingActionButton(
    onClick = {
        print("タップした。")
    },
    containerColor = Color.Green
) {
    Icon(Icons.Filled.Edit, "Floating ActionButton")
}
contentColor
引数としてcontentColorに以下のように書いて代入する。
そうすることで、ボタンの中の要素の色を変更することができる。
FloatingActionButton(
    onClick = {
        print("タップした。")
    },
    contentColor = Color.Red
) {
    Icon(Icons.Filled.Edit, "Floating ActionButton")
}
shape
引数としてshapeにCircleShapeを代入する。
そうすることで、FABを丸くすることができる。
FloatingActionButton(
    onClick = {
        print("タップした。")
    },
    shape = CircleShape
) {
    Icon(Icons.Filled.Edit, "Floating ActionButton")
}
筆者が実装したソース
参考資料


