こんにちは、Slack の公式 SDK 開発と日本の Developer Relations を担当している瀬良 (@seratch) と申します ![]()
この記事では Slack の最新のワークフロービルダーの基盤であるオートメーションプラットフォーム(ベータの期間では「次世代プラットフォーム」と呼んでいました)を使ったアプリ開発において、GitHub Actions を使った自動デプロイを設定する手順について紹介していきます。
「オートメーションプラットフォーム(次世代プラットフォーム)って何?」という方は、以下の記事で詳しく解説しましたので、まずはそちらをお読みください。
なお、これらの記事でも繰り返し注意書きがありますが、これまでの Slack アプリ開発と異なり、オートメーションプラットフォームは有料プランの Slack ワークスペースでのみ利用可能です。
有料プランのワークスペースをご用意の上でお試しください ![]()
TL;DR
すでに Slack のオートメーションプラットフォームについてある程度知っていて、英語の解説でも構わないという方は、私が作った以下のチュートリアル付きデモリポジトリを見る方が早いかもしれません。
この記事では、これをもう少し噛み砕きつつ、日本語で解説します。
この記事で説明すること
この記事では、main ブランチに変更が merge されたら自動的に本番デプロイを行ってくれる GitHub Actions つきの GitHub リポジトリを設定していきます。
- GitHub リポジトリを作成
- Slack CLI をインストール
- Slack CLI を使って新しい Slack ワークフローアプリを作成
- Slack CLI を使って初回デプロイを実行
- Slack CLI を使ってリンクトリガーを作成してワークフローの動作確認
- Slack CLI を使ってサービストークンを取得
- GitHub リポジトリの Secrets にサービストークンを追加
- GitHub Actions ワークフローの設定を追加
- main ブランチに変更を merge して動作確認
GitHub リポジトリを作成
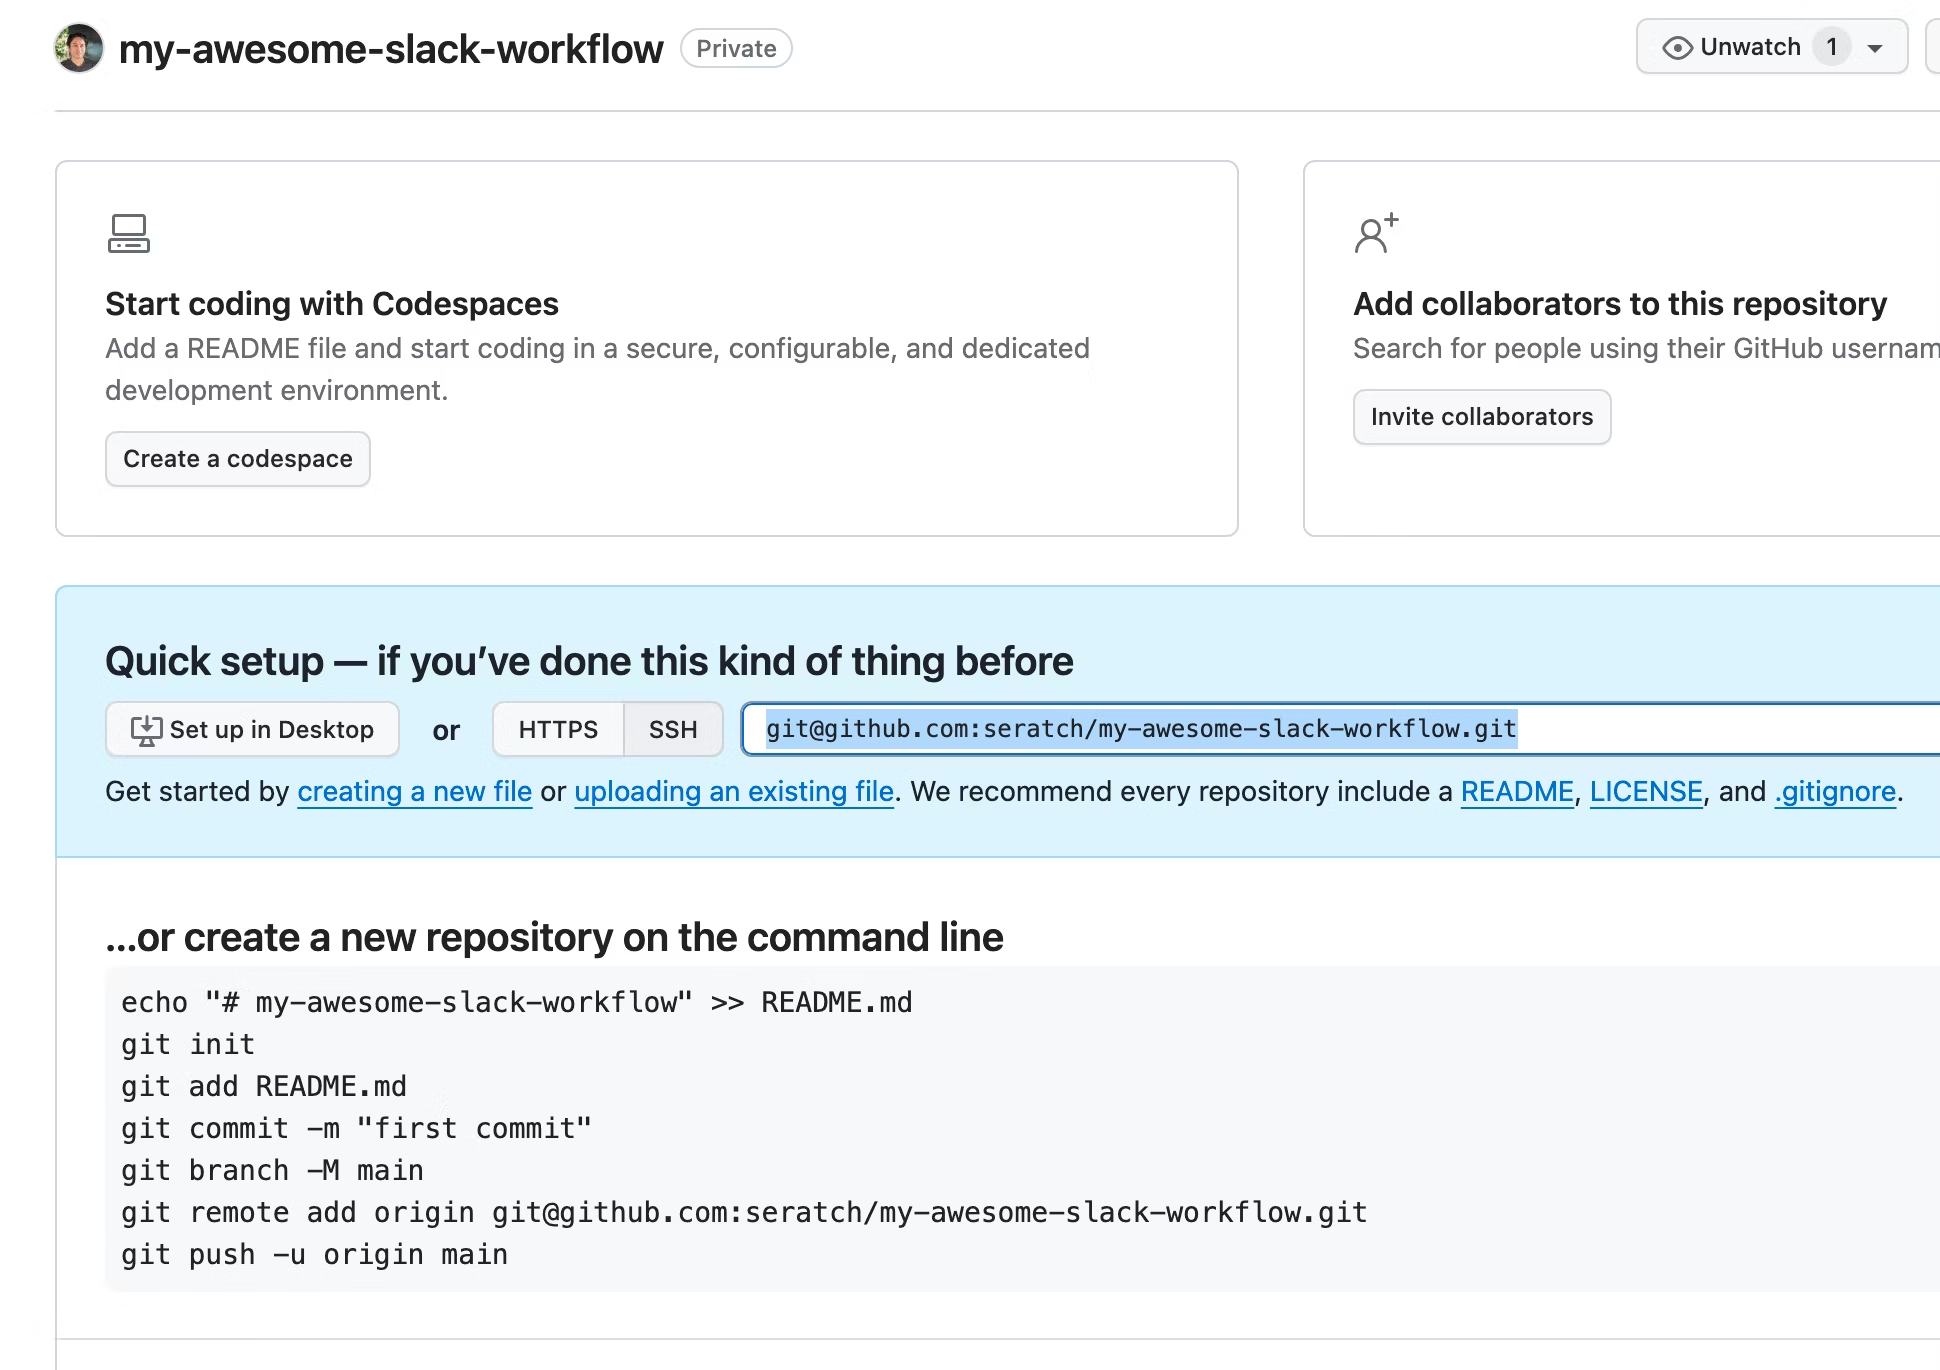
まずは GitHub リポジトリを作ります。何もファイルがない空のリポジトリで OK です。

作成したら、画面の指示に従ってローカルにこの空のリポジトリを git clone しましょう。
Slack CLI をインストール
最終的には GitHub Actions ワークフロー側で Slack CLI を実行するようになりますが、初回のデプロイや諸々の準備のためにローカルで Slack CLI を何度か使用します。以下のページを参考にインストールします。
macOS や Linux の場合は、以下を実行するだけでよいでしょう。
curl -fsSL https://downloads.slack-edge.com/slack-cli/install.sh | bash
インストールが正常に完了しているかを確認するために slack doctor コマンドを実行してみてください。
$ slack doctor

SYSTEM

    ✔ Operating System (system management software)
        Version: darwin (amd64)

    ✔ Deno (a JavaScript runtime)
        Version: v1.36.3
        Recommendation: We suggest using the latest version of Deno

    ✔ Git (a version control system)
        Version: git version 2.39.3 (Apple Git-145)

SLACK

    ✔ CLI (this tool for building Slack apps)
        Version: 2.10.0

    ✔ Configurations (any adjustments to settings)
        System ID: 651e1da4-bc9d-4190-bfb7-92b5f75111e0
        Last updated: 2023-10-24 14:00:02 +09:00
        Experiments: None

    ✘ Credentials (your Slack authentication)
      Error: You are not logged into a workspace or have not installed an app (slack_auth_error)
      Suggestion: Use the command `slack login` to login and `slack install` to install your app

Errors: 1

💌 We would love to know how things are going
   Survey your development experience with slack feedback --name platform-improvements
これまで Slack CLI を使ったことがない人の場合、上記のように Credentials がないぞと言ってくると思います。slack login コマンドを使って、この CLI 環境を Slack ワークスペースと接続します。
以下のようにスラッシュコマンドを実行するよう促されます。これからアプリをデプロイしたいワークスペースを開いて DM やチャンネルなどメッセージを投稿できる場所でこのコマンドを実行してください。
$ slack login

📋 Run the following slash command in any Slack channel or DM
   This will open a modal with user permissions for you to approve
   Once approved, a challege code will be generated in Slack

/slackauthticket MTlkOTg4OWUtOTI5My00N2E3LWJhN2QtNzJmZWM1NDVlM2E5

? Enter challenge code
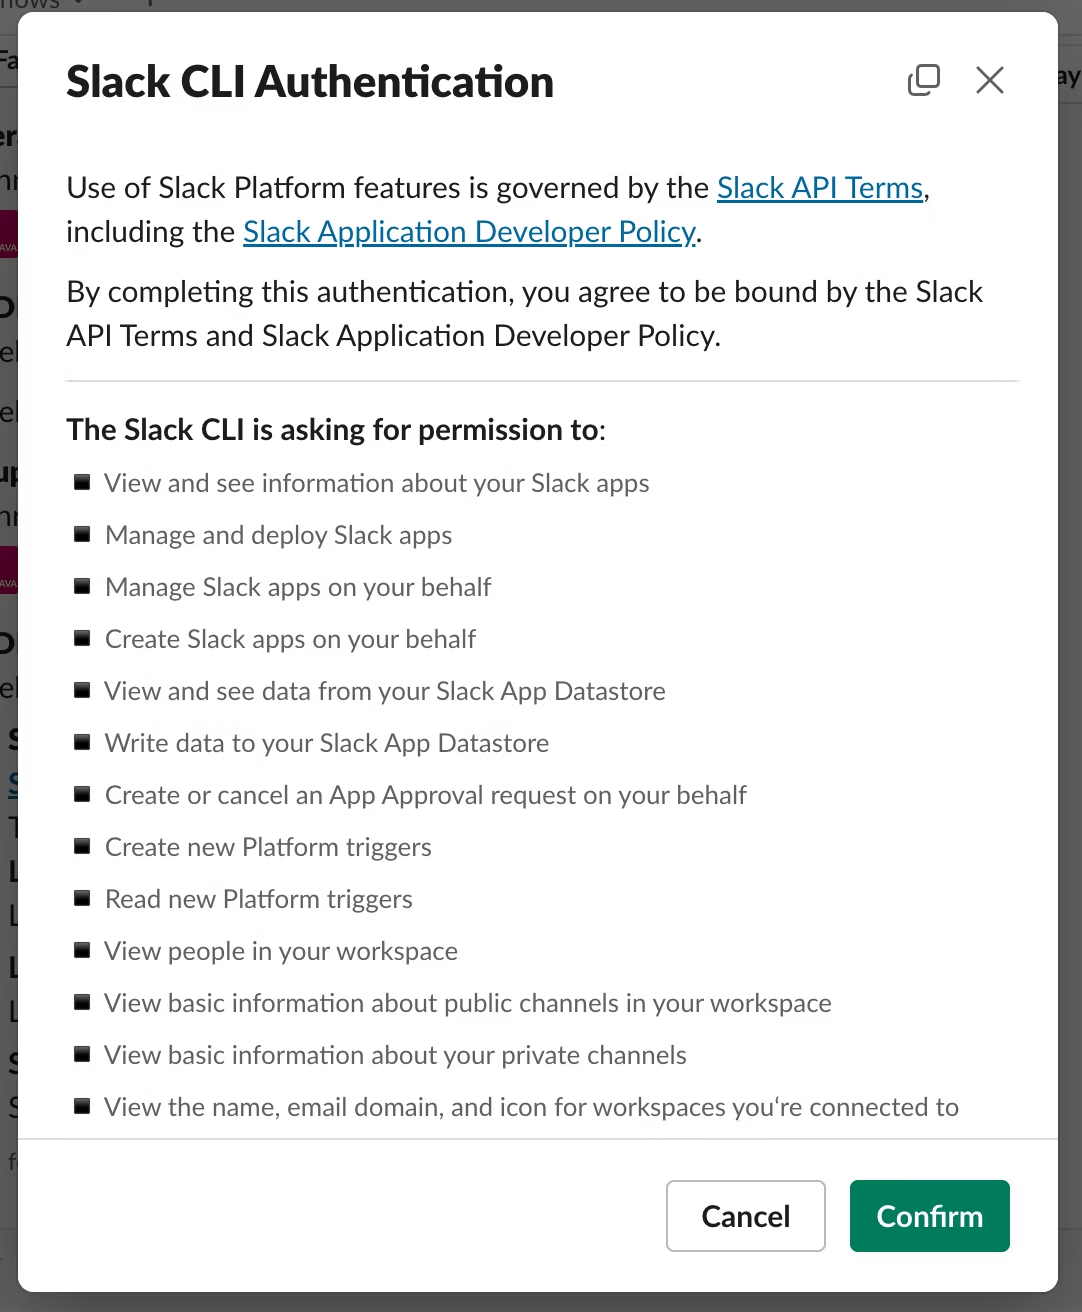
コマンドを実行すると、以下のようなポップアップモーダルが表示されるので「Confirm」ボタンをクリックします。
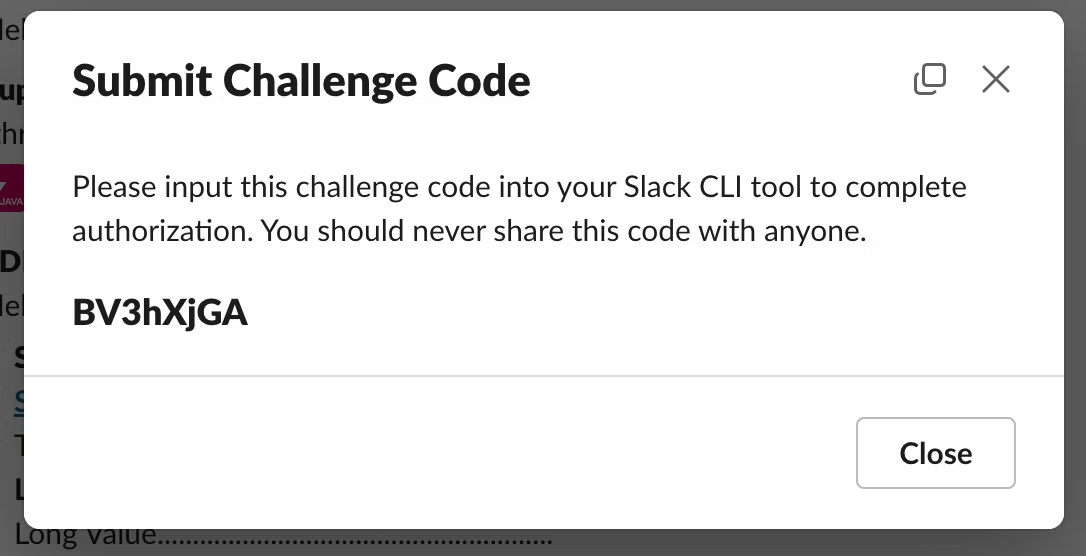
すると、以下のような Challenge Code の表示に切り替わるので、この「BV3hXjGA」のような文字列をコピーして、ターミナル上のプロンプトに入力します。
成功すると以下のような表示になります。
$ slack login

📋 Run the following slash command in any Slack channel or DM
   This will open a modal with user permissions for you to approve
   Once approved, a challege code will be generated in Slack

/slackauthticket MTlkOTg4OWUtOTI5My00N2E3LWJhN2QtNzJmZWM1NDVlM2E5

? Enter challenge code BV3hXjGA

✅ You've successfully authenticated! 🎉
   Authorization data was saved to ~/.slack/credentials.json

💡 Get started by creating a new app with slack create my-app
   Explore the details of available commands with slack help
$
もう一度 slack doctor コマンドを実行すると、エラーが 0 件になっているはずです。
Slack CLI を使って新しい Slack ワークフローアプリを作成
次に Slack ワークフローアプリを作成します。slack create gh-actions-demo を実行して、デフォルトの選択に従っていってください。
$ slack create gh-actions-demo
? Select a template to build from: Issue submission (default sample)
⚙️  Creating a new Slack app in ~/github/my-awesome-slack-workflow/gh-actions-demo

📦 Installed project dependencies

✨ gh-actions-demo successfully created

🧭 Explore the documentation to learn more
   Read the README.md or peruse the docs over at api.slack.com/automation
   Find available commands and usage info with slack help

📋 Follow the steps below to begin development
   Change into your project directory with cd gh-actions-demo/
   Develop locally and see changes in real-time with slack run
   When you're ready to deploy for production use slack deploy

$
出力にもあるように cd gh-actions-demo/ で生成されたアプリのディレクトリに移動します。
今回の GitHub Actions の設定手順においては必須ではありませんが、このアプリをローカルで実行してみたい場合は slack run コマンドを実行します。プロンプトに従って以下のようにリンクトリガーを作成、その URL をワークスペースのチャンネルで共有すれば、開発用の (local) という表示のものを動作確認できます。
$ slack run
? Choose a local environment Install to a new workspace or organization
? Install to a new workspace or organization acme-corp T03E94MJU

🔔 If you leave this workspace or organization, you can no longer manage the installed apps
   Installed apps will belong to the workspace or organization if you leave the workspace

Updating local app install for "Acme Corp"

⚡ Listing triggers installed to the app...
   There are no triggers installed for the app

⚡ Create a trigger
   Searching for trigger definition files under 'triggers/*'...
   Found 1 trigger definition file

? Choose a trigger definition file: triggers/submit_issue.ts

⚡ Trigger successfully created!

   Submit an issue (local) Ft***** (shortcut)
   Created: 2023-10-25 12:23:16 +09:00 (0 seconds ago)
   Collaborators:
     Kaz Sera @seratch U03E94MK0
   Can be found and used by:
     everyone in the workspace
   https://slack.com/shortcuts/Ft*****/**************************

✨ seratch of Acme Corp
Connected, awaiting events
この開発用アプリは slack delete コマンドで削除することができます。
$ slack delete
? Select a workspace or organization seratch T03E94MJU
? Choose an app environment Local A06283XK6T1

⚠️  Danger zone
   App (A06283XK6T1) will be permanently deleted
   All triggers, workflows, and functions will be deleted
   All datastores for this app will be deleted
   Once you delete this app, there is no going back

? Are you sure you want to delete the app? Yes

🏠 App Uninstall
   Uninstalled the app "gh-actions-demo" from "Acme Corp"

📚 App Manifest
   Deleted the app manifest for "gh-actions-demo" from "Acme Corp"

🏘️  Apps
   This project has no apps

$
Slack CLI を使って初回デプロイを実行
本題に戻って、デプロイを自動化する本番アプリを設定していきます。
上の slack run コマンドと同じように slack deploy コマンドを実行すると、そのまま流れに従っていくだけでデプロイは完了するはずです。
$ slack deploy
? Choose a deployed environment Install to a new workspace or organization
? Install to a new workspace or organization acme-corp T03E94MJU

🔔 If you leave this workspace or organization, you can no longer manage the installed apps
   Installed apps will belong to the workspace or organization if you leave the workspace

📚 App Manifest
   Created app manifest for "gh-actions-demo" in "Acme Corp"

🏠 App Install
   Installing "gh-actions-demo" app to "Acme Corp"
   Updated app icon: assets/default_new_app_icon.png
   Finished in 5.2s

⚡ Listing triggers installed to the app...
   There are no triggers installed for the app

⚡ Create a trigger
   Searching for trigger definition files under 'triggers/*'...
   Found 1 trigger definition file

? Choose a trigger definition file: triggers/submit_issue.ts

⚡ Trigger successfully created!

   Submit an issue Ft***** (shortcut)
   Created: 2023-10-25 12:27:26 +09:00 (1 second ago)
   Collaborators:
     Kaz Sera @seratch U03E94MK0
   Can be found and used by:
     everyone in the workspace
   https://slack.com/shortcuts/Ft*****/**************************

🎁 App packaged and ready to deploy
   0.016MB was packaged in 1.3s

🚀 gh-actions-demo deployed in 16.0s
   Dashboard:  https://slack.com/apps/A062G14249L
   App Owner:  seratch (U03E94MK0)
   Workspace:  Acme Corp (T03E94MJU)

🌩  Visit your workspace or organization to try out your live app!
   When you make any changes, update your app by re-running slack deploy

💌 We would love to know how things are going
   Survey your development experience with slack feedback --name platform-improvements
これでアプリは Slack ワークスペースにインストールされました。次のステップで動作確認をしていきます。
Slack CLI を使ってリンクトリガーを作成してワークフローの動作確認
slack deploy コマンドの実行中にトリガーを作成するかと聞かれて作成したと思います。 https://slack.com/shortcuts/... のような URL です。
これは Web ブラウザーでアクセスするための URL ではなく、アプリがインストールされたワークスペース内でのみ有効な、このワークフローを実行するための URL です。
なお、slack deploy 中に作成しなかった場合は slack trigger create コマンドでいつでも作成することができます。
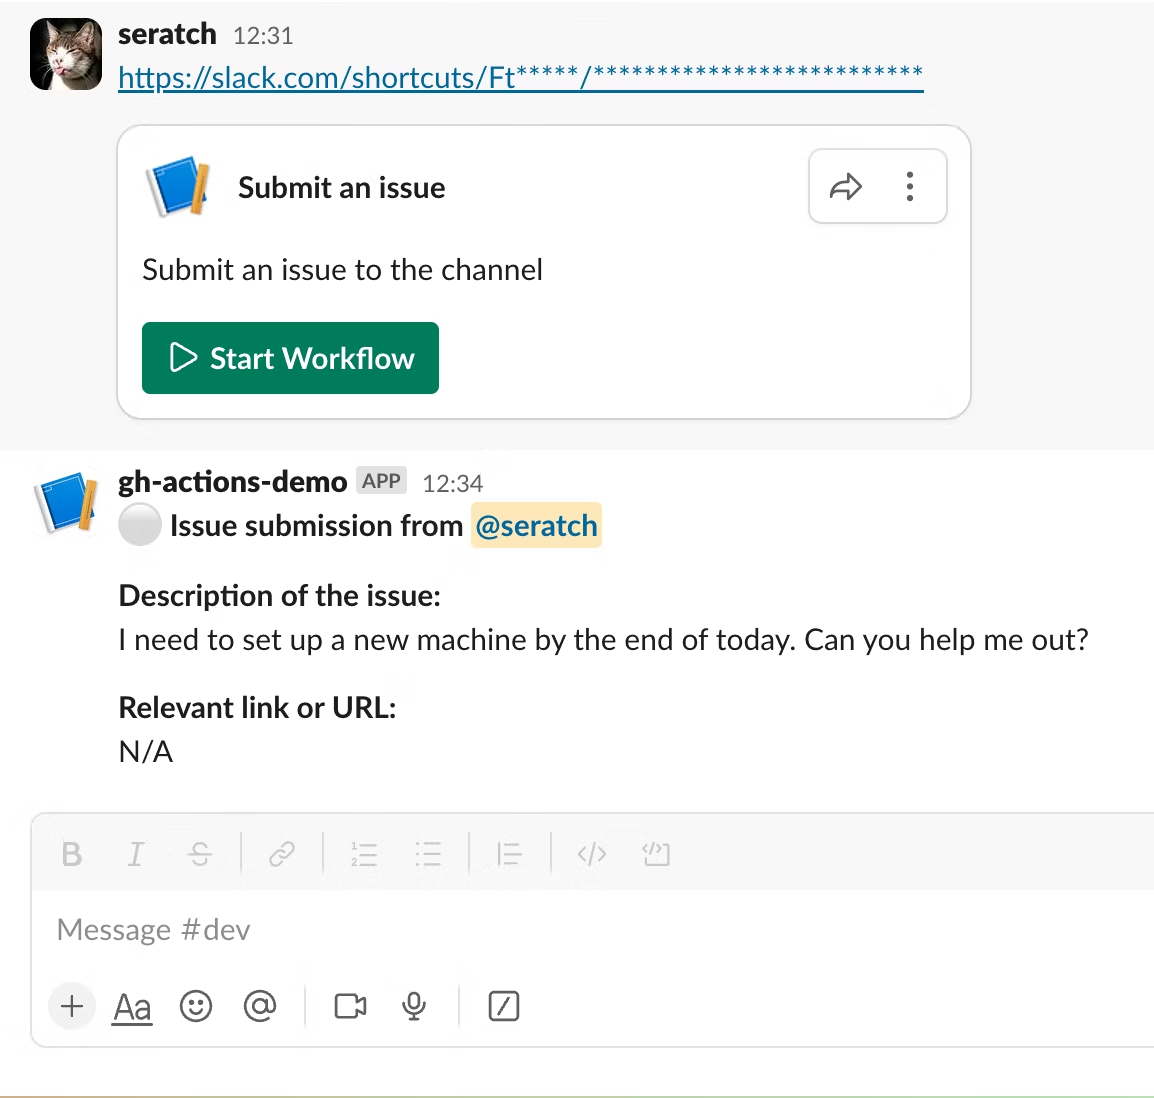
チャンネル内で URL を共有すると、以下のようにボタン付きのカードが表示されます。
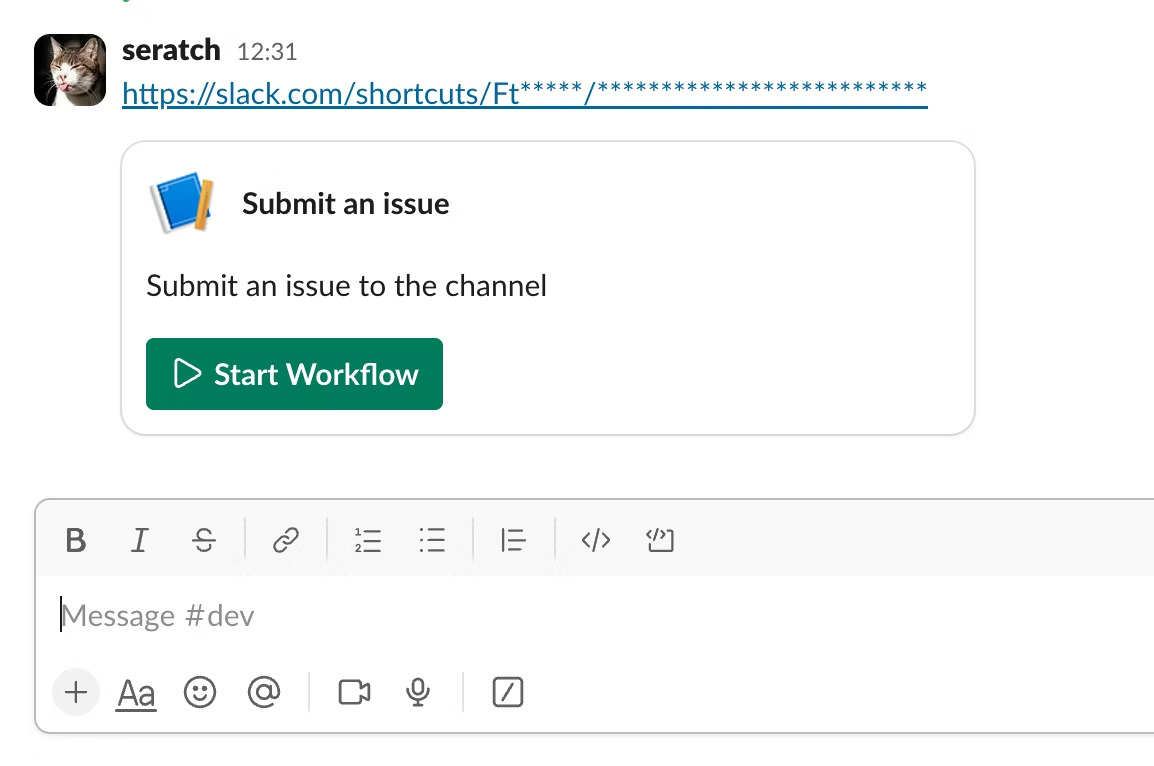
このボタンからワークフローを実行できますので、最後まで実行してみてください。
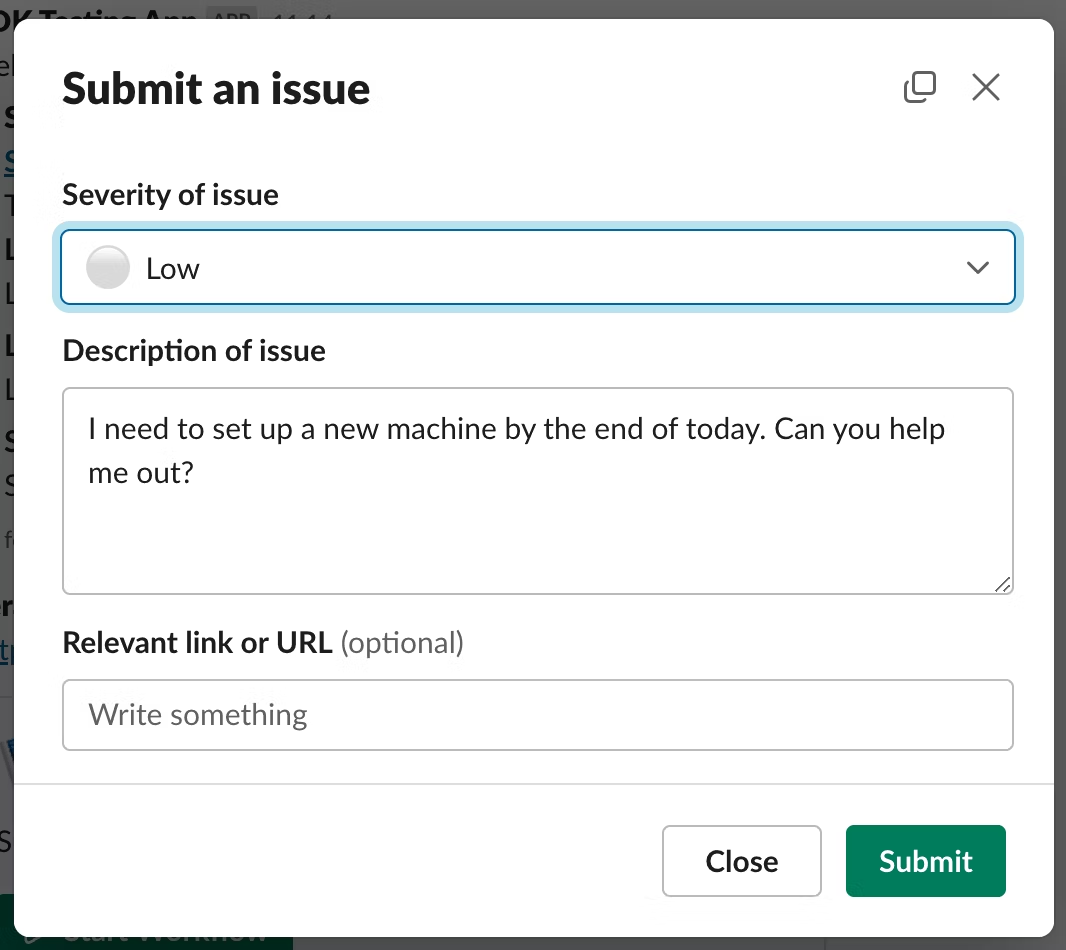
以下のように送信内容がチャンネルに投稿されれば OK です。
これでアプリの初回デプロイが成功していることが確認できました。次のステップからはいよいよ次回以降のデプロイを自動化していきます。
Slack CLI を使ってサービストークンを取得
サービストークンは、GitHub Actions などから自動化されたデプロイを行うために利用できるトークンです。slack auth token コマンドを実行すると、上で実行した slack login コマンドと同様にスラッシュコマンドを実行するよう促されますので、同様の手順で取得した challenge code を入力してください。
$ slack auth token

📋 Run the following slash command in any Slack channel or DM
   This will open a modal with user permissions for you to approve
   Once approved, a challege code will be generated in Slack

/slackauthticket YTQ5NDM4YjQtZTBlNi00ZTA5LWFmYWItYmZhODQyNjY3Y2Y5

? Enter challenge code
成功すると、画面上に xoxp- で始まるトークンが表示されます。
$ slack auth token

📋 Run the following slash command in any Slack channel or DM
   This will open a modal with user permissions for you to approve
   Once approved, a challege code will be generated in Slack

/slackauthticket YTQ5NDM4YjQtZTBlNi00ZTA5LWFmYWItYmZhODQyNjY3Y2Y5

? Enter challenge code lBc7B0N5

✅ You've successfully authenticated! 🎉
   Service token:

     xoxp-34851*****-34851*****-60842167*****-***************************

   Make sure to copy the token now and save it safely.

💡 Get started by creating a new app with slack create my-app
   Explore the details of available commands with slack help
この文字列を控えておいてください。次のステップで使用します。
GitHub リポジトリの Secrets にサービストークンを追加
GitHub リポジトリの設定画面を開いて Security > Secrets and variables > Actions のページの「New repository secret」というボタンをクリックして
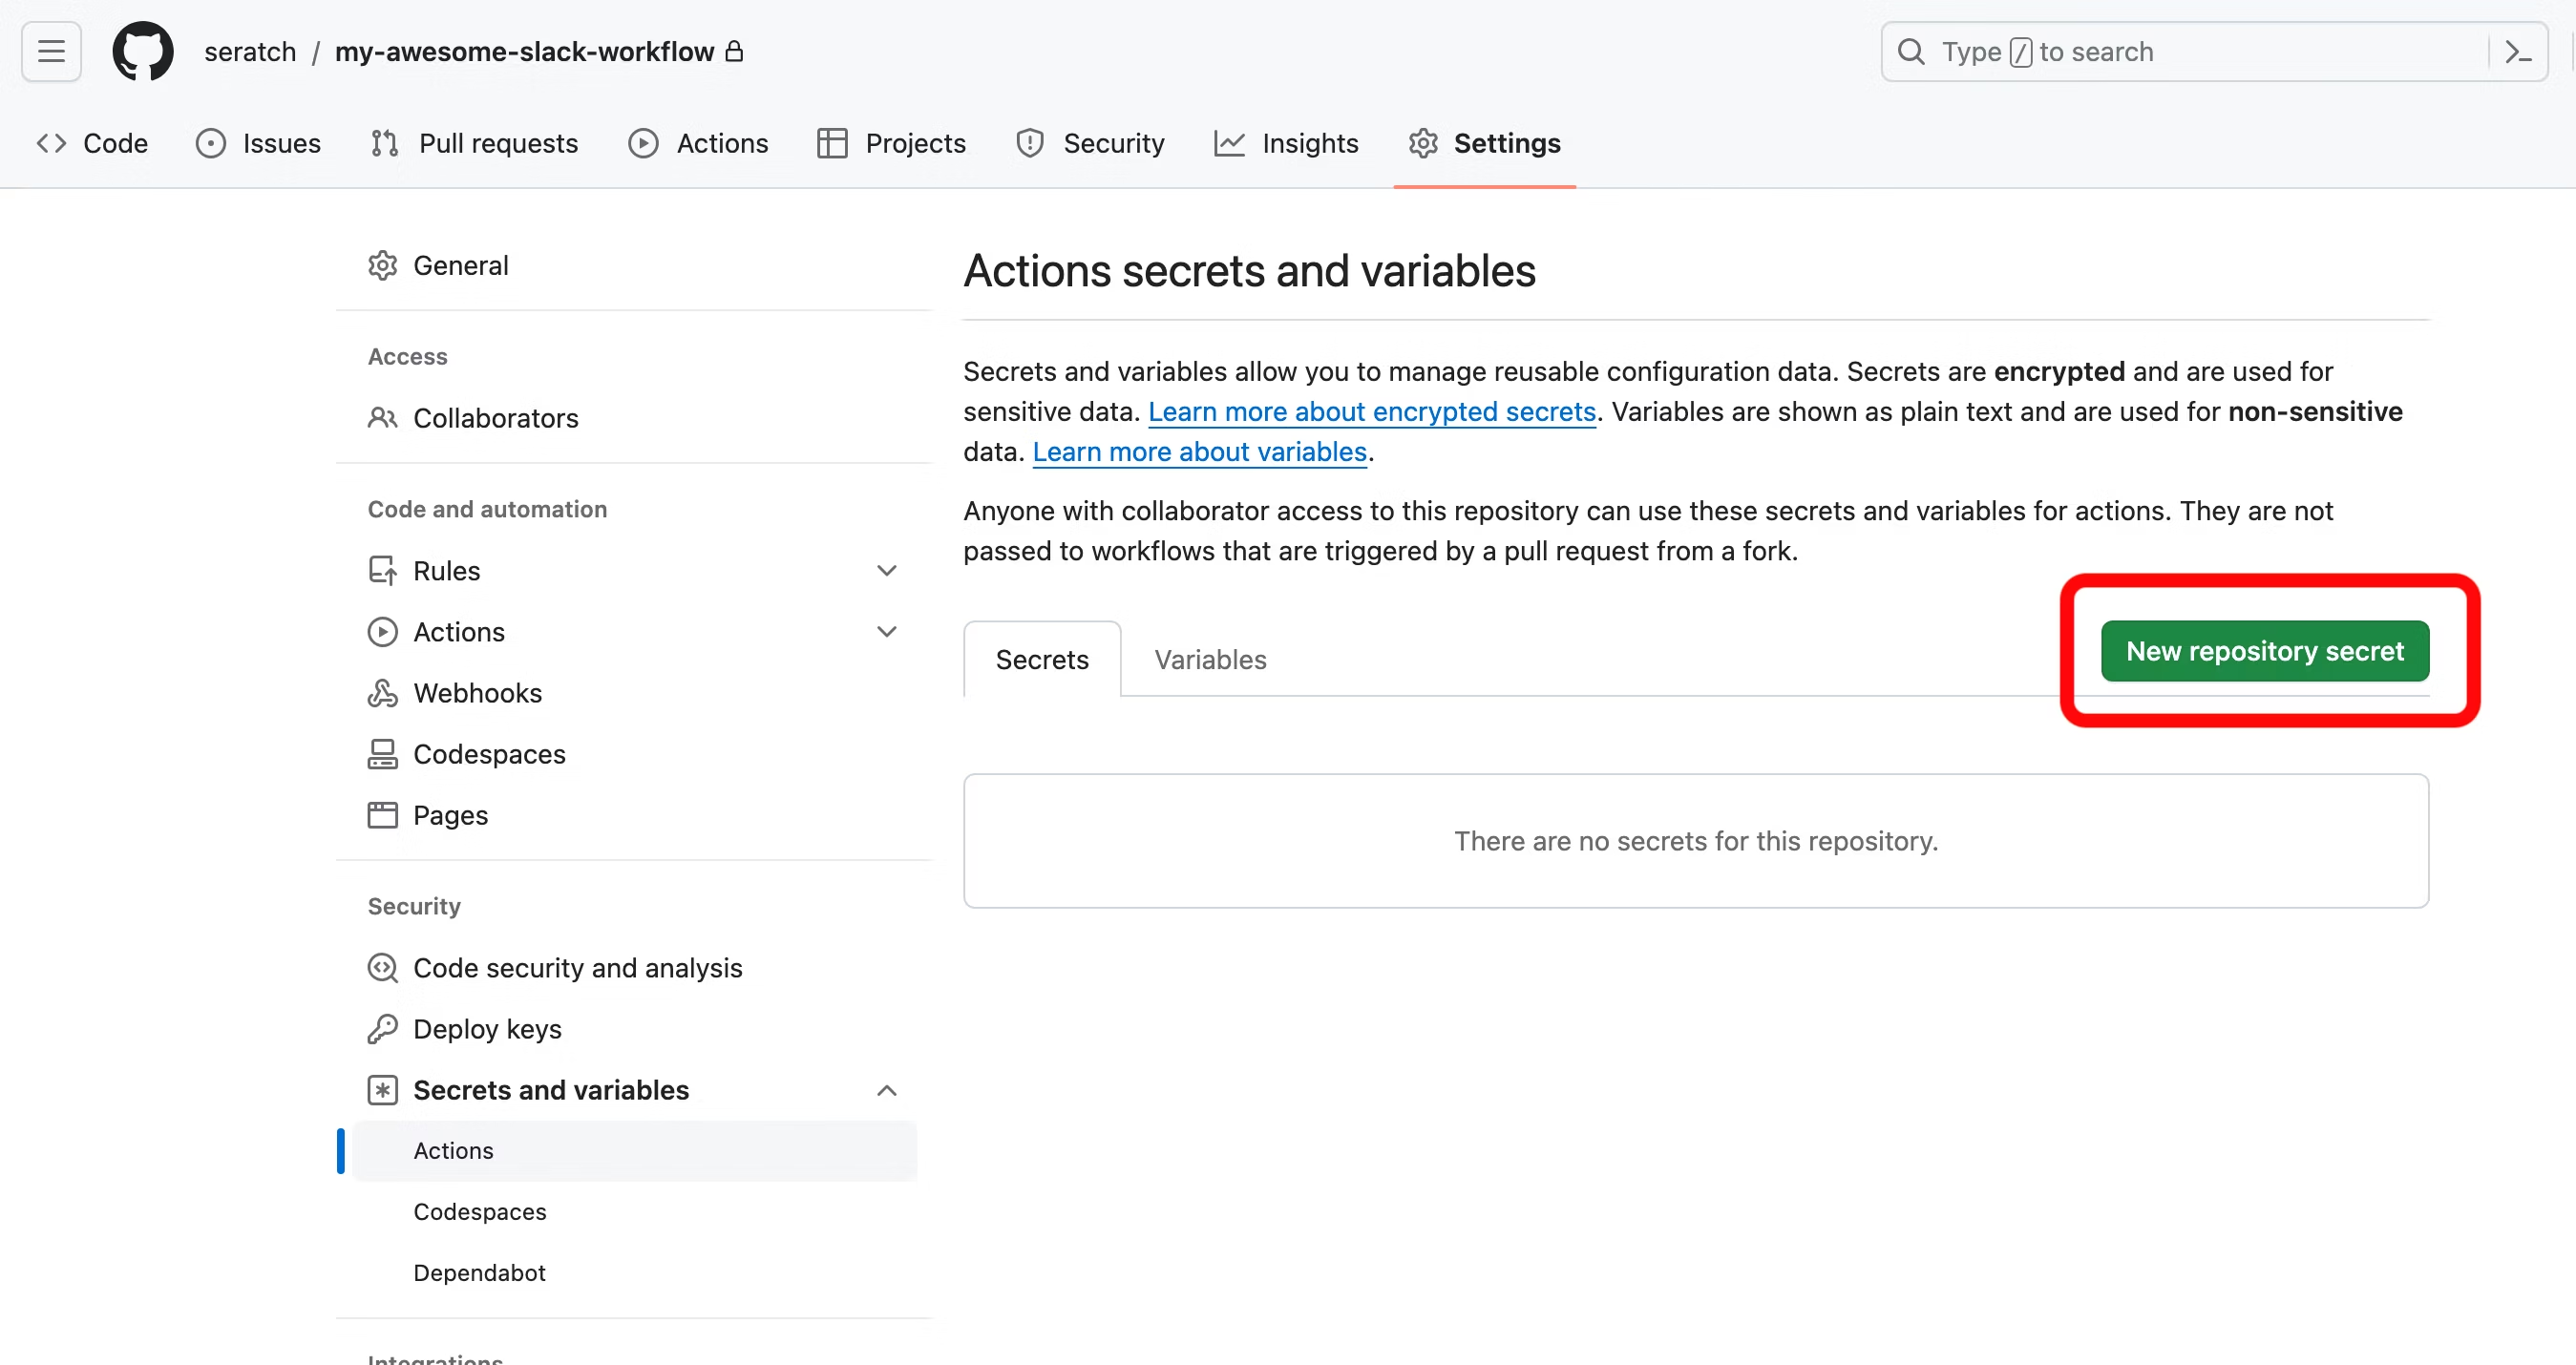
先ほどの xoxp- から始める文字列を SLACK_SERVICE_TOKEN として保存します。
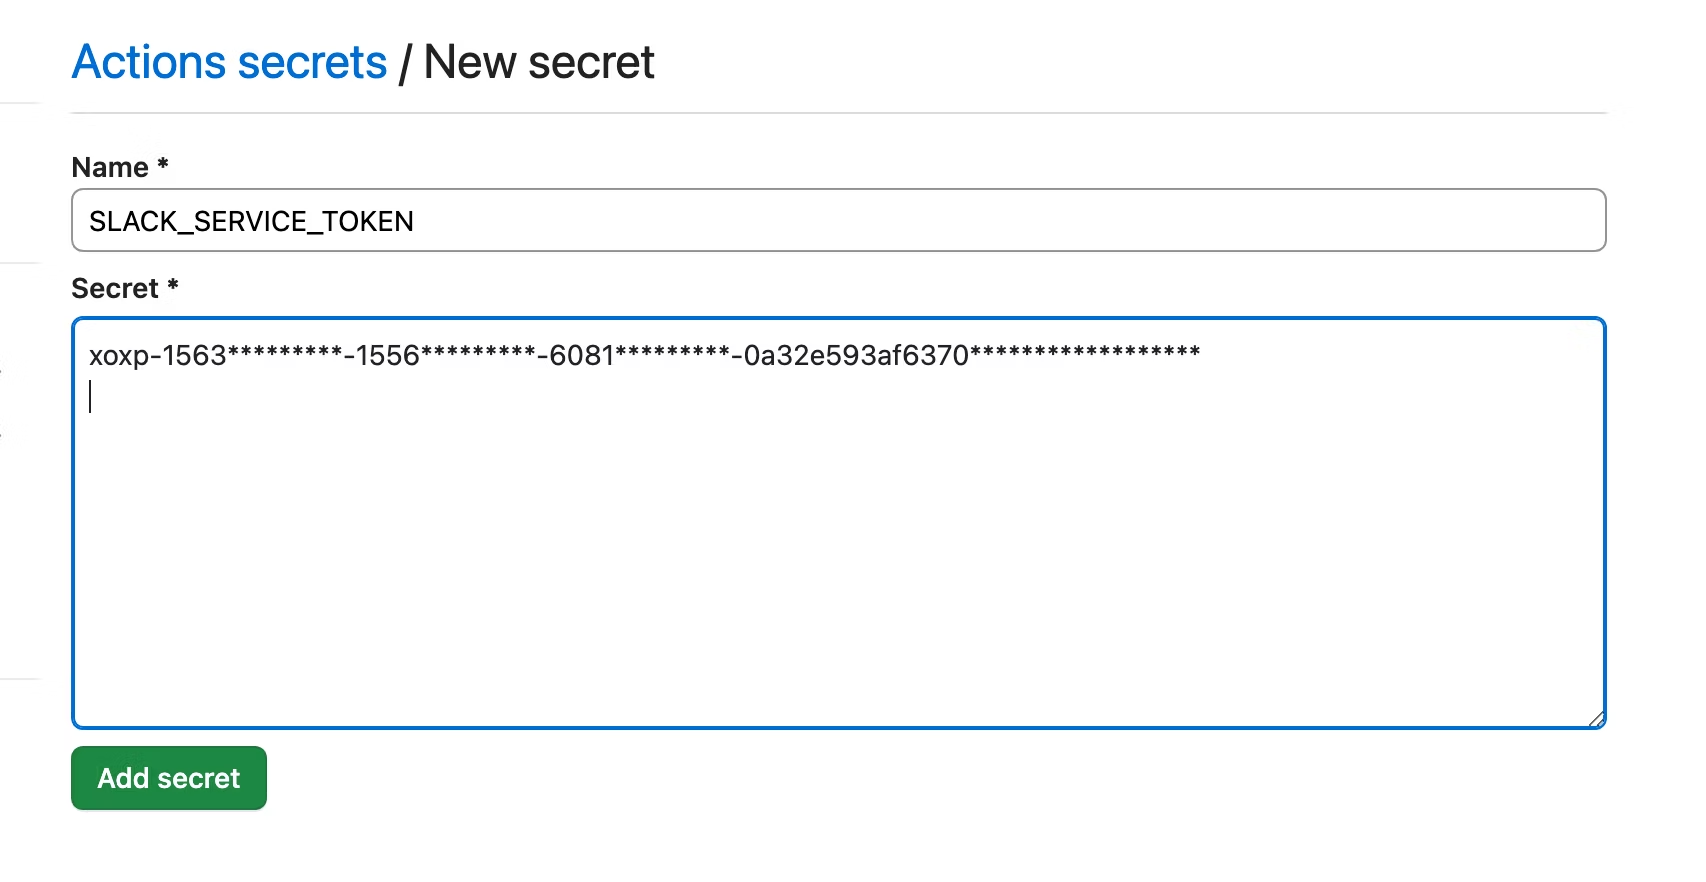
「Add secret」ボタンを押して保存したら設定完了です。
GitHub Actions ワークフローの設定を追加
GitHub Actions ワークフローを設定します。
このプロジェクトのルートディレクトリに戻って(今は ./gh-actions-demo 配下で作業しているはずです。その一つ上のディレクトリに戻ります)、.github/workflows というディレクトリを作成して、その配下に deployment.yml というファイル名(ファイル名は違うものでも OK です)で、以下の内容を保存します。
name: Slack App Deployment

# 最新のリビジョンを以下のイベント発生時にデプロイします:
on:
  push:
    branches: [ main ]

jobs:
  build:
    # 他の Linux ディストリビューションでも OK
    runs-on: ubuntu-latest

    # デプロイ作業は通常 1 分以内に完了しますが、将来コードベースが大きくなったり、何らか別の処理を同時に行うようになった場合はこの時間を調整します
    timeout-minutes: 5

    steps:
    - uses: actions/checkout@v4

    # Slack CLI は Deno ランタイムを必要とします
    - name: Install Deno runtime
      uses: denoland/setup-deno@v1
      with:
        # Slack CLI では。最新の stable version の Deno を利用することを推奨します
        deno-version: v1.x

    - name: Cache Slack CLI installation
      id: cache-slack
      uses: actions/cache@v3
      with:
        path: |
          /usr/local/bin/slack
          ~/.slack/bin/slack
        key: ${{ runner.os }}-slack
    - name: Install Slack CLI
      if: steps.cache-slack.outputs.cache-hit != 'true'
      run: |
        curl -fsSL https://downloads.slack-edge.com/slack-cli/install.sh | bash

    - name: Deploy the app
      env:
        # slack auth token コマンドを実行して所得した xoxp- から始まるトークン
        # このトークンはデプロイ先の Slack ワークスペース/OrG に紐づいている必要があります
        SLACK_SERVICE_TOKEN: ${{ secrets.SLACK_SERVICE_TOKEN }}
      run: |
        # アプリコードをトップディレクトリに配置する場合、この cd コマンドでの移動は不要です
        cd gh-actions-demo/
        slack deploy -s --token $SLACK_SERVICE_TOKEN
main ブランチに変更を merge して動作確認
ここまでの手順を正しく実行していれば、以下のようなファイルが作られているはずです。これらをそのままコミットして git push してください。特にデプロイにおいて必要となる以下のファイルが正しく配置されることを確認してください:
.github/workflows/deployment.ymlgh-actions-demo/.slack/apps.jsongh-actions-demo/.slack/config.json
$ tree -a
.
├── .git
├── .github
│   └── workflows
│       └── deployment.yml
└── gh-actions-demo
    ├── .gitignore
    ├── .slack
    │   ├── apps.json
    │   └── config.json
    ├── .vscode
    │   └── settings.json
    ├── LICENSE
    ├── README.md
    ├── assets
    │   └── default_new_app_icon.png
    ├── deno.jsonc
    ├── functions
    │   └── post_issue_message.ts
    ├── import_map.json
    ├── manifest.ts
    ├── slack.json
    ├── triggers
    │   └── submit_issue.ts
    └── workflows
        └── submit_issue.ts
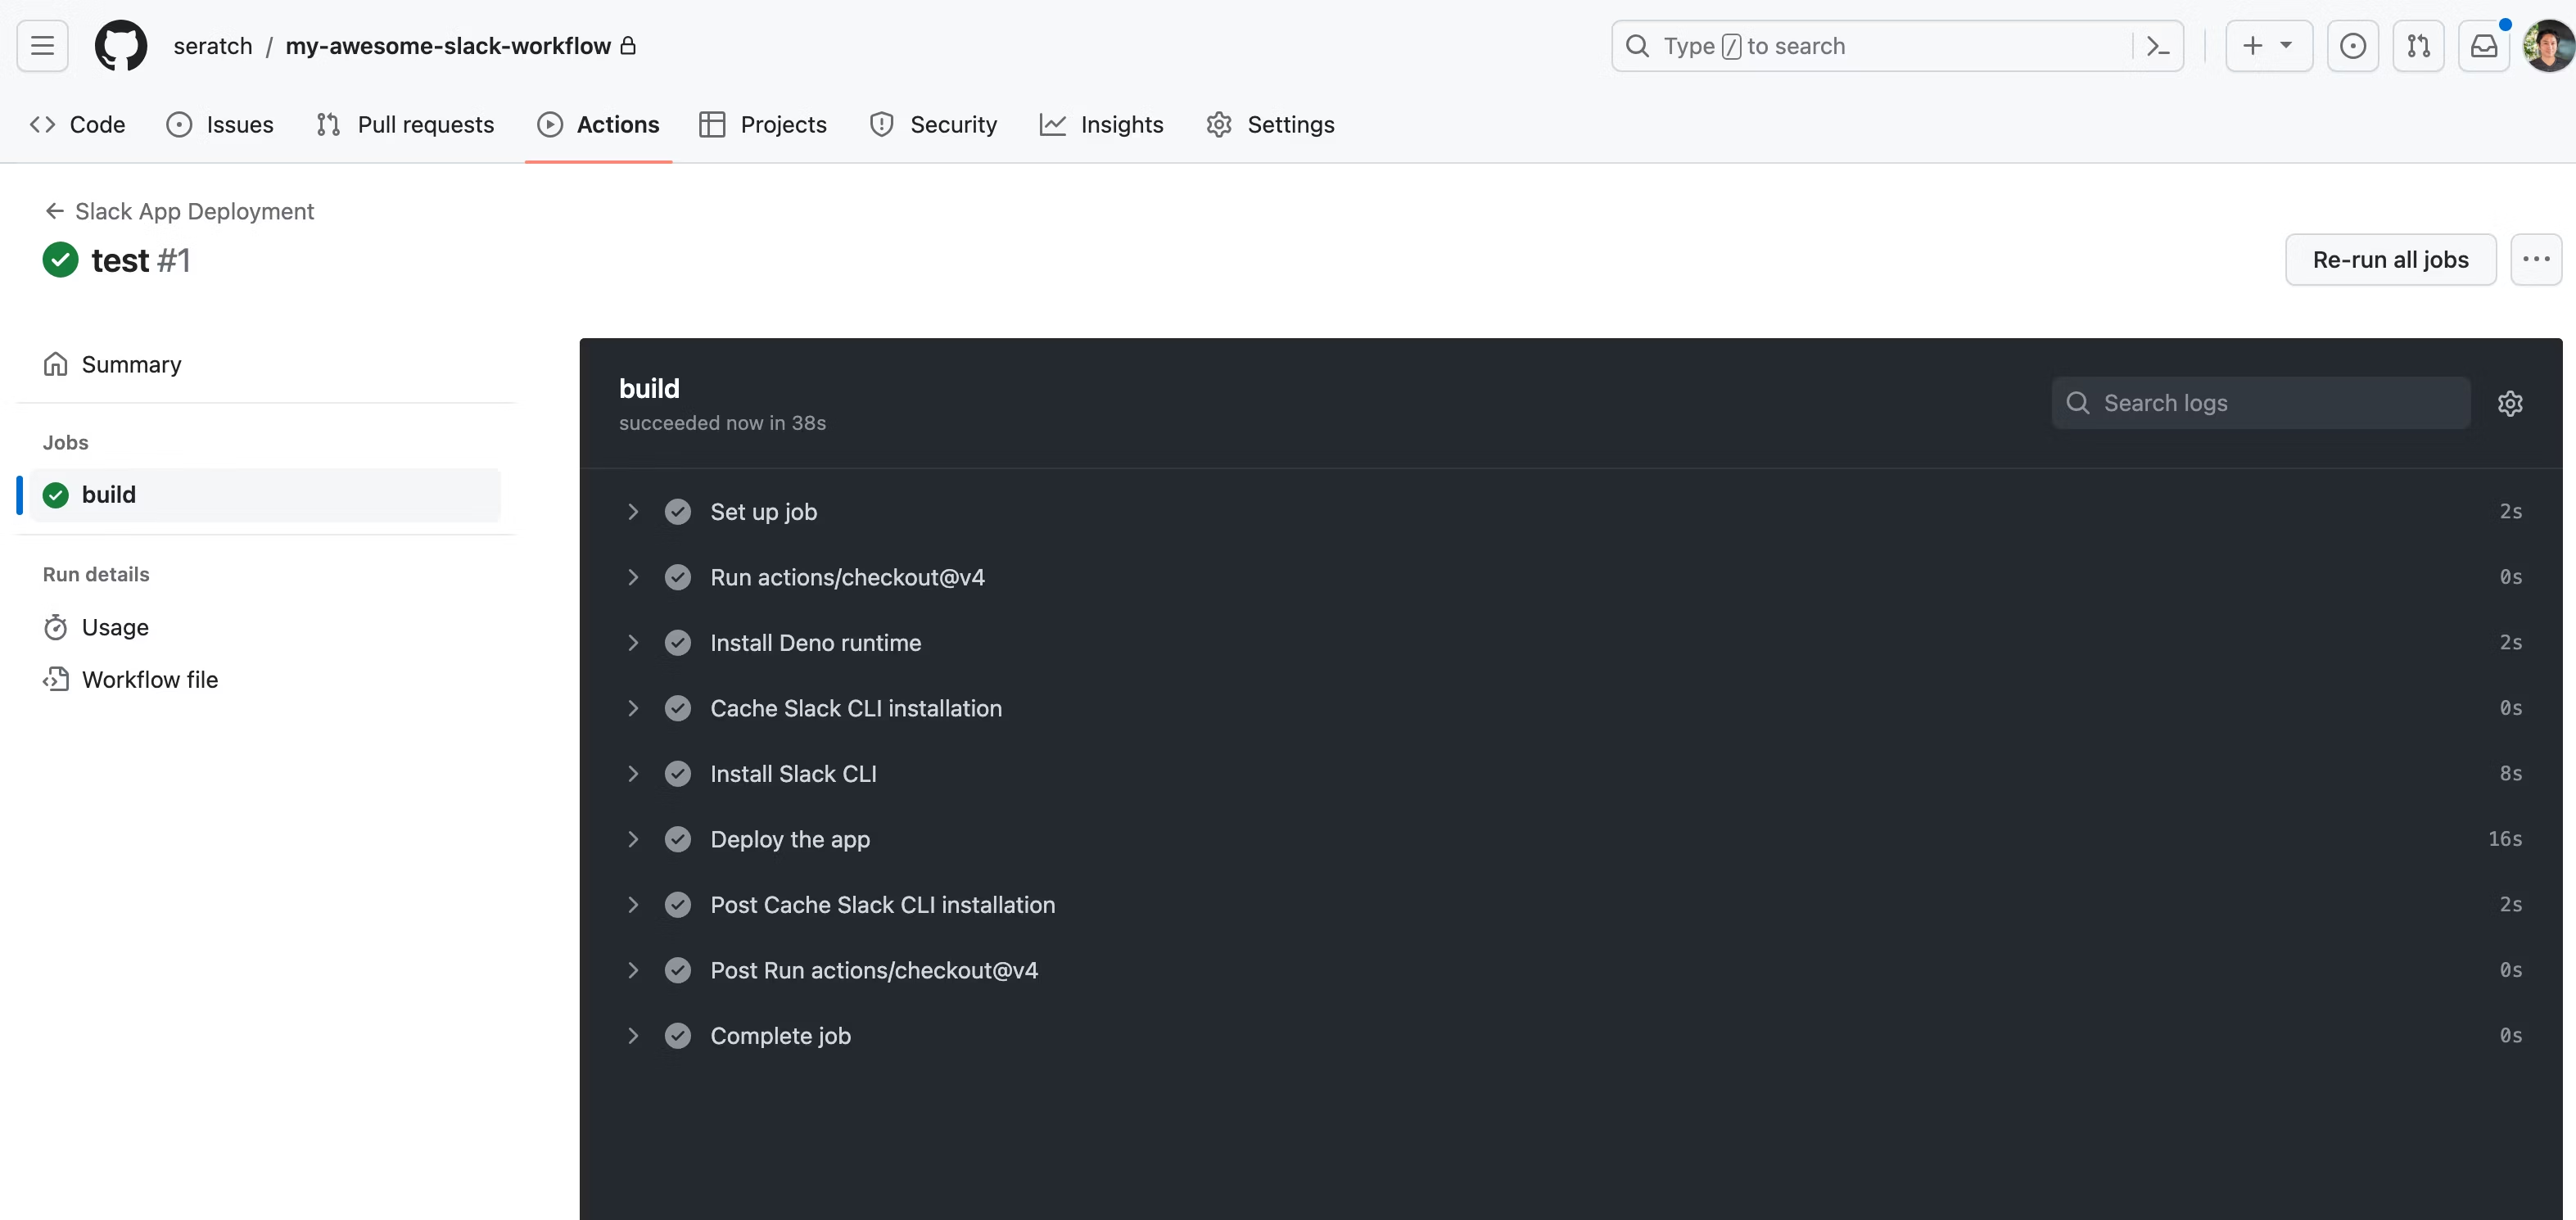
全て正しく設定されている場合は、GitHub Actions のジョブが以下のように正常に終了しているはずです。
正しく変更が反映されるかどうかを確かめるには gh-actions-demo 配下のコードの一部を変更して main ブランチに merge してみるとよいでしょう。
終わりに
いかがだったでしょうか?
サービストークンを取得して使用することと、初回のデプロイを手動で行って .slack/ ディレクトリ配下に設定ファイルをつくるところがポイントになるかなと思います。
このようにオートメーションプラットフォームのワークフローは、一般的なソフトウェア開発プロセスに乗せてチーム開発ができるようになっています。ぜひ便利なワークフローを作って、組織内で活用してみてください! ![]()