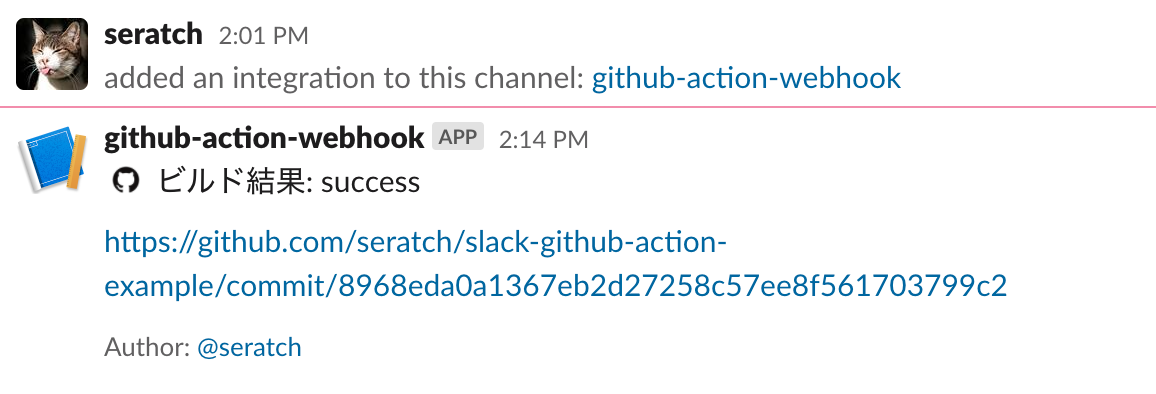
こんにちは、Slack で公式 SDK 開発と日本の DevRel を担当しております @seratch と申します。
この記事では、私もその一員である Slack の Developer Relations チームが開発・メンテナンスしている GitHub Action である "slack-send" の使い方を日本語で紹介していきます。
この GitHub Action には三つの使い方がありますので、それぞれ解説していきます。
- Incoming Webhooks で Slack に通知する
- chat.postMessage API で Slack に通知する
- ワークフロービルダーと連携する
Incoming Webhooks で Slack に通知する
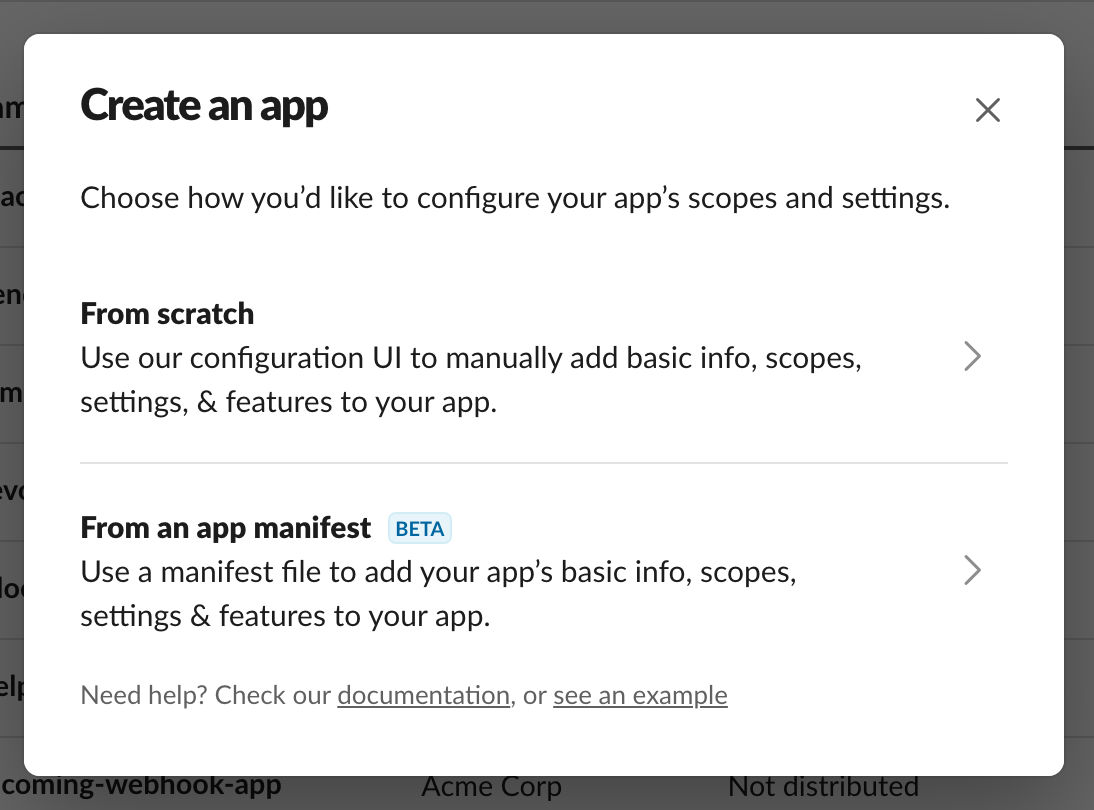
まず Slack アプリ設定の作成を行います。https://api.slack.com/apps?new_app=1 にアクセスし、From an app manifest を選択して、
ワークスペースを選択した後の App Manifest の設定画面で、以下の設定をコピペして貼り付けてください。
_metadata:
  major_version: 1
  minor_version: 1
display_information:
  name: github-action-webhook
features:
  bot_user:
    display_name: github-action-webhook
oauth_config:
  scopes:
    bot:
      - incoming-webhook
以下のようになります。
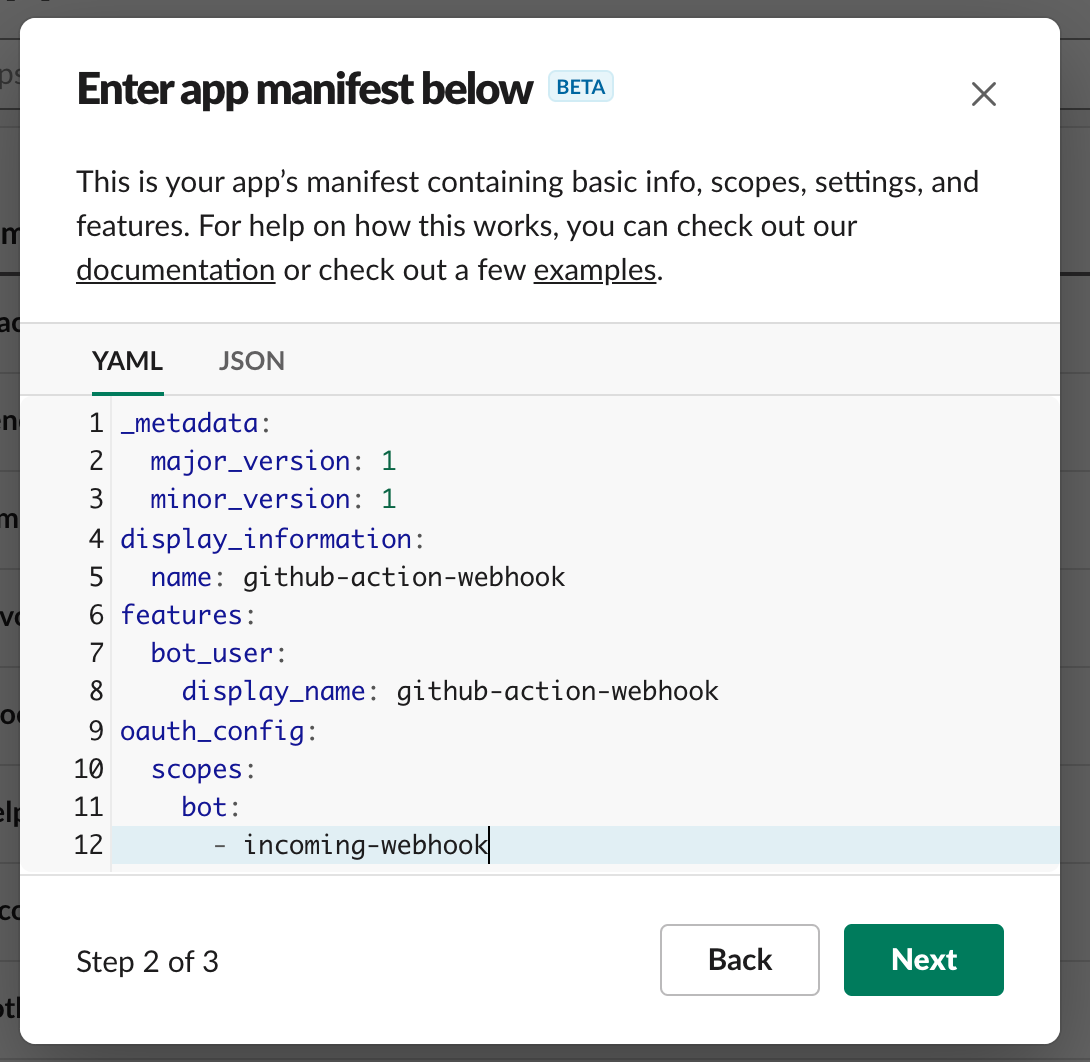
この状態でアプリを作ったら、そのまま Install to Workspace ボタンからインストールを実行してください。
確認画面でチャンネルを選ぶように促されますので、通知を送りたいチャンネルを選択してから Allow ボタンをクリックしてください。
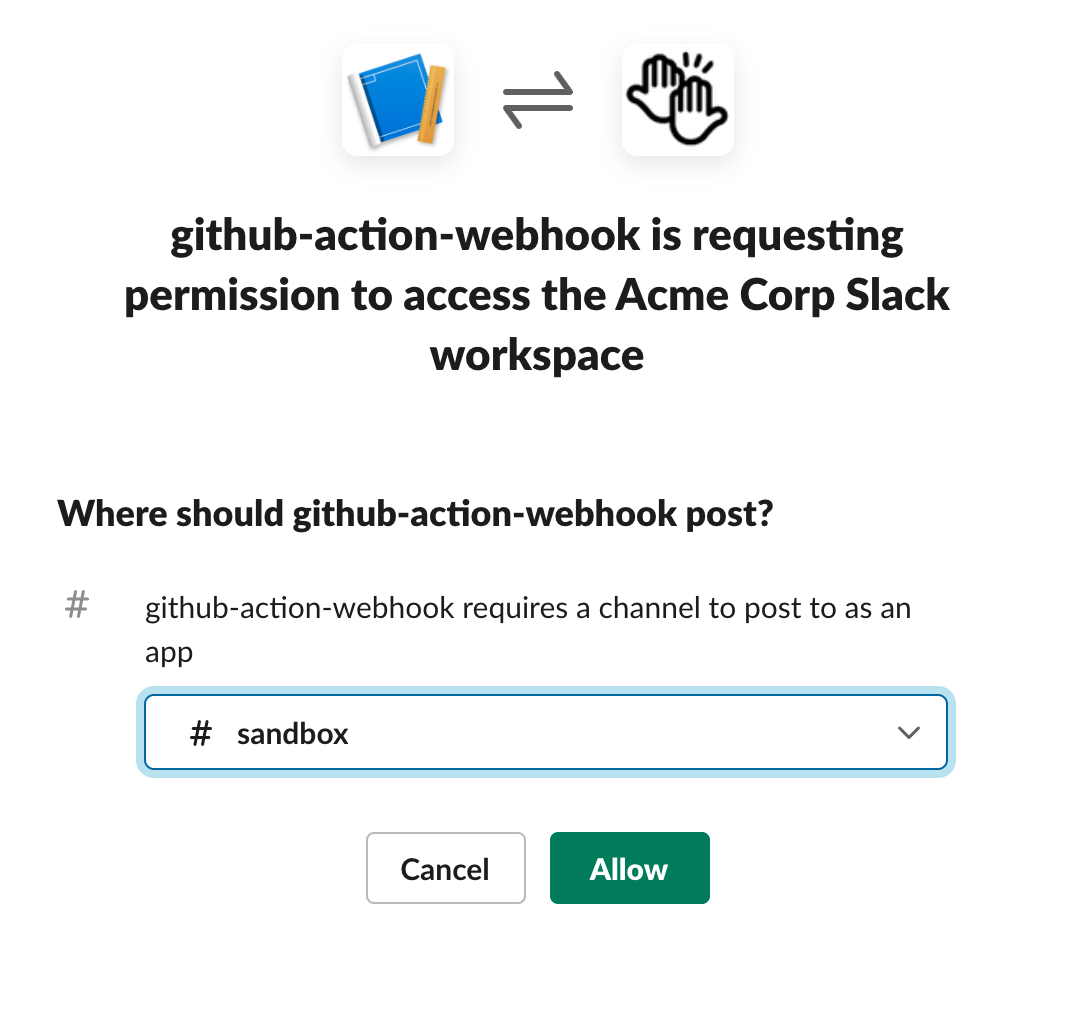
インストールが完了すると Bot User OAuth Token と Webhook URL が発行されていると思います。Incoming Webhooks だけを使う場合は OAuth Token の方は利用しません。
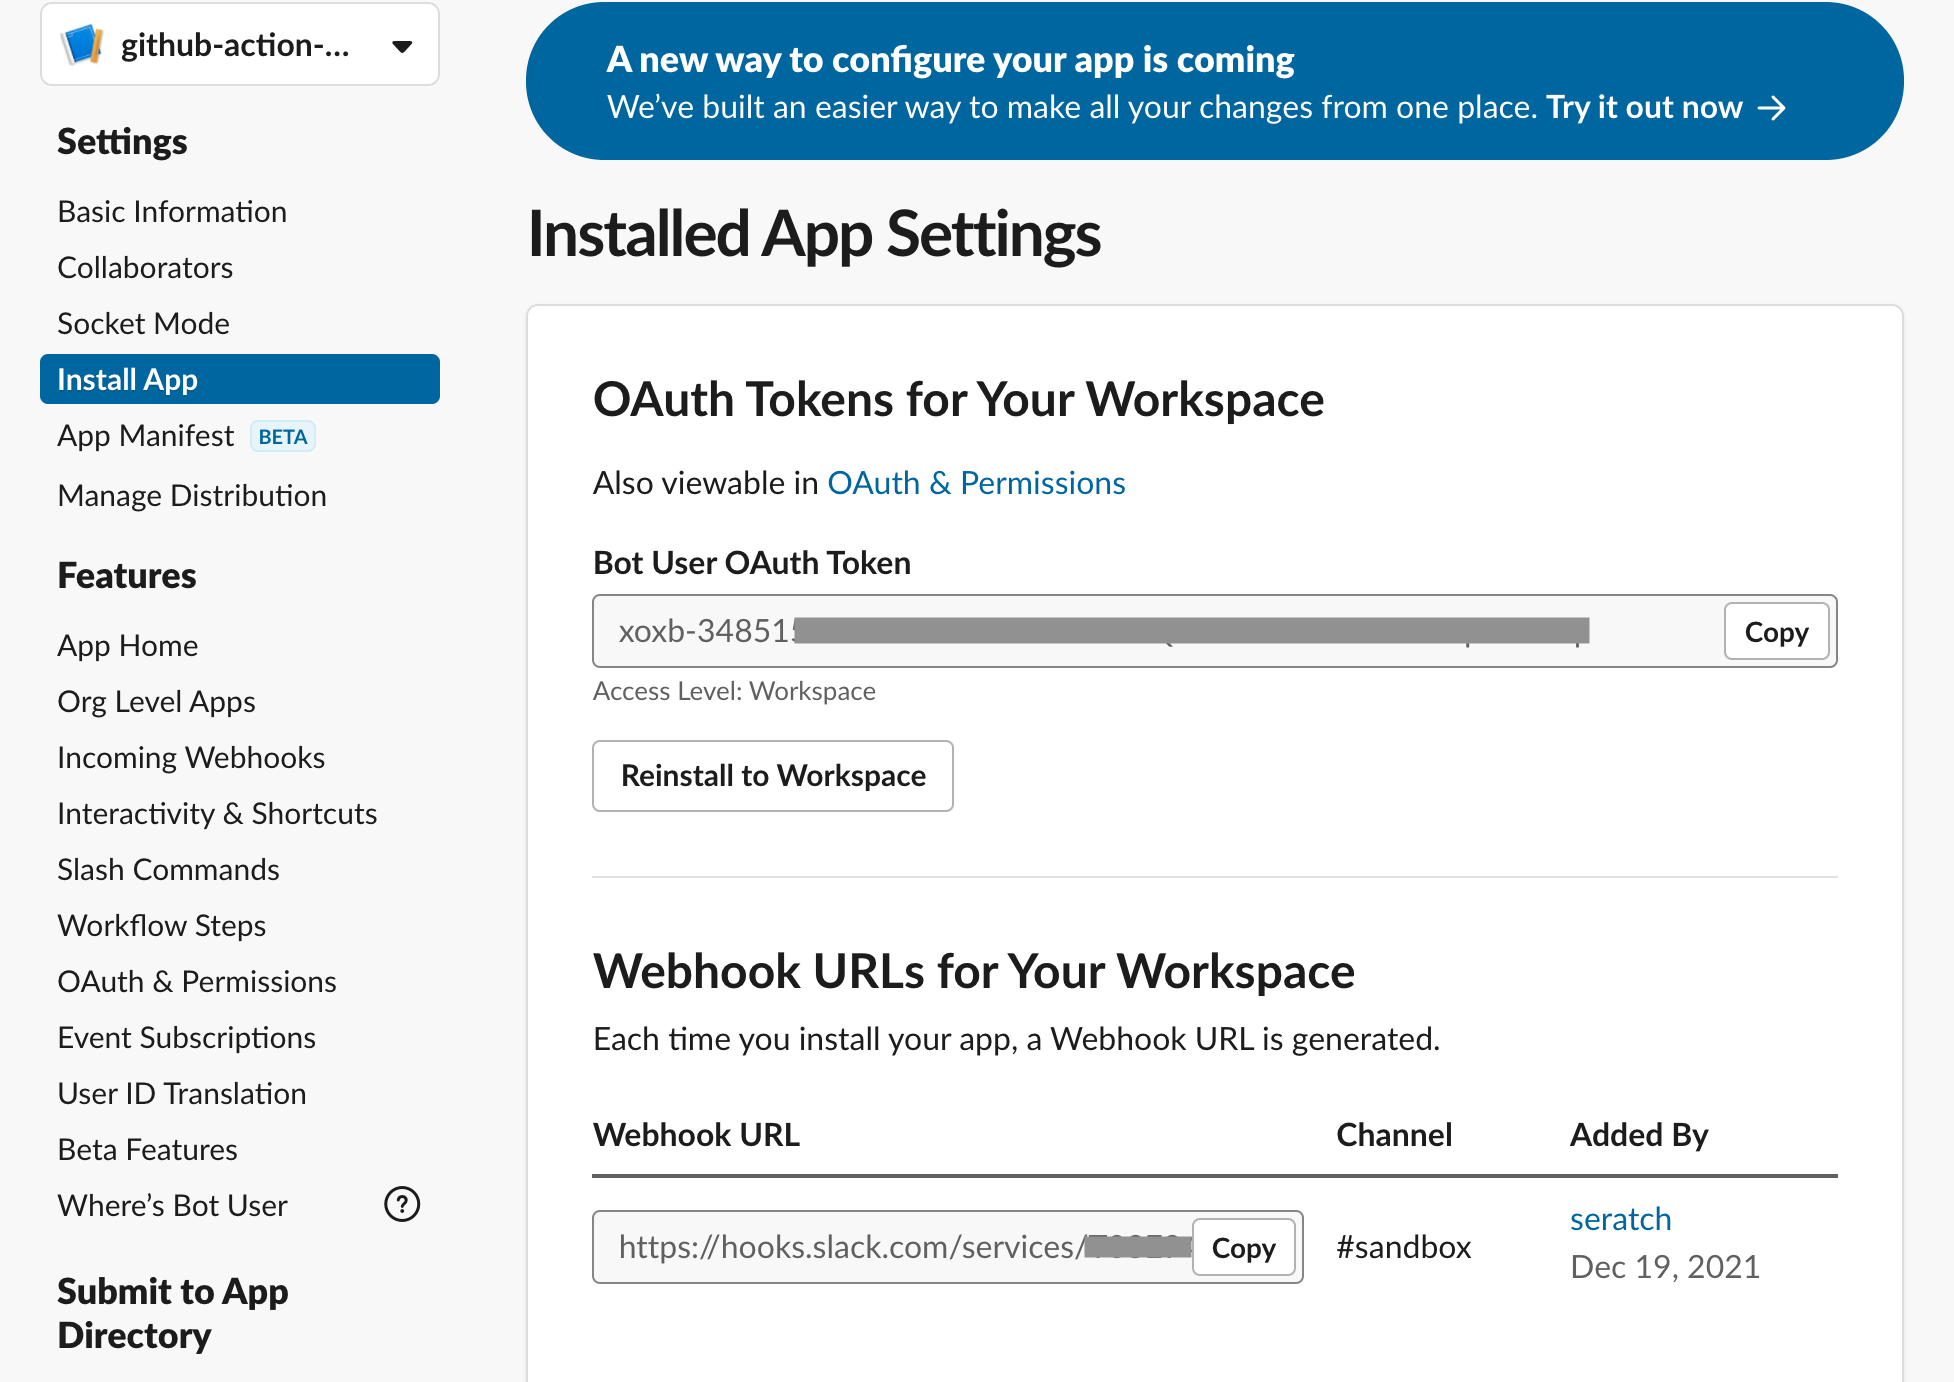
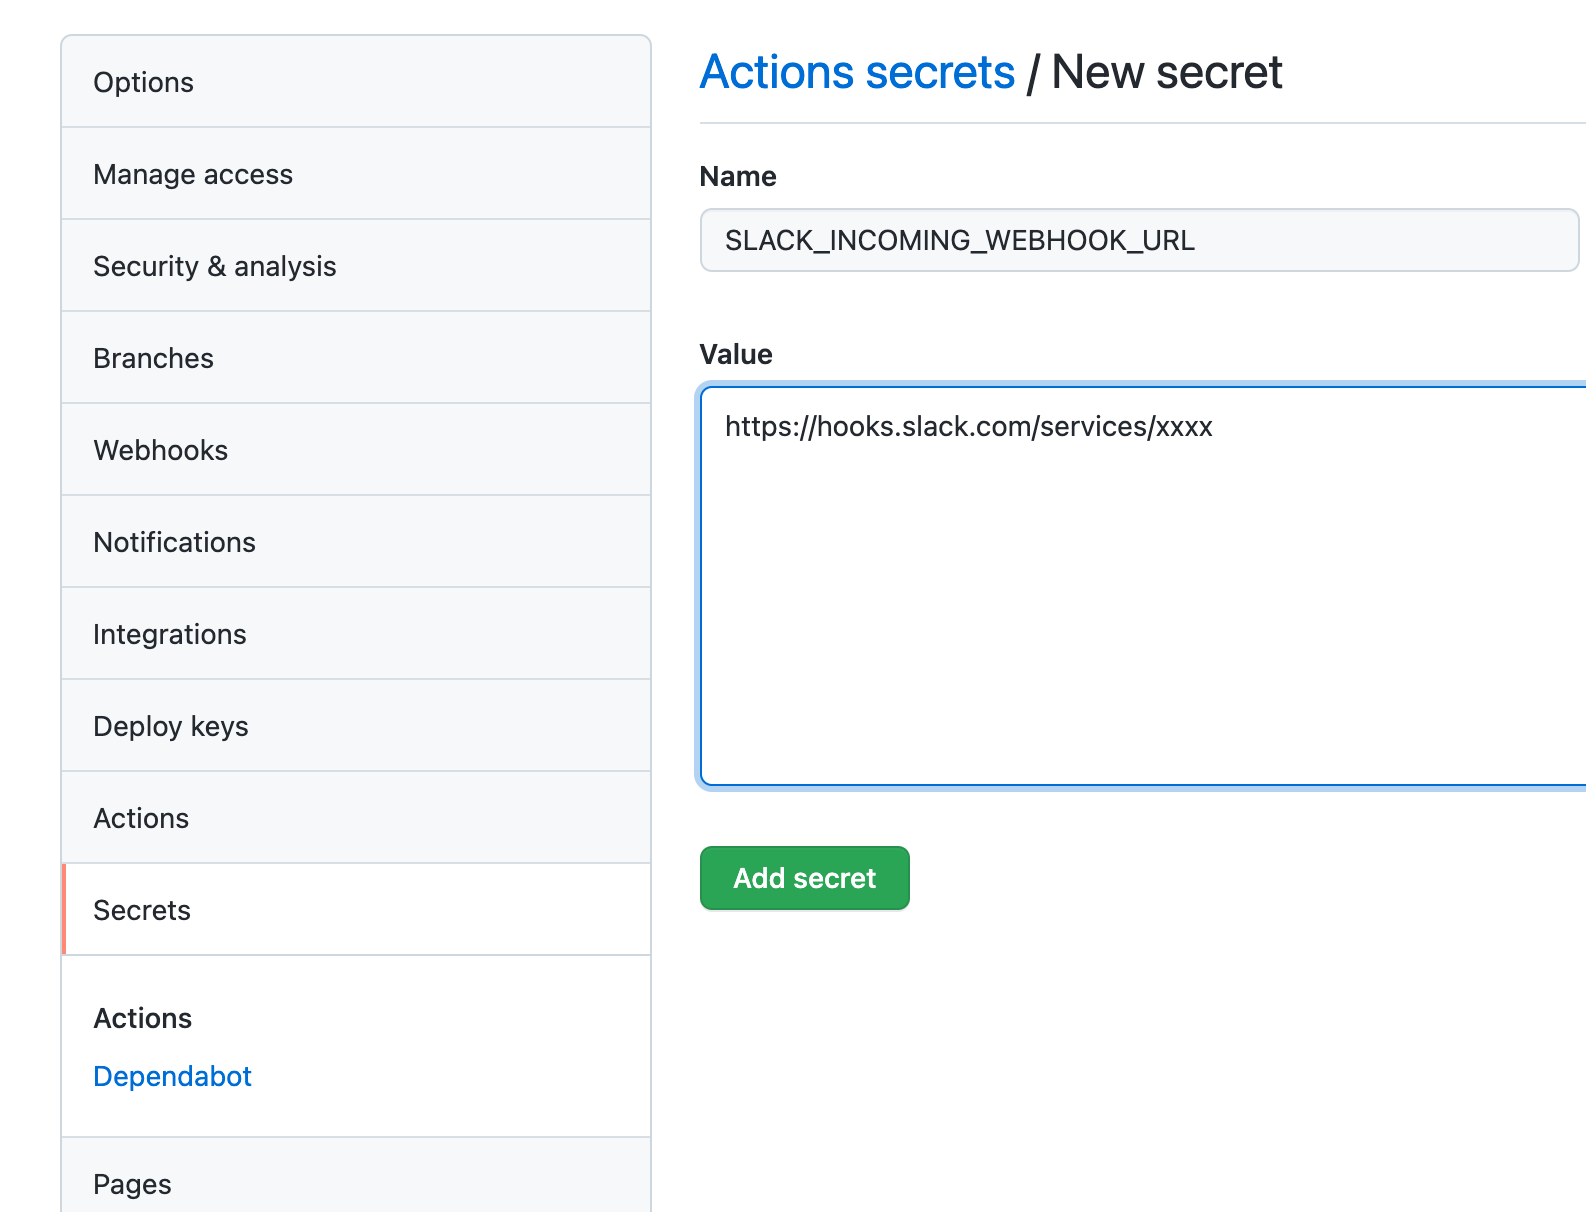
発行された Webhook URL をコピーして GitHub 側の Secrets 設定画面で SLACK_INCOMING_WEBHOOK_URL として設定してください。
最後に以下のような GitHub Action を .github/workflows/incoming-webhook.yml として保存します。なお、:github: は標準の絵文字ではありませんので、ご自身で設定されてください。
name: Slack Incoming Webhooks
on:
  push:
    branches: [ main ]
  pull_request:
jobs:
  build:
    runs-on: ubuntu-latest
    steps:
      # Check out theis repo
      - uses: actions/checkout@v2

      # Start a Slack workflow using a webhook trigger
      # https://github.com/slackapi/slack-github-action
      - name: Send GitHub Action trigger data to Slack workflow
        id: slack
        uses: slackapi/slack-github-action@v1.16.0
        with:
          payload: |
            {
              "text": ":github: ビルド結果: ${{ job.status }}\n\n${{ github.event.pull_request.html_url || github.event.head_commit.url }}",
              "blocks": [
                {
                  "type": "section",
                  "text": {
                    "type": "mrkdwn",
                    "text": ":github: ビルド結果: ${{ job.status }}\n\n${{ github.event.pull_request.html_url || github.event.head_commit.url }}"
                  }
                },
                {
                  "type": "context",
                  "elements": [
                    {
                      "type": "mrkdwn",
                      "text": "Author: <https://github.com/${{ github.event.sender.login }}|@${{ github.event.sender.login }}>"
                    }
                  ]
                }
              ]
            }
        env:
          SLACK_WEBHOOK_TYPE: INCOMING_WEBHOOK
          SLACK_WEBHOOK_URL: ${{ secrets.SLACK_INCOMING_WEBHOOK_URL }}
chat.postMessage API で Slack に通知する
Incoming Webhooks と同様、まず Slack アプリ設定の作成を行います。https://api.slack.com/apps?new_app=1 にアクセスし、From an app manifest を選択して、

ワークスペースを選択した後の App Manifest の設定画面で、以下の設定をコピペして貼り付けてください。
_metadata:
  major_version: 1
  minor_version: 1
display_information:
  name: github-action-api-call
features:
  bot_user:
    display_name: github-action-api-call
oauth_config:
  scopes:
    bot:
      - chat:write
      # 以下は public channel に bot を追加しなくても投稿できる権限ですが
      # 不要の場合 chat:write だけを設定してください
      - chat:write.public
アプリを作ったらそのまま Install to Workspace ボタンからインストールしてください。インストールすると Settings > Install App のページに xoxb- から始まる Bot User OAuth Token が表示されているはずですので、これをコピーします。
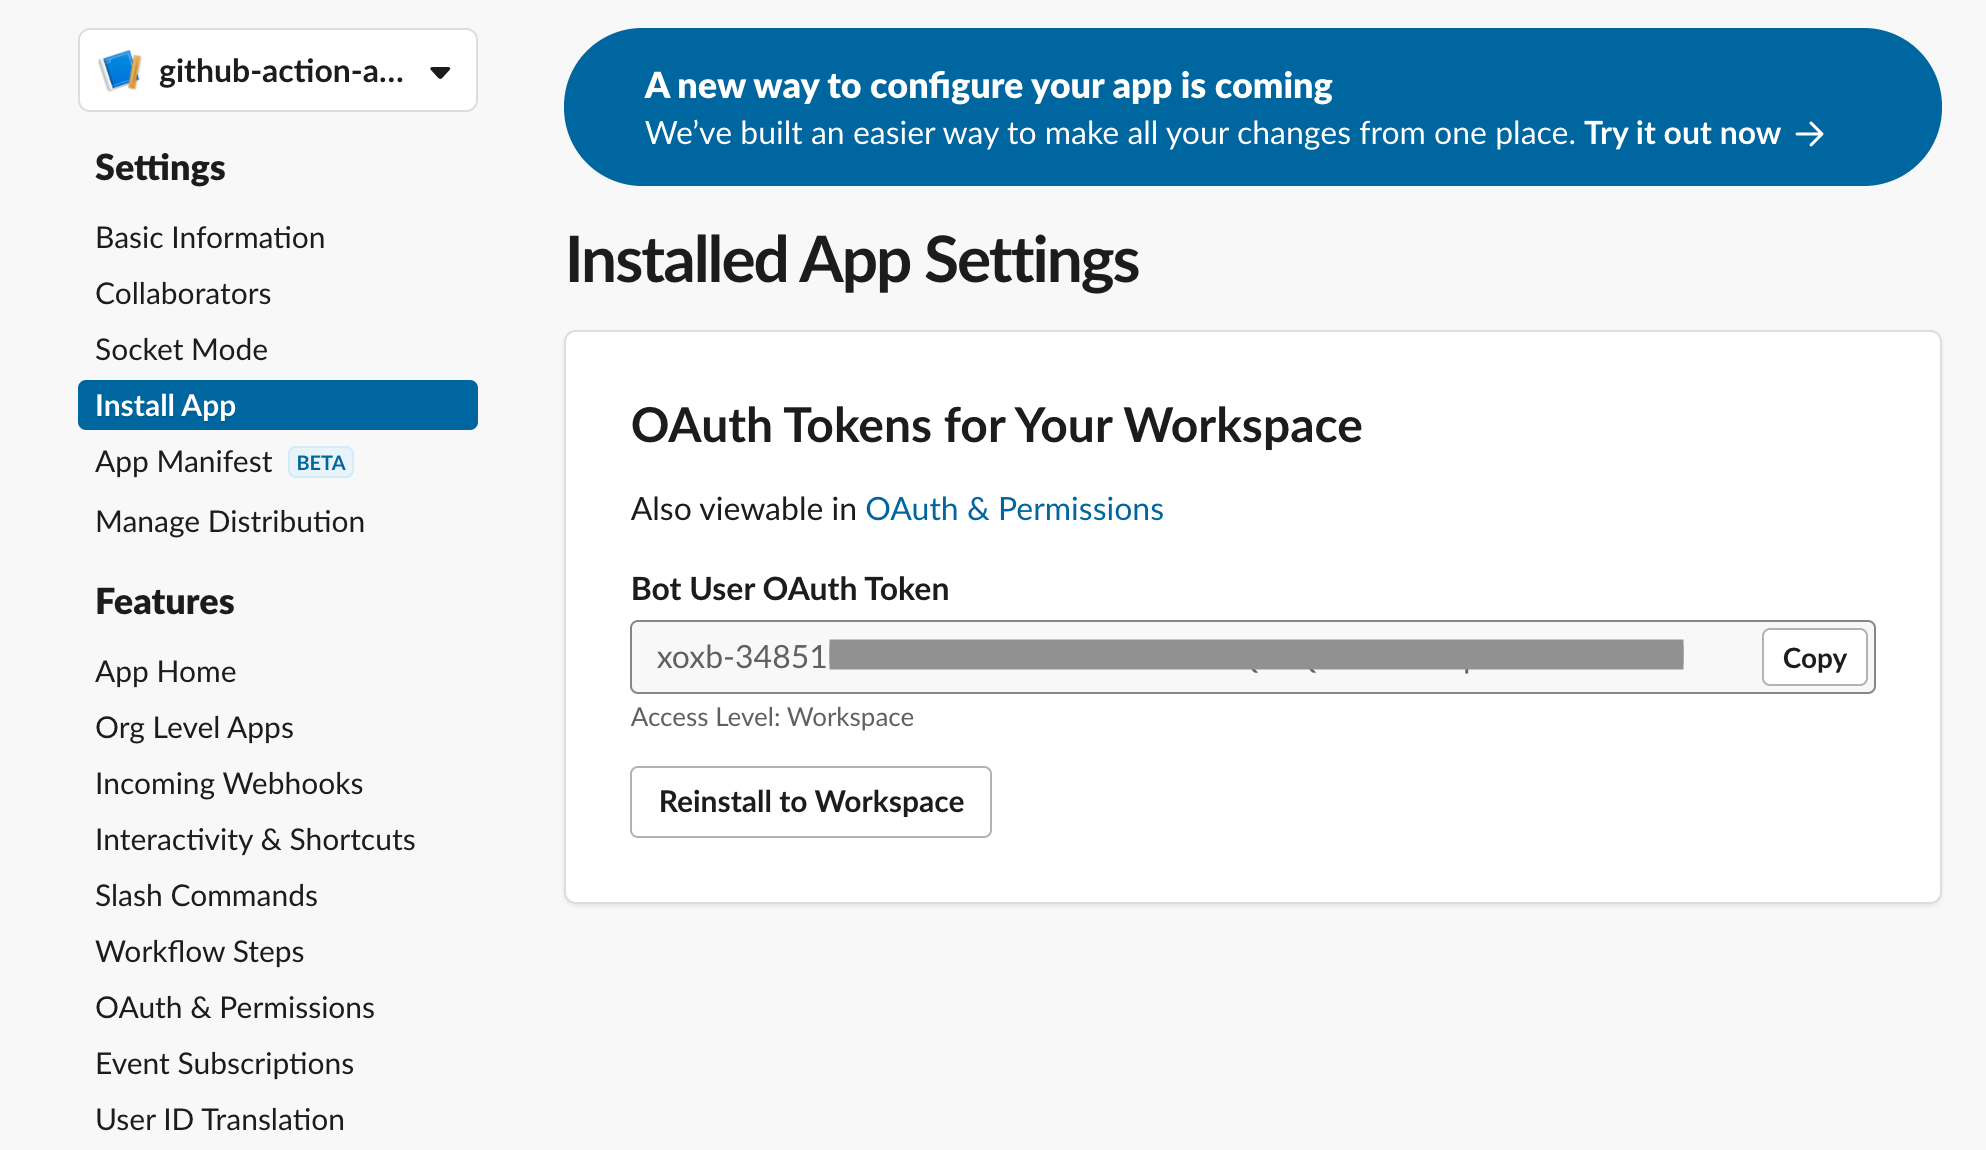
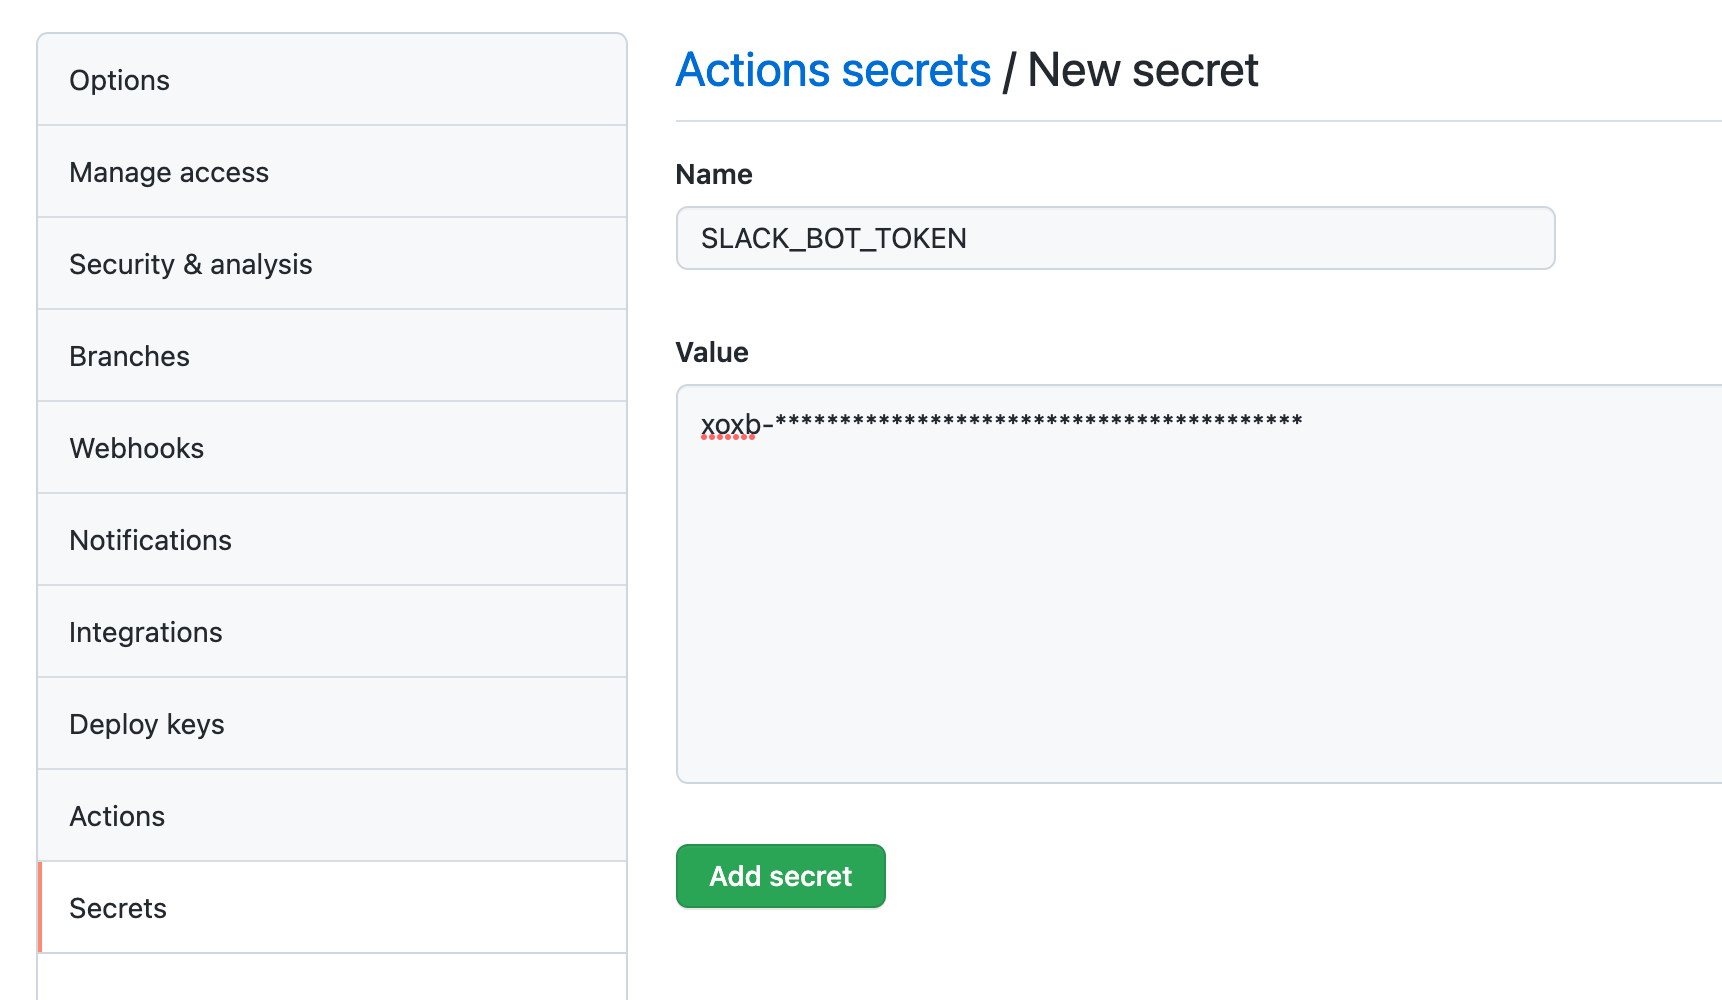
これを GitHub リポジトリの Secrets の設定ページで SLACK_BOT_TOKEN として設定します。
それでは GitHub Action を追加しましょう。以下の内容を .github/workflows/post-message.yml として保存します。なお、:github: は標準の絵文字ではありませんので、ご自身で設定されてください。
name: Slack chat.postMessage
on:
  push:
    branches: [ main ]
  pull_request:
jobs:
  build:
    runs-on: ubuntu-latest
    steps:
      # Check out theis repo
      - uses: actions/checkout@v2

      # Start a Slack workflow using a webhook trigger
      # https://github.com/slackapi/slack-github-action
      - name: Send GitHub Action trigger data to Slack workflow
        id: slack
        uses: slackapi/slack-github-action@v1.16.0
        with:
          # 以下のように #チャンネル名も動作はしますが
          # チャンネル名が変更されると動かなくなるので
          # 実運用では C1QAUTY0M のような ID を使ってください
          channel-id: '#sandbox'
          payload: |
            {
              "text": ":github: ビルド結果: ${{ job.status }}\n\n${{ github.event.pull_request.html_url || github.event.head_commit.url }}",
              "blocks": [
                {
                  "type": "section",
                  "text": {
                    "type": "mrkdwn",
                    "text": ":github: ビルド結果: ${{ job.status }}\n\n${{ github.event.pull_request.html_url || github.event.head_commit.url }}"
                  }
                },
                {
                  "type": "context",
                  "elements": [
                    {
                      "type": "mrkdwn",
                      "text": "Author: <https://github.com/${{ github.event.sender.login }}|@${{ github.event.sender.login }}>"
                    }
                  ]
                }
              ]
            }
        env:
          SLACK_BOT_TOKEN: ${{ secrets.SLACK_BOT_TOKEN }}
なお、chat:write.public scope を設定しない場合は、通知先のチャンネルにこのアプリの bot user を追加する必要がありますので、お忘れなく。
ワークフロービルダーと連携する
ワークフロービルダーはコーディングなしで Slack 内での自動化されたワークフローを作成するためのノーコード・ローコードツールです。全ての Slack 有料プランで利用可能です。
このワークフロービルダーで作成したワークフローと GitHub Action を連携させてみましょう。
なお、上の二つの手順では https://api.slack.com/apps にアプリ設定を作って、ワークスペースにインストールしましたが、ここから先の手順を試す場合はそれは不要です。有料プランのワークスペースの Tools > Workflow Builder を開いてそこで設定をするだけです。
まず、ワークフローのトリガーで Webhook を選択してください。
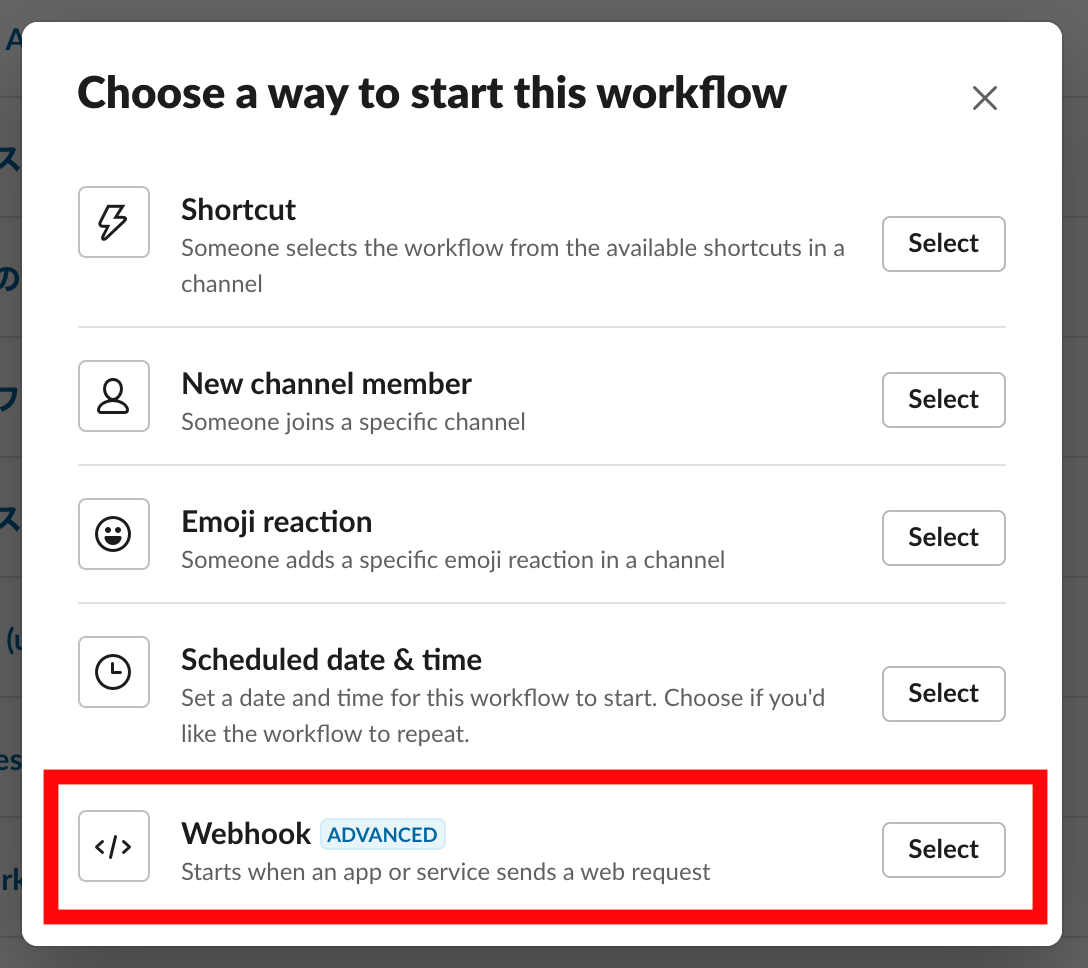
まずは適当に "foo" というキーで値を受け取れているかテストしてみましょう。
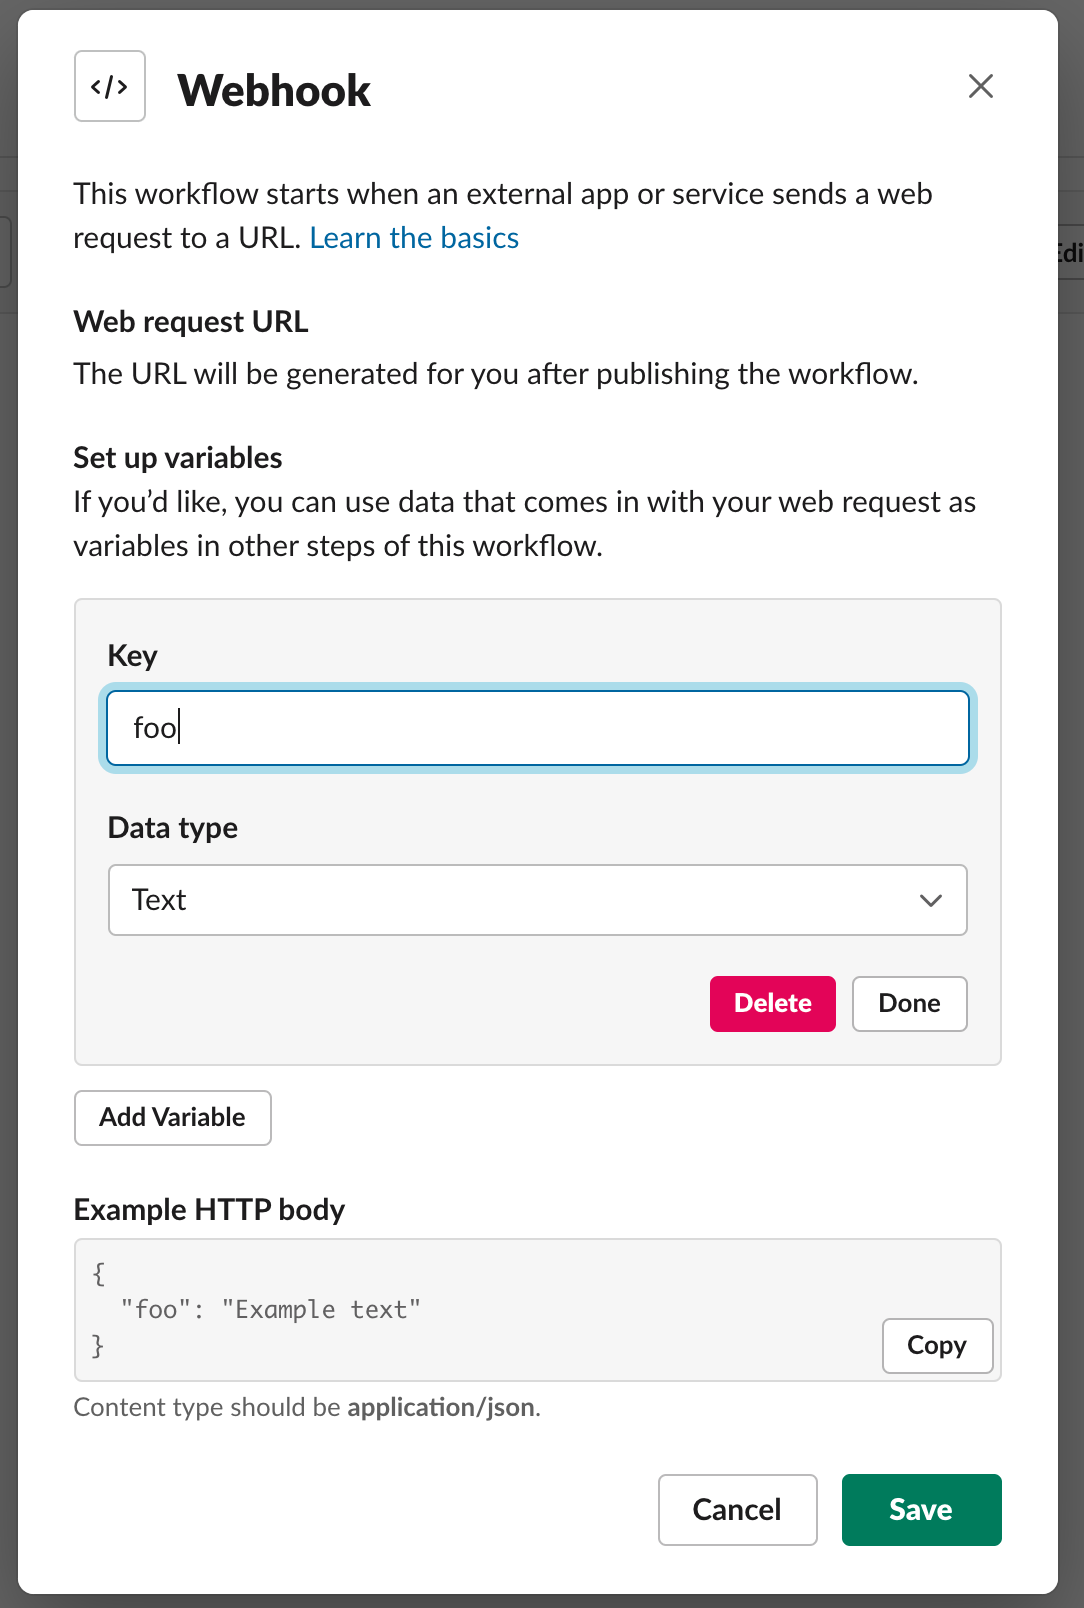
次にテスト用のチャンネルにメッセージを投稿するステップを追加します。
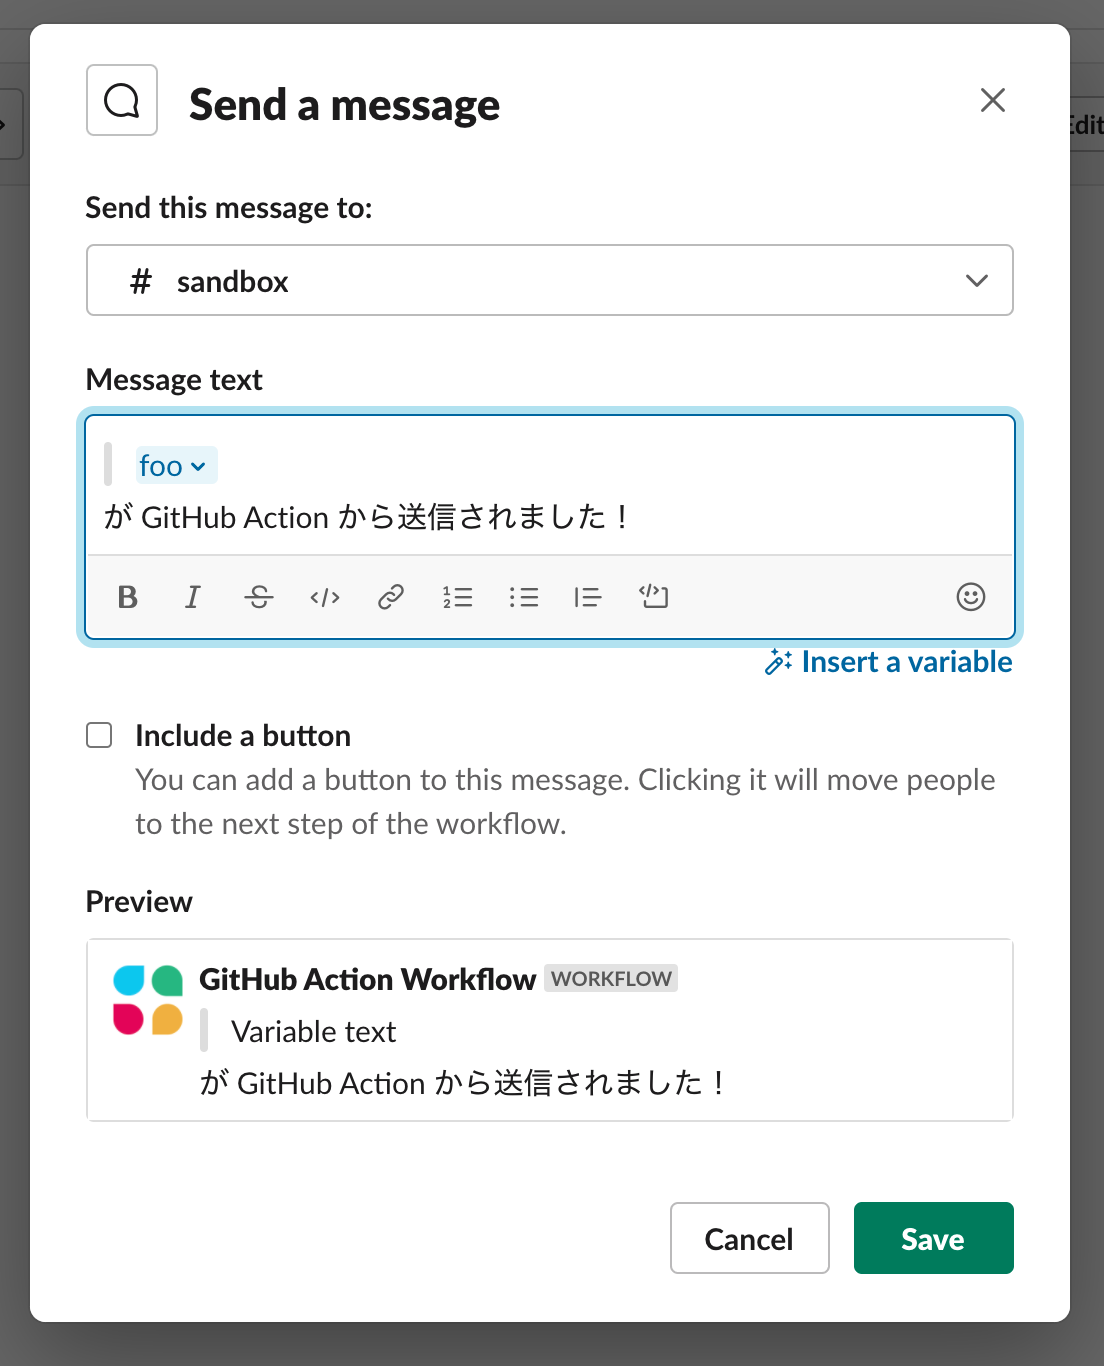
以下のようなトリガーとステップがあるだけのシンプルなワークフローができました。これを publish しましょう。
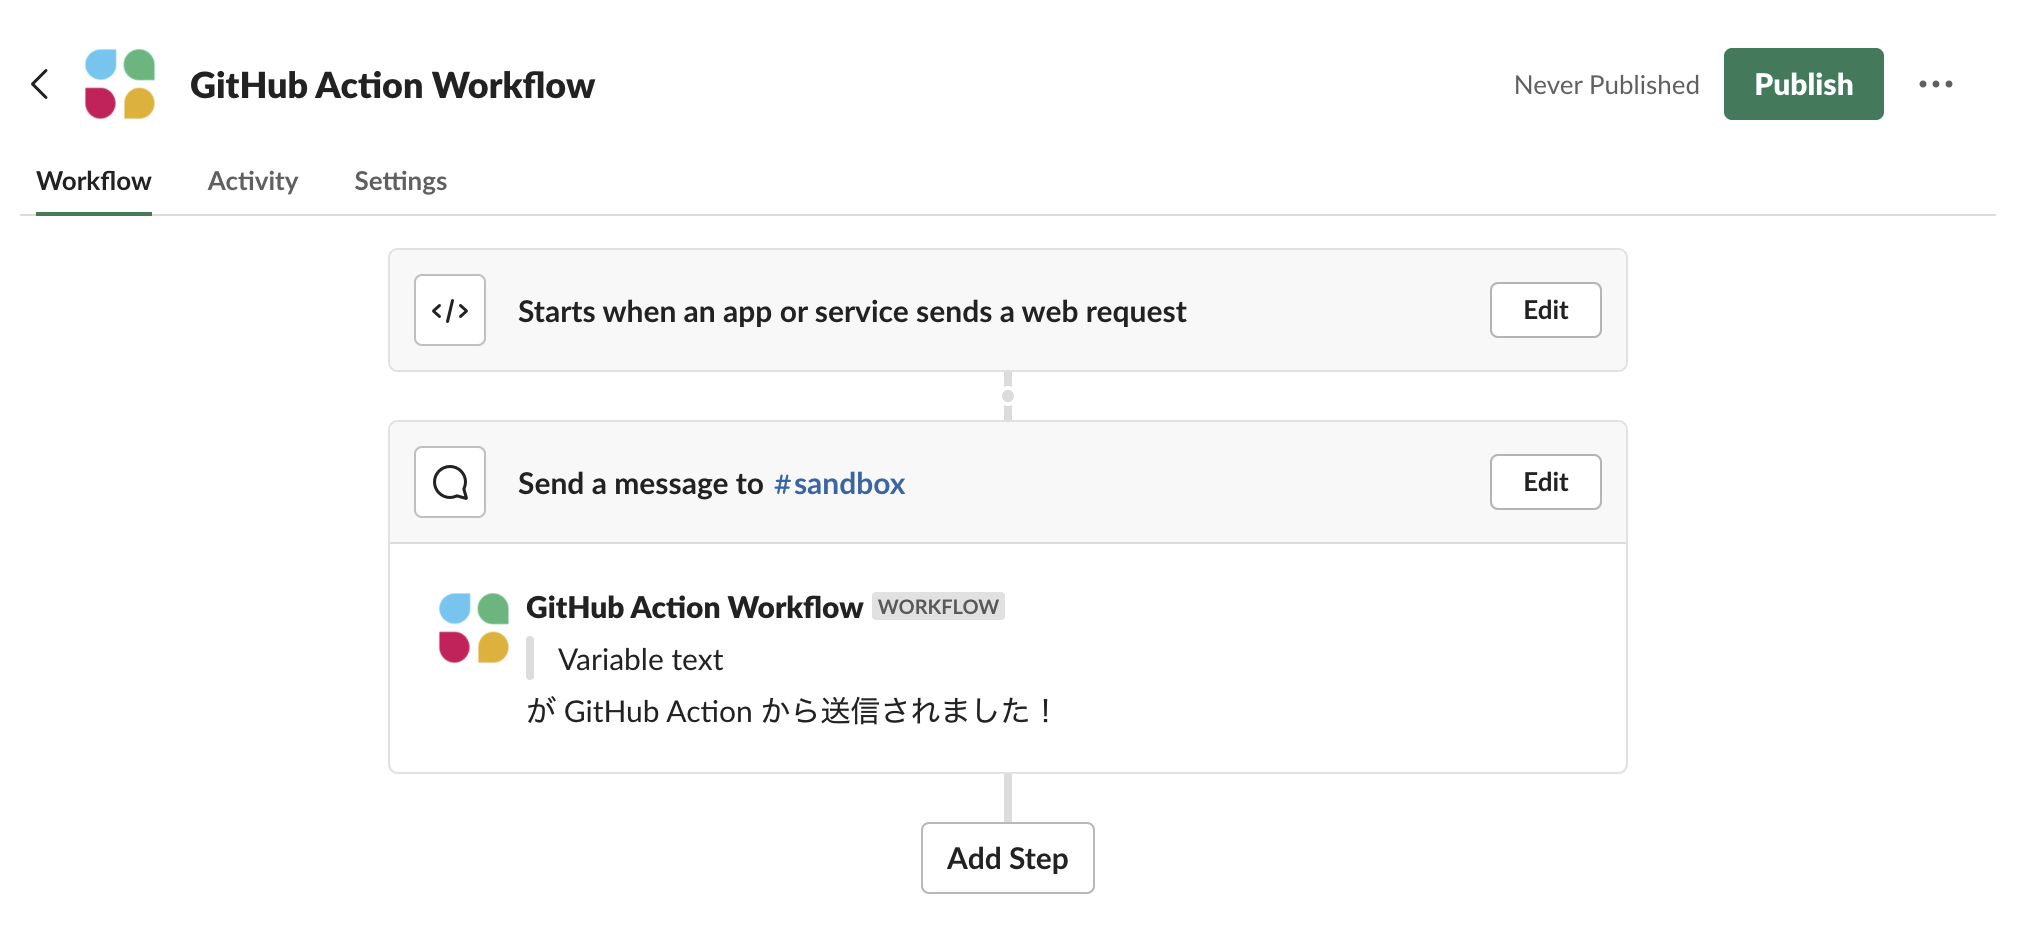
ワークフローを publish すると Webhook の URL が払い出されますので、これをコピーします。
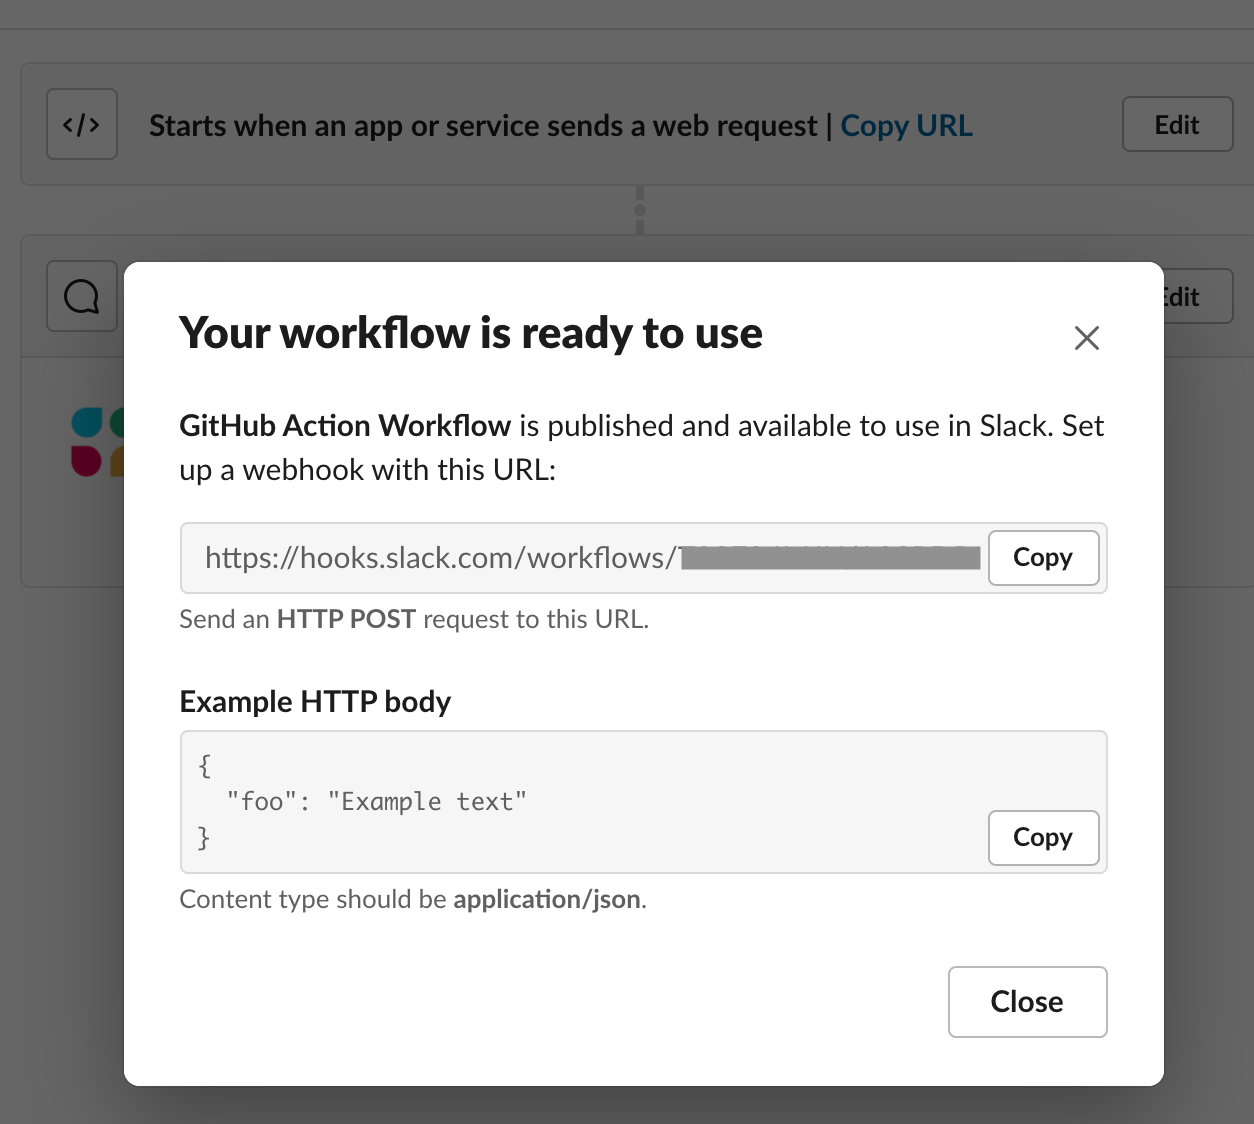
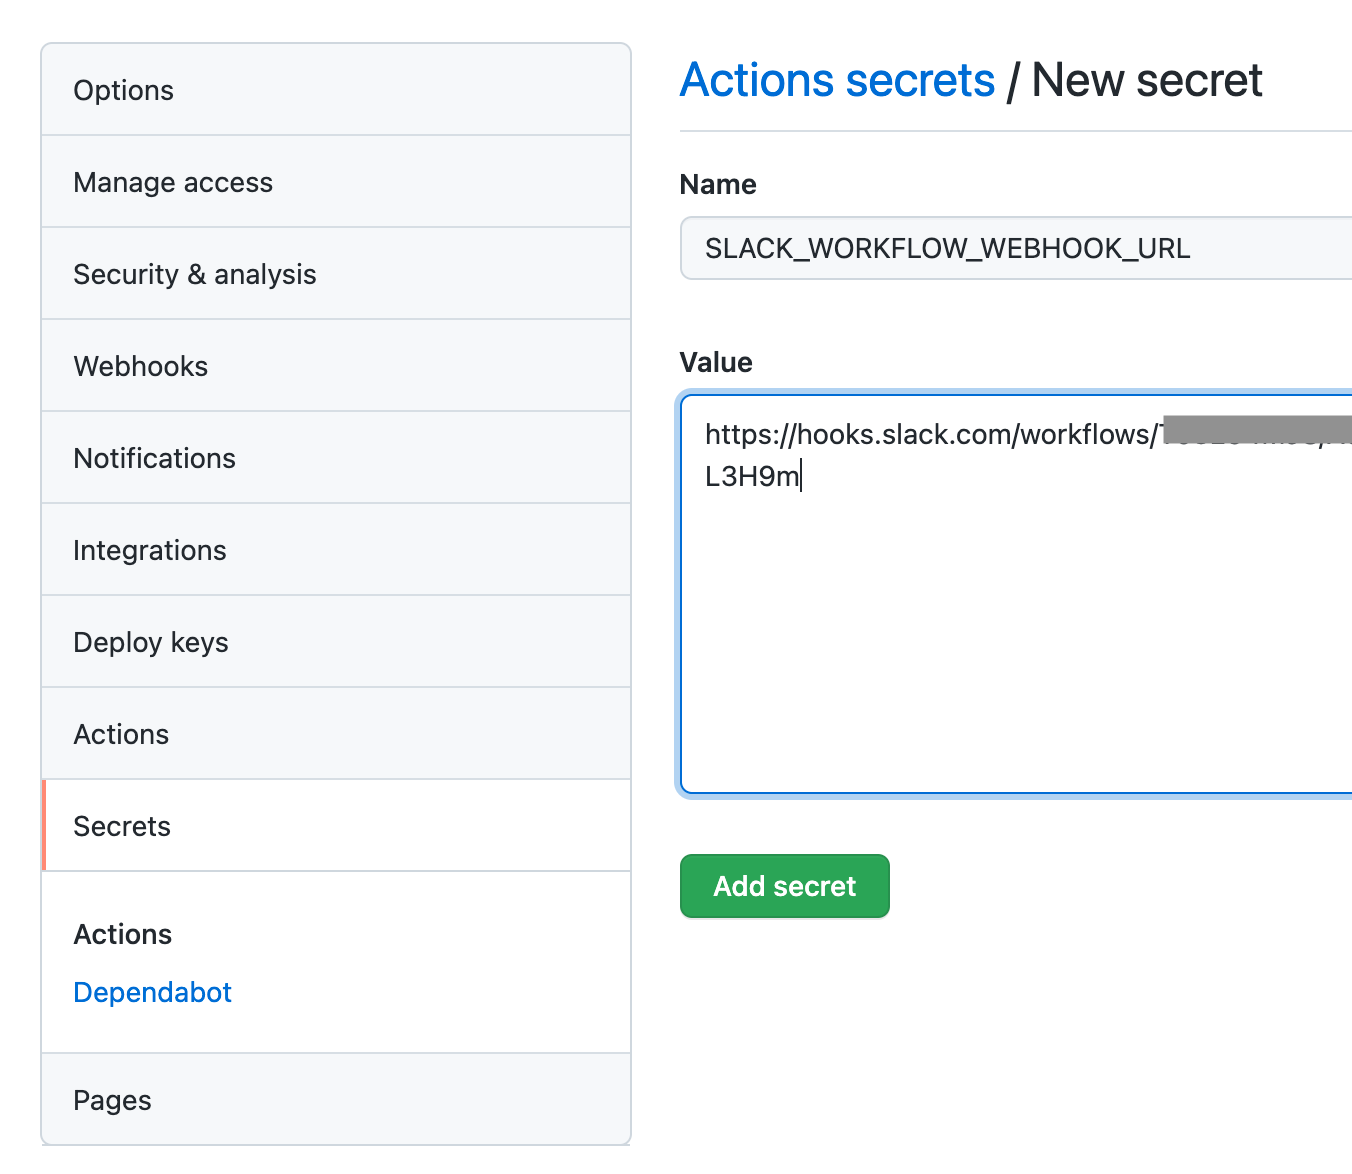
次に GitHub のリポジトリの設定画面の Secrets タブに移動して、そこで SLACK_WORKFLOW_WEBHOOK_URL としてその URL を設定します。
それではいよいよ GitHub Actions を設定してみましょう。とりあえずは以下の設定を .github/workflows/slack-workflow.yml として commit してみてください。
name: Slack Workflow
on:
  push:
    branches: [ main ]
  pull_request:
jobs:
  build:
    runs-on: ubuntu-latest
    steps:
      # Check out theis repo
      - uses: actions/checkout@v2

      # Start a Slack workflow using a webhook trigger
      # https://github.com/slackapi/slack-github-action
      - name: Send GitHub Action trigger data to Slack workflow
        id: slack
        uses: slackapi/slack-github-action@v1.16.0
        with:
          payload: |
            {
              "foo": "bar"
            }
        env:
          SLACK_WEBHOOK_URL: ${{ secrets.SLACK_WORKFLOW_WEBHOOK_URL }}
設定が正しくできていれば以下のメッセージが投稿されるはずです。
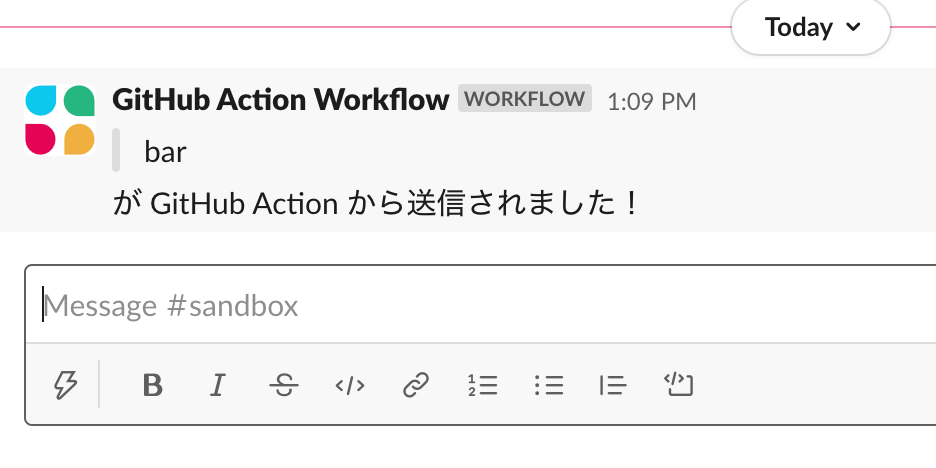
次にもう少し現実的に使えそうな値を渡すようにしてみましょう。以下のように GitHub Action 内で、いくつかの GitHub 標準の変数を取得して JSON に埋め込んでみましょう。
      # Start a Slack workflow using a webhook trigger
      # https://github.com/slackapi/slack-github-action
      - name: Send GitHub Action trigger data to Slack workflow
        id: slack
        uses: slackapi/slack-github-action@v1.16.0
        with:
          payload: |
            {
              "author": "${{ github.event.sender.login }}",
              "url": "${{ github.event.pull_request.html_url || github.event.head_commit.url }}",
              "repo_name": "${{ github.event.repository.full_name }}",
              "status": "${{ job.status }}"
            }
        env:
          SLACK_WEBHOOK_URL: ${{ secrets.SLACK_WORKFLOW_WEBHOOK_URL }}
Slack で先ほど作ったワークフロー側を少し手直しします。まず、トリガーで新しい変数 4 つを受け取るよう設定を変更して保存します。
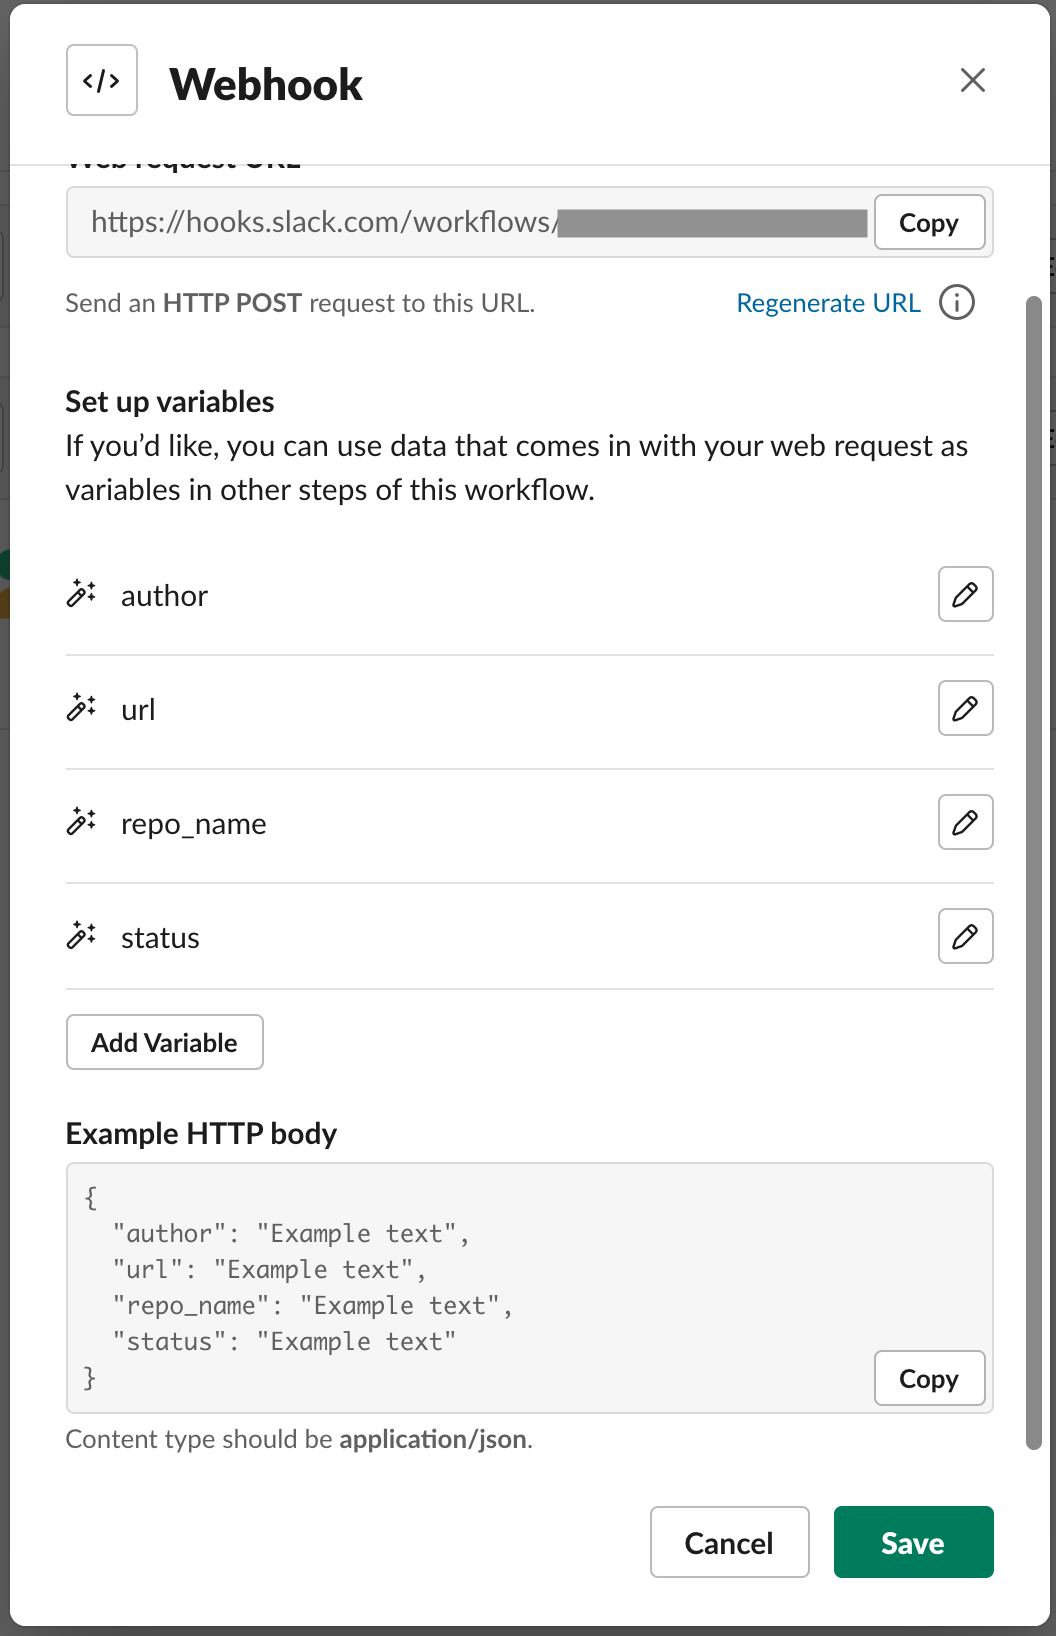
そして、後続のステップで送信しているメッセージもこのように編集してみましょう。
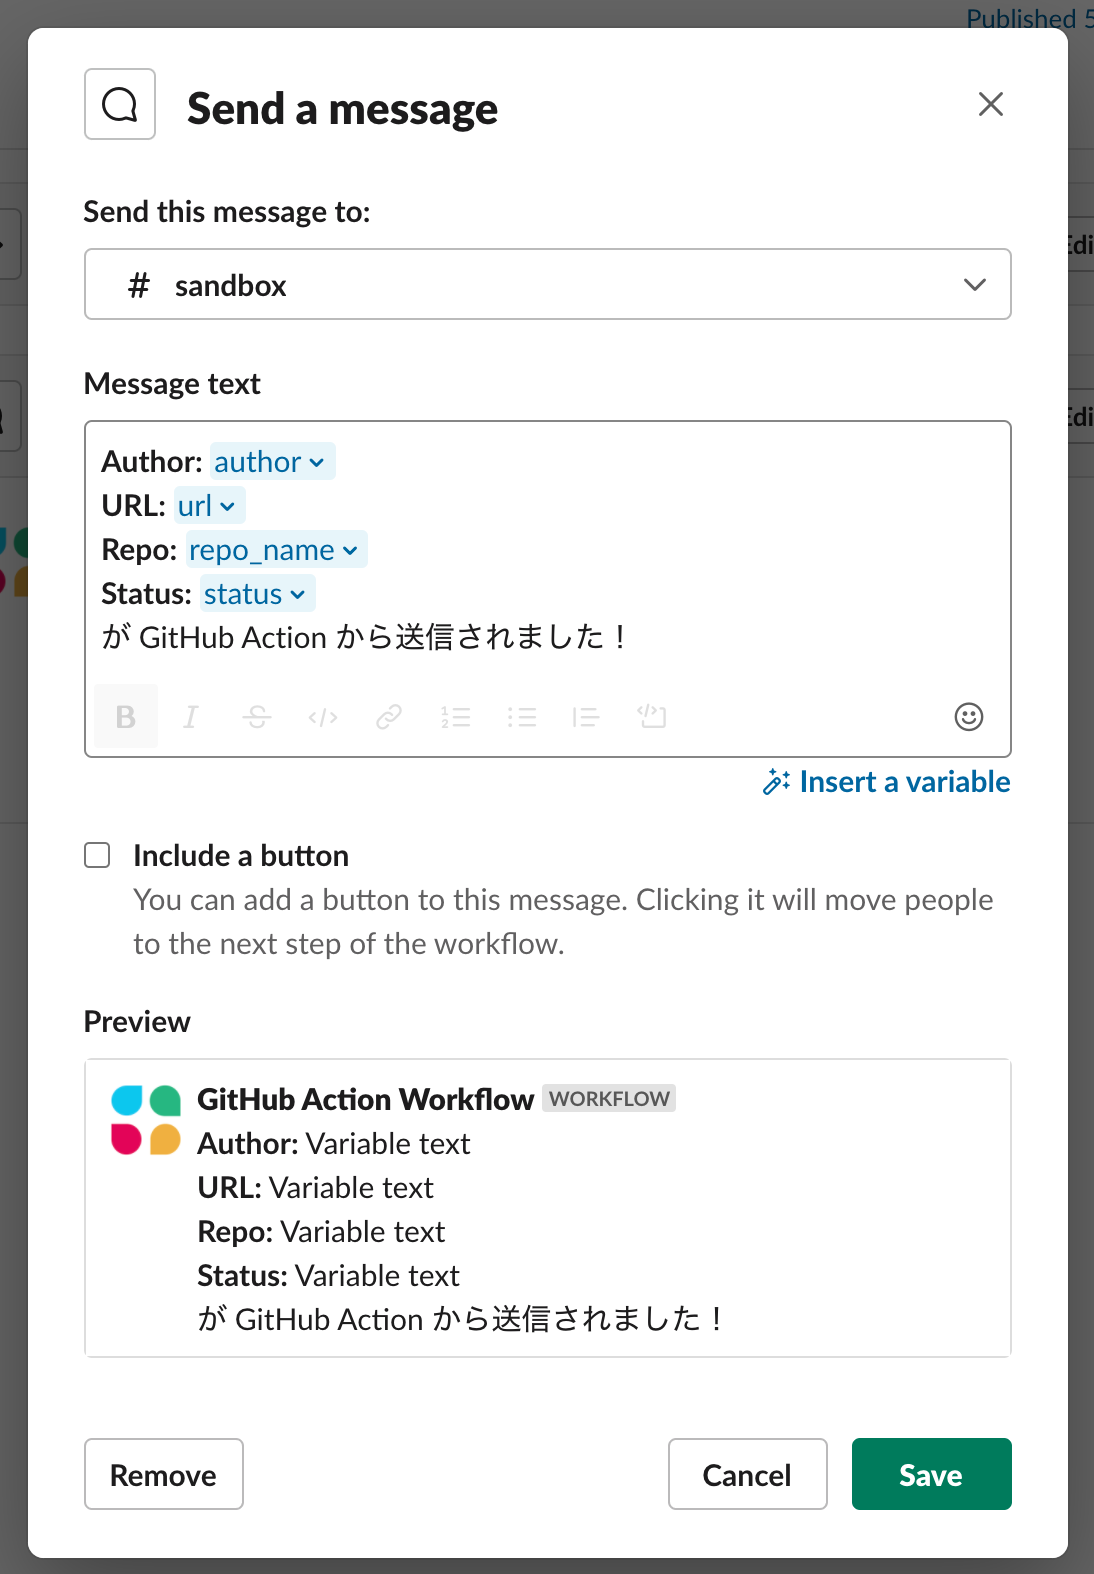
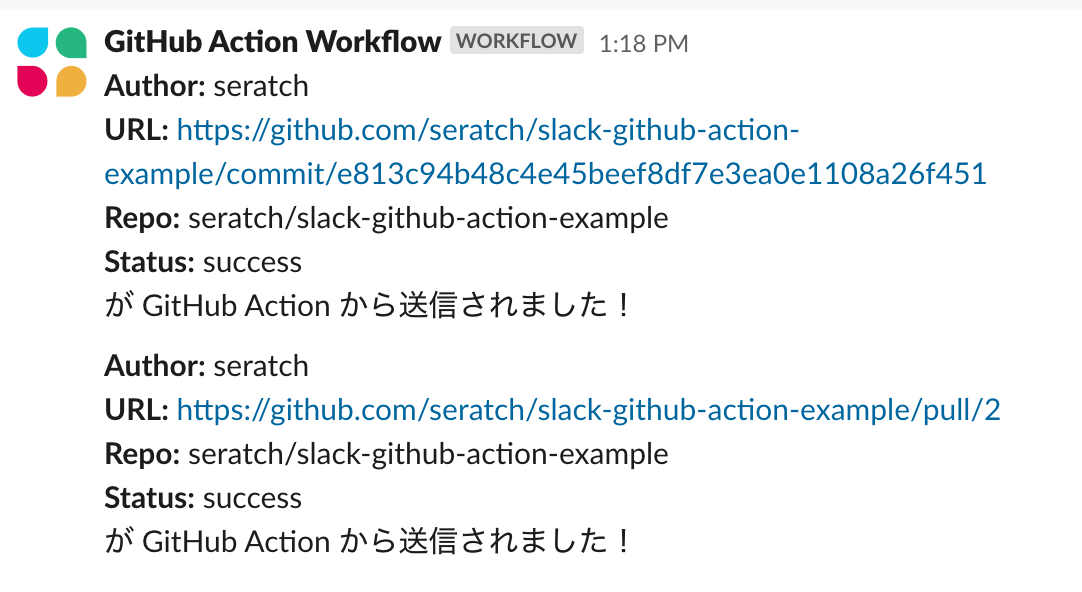
この状態で送信すると、main への push、pull request の受付でそれぞれ以下のようなメッセージが送信されてくるようになります。
このまま使う方はあまりいないかとは思いますが、このワークフローを export したものを置いておきます。もし参考になるようでしたらご利用ください。
{"source_id":"386619983389538580","version":"1","workflow":{"name":"GitHub Action Workflow","blueprint":{"version":"1","trigger":{"type":"webhook","id":"afaa1714-e1e3-4b5d-a485-d85d315c3380","config":{"url":"","variables":[{"type":"text","key":"author","client_id":"abe43bb4-b21b-42d8-b99d-187e2474e0ce"},{"type":"text","key":"url","client_id":"70dea735-1e73-4907-9234-bcfd99def75e"},{"type":"text","key":"repo_name","client_id":"e84b6906-2354-441c-80bf-025515ccea01"},{"type":"text","key":"status","client_id":"f7ea2a50-8fdd-4dc0-a773-5c3175dd8312"}],"revoked_token":false}},"steps":[{"type":"message","id":"61d8b291-a383-46ee-9c3e-0802db44bd30","config":{"channel":{"value":"C1QAUTY0M"},"has_button":false,"message_text":"Author: {{afaa1714-e1e3-4b5d-a485-d85d315c3380==abe43bb4-b21b-42d8-b99d-187e2474e0ce==text}}\nURL: {{afaa1714-e1e3-4b5d-a485-d85d315c3380==70dea735-1e73-4907-9234-bcfd99def75e==text}}\nRepo: {{afaa1714-e1e3-4b5d-a485-d85d315c3380==e84b6906-2354-441c-80bf-025515ccea01==text}}\nStatus: {{afaa1714-e1e3-4b5d-a485-d85d315c3380==f7ea2a50-8fdd-4dc0-a773-5c3175dd8312==text}}\nが GitHub Action から送信されました!","message_blocks":[{"type":"rich_text","elements":[{"type":"rich_text_section","elements":[{"text":"Author:","type":"text","style":{"bold":true}},{"text":" ","type":"text"},{"type":"workflowtoken","id":"afaa1714-e1e3-4b5d-a485-d85d315c3380==abe43bb4-b21b-42d8-b99d-187e2474e0ce==text","property":"","data_type":"text"},{"text":"\n","type":"text"},{"text":"URL:","type":"text","style":{"bold":true}},{"text":" ","type":"text"},{"type":"workflowtoken","id":"afaa1714-e1e3-4b5d-a485-d85d315c3380==70dea735-1e73-4907-9234-bcfd99def75e==text","property":"","data_type":"text"},{"text":"\n","type":"text"},{"text":"Repo:","type":"text","style":{"bold":true}},{"text":" ","type":"text"},{"type":"workflowtoken","id":"afaa1714-e1e3-4b5d-a485-d85d315c3380==e84b6906-2354-441c-80bf-025515ccea01==text","property":"","data_type":"text"},{"text":"\n","type":"text"},{"text":"Status:","type":"text","style":{"bold":true}},{"text":" ","type":"text"},{"type":"workflowtoken","id":"afaa1714-e1e3-4b5d-a485-d85d315c3380==f7ea2a50-8fdd-4dc0-a773-5c3175dd8312==text","property":"","data_type":"text"},{"text":"\nが GitHub Action から送信されました!","type":"text"}]}]}]}}]}}}
ワークフロービルダーを活用すると、単にメッセージを送信するだけでなく、他の処理も実行できます。また、メッセージの組み立てもこのように Slack 側で自由にカスタマイズができます。ぜひ活用してみてください。
終わりに
Slack が開発・メンテナンスしている GitHub Action である "slack-send" の使い方を以下の 3 パターンご紹介しました。
- Incoming Webhooks で Slack に通知する
- chat.postMessage API で Slack に通知する
- ワークフロービルダーと連携する
この GitHub Action はまだ若いプロジェクトで改善できるところや機能追加の余地もまだまだあると思います。何かフィードバックがありましたら(英語で ![]() )GitHub issues でお気軽にお知らせください
)GitHub issues でお気軽にお知らせください ![]()
