Flutter | GW アドベントカレンダーの2日目です。
みなさんは flutter driver test しているでしょうか。1
最近それなりに書いていて、ポイント(問題/興味)と感じたことをまとめました。
なお、引用している flutter のソースコードは stable 版です。
[追記]
コメントでも書きましたが、
パフォーマンス観点で Flutter Driver について Flutter チームの人が記事「Performance testing of Flutter apps」を公開していました。とても有益な情報なので必読!!
1. Driver Extenstion が有効になってるのをまず確かめる
いきなりこうやって test を書かずに、
test('sample test', () async {
  // なんか色々
});
まず最初に checkHealth を実行することで、Flutter Driver extension がちゃんと有効化されているのをチェックすると良いです。
これにより、main でのenableFlutterDriverExtension() を保証します。
test('check flutter driver extension', () async {
  final health = await driver.checkHealth();
  print(health.status);
});
2. ディレクトリ構成をどうするか
brianegan/flutter_architecture_samples の integration_tests を参考にしつつ、筆者はこんな感じに書いています。
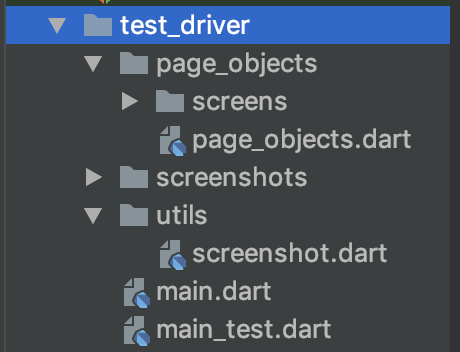
-
utils/screenshot.dart: 詳しくは後述 -
screenshots: スクショの保存先。CI でここを吐き出すようにしておくと嬉しさアップ。 -
page_objects: テストの時にチェックしたい 画面 をオブジェクト化したものたち。
page_objects
これだけ少し補足します。
まず、こんな感じの薄い Base クラスを作っています。
import 'dart:async';
import 'package:flutter_driver/flutter_driver.dart';

abstract class TestScreen {
  TestScreen(this.driver);
  final FlutterDriver driver;
  Future<bool> get isReady;
}
そして、こんな風に画面ごとにクラスを定義しておきます。
import 'package:flutter_driver/flutter_driver.dart';
import 'base_test_screen.dart';

class TopTestScreen extends TestScreen {
  TopTestScreen(FlutterDriver driver) : super(driver);
  final _fooButton = find.byTooltip('バラ色の人生 Foo!');

  @override
  Future<bool> get isReady {
    return driver.waitFor(_fooButton).then((_) => true).catchError((_) => false);
  }

  Future<void> tapFooButton() async {
    await driver.tap(_fooButton);
  }
}
これで、テストをこんな感じに見通しよくかけます。
test('verify showing top page', () async {
  expect(await topTestScreen.isReady, true);
  await topTestScreen.tapFooButton();
  // その他色々
});
3. スクショをちゃんと取る
screenshot を取るメソッド は用意されているのでこんな感じに書けますが、、、、
import 'dart:io';
import 'package:flutter_driver/flutter_driver.dart';

Future<void> takeScreenshot(FlutterDriver driver, String path) async {
  print('will take screenshot $path');
  await driver.waitUntilNoTransientCallbacks();
  final pixels = await driver.screenshot();
  final file = File(path);
  await file.writeAsBytes(pixels);
  print('wrote $file');
}
これには難しい問題が含まれており、screenshot の実装履歴を見ると興味深いです。
flutter/packages/flutter_driver/lib/src/driver/driver.dart から引用。
  /// Take a screenshot.
  ///
  /// The image will be returned as a PNG.
  Future<List<int>> screenshot() async {
    // HACK: this artificial delay here is to deal with a race between the
    //       driver script and the GPU thread. The issue is that driver API
    //       synchronizes with the framework based on transient callbacks, which
    //       are out of sync with the GPU thread. Here's the timeline of events
    //       in ASCII art:
    //
    //       -------------------------------------------------------------------
    //       Without this delay:
    //       -------------------------------------------------------------------
    //       UI    : <-- build -->
    //       GPU   :               <-- rasterize -->
    //       Gap   :              | random |
    //       Driver:                        <-- screenshot -->
    //
    //       In the diagram above, the gap is the time between the last driver
    //       action taken, such as a `tap()`, and the subsequent call to
    //       `screenshot()`. The gap is random because it is determined by the
    //       unpredictable network communication between the driver process and
    //       the application. If this gap is too short, which it typically will
    //       be, the screenshot is taken before the GPU thread is done
    //       rasterizing the frame, so the screenshot of the previous frame is
    //       taken, which is wrong.
    //
    //       -------------------------------------------------------------------
    //       With this delay, if we're lucky:
    //       -------------------------------------------------------------------
    //       UI    : <-- build -->
    //       GPU   :               <-- rasterize -->
    //       Gap   :              |    2 seconds or more   |
    //       Driver:                                        <-- screenshot -->
    //
    //       The two-second gap should be long enough for the GPU thread to
    //       finish rasterizing the frame, but not longer than necessary to keep
    //       driver tests as fast a possible.
    //
    //       -------------------------------------------------------------------
    //       With this delay, if we're not lucky:
    //       -------------------------------------------------------------------
    //       UI    : <-- build -->
    //       GPU   :               <-- rasterize randomly slow today -->
    //       Gap   :              |    2 seconds or more   |
    //       Driver:                                        <-- screenshot -->
    //
    //       In practice, sometimes the device gets really busy for a while and
    //       even two seconds isn't enough, which means that this is still racy
    //       and a source of flakes.
    await Future<void>.delayed(const Duration(seconds: 2));

    final Map<String, dynamic> result = await _peer.sendRequest('_flutter.screenshot');
    return base64.decode(result['screenshot']);
  }
これは Issue「FlutterDriver: no way to wait until a screenshot is ready」 が立ったことにより取られた対応です。
上記のコメントブロックに書いてある通りですが、人為的に2秒待つことで基本的には回避できるはず..! ということです。
この実装が入る前は、テスト実装者が意識的に delay することがありました。
flutter/examples に含まれる catalog アプリにはまだその名残りがあります。
むう〜難しいですね...
[追記] PR を送ってマージされました!
4. wait 系 の timeout 引数の正体
さて、このコードは何秒 wait するでしょう?
await driver.waitFor(fooBar, timeout: const Duration(seconds: 3));
3秒でしょうか?
いいえ、 5秒 です。
[追記] PR送ってマージされました!なので今は3秒です。
driver の wait 系メソッドの実装を追いかけてみます。
flutter/packages/flutter_driver/lib/src/driver/driver.dart から引用。
const Duration _kUnusuallyLongTimeout = Duration(seconds: 5);

// 中略

Future<T> _warnIfSlow<T>({
  @required Future<T> future,
  @required Duration timeout,
  @required String message,
}) {
  assert(future != null);
  assert(timeout != null);
  assert(message != null);
  return future..timeout(timeout, onTimeout: () { _log.warning(message); });
}

Duration _maxDuration(Duration a, Duration b) {
  if (a == null)
    return b;
  if (b == null)
    return a;
  if (a > b)
    return a;
  return b;
}

// 中略

Future<Map<String, dynamic>> _sendCommand(Command command) async {
  Map<String, dynamic> response;
  try {
    final Map<String, String> serialized = command.serialize();
    _logCommunication('>>> $serialized');
    final Future<Map<String, dynamic>> future = _appIsolate.invokeExtension(
      _flutterExtensionMethodName,
      serialized,
    ).then<Map<String, dynamic>>((Object value) => value);
    response = await _warnIfSlow<Map<String, dynamic>>(
      future: future,
      timeout: _maxDuration(command.timeout, _kUnusuallyLongTimeout),
      message: '${command.kind} message is taking a long time to complete...',
    );
    _logCommunication('<<< $response');
  } catch (error, stackTrace) {
    throw DriverError(
      'Failed to fulfill ${command.runtimeType} due to remote error',
      error,
      stackTrace,
    );
  }
  if (response['isError'])
    throw DriverError('Error in Flutter application: ${response['response']}');
  return response['response'];
}
flutter から部分的に抜粋した👆のコードを読むと、使われる値は、指定した 3秒 ではなく、内部定義されている定数(5秒)の方であるとわかります。
そしてさらに、 この timeout はただの warning メッセージを出すまでの時間にすぎない こともまた同時にわかります。
ドキュメント を見た時は「3秒を指定すれば3秒だけ wait して fail になるのかな」と思ってたので少し驚きでした。
Timeout の仕様が👆のようになった経緯の詳細は以下あたりの PR です。
- 「FlutterDriver: allow customizing timeouts using a multiplier」 : Timeout を倍率的に設定できるようにしたよ〜
- 「[O] Removing all timeouts (mark II)」 : Timeout するの自体やめるよ〜
さて、それでは test は何秒でも待つんでしょうか?
もちろんそんなことは無く、デフォルトで 30s です。
test_api | test function にもちゃんと書いてあり、こんな感じで変更可能です。
test('verify showing top page', () async {
  expect(await topTestScreen.isReady, true);
  await topTestScreen.tapFooButton();
  // その他色々
}, timeout: Timeout(Duration(seconds: 100)));
ちなに、この Issueはチェックしておくと良いかもです。
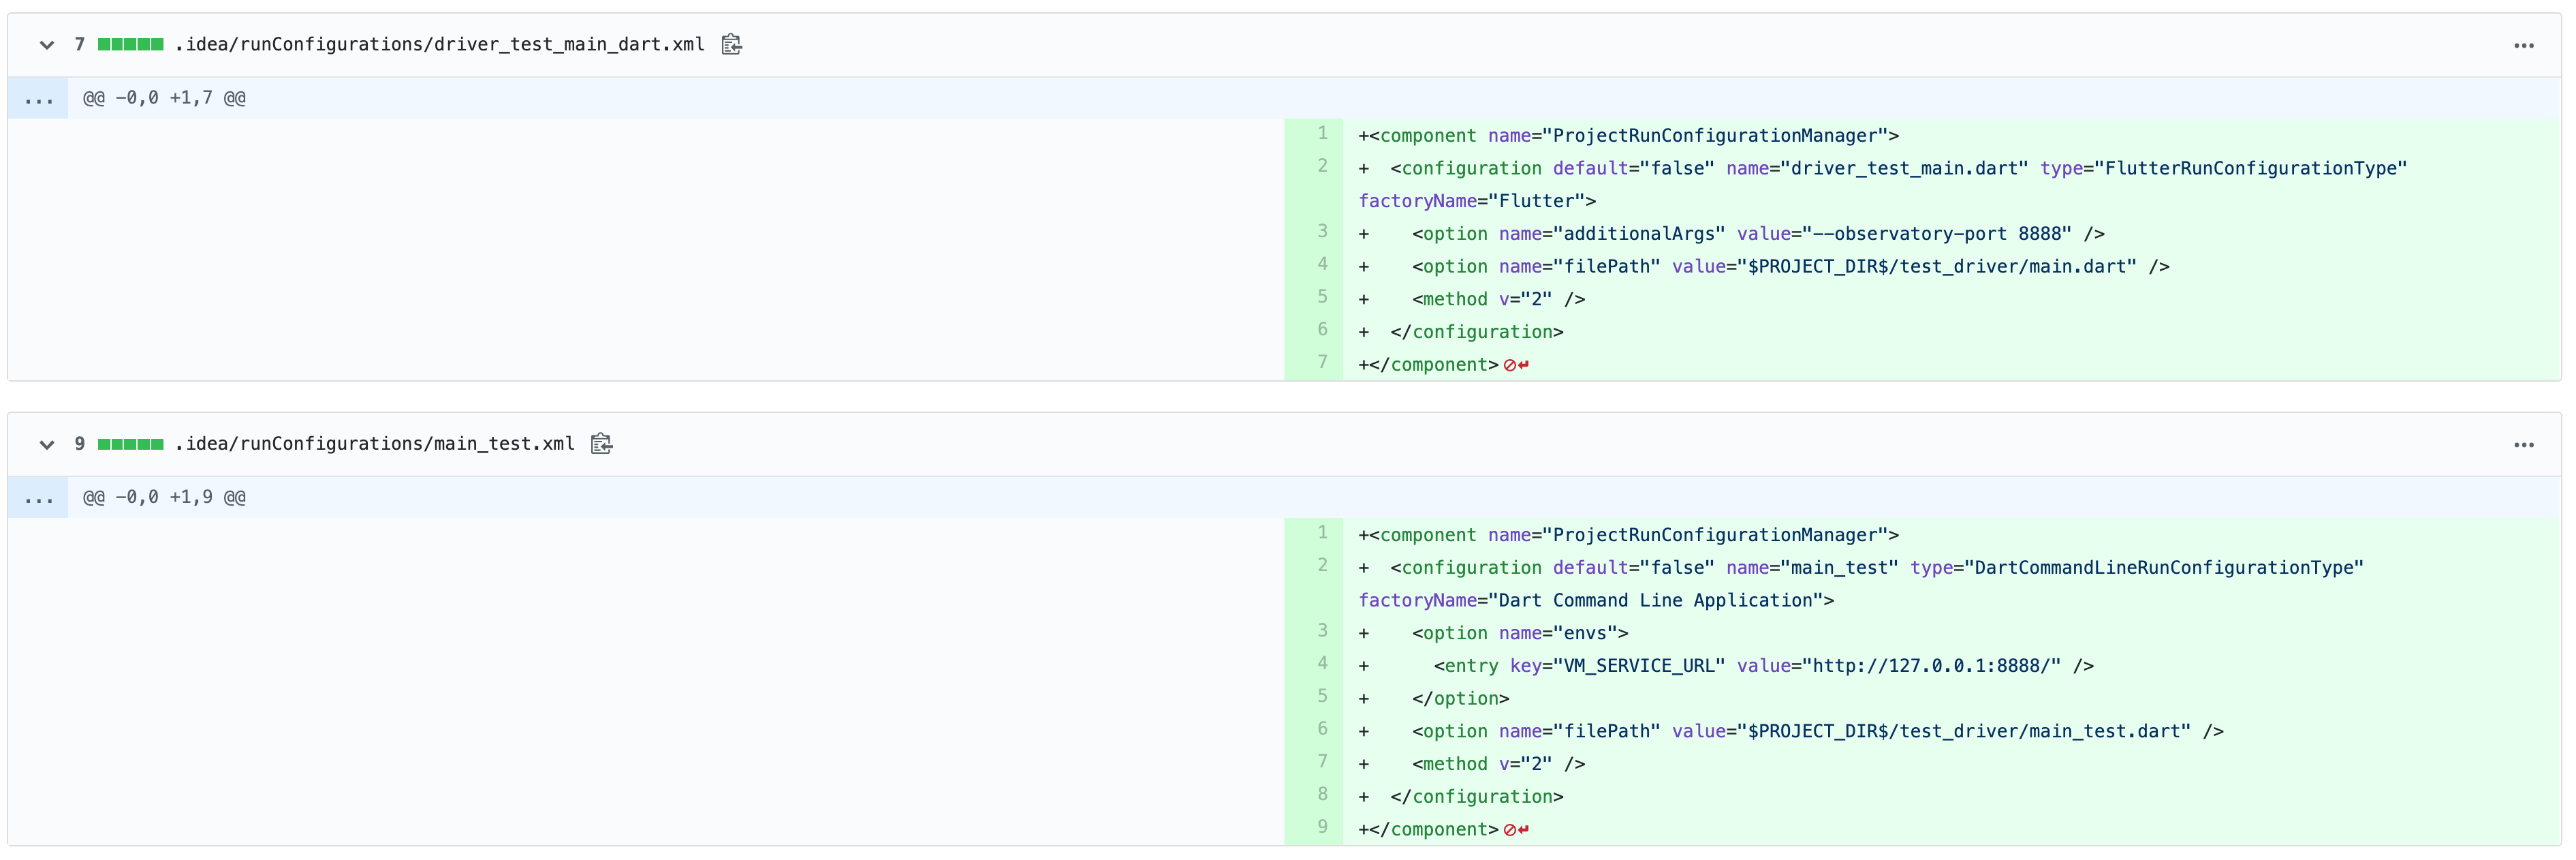
5. ブレークポイントを打ちたい
Hot Reload For Flutter Integration Tests という素晴らしい記事を真似るのみです。
新規スキーマを2つ定義すればいけます〜
なお、Kotlin/C++/C のデバッグを含む場合は 拙著: Kotlin と C++/C をデバッグする方法 が参考になるかと思います。
6. CI で実行する時のTips
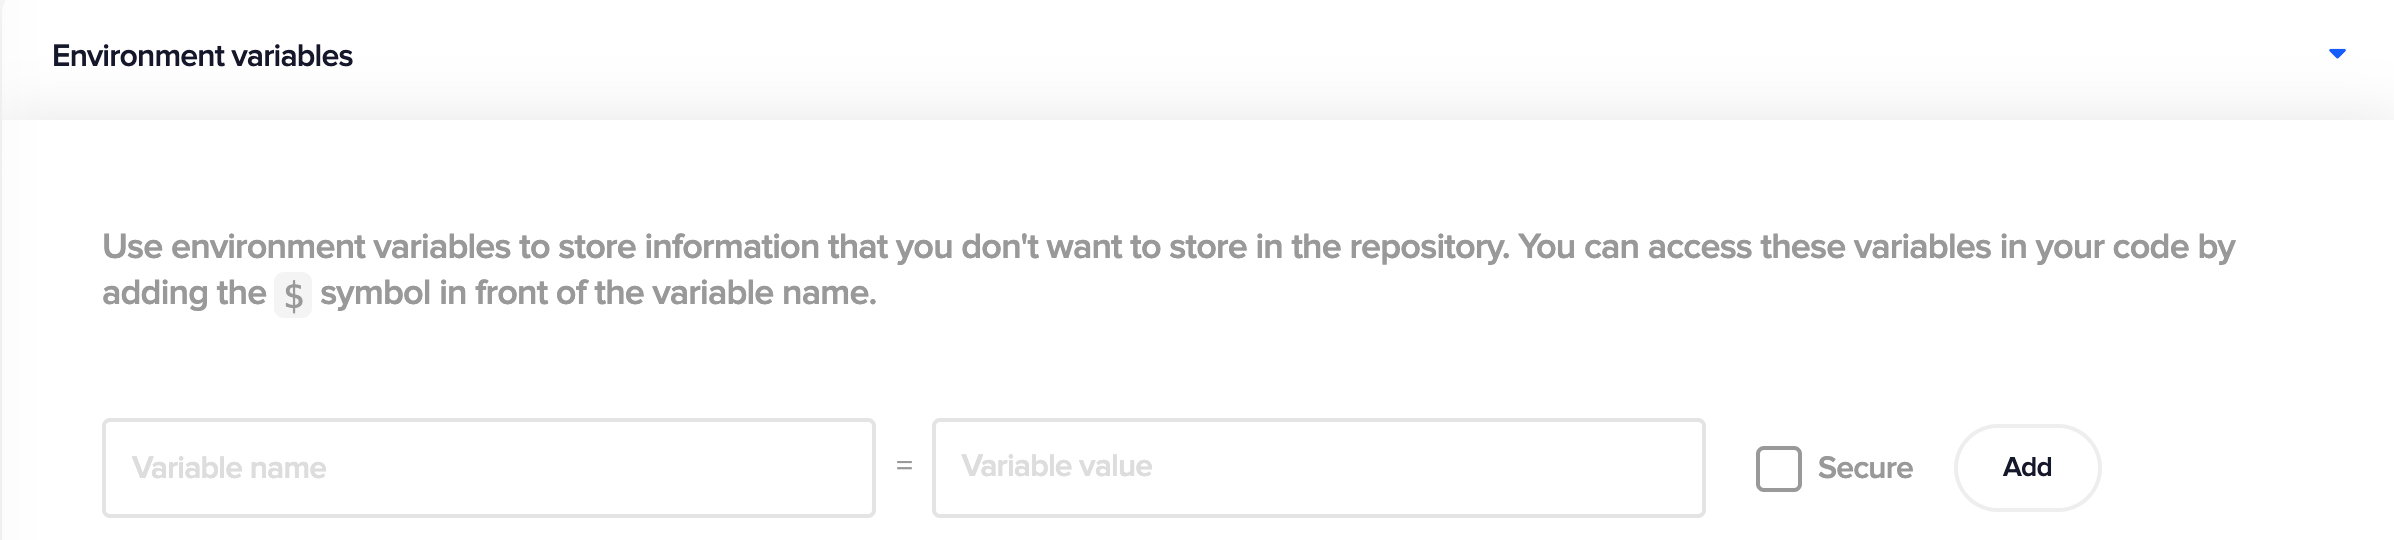
環境変数で値を渡す
final foo = Platform.environment['Foo']
例えば Codemagic ならここで設定しておく。
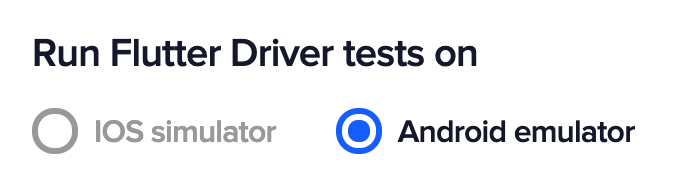
実行する Platform
iOS, Android 両方で実行したいはず。
例えば Codemagic では iOS がデフォルトのような振る舞いをしていたので、Slack で質問&要望したところ、すぐに対応してもらえました!! yeah!
スクショをエクスポート
test_driver/screenshots に保存しているとして、例えば Codemagic ならこんな感じに書けば Zip で吐いてくれる。
cp -r test_driver/screenshots $FCI_EXPORT_DIR/screenshots

参考: https://docs.codemagic.io/custom-scripts/upload-custom-artifacts/
7. Platform 依存の処理をモックするかどうか
Intergration Test は Widget Test と違って端末依存度が強いのが特徴のテストです。
なので、Swift/Kotlin/C++/C の純粋(=外部サービスと繋がりのない)呼び出しはモックせず動かす で良いはずです。
Firebase のような外部サービスと繋がる箇所は、Widget Test 同様にモックします。
モックする場合は cloud_firestore 自体のテスト みたくベタにモックするよりも、Mockito 使った方がまだ楽に書ける気がします。
雰囲気👇2
final firestoreMock = FirestoreMock();
final mockCollectionRef = MockCollectionReference();
final mockQuery = MockQuery();
final mockQuerySnapshot = MockQuerySnapshot();
final mockDocumentSnapshot = MockDocumentSnapshot();

when(firestoreMock.collection('/version/1/foo')).thenReturn(mockCollectionRef);
when(mockCollectionRef.orderBy('createdAt')).thenReturn(mockQuery);
when(mockQuery.snapshots()).thenAnswer((_) => Stream.fromIterable([mockQuerySnapshot]));
when(mockQuerySnapshot.documents).thenReturn([mockDocumentSnapshot]);
when(mockDocumentSnapshot.data).thenReturn({'foo': 'bar'});
おわりに
Widget Test の逆引き Tips も書いています〜
初 contribute して楽しかったです〜
-
優先度としては
widget test>unit test>=integration testという感じかなーと思っています。そもそも目的がそれぞれ別なので単純比較はできませんが... ↩ -
これでもまだ面倒さがあるので、https://pub.dartlang.org/packages/mock_cloud_firestore みたいなパッケージが出てきたりしているのが現状ですね。 ↩