こんな人向け
- 自作アプリ専用のWebAPIを作りたい
- SwiftとGoで通信処理を実装してみたい
- **Google App Engine**を使ってみたい
何をするの?
「WebAPIを自作し、iOSからそのAPIを叩いてデータを取得する」を簡潔に行う。
GETをメインに書きましたが、POSTも書いてます。
サーバーサイド(GAE/Go)
公式チュートリアル
まずはこれを終える。
チュートリアルの指示に従って、ハローワールドを出すだけです。
エラーに出くわしたら、多分PATHまわりだと思います。
vim ~/.bashrcでbashrcを開き、
export GOPATH=$HOME/go
export PATH=$PATH:$GOPATH/bin
export PATH=$PATH:$HOME/Downloads/google-cloud-sdk/bin
みたいに設定しておきましょう。
編集したら、source ~/.bashrcの実行を忘れずに。
チュートリアルを終えれば準備万端!
こっからが楽しい本番!!(30分かかんないはず!)
APIを自作
package hello

import (
	"net/http"
	"github.com/gin-gonic/gin"
)

type User struct {
		ID           string `json:"id"`
		Name         string `json:"name"`
		Introduction string `json:"introduction"`
}

// 初期化
func init() {
	http.Handle("/", GetEngine())
}

// APIのルーティング
func GetEngine() *gin.Engine {
	router := gin.Default()
	router.GET("/", func(c *gin.Context) {
		c.String(http.StatusOK, "yea! rootだね!")
	})
	router.GET("/api/users/:id", GetUser)
    router.POST("/api/users", SaveUser)
	return router
}

// Userをjsonで返す
func GetUser(c *gin.Context) {
    // パラメータを抽出
    id := c.Param("id")
    // Userを生成
    u := User{
		ID:           id,
		Name:         "jsonてすと君",
		Introduction: "ハロー iOSさん",
	}
    // jsonとして返す
    c.JSON(http.StatusOK, u)
}

// Userをデータストアに保存する
func SaveUser(c *gin.Context) {
	u := User{}
    // POSTで渡ってきたjsonを構造体に埋め込む
	c.BindJSON(&u)

	// >> 本来はここでデータストアへの保存処理などを行う。今回は省略。 <<

    // 今回はただ出力するだけ
	c.String(http.StatusOK, "SaveUser Success. %+v", u)
}
-
dev_appserver.py app.yamlを実行し、ブラウザで「localhost:8080/」を見てみる。→「yea! rootだね!」を確認
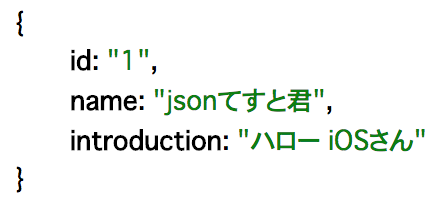
5)ブラウザに 「localhost:8080/api/users/好きな数字」を打ち込み、jsonが返ってくることを確認。
以下は「localhost:8080/api/users/1」の例
 感動ですね!!
クライアント(iOS/Swift)
XcodeでSingle Viewのプロジェクトを作り、ViewController.swiftに以下をコピペ
import UIKit

// jsonの変換先となる構造体(初期値あり)
struct User : Codable {
    var id           : String = "0"
    var name         : String = "加賀鉄男"
    var introduction : String = "将棋が強い"
}

class ViewController: UIViewController {

    override func viewDidLoad() {
        super.viewDidLoad()

        // サーバーからUser情報を取得
        let user = getUser()
        // Userを出力してみる
        print("GETの結果: ", user)

        // サーバーにPOSTしてみる
        postUser()
    }

}

func getUser() -> User {
    // 情報の欲しいユーザーIDを指定
    let id = 1
    // URLを指定(今回はローカルサーバー)
    let url = URL(string: "http://localhost:8080/api/users/\(id)")!

    let decoder: JSONDecoder = JSONDecoder()

    do {
        // jsonを取得
        let data = try Data(contentsOf: url, options: [])
        // User構造体に値を埋め込む
        let user = try decoder.decode(User.self, from: data)
        return user
    } catch {
        print(error)
        return User()
    }
}

func postUser() {
    // URLを指定(今回はローカルサーバー)
    let url = URL(string: "http://localhost:8080/api/users")!

    // POSTリクエストを生成
    let request = NSMutableURLRequest(url: url)
    request.httpMethod = "POST"
    request.addValue("application/json", forHTTPHeaderField: "Content-Type")

    // POSTで渡したいパラメータを生成
    let params:[String:Any] = [
        "id": "789",
        "name": "postテストさん",
        "introduction": "Hello Go I'm Post",
        ]

    // それをjsonとして生成し、httpBodyに付加
    do {
        let json = try JSONSerialization.data(withJSONObject: params, options: .prettyPrinted)
        request.httpBody = json
    } catch {
        print("Error:\(error)")
        return
    }

    // POSTリクエストを発行
    let task = URLSession.shared.dataTask(with: request as URLRequest, completionHandler: {data, response, error in
        if error != nil {
            print("Connection Error: ", error!)
            return
        }
        if let httpResponse = response as? HTTPURLResponse {
            let result = NSString(data: data!, encoding: String.Encoding.utf8.rawValue)!
            if httpResponse.statusCode != 200 {
                print(httpResponse)
            }
            print("POSTの結果:", result)
        }
    })
    task.resume()
}
最高ですね!!!
データストアについて
本記事はデータストア処理を省略しています。
実際の開発では、GETでデータストアのデータを取得したり、POSTでデータストアにデータを保存したりするはずです。
その際は、GAE/GoのDatastoreチートシート with "goonライブラリ"が参考になれば嬉しいです。
真にローカルから抜け出すには?
チュートリアルにもあるように、hello.goのあるディレクトリでgcloud app deploy app.yamlを実行するだけで、GCP上にデプロイされます。
あとは、swiftのURL指定部分を任意のURLに変えるだけです
なお、料金については小規模なら無料です。
おわりに
このような一連の流れをまとめた記事があまりなかったので、筆者なりに書いてみました。
30分以上かかってたらごめんなさい![]()
-
もちろん入れなくても書けます。最近はgorilla系の方が人気ぽい ↩
