Part1 https://qiita.com/senku/items/07c3e2859ac90c03867a
Part2 https://qiita.com/senku/items/20e21033edd512be1d4d
Part3 ここ
前回までにStorybookを整えてきたのは、Storybookから画像を生成するためでした。
今回は画像の生成とそれ以降をやっていきます。テンション爆上げ。
Summary
- storycapは神
- reg-suitは神
storycapをいれる
storycapは、Storybookからスクリーンショットを生成するツールです。公式な話もどうぞ。→storybook-chrome-screenshotとzisuiとStorycapと
他にもJestから生成したり色々できるんですが、今回はやりません。
storycapインストールします。
$ npm install --save-dev storycap
puppeteerが入ってくるのでnode_modulesがでっかくなります。そこへの対処は後で。
とりあえずstorycapを動かしてみましょう。package.jsonのscriptsに、storycapを登録します。
diff --git a/package.json b/package.json
index 75cab63..0df9125 100644
--- a/package.json
+++ b/package.json
@@ -7,6 +7,7 @@
     "build": "vue-cli-service build",
     "lint": "vue-cli-service lint",
     "i18n:report": "vue-cli-service i18n:report --src './src/**/*.?(js|vue)' --locales './src/locales/**/*.json'",
+    "storycap": "storycap --serverCmd \"npm run storybook:ci\" http://localhost:6006 -o actual_images --serverTimeout 1
     "storybook:build": "vue-cli-service storybook:build -c config/storybook",
     "storybook:ci": "vue-cli-service storybook:serve -p 6006 -c config/storybook --ci",
     "storybook:serve": "vue-cli-service storybook:serve -p 6006 -c config/storybook"
Storycapのオプションを軽く説明しておきます。詳細はリポジトリのREADMEに書いてあるヨ。
| オプション | 設定値 | 説明 |
|---|---|---|
| なし | http://localhost:6006 | Storybookが起動しているURLを指定します。 |
| --serverCmd | npm run storybook:ci | Storybookを起動するためのコマンドを指定します。 Part1で作成したコマンドをここで使います。 |
| -o --outDir |
actual_images | キャプチャ結果の出力先ディレクトリを指定します。 |
| --serverTimeout | 120000 | Storybookに接続するまでの待ち時間(ミリ秒)です。 デフォルト20秒ですが、起動が遅れた時のためにおまじない的につけてます。 |
今回は使いませんが、以下のオプションも使いがち。
| オプション | 説明 |
|---|---|
| -V --viewport |
キャプチャするviewportを指定します。-V 1024x768 -V 360x640のような複数指定もできます。puppeteerが許可しないviewportにはできない模様。 |
| --puppeteerLaunchConfig | puppeteerのコンフィグを指定できます。 ブラウザの言語はこのオプションで渡すしかなさそう。日本語にする場合は、エスケープを含めてこんな感じ --puppeteerLaunchConfig \"{\\\"args\\\":[\\\"--no-sandbox\\\",\\\"--disable-setuid-sandbox\\\",\\\"--disable-dev-shm-usage\\\",\\\"--lang=ja\\\"]}\"
|
画像が出力されるactual_imagesは.gitignoreに登録しておきましょう。
diff --git a/.gitignore b/.gitignore
index a0dddc6..5b15dcf 100644
--- a/.gitignore
+++ b/.gitignore
@@ -19,3 +19,5 @@ yarn-error.log*
 *.njsproj
 *.sln
 *.sw?
+
+actual_images
storycapを走らせてみます。もしnpm run storybook:serveやnpm run storybook:ciが動いている場合は停止してから実行してください。
$ npm run storycap
actual_imagesの下に、各Storyのキャプチャ画像が生成されましたね。これがビジュアルリグレッションテストの元ネタになります。
reg-suitをいれる
reg-suitは、2つの画像群を比較して差分をレポートしてくれるツールです。publish先としてS3とかGCS、notify先にGitHubやSlackに対応しています。今回はS3とGitHubを使います。
公式の手順ではグローバルにインストールしていますが、後々のためにプロジェクトローカルにインストールします。
$ npm install --save-dev reg-suit
設定を作成するためreg-suit initを走らせます。node_modulesの中のファイルを叩きますよ。
$ ./node_modules/.bin/reg-suit init
最初のプラグイン選択では、reg-keygen-git-hash-plugin, reg-notify-github-plugin, reg-publish-s3-pluginを選択しておきます。
次は共通の設定です。irectory contains actual images.には、storycapで出力したactual_imagesを指定しましょう。
? Working directory of reg-suit. .reg
? Directory contains actual images. actual_images // ここだけ変更
? Threshold, ranges from 0 to 1. Smaller value makes the comparison more sensitive. 0
reg-notify-github-pluginの設定は言われるがままにやります。GitHub認証のためにブラウザが開くので、認証後、通知するリポジトリのClientIDを取得して貼り付けましょう。
[reg-suit] info Set up reg-notify-github-plugin:
? notify-github plugin requires a client ID of reg-suit GitHub app. Open installation window in your browser Yes
? This repositoriy's client ID of reg-suit GitHub app // リポジトリのClientIDを入力
reg-publish-s3-pluginの設定では、AWS関連に環境変数があればバケットの自動作成も行えるみたいです。別途作ったバケットを設定することもできます。
[reg-suit] info Set up reg-publish-s3-plugin:
? Create a new S3 bucket Yes
こんな感じのregconfig.jsonが生成されれば完了です。
reg-suit initをせずに直接作成しても大丈夫です。その場合は.gitignoreに.regを追加されていないので、手動で追加しておきましょう。
{
  "core": {
    "workingDir": ".reg",
    "actualDir": "actual_images",
    "thresholdRate": 0,
    "ximgdiff": {
      "invocationType": "client"
    }
  },
  "plugins": {
    "reg-keygen-git-hash-plugin": true,
    "reg-notify-github-plugin": {
      "clientId": "環境によってちがいます"
    },
    "reg-publish-s3-plugin": {
      "bucketName": "バケット名"
    }
  }
}
プラグインのオプションは色々設定できます。ここではreg-publish-s3-pluginのオプション例について軽く触れます。詳しくはreg-publish-s3-pluginのREADMEをみてください。
pathPrefixの指定があると、そのパスの下にファイルが配置されます。"pathPrefix": "hoge"ならS3BUCKET/hoge/COMMITID...って感じのパスになります。一つのバケットを複数のテストで使い回す場合はどうぞ。
customDomainの指定はでnotifyが通知するレポートの公開URLを調整できます。
    "reg-publish-s3-plugin": {
      "bucketName": "バケット名",,
      "pathPrefix": "配置先のPrefix"
      "customDomain": "レポート公開URLのFQDN"
    }
S3互換ストレージを使う場合はsdkOptionsでいろいろ設定できます。エンドポイントとか変えればいいですね。ここはAWS CLIのマニュアルを読んだほうがいいのかな。
    "reg-publish-s3-plugin": {
      "bucketName": "バケット名",
      "sdkOptions": {
        "endpoint": "エンドポイントのURL"
      }
    }
設定が完了したので、reg-suitを実行するためのスクリプトを作っておきましょう。
diff --git a/package.json b/package.json
index 953a07c..bbc6c2b 100644
--- a/package.json
+++ b/package.json
@@ -8,6 +8,7 @@
     "lint": "vue-cli-service lint",
     "i18n:report": "vue-cli-service i18n:report --src './src/**/*.?(js|vue)' --locales './src/locales/**/*.json'",
     "storycap": "storycap --serverCmd \"npm run storybook:ci\" http://localhost:6006 -o actual_images --serverTimeout 1
+    "reg-suit": "reg-suit run",
     "storybook:build": "vue-cli-service storybook:build -c config/storybook",
     "storybook:ci": "vue-cli-service storybook:serve -p 6006 -c config/storybook --ci",
     "storybook:serve": "vue-cli-service storybook:serve -p 6006 -c config/storybook"
これで準備ができました。
GitHubのmasterリポジトリに、ここまでのコミットをpushしておきます。(重要)
レポートを出していこう
まずは現在のコミット(masterの最新コミット)で生成したキャプチャ画像を、S3へpublishします。
今のmasterの画像をアップロード
すでにactual_imagesは生成されているので、reg-suit runを実行するだけです。
$ npm run reg-suit
実行後にS3バケットを確認すると、コミットのハッシュから始まる画像ファイルと、レポートのindex.htmlとその他ファイルがアップロードされています。
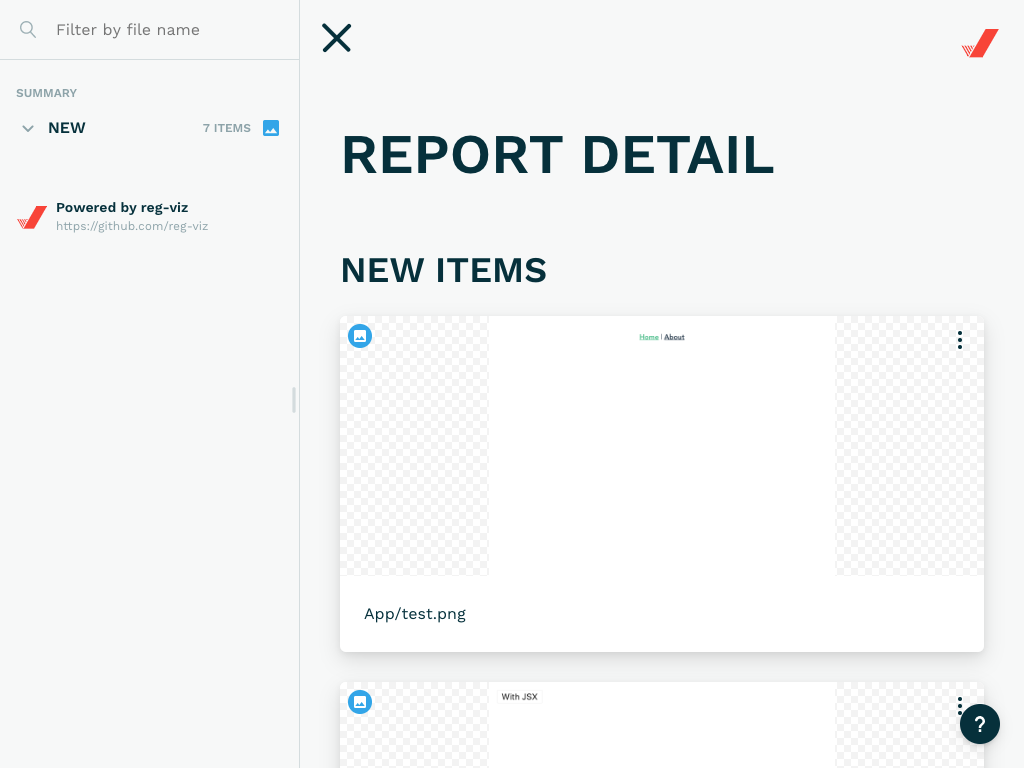
index.htmlを開くとこんな感じ。
コンポーネントを変更してPRをつくる
レポートをわかりやすくするため、見た目の差分があるPullRequestを作ります。
とりあえずブランチを切り替えましょう。
$ git checkout -b test
なんでもいいんですがHelloI18n.vueあたりを変更します。
diff --git a/src/components/HelloI18n.vue b/src/components/HelloI18n.vue
index 57ad691..21156c9 100644
--- a/src/components/HelloI18n.vue
+++ b/src/components/HelloI18n.vue
@@ -11,7 +11,7 @@ export default {
 <i18n>
 {
   "en": {
-    "hello": "Hello i18n in SFC!"
+    "hello": "Hello i18n in SFC!!!!!"
   }
 }
 </i18n>
コミットしてpush。
$ git add src/components/HelloI18n.vue
$ git commit -m "test commit"
$ git push origin test
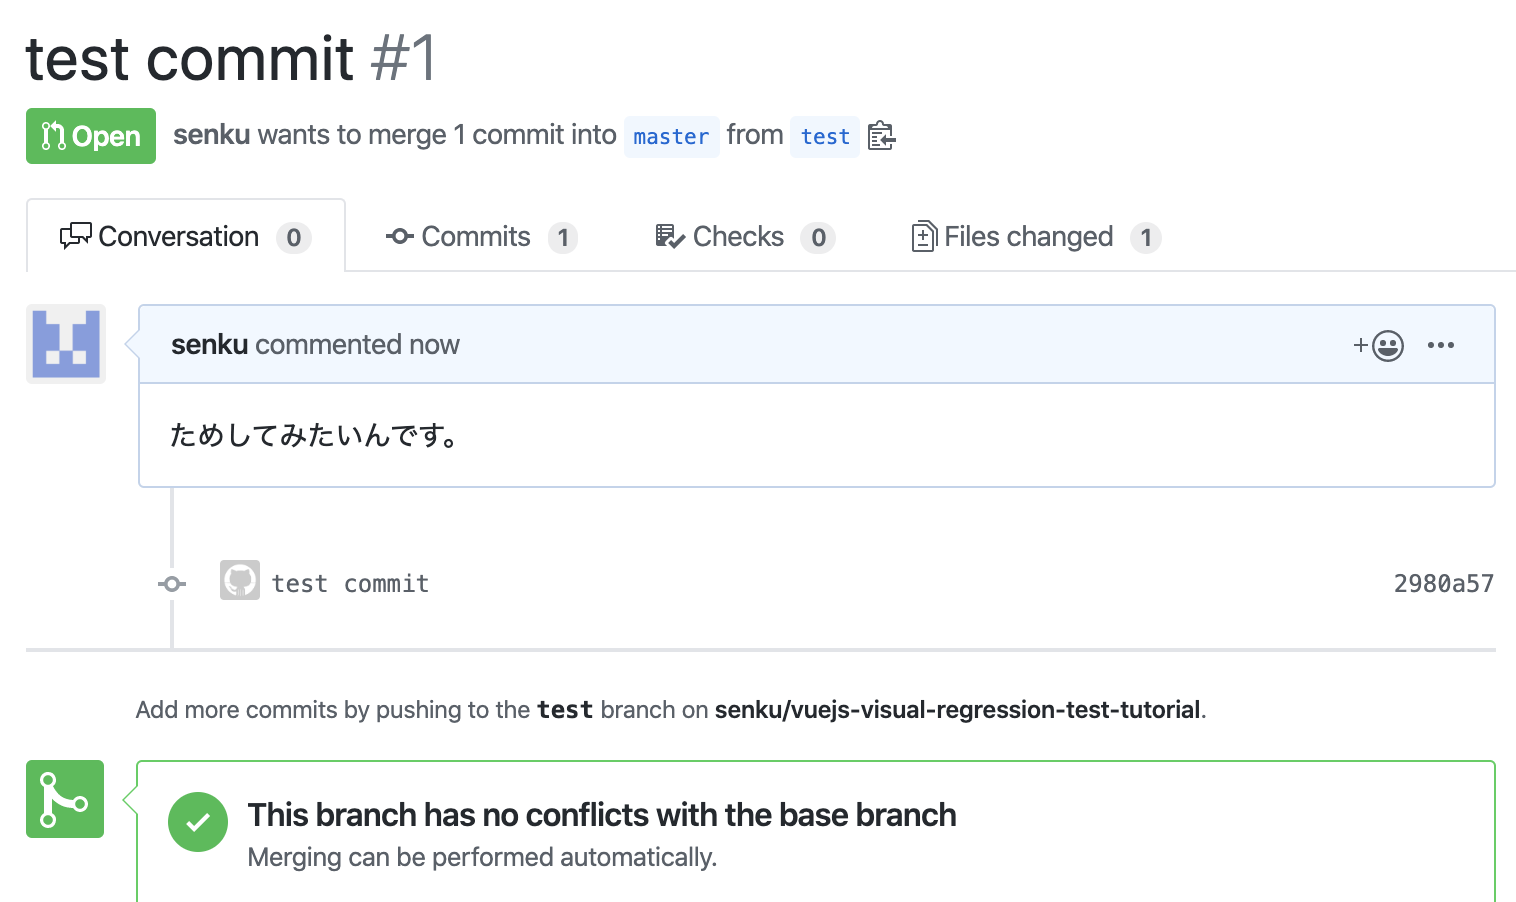
GitHubにPullRequestを作成します。
参考までに、この時点でリモートブランチ(GitHub)はこんな状態になってます。
- masterブランチの最新コミット
- testブランチの最新コミット(
masterブランチの最新コミットからfork)- testブランチの最新コミットから作られたPullRequest
reg-suitのpublish先のS3バケットには、masterブランチの最新コミットに対応するキャプチャ画像だけがアップロードされています。
PRにレポートを送る
現在のコミット(testブランチの最新コミット)のキャプチャ画像をstorycapで生成して、reg-suitで比較しましょう。
$ npm run storycap
$ npm run reg-suit
この作業によって、
- S3バケットに
testブランチの最新コミットに対応するキャプチャ画像がアップロードされ、 - reg-suitが
masterブランチの最新コミットとtestブランチの最新コミットの画像を比較して、 -
testブランチの最新コミットと関連するPullRequestにコメントを投稿
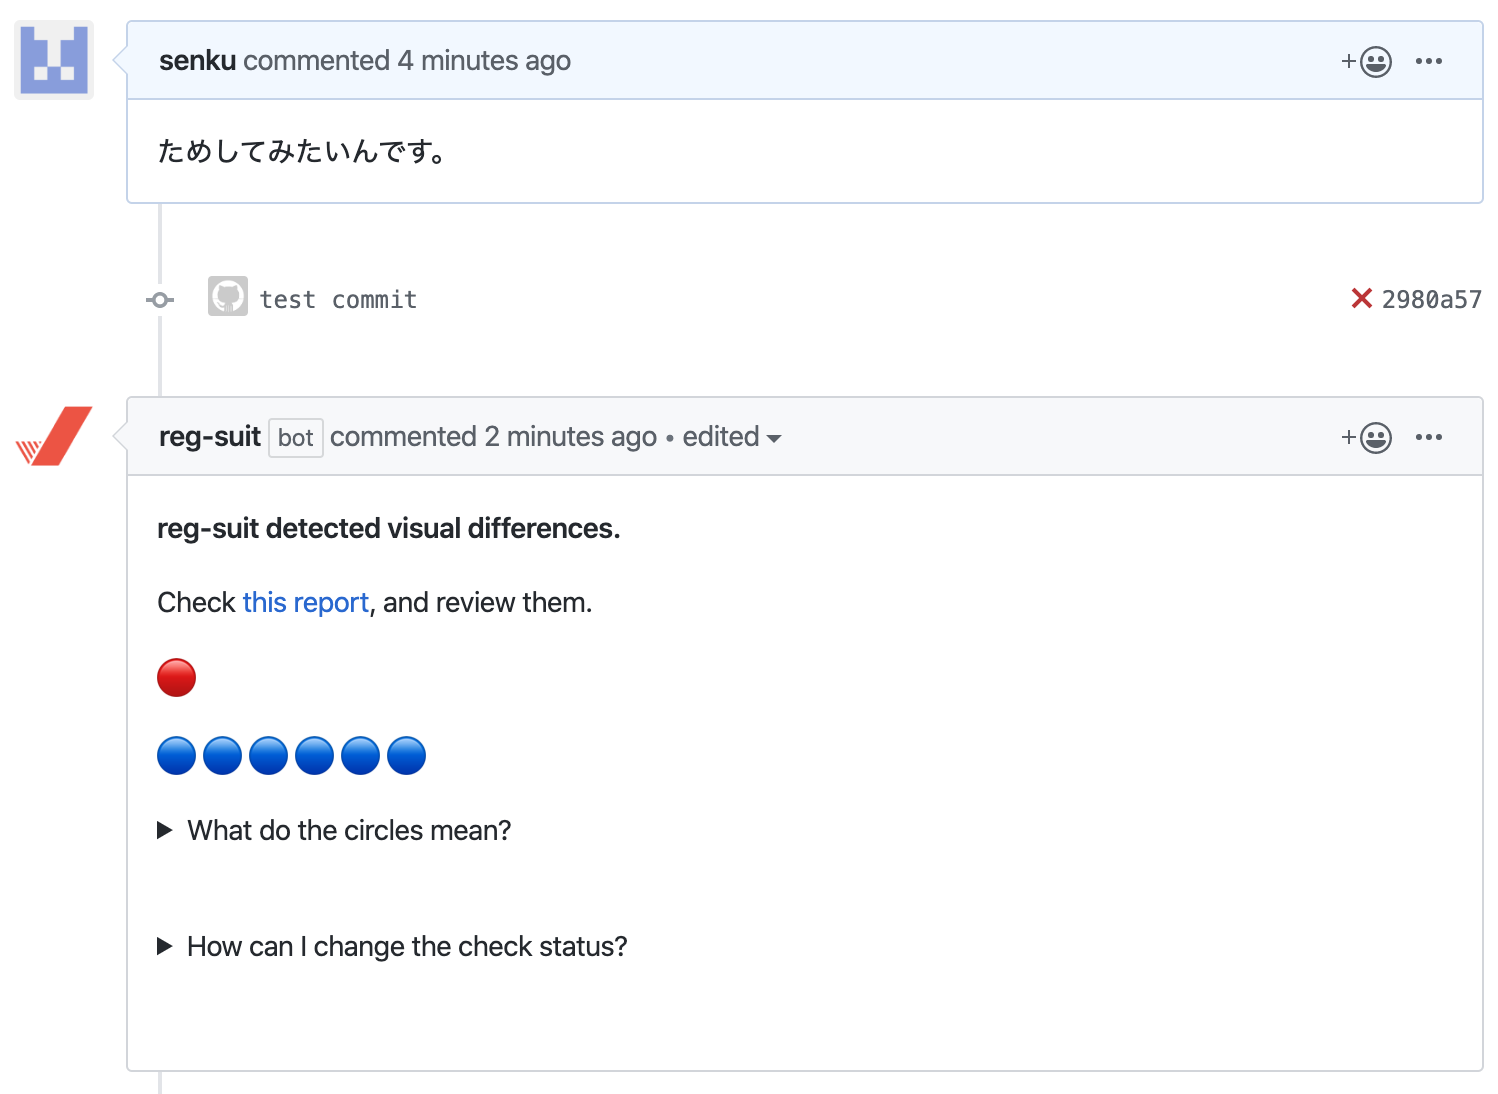
されます。PullRequestを見てみましょう。なんか書き込まれてますね。
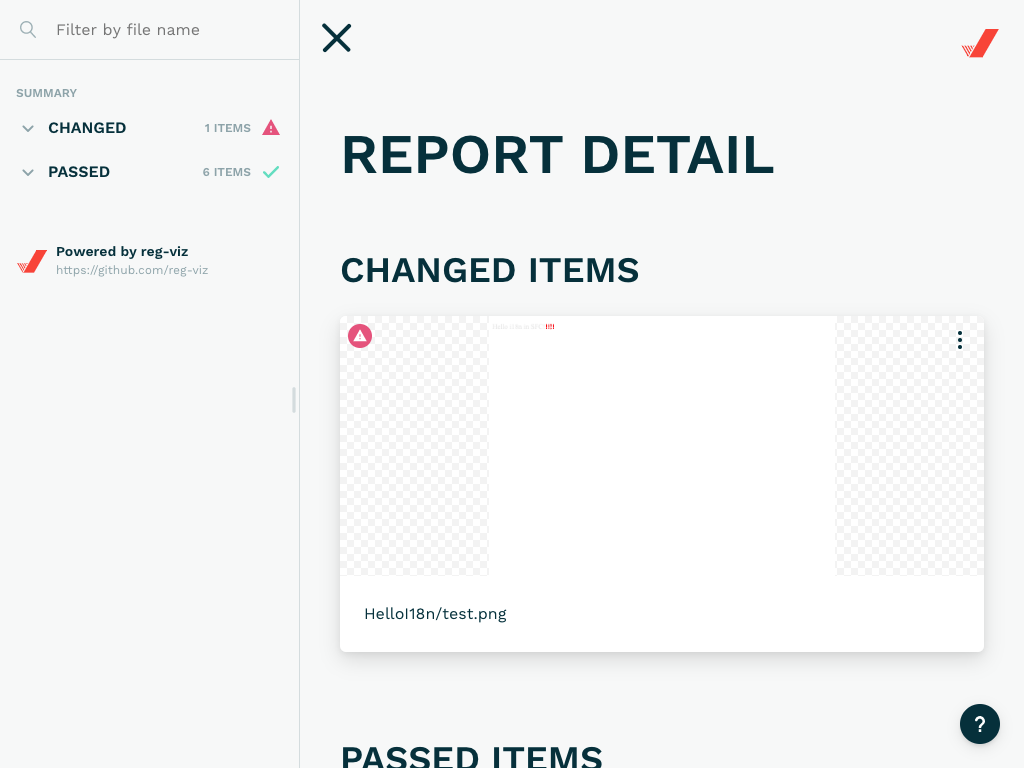
コメントのリンク先のレポートでも差分が確認できます。
reg-suitはここまで自動でやってくれます。神。
基本的な動きはこれで完成です。後はCIを考えましょう。
CI戦略
CI戦略のために必要な情報を整理しておきます。
画像の比較のためには、PullRequestのfork元のコミットでstorycap+reg-suitが実行された(図A)上で、PullRequest自体の最新のコミットでstorycap+reg-suitが実行される(図B)必要があります。
master -->A - - - - - - -
          ↓ branch   ↑ PR
 branch   ---------->B
GitHub flowを前提にすると、以下のタイミングでキャプチャの取得とreg-suitによる判定を行えばよさそうです。
- masterブランチが進んだとき(masterへのmergeが起きたとき)
- PullRequestが作成されたとき
- PullRequestのブランチがpushされたとき
reg-notify-github-pluginは賢いので、これらのトリガーでnpm run storycapとnpm run reg-suitが実行するだけで、PullRequestにコメントをつけるようになります。S3の容量が許すなら、全てのコミットに実行してもおそらく問題ありません。
reg-notify-slack-pluginとかだとPullRequestの存在確認ができないので、どのパターンか独自に判断しないと常に通知されることになります。
storycapをpackage.jsonから外したい
CIなんてDockerで走らせればいいんですよ!というわけでおもむろにstorycapをuninstallします。設定ファイルは残しておきます。
reg-suitをプロジェクトにインストールしたのはこのためでした。
$ npm uninstall storycap
次はDockerfileを作ります。storycapをインストールしつつ、npm run storycapとnpm run reg-suitを実行させます。Puppeteer公式のRunning Puppeteer in Dockerを参考にしました。
宗教上の理由によりイメージを使い回さずdocker-buildで完結させます。
また、SSH鍵でGitHubにアクセスできると信じて、experimentalな機能でSSH鍵を渡しています。
# syntax = docker/dockerfile:experimental

FROM node:10-slim

ARG AWS_ACCESS_KEY_ID
ARG AWS_SECRET_ACCESS_KEY
ENV AWS_ACCESS_KEY_ID=${AWS_ACCESS_KEY_ID}
ENV AWS_SECRET_ACCESS_KEY=${AWS_SECRET_ACCESS_KEY}

RUN wget -q -O - https://dl-ssl.google.com/linux/linux_signing_key.pub | apt-key add - \
    && sh -c 'echo "deb [arch=amd64] http://dl.google.com/linux/chrome/deb/ stable main" >> /etc/apt/sources.list.d/google.list' \
    && apt-get update \
    && apt-get install -y ssh git google-chrome-unstable fonts-ipafont-gothic fonts-wqy-zenhei fonts-thai-tlwg fonts-kacst fonts-freefont-ttf \
      --no-install-recommends \
    && rm -rf /var/lib/apt/lists/*
RUN usermod -aG audio,video node
RUN mkdir -p -m 0600 ~/.ssh
RUN --mount=type=secret,id=ssh ssh-keyscan -H github.com >> ~/.ssh/known_hosts
COPY . /home/node
WORKDIR /home/node

RUN npm ci
RUN npm install storycap

RUN npm run storycap
RUN --mount=type=secret,id=ssh npm run reg-suit
次はdocker buildするぞい。前述の宗教上の理由により--force-rmを付けます。experimentalな機能を有効にするためのDOCKER_BUILDKIT環境変数もバッチリだ。AWS用の環境変数はちゃんと--build-argで渡すんだ。
$ DOCKER_BUILDKIT=1 docker build -t reg-suit-gambaruzoi -f Dockerfile --force-rm \
--build-arg AWS_ACCESS_KEY_ID=あなたのアクセスキー \
--build-arg AWS_SECRET_ACCESS_KEY=あなたのシークレットアクセスキー .
これで環境を汚染せずにnpm run storycapもnpm run reg-suitも実行できます。ヨカッタネ。
現場からは以上です。


