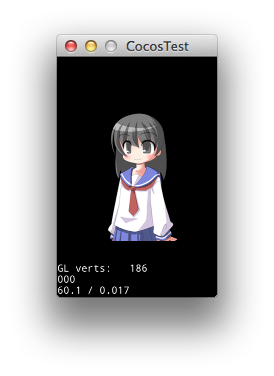
Cocos Code IDEを使ってLua言語でパラパラアニメーションをするための基本をまとめました。
Code IDEのプロジェクトの新規作成で作られるサンプルプログラムを参考にして、少し手を加えています。
| 実行環境、IDE | Cocos2d-xバージョン | 言語 |
|---|---|---|
| Cocos Code IDE Mac OS X 1.0.0-RC2 | Cocos2d-x V3.2 | Lua言語 |
サンプルコード
プロジェクトの新規作成で作成されるGameScene.luaのGameScene.create()を書き換えます。
GameScene.lua/GameScene.create
function GameScene.create()
    local scene = GameScene.new()

    visibleSize = cc.Director:getInstance():getVisibleSize()

    -- テクスチャの作成
    local texture = cc.Director:getInstance():getTextureCache():addImage("texture.png")

    -- スプライトフレームの作成
    local frame0 = cc.SpriteFrame:createWithTexture(texture, cc.rect(0, 0, 256, 256))
    local frame1 = cc.SpriteFrame:createWithTexture(texture, cc.rect(256, 0, 256, 256))

    -- スプライトの作成
    local sprite = cc.Sprite:createWithSpriteFrame(frame0)

    -- アニメーションの作成
    local animation = cc.Animation:createWithSpriteFrames({frame0,frame1}, 0.8) -- 0.8はアニメーションを切り替える秒数
    local animate = cc.Animate:create(animation)
    sprite:runAction(cc.RepeatForever:create(animate))

    -- スプライトの位置を設定
    sprite:setPosition(visibleSize.width / 2, visibleSize.height / 2)

    -- シーンに加える
    scene:addChild(sprite)

    return scene
end
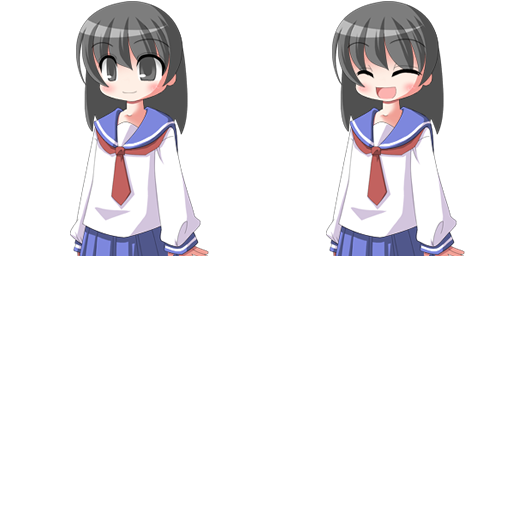
テクスチャ画像としてtexture.pngファイルをresディレクトリにコピーします。
画像はキャラクターなんとか機Web版で作りました。
(本番用には自分で書くべきでしょうが、テスト用の画像にすぐ用意したい時は大変重宝します。)
テクスチャは256x256の大きさの画像を横に2つ並べています。

実行してキャラクターがまばたきするアニメーションをすればOKです。
アニメーションの手順
アニメーションの手順は
- テクスチャからアニメーションのコマ数だけスプライトフレームを作る
- スプライトを作成してアニメーションを設定する
- スプライトの表示位置を指定してレイヤに加える
になります。手順が多いですが、ゲーム制作には避けて通れない部分です。
1 テクスチャからアニメーションのコマとなるフレームを作る
-- テクスチャの作成
local texture = cc.Director:getInstance():getTextureCache():addImage("texture.png")

-- スプライトフレームの作成
local frame0 = cc.SpriteFrame:createWithTexture(texture, cc.rect(0, 0, 256, 256))
local frame1 = cc.SpriteFrame:createWithTexture(texture, cc.rect(256, 0, 256, 256))
テクスチャをアニメーションのコマで1つずつ切り出しています。
2 スプライトを作成してアニメーションを設定する
-- スプライトの作成
local sprite = cc.Sprite:createWithSpriteFrame(frame0)

-- アニメーションの作成
local animation = cc.Animation:createWithSpriteFrames({frame0,frame1}, 0.8) -- 0.8はアニメーションを切り替える秒数
local animate = cc.Animate:create(animation)
sprite:runAction(cc.RepeatForever:create(animate))
スプライトを作成してアクションを設定しています。
スプライトフレームの配列とアニメーションを切り替える時間を指定してアニメーションを作成して、それを無限に繰り返しています。
3 スプライトの表示位置を指定してシーンに加える
-- スプライトの位置を設定
sprite:setPosition(visibleSize.width / 2, visibleSize.height / 2)

-- シーンに加える
scene:addChild(sprite)
表示する位置を指定して、シーンに配置して画面に表示します。
