本稿では,Visual Studio の WPF(C#) に OpenGL(アンチエイリアス付き) を実装するための手順を述べる.
#OpenTKのインストール
- 新規作成→プロジェクトで,テキトウに新規プロジェクトを作成する.
- [ツール]→[NuGet パッケージマネージャ]→[パッケージマネージャコンソール]
(下にPM>と書いてある,コマンドを入力できるウィンドウが出てくる) - PM> Install-Package OpenTK.GLControl -Version 3.3.3 と入力.エンターキーを押す.
終わり.
#OpenGLで描画する領域をメインウィンドウに作る
[表示]→[ツールボックス]→[WindowsFormsHost]をクリックし,メインウィンドウにドラッグ&ドロップ.
MainWindow.xaml の下の方に「x:Name="glHost"」を追記する.
MainWindow.xaml
<Window x:Class="入力したプロジェクト名.MainWindow"
        xmlns="http://schemas.microsoft.com/winfx/2006/xaml/presentation"
        xmlns:x="http://schemas.microsoft.com/winfx/2006/xaml"
        xmlns:d="http://schemas.microsoft.com/expression/blend/2008"
        xmlns:mc="http://schemas.openxmlformats.org/markup-compatibility/2006"
        xmlns:local="clr-namespace:入力したプロジェクト名"
        mc:Ignorable="d"
        Title="MainWindow" Height="820.8" Width="1060" Background="#FF1860F0">
        <Grid>
             <WindowsFormsHost x:Name="glHost" HorizontalAlignment="Left" Width="300" Margin="10,10,0,0" VerticalAlignment="Top" RenderTransformOrigin="0.512,0.055"/>
        </Grid>
</Window>
#描画する準備
MainWindow.xaml.cs を次のように編集する.
MainWindow.xaml.cs
using System;
using System.Collections.Generic;
using System.Linq;
using System.Text;
using System.Threading.Tasks;
using System.Windows;
using System.Windows.Controls;
using System.Windows.Data;
using System.Windows.Documents;
using System.Windows.Input;
using System.Windows.Media;
using System.Windows.Media.Imaging;
using System.Windows.Navigation;
using System.Windows.Shapes;

using OpenTK;
using OpenTK.Graphics;
using OpenTK.Graphics.OpenGL;

namespace (入力したプロジェクト名)
{
    /// <summary>
    /// MainWindow.xaml の相互作用ロジック
    /// </summary>
    public partial class MainWindow : Window
    {

        static GraphicsMode mode = new GraphicsMode(
                                                 GraphicsMode.Default.ColorFormat,
                                                 GraphicsMode.Default.Depth,
                                                 8,//GraphicsMode.Default.Stencil,
                                                 8,//GraphicsMode.Default.Samples,
                                                 GraphicsMode.Default.AccumulatorFormat,
                                                 GraphicsMode.Default.Buffers,
                                                 GraphicsMode.Default.Stereo
                                                 );

        //コンテキストの作成
        GLControl glControl = new GLControl(mode);

        /// <summary>
        /// コンストラクタ
        /// </summary>
        public MainWindow()
        {
            InitializeComponent();

            //イベントの追加
            glControl.Load += glControl_Load;
            glControl.Paint += glControl_Paint;
            glControl.Resize += glControl_Resize;
            //ホストの子に設定
            glHost.Child = glControl;

        }

        private void glControl_Load(object sender, EventArgs e)
        {

        }

        private void glControl_Resize(object sender, EventArgs e)
        {

        }

        private void glControl_Paint(object sender, System.Windows.Forms.PaintEventArgs e)
        {

        }


    }
}
[▷開始]を押す.
エラーがでなければ次へ.
#円柱を描画する
MainWindow.xaml.cs を次のように編集する.
MainWindow.xaml.cs
using System;
using System.Collections.Generic;
using System.Linq;
using System.Text;
using System.Threading.Tasks;
using System.Windows;
using System.Windows.Controls;
using System.Windows.Data;
using System.Windows.Documents;
using System.Windows.Input;
using System.Windows.Media;
using System.Windows.Media.Imaging;
using System.Windows.Navigation;
using System.Windows.Shapes;

using OpenTK;
using OpenTK.Graphics;
using OpenTK.Graphics.OpenGL;

namespace (入力したプロジェクト名)
{
    /// <summary>
    /// MainWindow.xaml の相互作用ロジック
    /// </summary>
    public partial class MainWindow : Window
    {

        static GraphicsMode mode = new GraphicsMode(
                                                 GraphicsMode.Default.ColorFormat,
                                                 GraphicsMode.Default.Depth,
                                                 8,//GraphicsMode.Default.Stencil,
                                                 8,//GraphicsMode.Default.Samples,
                                                 GraphicsMode.Default.AccumulatorFormat,
                                                 GraphicsMode.Default.Buffers,
                                                 GraphicsMode.Default.Stereo
                                                 );

        //コンテキストの作成
        GLControl glControl = new GLControl(mode);

        /// <summary>
        /// コンストラクタ
        /// </summary>
        public MainWindow()
        {
            InitializeComponent();

            //イベントの追加
            glControl.Load += glControl_Load;
            glControl.Paint += glControl_Paint;
            glControl.Resize += glControl_Resize;
            //ホストの子に設定
            glHost.Child = glControl;

        }

        private void glControl_Load(object sender, EventArgs e)
        {
            // 背景色の設定
            GL.ClearColor(Color4.White);

            // ビューポートの設定
            GL.Viewport(0, 0, glControl.Width, glControl.Height);

            // 視体積の設定
            GL.MatrixMode(MatrixMode.Projection);
            Matrix4 proj = Matrix4.CreatePerspectiveFieldOfView(MathHelper.PiOver4, glControl.AspectRatio, 0.2f, 5);
            GL.LoadMatrix(ref proj);

            // 視界の設定
            GL.MatrixMode(MatrixMode.Modelview);
            Matrix4 look = Matrix4.LookAt(Vector3.One, new Vector3(0, 0, 0.75f), Vector3.UnitZ);
            GL.LoadMatrix(ref look);

            // デプスバッファの使用
            GL.Enable(EnableCap.DepthTest);

            // 光源の使用
            GL.Enable(EnableCap.Lighting);

        }

        private void glControl_Resize(object sender, EventArgs e)
        {
            // ビューポートの設定
            GL.Viewport(0, 0, glControl.Width, glControl.Height);
        }

        private void glControl_Paint(object sender, System.Windows.Forms.PaintEventArgs e)
        {
            GL.Clear(ClearBufferMask.ColorBufferBit | ClearBufferMask.DepthBufferBit);

            GL.Material(MaterialFace.Front, MaterialParameter.Emission, Color4.Blue);
            tube(2, 0.1f, 0.1f);

            glControl.SwapBuffers();
        }

        float rx, ry;
        void tube(float length, float radius1, float radius2)
        {

            GL.PushMatrix();
            GL.Begin(PrimitiveType.TriangleStrip);
            GL.Normal3(Vector3.One);
            for (int deg = 0; deg <= 360; deg = deg + 3)
            {
                rx = (float)Math.Cos((float)Math.PI * deg / 180);
                ry = (float)Math.Sin((float)Math.PI * deg / 180);
                GL.Vertex3(rx * radius2, ry * radius2, length / 2);
                GL.Vertex3(rx * radius1, ry * radius1, -length / 2);

            }
            GL.End();
            GL.PopMatrix();

        }

    }
}
[▷開始]を押す.
青い円柱が描画されているはず.
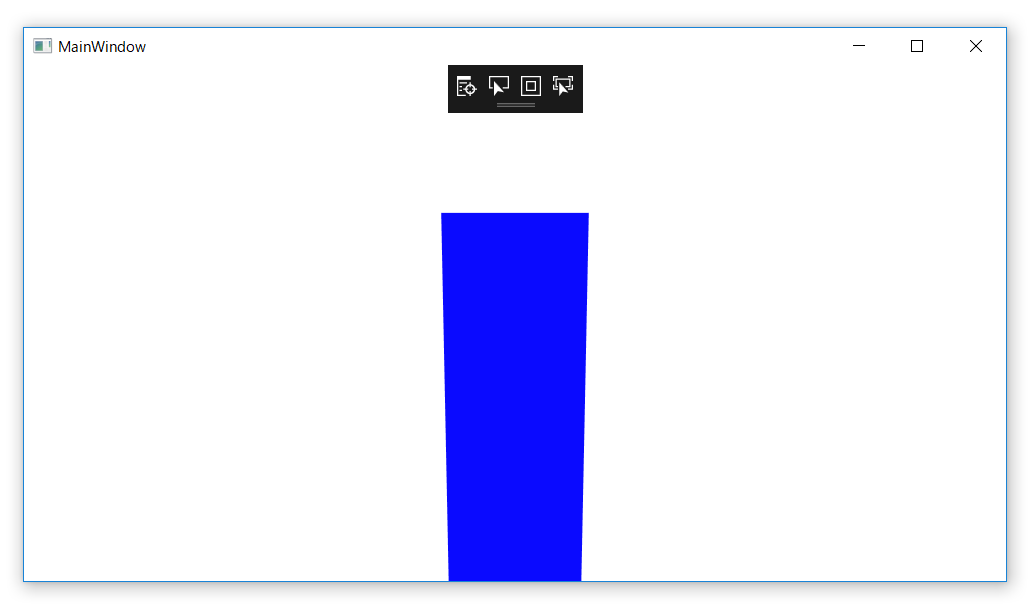
アンチエイリアスが効いているため,線がギザギザしない.
#黒い謎の四角を消す

[デバッグ]→[オプション]→[全般]→(下の方にスクロール)→[xamlのUIデバッグツールを有効にする]のチェックを外す.
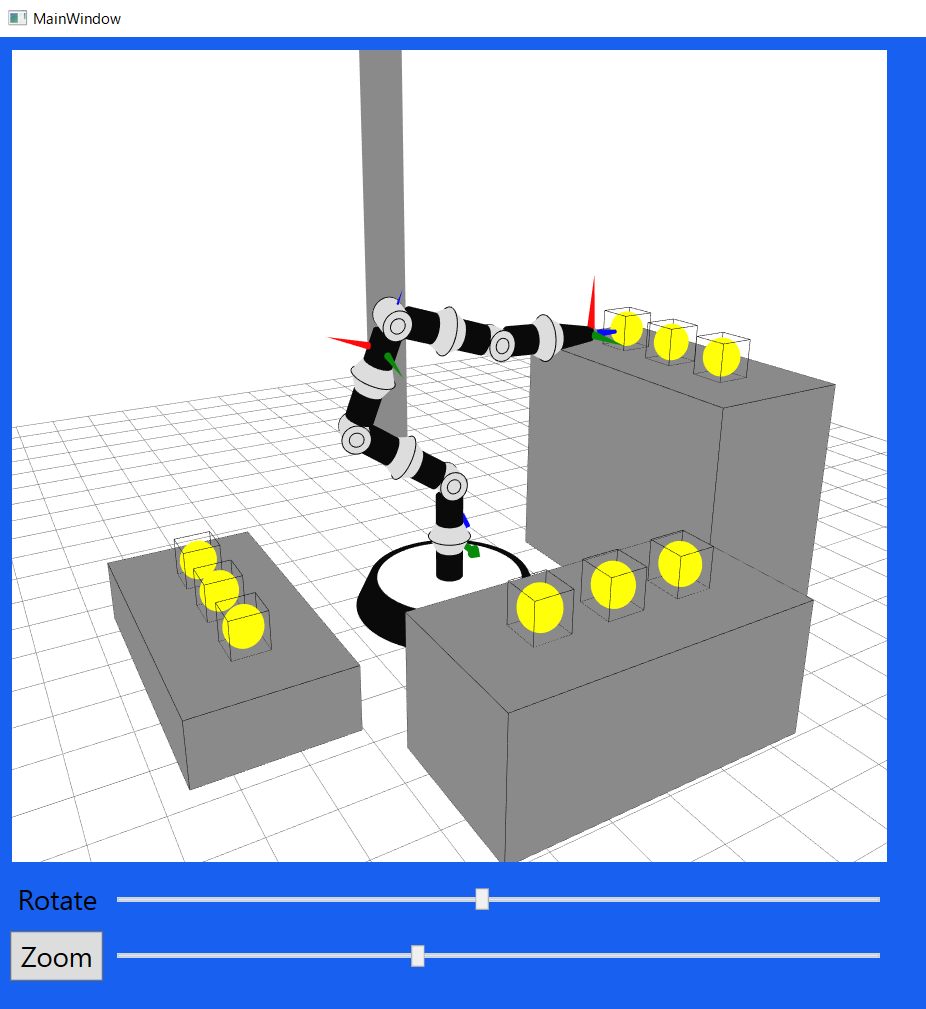
#応用例
私の場合は,この記事の内容を起点にして多関節ロボットのシミュレータを作成しました.