はじめに
three.jsというwebGLを扱えるライブラリがあったので軽く触ってみました。
試しに動かしてみる程度から始めたいので下記CDNを使用しています。
用語の理解など間違っている部分があれば指摘していただけるとありがたいです。
<script src="https://unpkg.com/three@0.137.4/build/three.min.js"></script>
実際に試してみる
- htmlはcanvasタグを用意して、表示させるアニメーション、CGなどをcanvas内で扱う流れみたいです。
sample.html
<!DOCTYPE html>
<html>
<head>
  <meta charset="utf-8"/>
  <script src="https://unpkg.com/three@0.137.4/build/three.min.js"></script>
</head>
<body>
  <canvas id="canvas"></canvas>
</body>
</html>
- レンダラーを新しく作ります。
レンダラーとは映像を出力させるシステムのことです、テレビやディスプレイみたいなイメージです。
この設定でhtmlで記載したcanvasタグ内に画面を300×400の大きさで作成しました。
sample.js
function init(){
  const width = 400;
  const height = 300;

  // レンダラーを作成
  const renderer = new THREE.WebGLRenderer({
    canvas: document.querySelector("#canvas")
  });
  renderer.setPixelRatio(window.devicePixelRatio);
  renderer.setSize(width, height);
}
- レンダラー(画面)だけ作っても映すものがないので今度は映す対象であるscene(画面の内側)を作っていきます。
Sceneとは実際に中身(カメラ、キャラクター、その他オブジェクトなど)を配置する空間のことを指します。
ゲームをするときに実際にキャラクターが動いている空間のイメージです。
sample.js
function init(){
  const width = 400;
  const height = 300;

  // レンダラーを作成
  const renderer = new THREE.WebGLRenderer({
    canvas: document.querySelector("#canvas")
  });
  renderer.setPixelRatio(window.devicePixelRatio);
  renderer.setSize(width, height);

  // シーンを作成
  const scene = new THREE.Scene();
}
- 空間だけ用意しても何も表示されないのでカメラを用意します。
カメラを設置することでこの空間の中の大体このあたりを表示させるという範囲を設定します。
ちなみにz座標を1000に設定しているのは被写体をsceneの中心である(0,0,0)あたりに配置させたいからです。
sample.js
function init(){
  const width = 400;
  const height = 300;

  // レンダラーを作成
  const renderer = new THREE.WebGLRenderer({
    canvas: document.querySelector("#canvas")
  });
  renderer.setPixelRatio(window.devicePixelRatio);
  renderer.setSize(width, height);

  // シーンを作成
  const scene = new THREE.Scene();

  //カメラを作成
  const camera = new THREE.PerspectiveCamera(45, width / height);
  //scene内にセットする
  camera.position.set(0, 0, +1000);
}
- sceneとカメラを作成しただけだと画面(レンダラー)と紐づいていないため何も映りません。
そこで紐づける処理(レンダリング)を追加します。
sample.js
function init(){
  const width = 400;
  const height = 300;

  // レンダラーを作成
  const renderer = new THREE.WebGLRenderer({
    canvas: document.querySelector("#canvas")
  });
  renderer.setPixelRatio(window.devicePixelRatio);
  renderer.setSize(width, height);

  // シーンを作成
  const scene = new THREE.Scene();

  //カメラを作成
  const camera = new THREE.PerspectiveCamera(45, width / height);
  //scene内にセットする
  camera.position.set(0, 0, +1000);

  // レンダリング
  renderer.render(scene, camera);
}
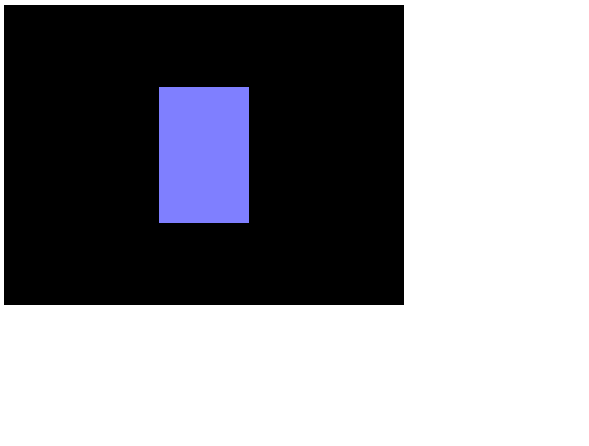
-
表示された画面

-
ここまでで上のスクショのような真っ暗な画面が映ります。
これはカメラに何もない空間が映っている、被写体がいない状態です。 -
さすがに真っ暗なだけではつまらないので被写体である箱を追加します。
sample.js
function init(){
  const width = 400;
  const height = 300;

  // レンダラーを作成
  const renderer = new THREE.WebGLRenderer({
    canvas: document.querySelector("#canvas")
  });
  renderer.setPixelRatio(window.devicePixelRatio);
  renderer.setSize(width, height);

  // シーンを作成
  const scene = new THREE.Scene();

  //カメラを作成
  const camera = new THREE.PerspectiveCamera(45, width / height);
  //scene内にセットする
  camera.position.set(0, 0, +1000);

  // 箱を作成
  //大きさ(x,y,z)
  const geometry = new THREE.BoxGeometry(200, 300, 400);
 //色、質感など見た目の設定
  const material = new THREE.MeshNormalMaterial();
  //上記で指定した大きさ、質感を箱に適用
  const box = new THREE.Mesh(geometry, material);
  //scene上のどこに配置するか
  box.position.set(0,0,0);
  //scene上に配置
  scene.add(box);
  // レンダリング
  renderer.render(scene, camera);
}
-
少しのっぺりとしていますが、上記スクショのように箱が追加されました。
-
奥行きがあるようには見えませんが、ちゃんと直方体になっているはずです。
-
ちなみにthree.jsでは箱以外にもいろんな形が用意されています。
詳しくは下記リンクへ
おわりに
- 下準備の段階でブラウザ上にポリゴンを表示させるまで試してみました。
表示させることができれば、メッシュを変えてみたり、自分で作った3dデータ表示させてみたり、操作してみたり試す幅が広がると思います。
今後も少しずつ試していければと思っています。
実装サンプル(おまけ)
- 表示させるだけではつまらなかったのでオブジェクトが回転しながら1秒(正確には60フレーム)ごとに跳ね返るサンプルを作成してみました。
See the Pen Untitled by kentaro.ishida (@msippc1997) on CodePen.
参考文献