今回はXcode5を使用して、カウンターアプリを作成しました。
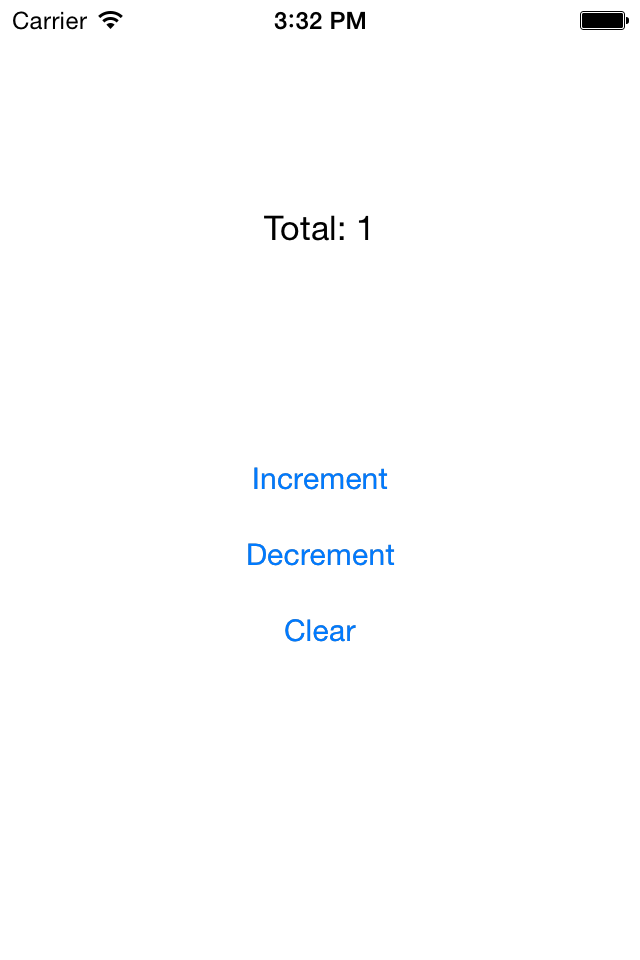
完成系はこちら。シンプルの極みです。
今更感が否めないですが、はじめてのiOSアプリケーションなのでその手順を記していきます。笑
1.Xcode起動
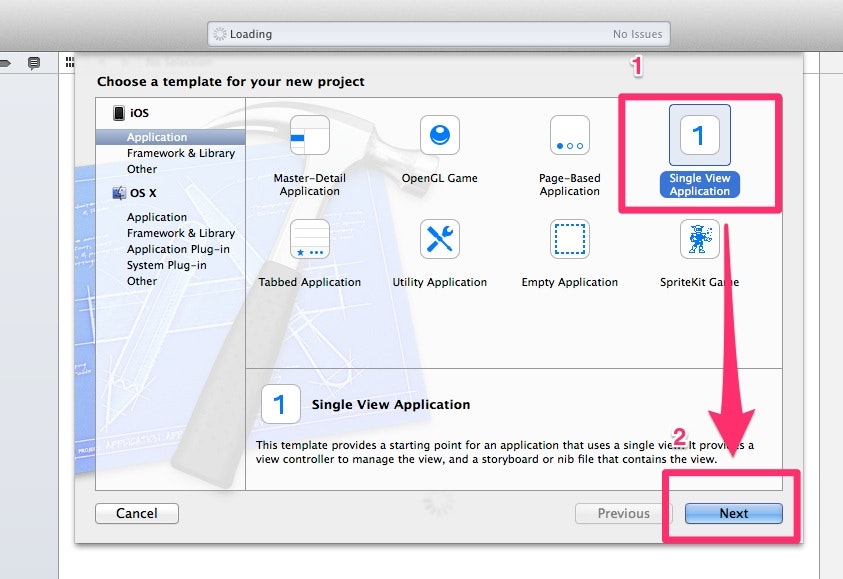
- Single View Applicationを選択
- Nextを選択
- Product Name/Organization Name/Company Identiferを入力し、Nextを選択
*今回、私はProduct Nameをcounterとしました。
2. View Controllerの編集
View Controllerってなんぞや?
iOS View Controllerプログラミングガイドによると
View Controllerはアプリケーションのデータとその外観を結びつける重要な役割を果たします。
iOSアプリケーションがユーザインターフェイスを表示する際、その内容はView Controllerが単独で、またはそのグループが連携して管理します。
つまりは、アプリケーションの骨組みです。
RailsのようなMVCのフレームワークでいうControllerに相当します。
ViewController.hとViewController.mの違い
ViewController.hの.hはヘッダーを意味しています。
ヘッダーではボタン等でのアクション情報や、各プログラムに処理結果を渡したり受け取ったりと、プログラムを管理する働きをします。
対して、ViewController.mはViewController.hから渡された値を基に実際に処理を行う働きをします。
1.ViewController.hの編集
実際に書いていきましょう。
今回は、カウントを増やす/減らす/削除する機能を実装します。
コードは以下の通りです。
# import <UIKit/UIKit.h>

@interface ViewController : UIViewController
{
    NSInteger total;
    IBOutlet UILabel *screen;
}

-(IBAction)increment:(id)sender; #カウントを増やす
-(IBAction)decrement:(id)sender; #カウントを減らす
-(IBAction)clear:(id)sender; #カウントをクリアにする

@end
IBActionのIBとは、Interface Builderの略で、マウスなどで直感的に機能を配置できるようにしてくれるソフト(?)のようなものだそうです。
2.ViewController.mの編集
# import "ViewController.h"
@interface ViewController ()
@end
@implementation ViewController
- (void)viewDidLoad
{
[super viewDidLoad];
// Do any additional setup after loading the view, typically from a nib.
}
- (void)didReceiveMemoryWarning
{
[super didReceiveMemoryWarning];
// Dispose of any resources that can be recreated.
}
-(IBAction)increment:(id)sender
{
total++;
[screen setText:[NSString stringWithFormat:@"Total: %d", total]];; #カウントを増やす処理
}
-(IBAction)decrement:(id)sender
{
total--;
[screen setText:[NSString stringWithFormat:@"Total: %d", total]];; #カウントを減らす処理
}
-(IBAction)clear:(id)sender
{
total = 0;
[screen setText:[NSString stringWithFormat:@"Total: %d", total]];;
# カウントをクリアにする処理
}
@end
・total++;やtotal--;、toral = 0;は見てそのまま、totalという変数にカウントの増減の処理を行います。
・[screen setText:[NSString stringWithFormat:@"Total: %d", total]];;では、totalの値を文字列で表示するという処理を行います。
3. 関連づけ
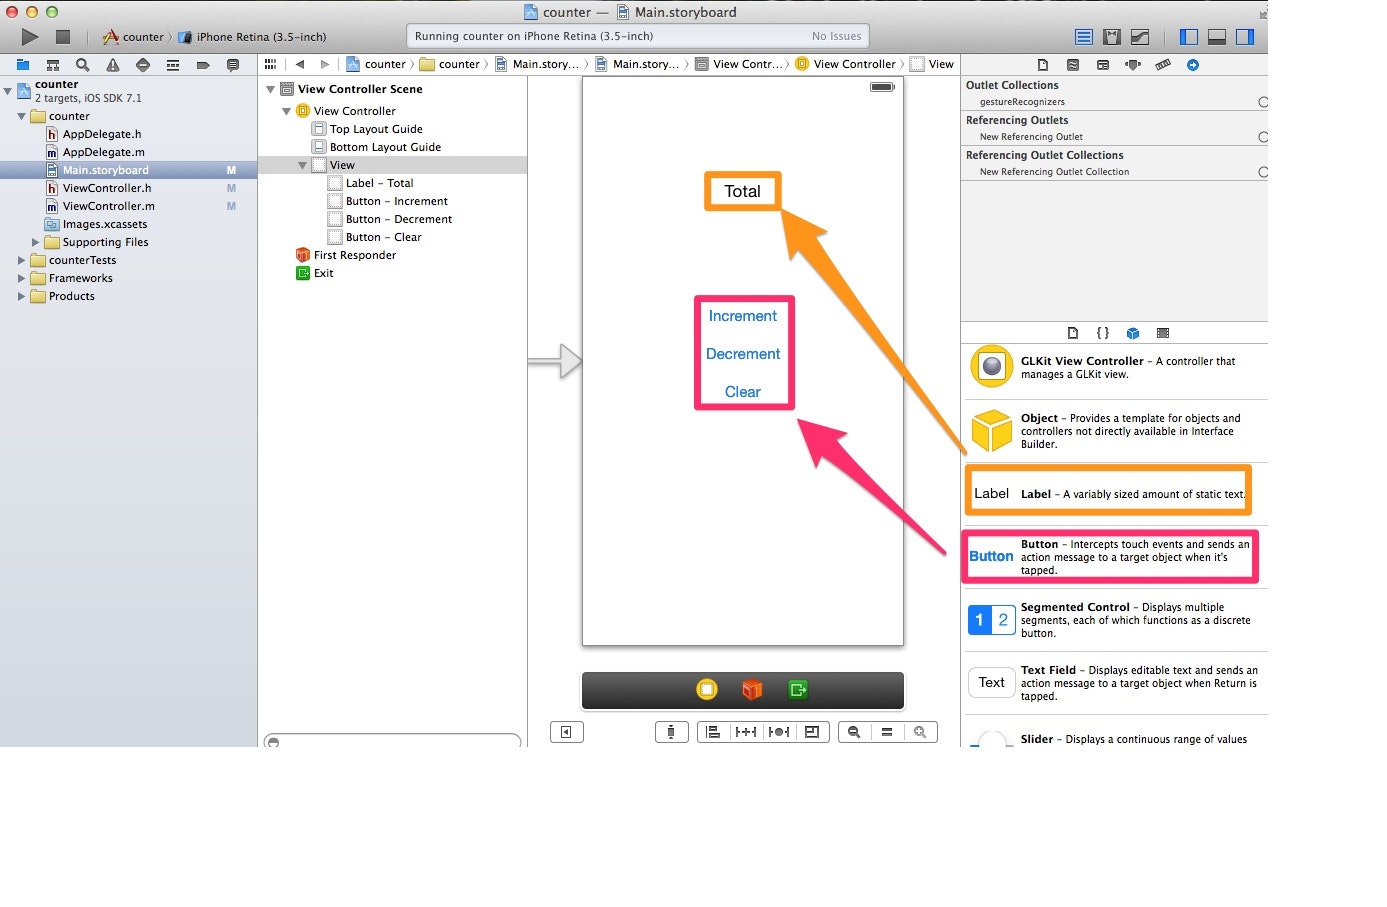
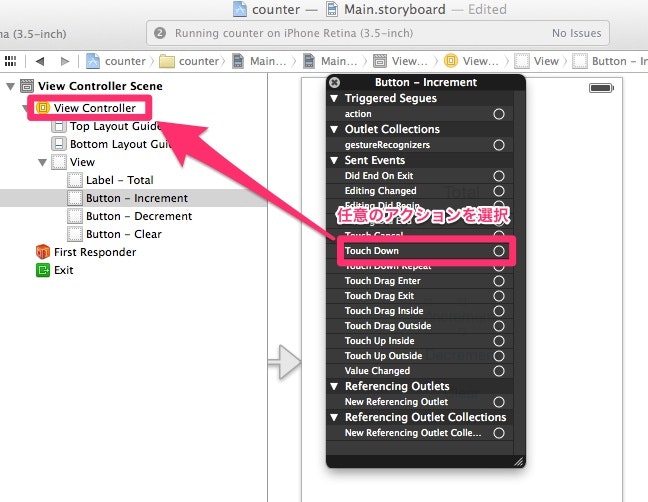
Main StoryboardでViewのパーツとViewControllerのメソッドを関連づけます。
1. パーツの配置
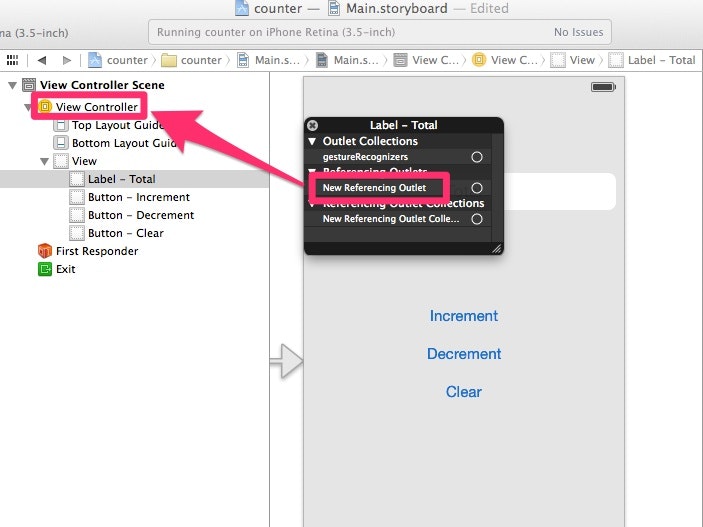
2. パーツとメソッドの関連づけ
1.関連づけたいパーツを右クリック。
2.右に表示されている黒いウィンドウのNew Referencing OutletをViewControllerにドラッグ
これで、Label - TotalはViewControllerと関連づけられ、カウント数を表示できるようになりました。
Button - incrementやdecrementも同じ要領です。
今回はボタンをタップした時にカウントをされるようにしたいので、Touch Downを選択し、関連づけます。
4. ビルド
以上で完了です。最後にiOSシミュレーターでポチポチできるようにビルドしてみてください。
プログラミング経歴が浅い上にはじめてのiOSということで、何がなんだかちゃんと理解は出来てませんが、やってみて非常に良い経験になりました。次は、Xcode6 + Swiftで簡単なアプリを作ってみようと思います。
