こんにちは!
先日、UI改修をしている中で、「テーブルビューのスクロール時にヘッダーとフッターを一緒にスクロールさせたい!」ということがありました...
「ヘッダー、フッターのどちらかを固定しない」という記事はあったのですが、どちらも固定しない記事は見つけられなかったので、私がした対処を書いておきます。
コード
# import "InitialViewController.h"

@interface InitialViewController () <UITableViewDataSource, UITableViewDelegate>
@property (weak, nonatomic) IBOutlet UITableView *tableView;

@end

@implementation InitialViewController

- (void)viewDidLoad {
    [super viewDidLoad];
    self.tableView.dataSource = self;
    self.tableView.delegate = self;

    [self scrollViewDidScroll:self.tableView];
}


// MARK: - UITableViewDataSource
- (NSInteger)tableView:(UITableView *)tableView numberOfRowsInSection:(NSInteger)section
{
    return 5;
}

- (UITableViewCell *)tableView:(UITableView *)tableView
         cellForRowAtIndexPath:(NSIndexPath *)indexPath
{
    NSString *cellName = @"Cell";
    UITableViewCell *cell = [tableView dequeueReusableCellWithIdentifier:cellName forIndexPath:indexPath];
    cell.textLabel.text = [NSString stringWithFormat:@"%ld - %ld", indexPath.section, indexPath.row];
    return cell;
}


// MARK: - UITableViewDelegate
- (NSInteger)numberOfSectionsInTableView:(UITableView *)tableView
{
    return 5;
}

- (NSString *)tableView:(UITableView *)tableView titleForHeaderInSection:(NSInteger)section
{
    return [NSString stringWithFormat:@"Header - %ld", section];
}

- (NSString *)tableView:(UITableView *)tableView titleForFooterInSection:(NSInteger)section
{
    return [NSString stringWithFormat:@"Footer - %ld", section];
}

- (void)scrollViewDidScroll:(UIScrollView *)scrollView {
    CGFloat offsetY = scrollView.contentOffset.y;
    CGFloat sectionHeaderHeight = self.tableView.sectionHeaderHeight;
    CGFloat sectionFooterHeight = self.tableView.sectionFooterHeight;
    CGFloat bottomHeight = scrollView.contentSize.height - self.tableView.frame.size.height;

    if (offsetY <= sectionHeaderHeight && offsetY >= 0) {
        scrollView.contentInset = UIEdgeInsetsMake(-offsetY, 0, -sectionFooterHeight, 0);
    } else if (bottomHeight-sectionFooterHeight > scrollView.contentOffset.y && offsetY >= 0) {
        scrollView.contentInset = UIEdgeInsetsMake(-sectionHeaderHeight, 0, -sectionFooterHeight, 0);
    } else if (offsetY >= bottomHeight) {
        scrollView.contentInset = UIEdgeInsetsMake(-sectionHeaderHeight, 0, 0, 0);
    } else if (offsetY >= sectionHeaderHeight) {
        scrollView.contentInset = UIEdgeInsetsMake(-offsetY, 0, -sectionFooterHeight, 0);
    }
}

@end
gitHubにもあげています!!
https://github.com/IshibaSeiko/UntrackingHeaderTable.git
解説
まず、ViewDidLoadに [self scrollViewDidScroll:self.tableView]; を書きます。
初期表示の際にヘッダーやフッターが表示されないように、更新しておきます!
そして、 - (void)scrollViewDidScroll:(UIScrollView *)scrollView では何をやっているかというと...
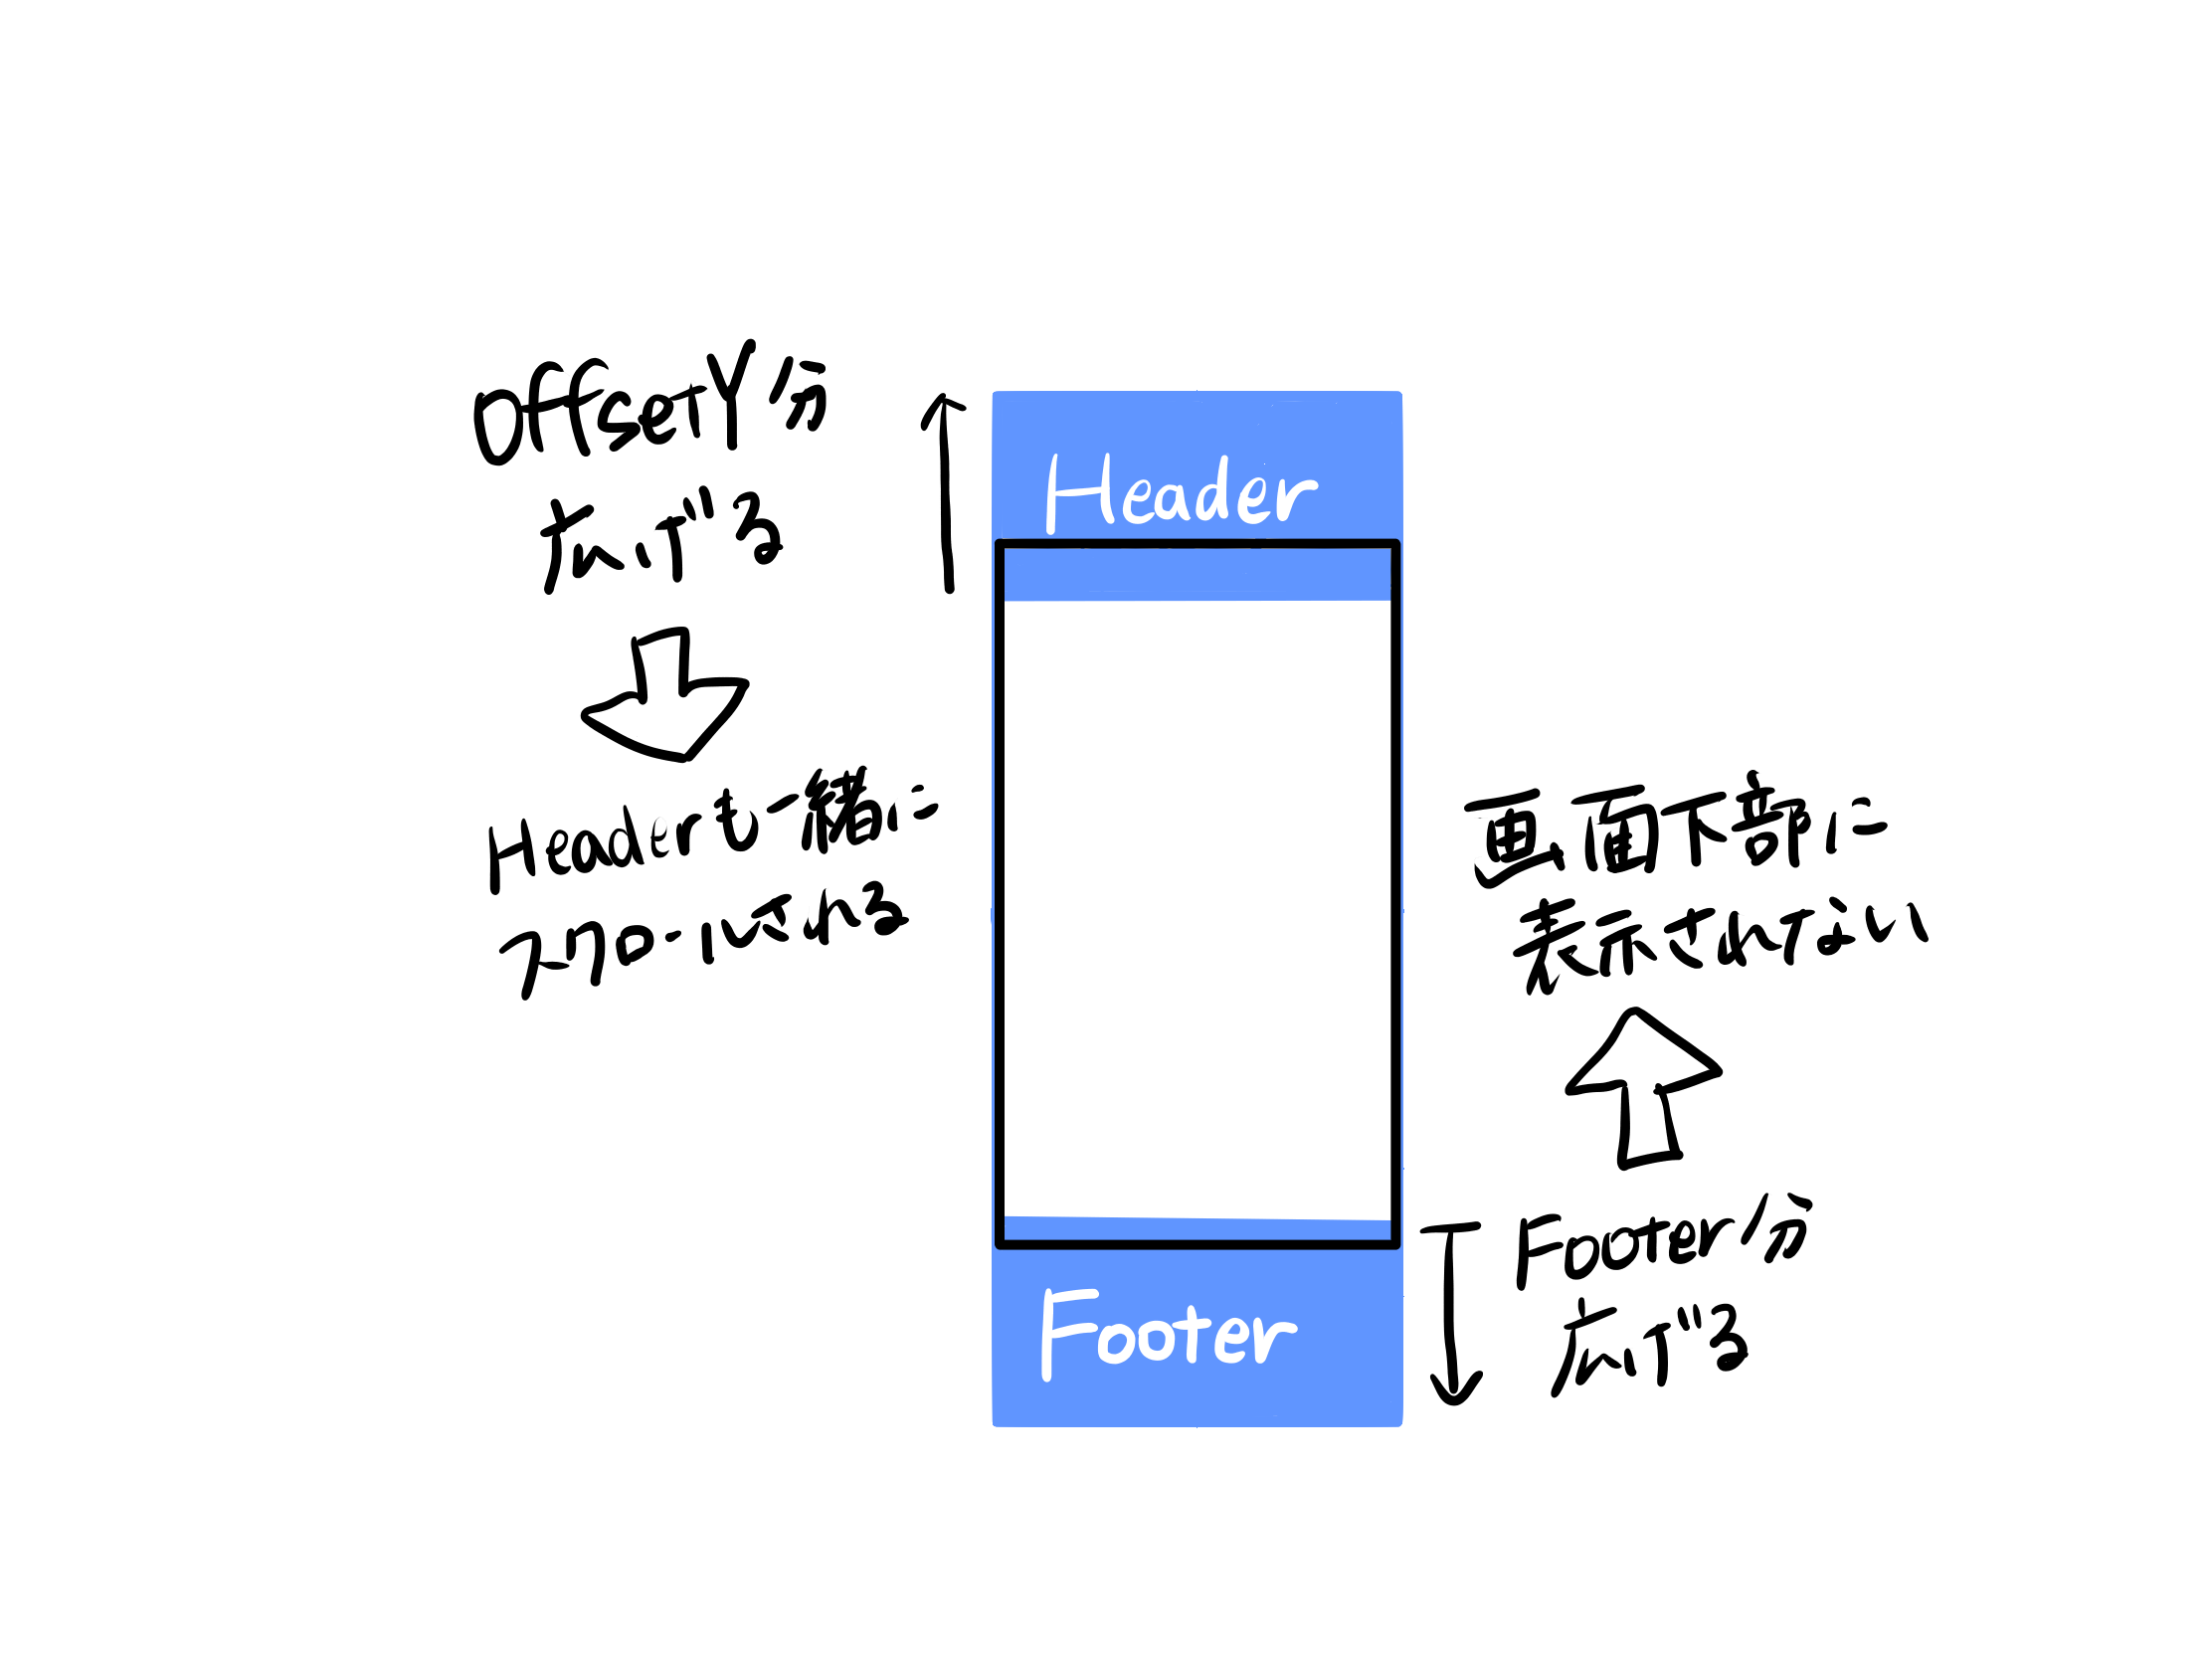
if (offsetY <= sectionHeaderHeight && offsetY >= 0) {
        scrollView.contentInset = UIEdgeInsetsMake(-offsetY, 0, -sectionFooterHeight, 0);
    }
スクロールした領域がテーブルのトップからヘッダーまでの時、スクロールビューの領域をスクロールした分広げます。
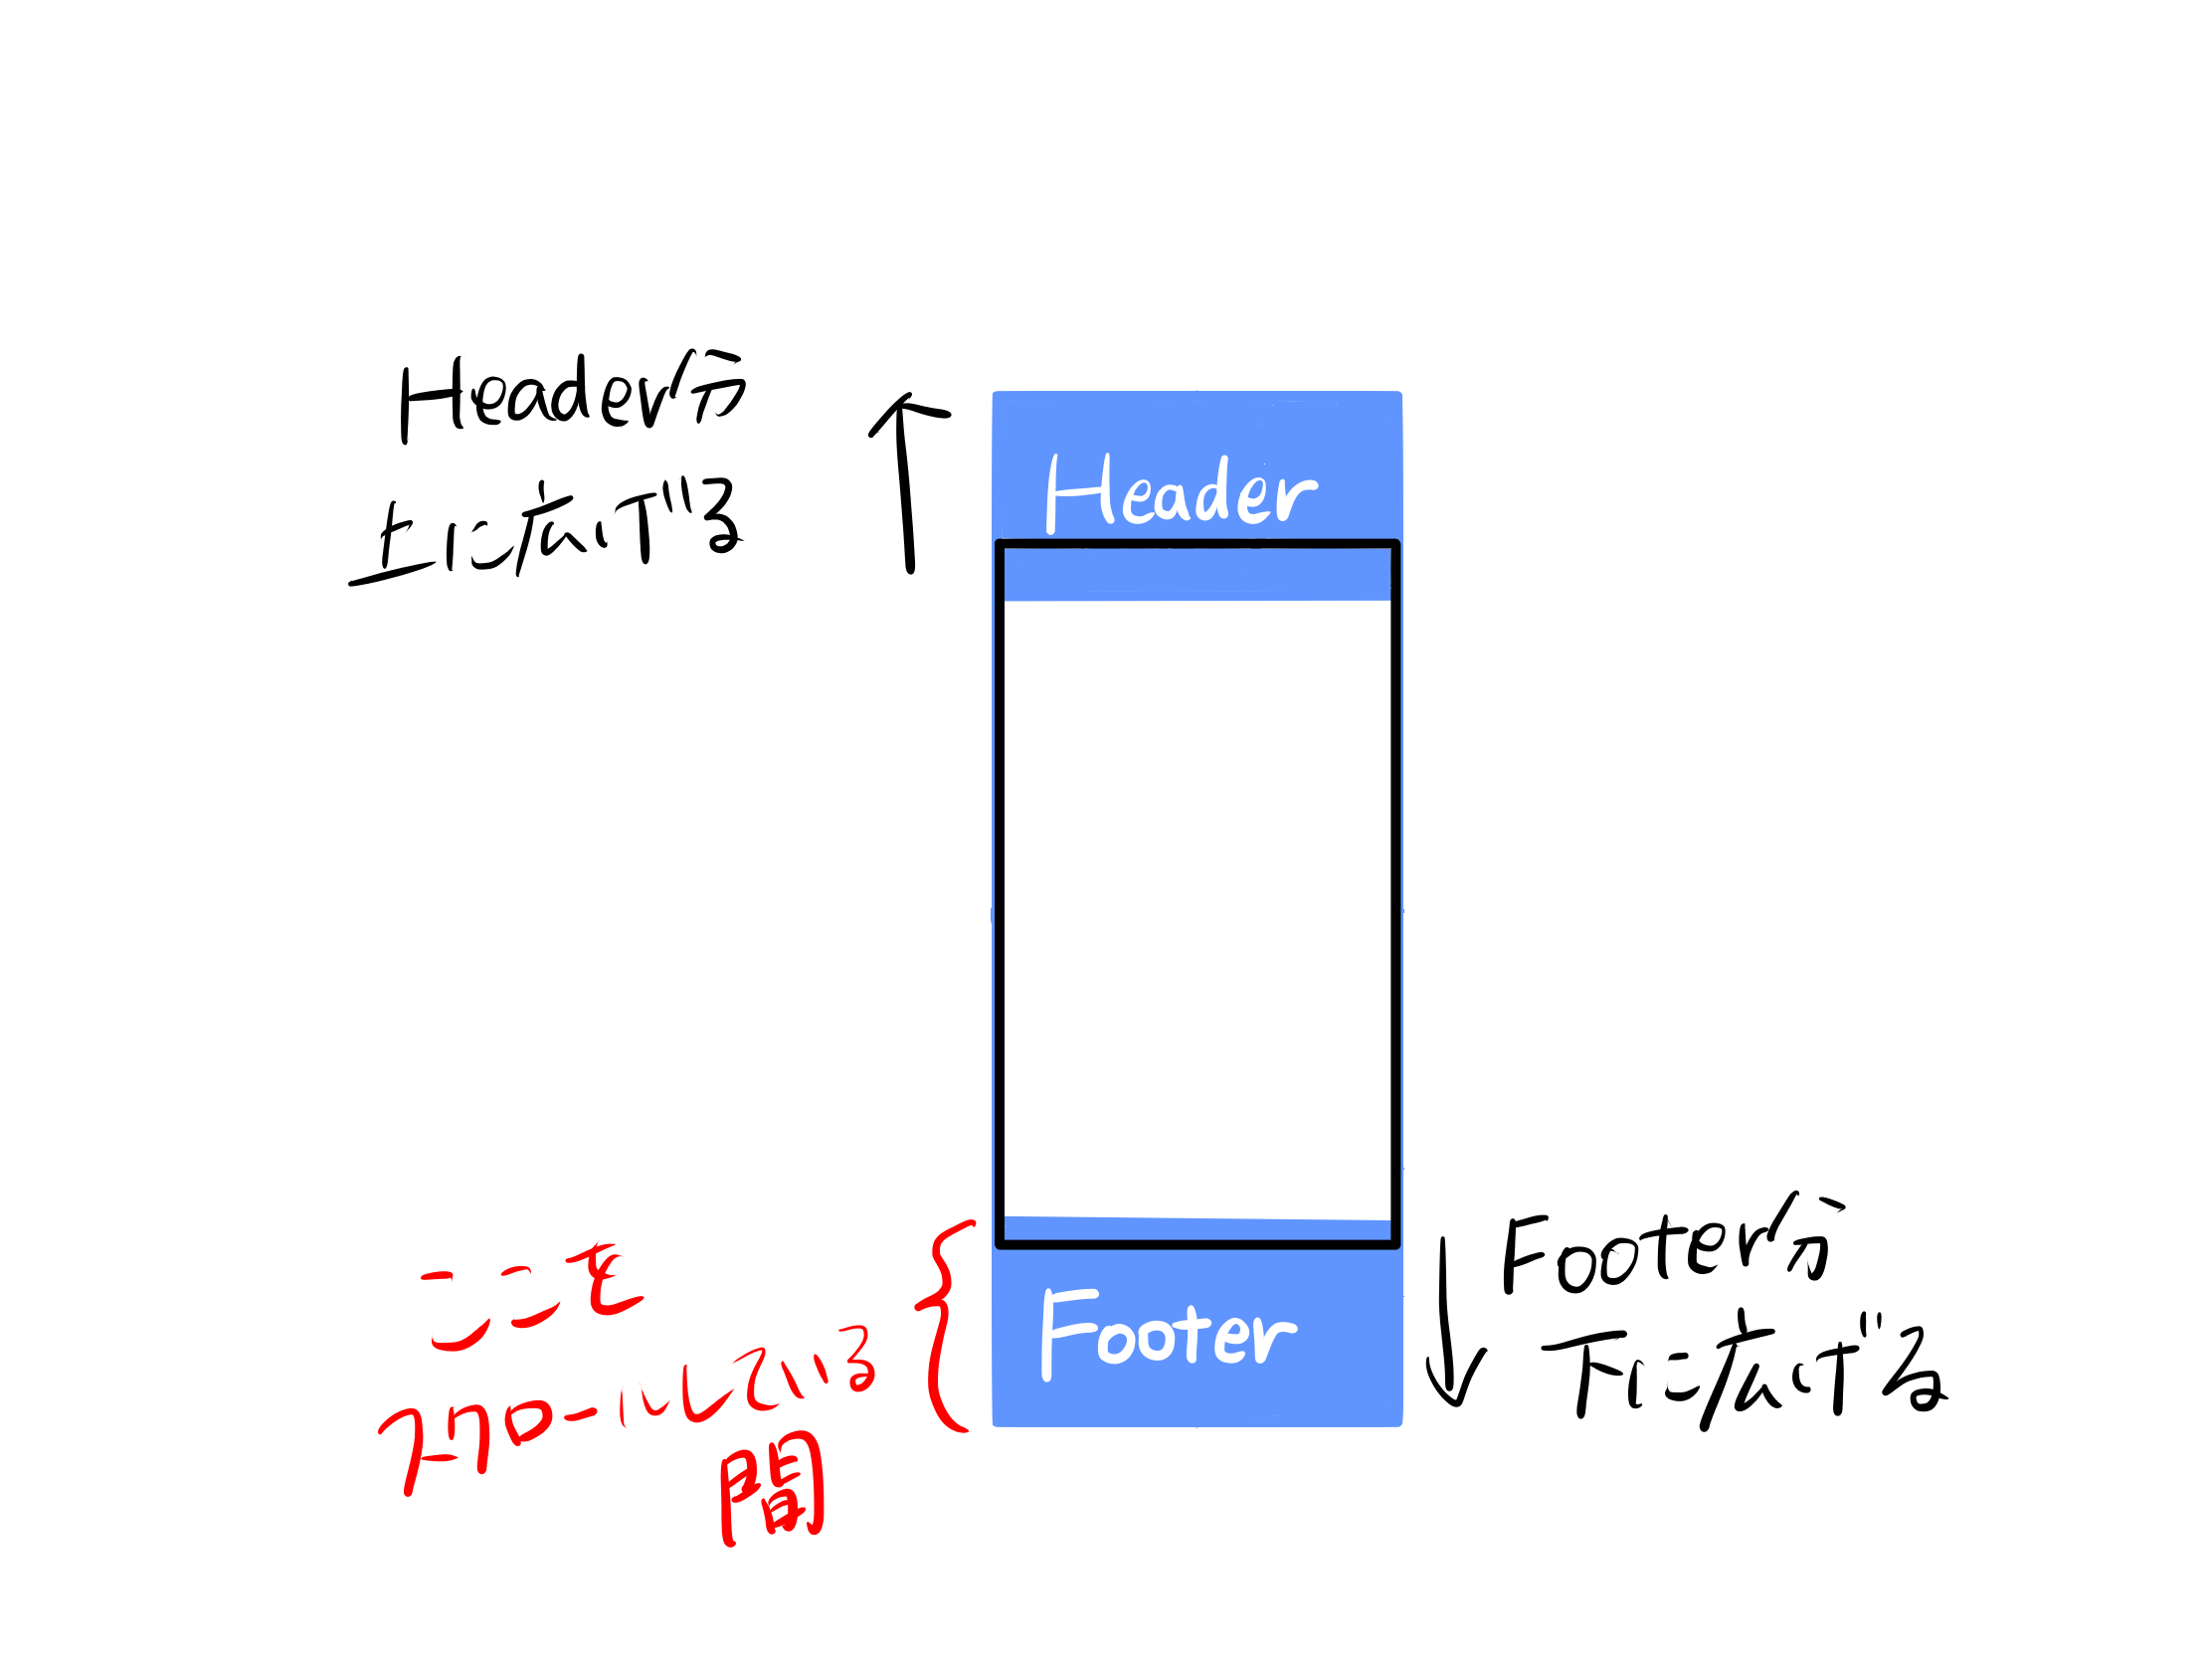
if (bottomHeight-sectionFooterHeight > scrollView.contentOffset.y && offsetY >= 0) {
        scrollView.contentInset = UIEdgeInsetsMake(-sectionHeaderHeight, 0, -sectionFooterHeight, 0);
    }
テーブルの一番下のセルから、テーブルの一番下が表示領域に入っているときは、スクロールビューの領域を上はヘッダー分、下はフッター分広げます。
if (offsetY >= bottomHeight) {
        scrollView.contentInset = UIEdgeInsetsMake(-sectionHeaderHeight, 0, 0, 0);
    }
テーブルの一番下までスクロールしたときは、スクロールビューの領域をヘッダー分広げます。

if (offsetY >= sectionHeaderHeight) {
        scrollView.contentInset = UIEdgeInsetsMake(-offsetY, 0, -sectionFooterHeight, 0);
    }
ヘッダーより下にスクロールしたときは、スクロールビューの領域を上はスクロールした分、下はフッター分広げます。
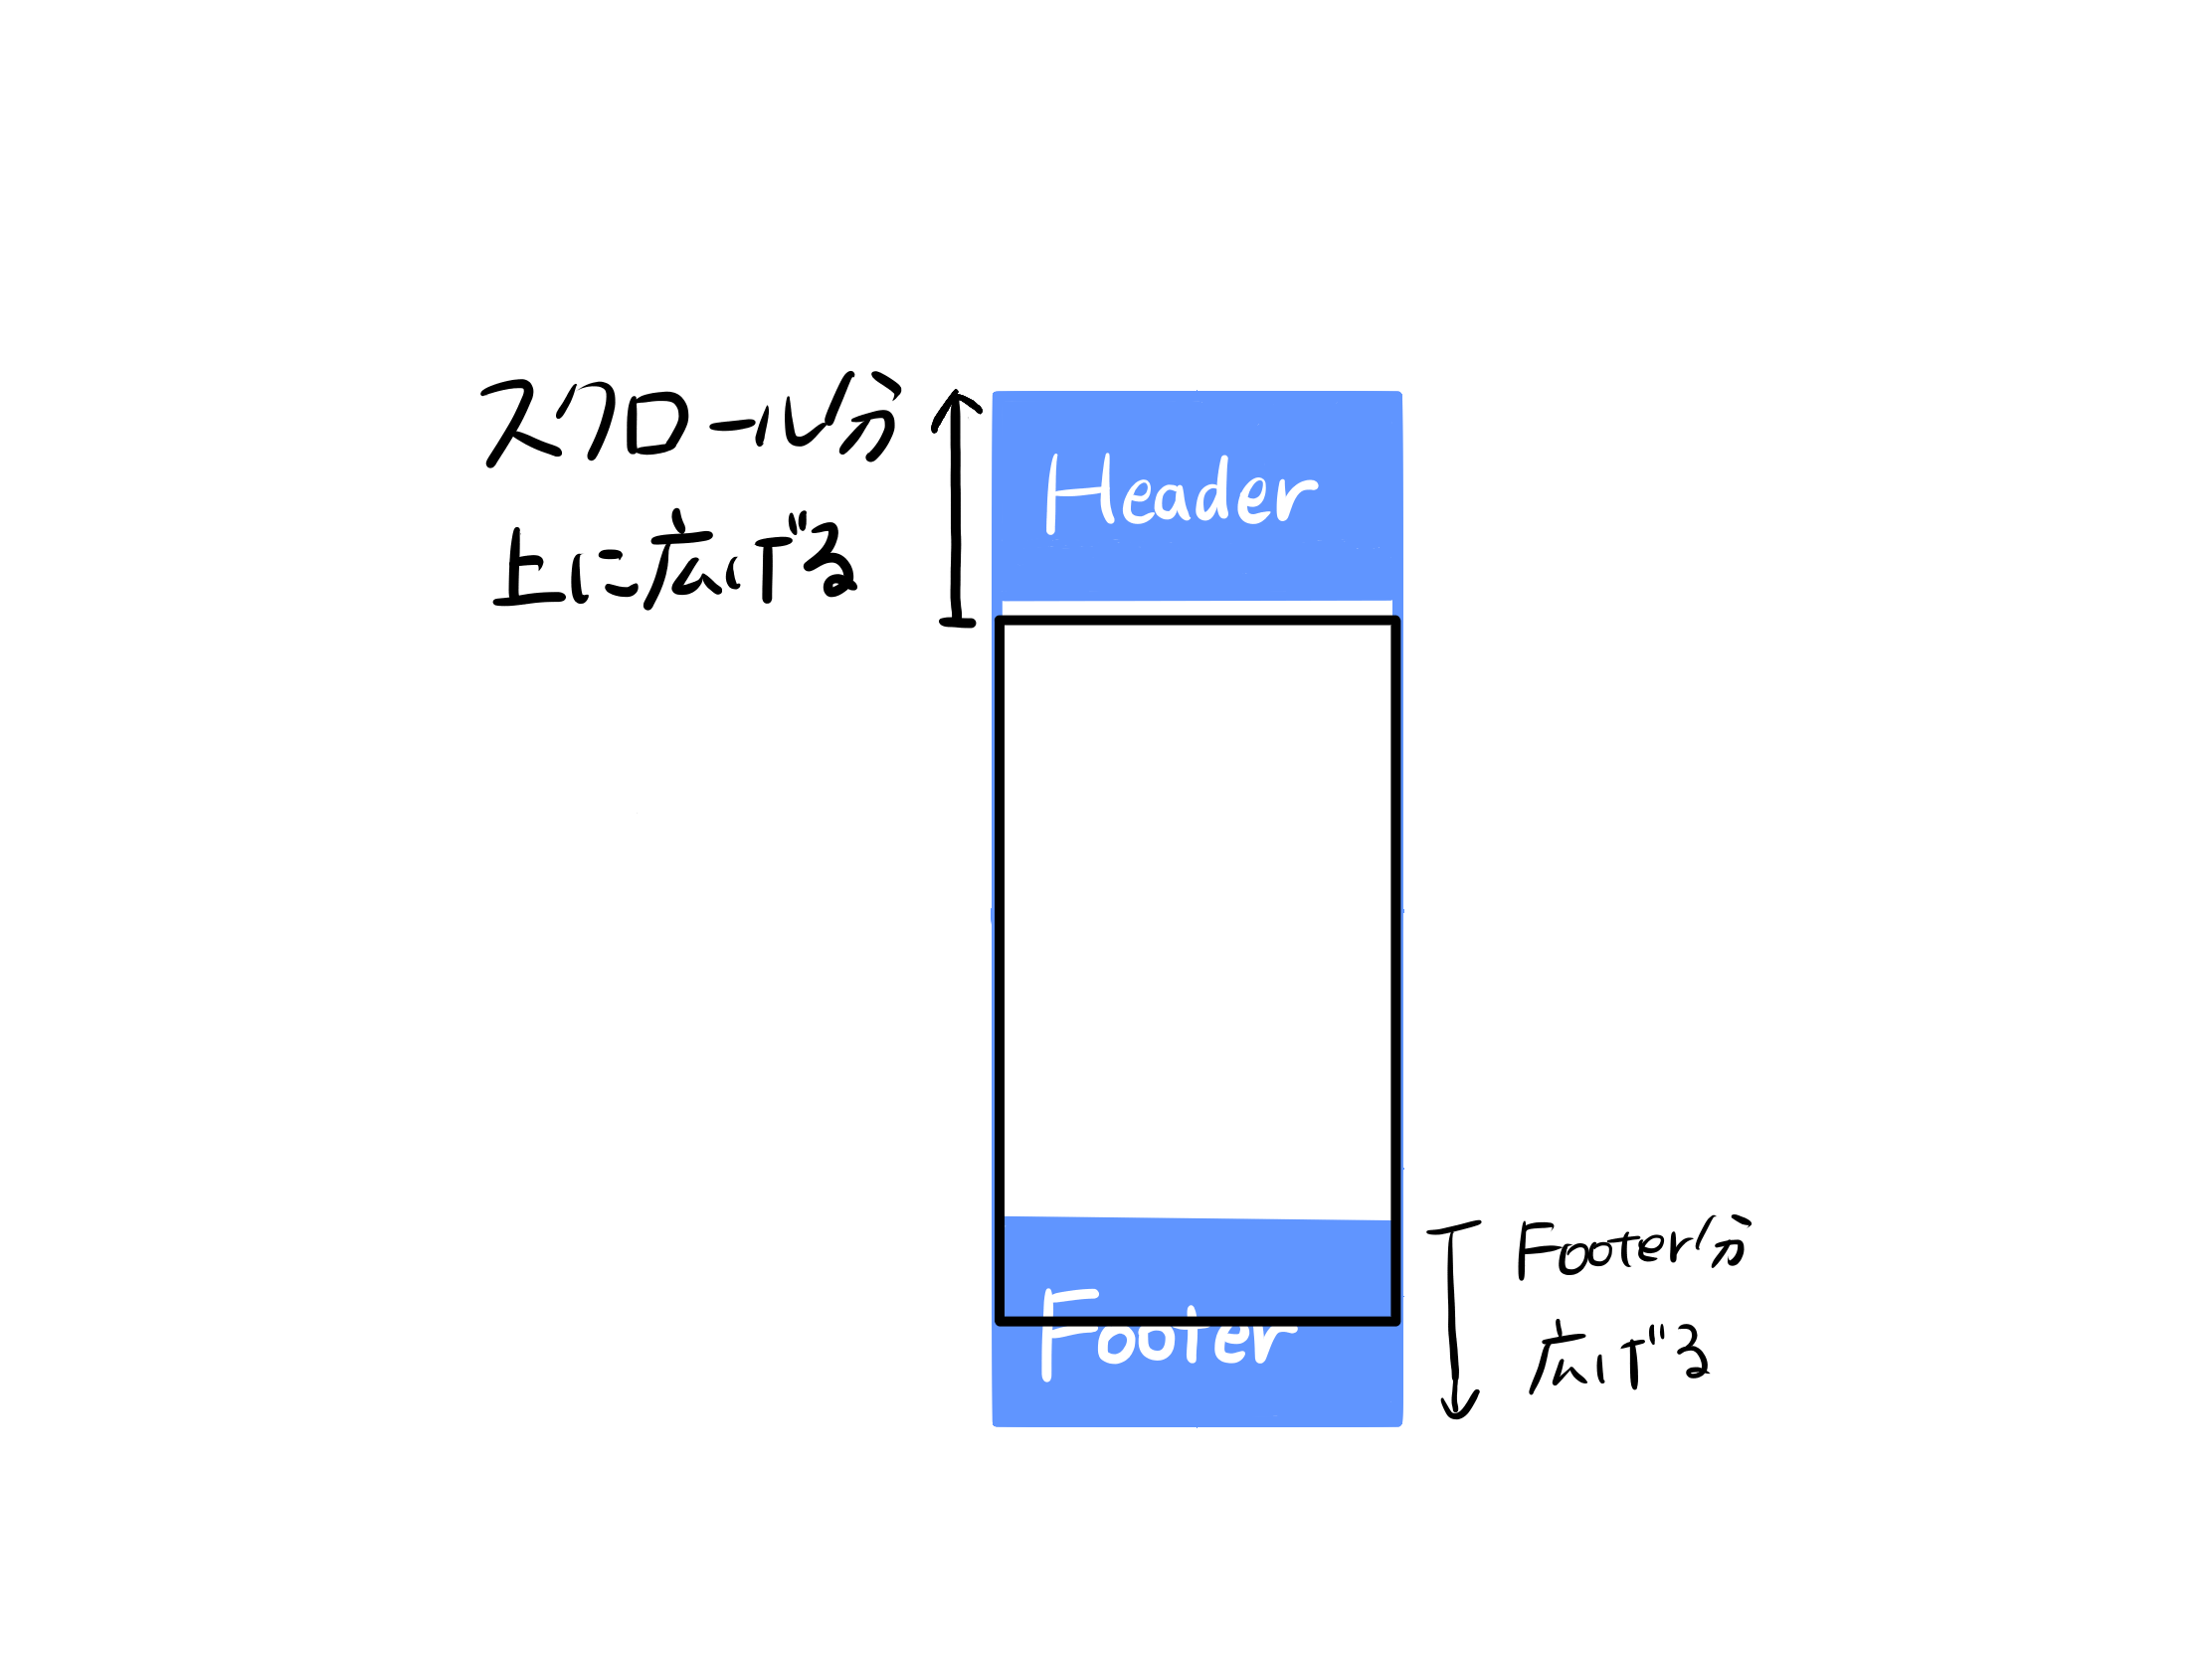
下手すぎて絵の意味がないかもしれませんが、、、こんなイメージです。
参考にした記事
この、テーブルビューのヘッダー、フッターを固定せず、スクロールさせる対応をするにあたって、
下記の記事を参考にさせていただきました。ありがとうございます。
UITableViewでSectionHeader/SectionFooterを残さない方法
https://qiita.com/Yuta/items/a804a25d82ade964b315
UITableViewでセクションフッターをページ下部に残さない・固定しない方法
http://yandr.randy.boy.jp/?eid=9
まとめ
今後のために、とりあえずまとめておきました。