サーバサイドKotlin、流行ってますね!!(?)
Kotlin用フレームワークは黎明期なので、Javaなフレームワークを選択する事になると思います。
Javaフレームワークと言ったらSpringFrameworkですよね。
KotlinでSpringBoot2をやってみたです。
サンプルでDBからデータと取得し返すRestAPIを作成します。
Projectを作成する
https://start.spring.io/
Spring InitializrでProjectを作成します。
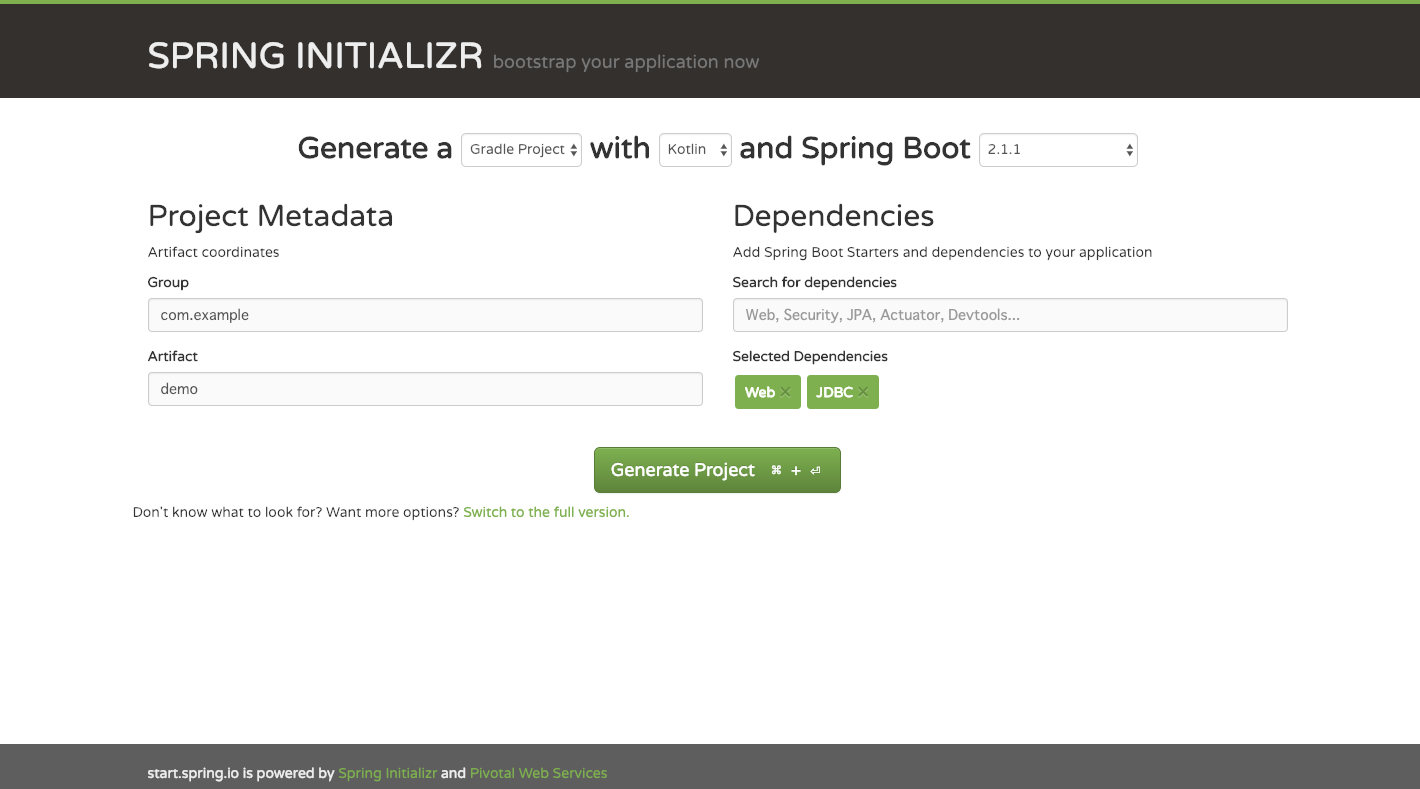
DLしたプロジェクトをIntelliJ IDEAなどで開きます。
お好みですが、APサーバをTomcatではなく、Jettyとかを使用したいときは、dependenciesにJettyを追加し、spring-boot-starter-webに含まれているTomcatを除外します。
implementation('org.springframework.boot:spring-boot-starter-jetty')
configurations {
    implementation.exclude group: 'org.springframework.boot', module: 'spring-boot-starter-tomcat'
}
jdbcを入れているのでDriverが起動時に必要です。dependenciesに追加します。
runtime('com.h2database:h2')
これもお好みですが、application.propertiesではなくapplication.yml使用したい場合は、 application.propertiesを削除してapplication.ymlを作成します。
## 例です
logging:
  level:
    root: warn
    org:
      springframework:
        web: info
spring:
  main:
    banner-mode: "off"
Controllerの作成
まず、簡易なAPIを作成します。
Annotationも気にせずに使用できます。
import com.fasterxml.jackson.annotation.JsonProperty
import org.springframework.http.MediaType
import org.springframework.web.bind.annotation.GetMapping
import org.springframework.web.bind.annotation.RequestMapping
import org.springframework.web.bind.annotation.RestController

@RestController
@RequestMapping(value = ["/api"])
class DemoRestController {

	@GetMapping(
			value = ["/"],
			produces = [MediaType.APPLICATION_JSON_VALUE]
			)
	fun index(): IndexJson {
		return IndexJson("hogehoge", 12345)
	}
}

data class IndexJson(
		@JsonProperty(value = "name") val name: String,
		@JsonProperty(value = "no") val no: Int
)
Data Classを、そのまま返すだけなのでお手軽ですね。
起動
$ ./gradlew bootRun
$ curl -D - http://localhost:8080/api/
HTTP/1.1 200 OK
Date: Wed, 19 Dec 2018 10:30:50 GMT
Content-Type: application/json;charset=utf-8
Transfer-Encoding: chunked

{"name":"hogehoge","no":12345}
はい。Jsonで返ってきました。
DB接続
H2の定義を追加します。
spring:
  main:
    banner-mode: "off"
  datasource:
    url: jdbc:h2:/tmp/h2/demo
    username: sa
    password:
  h2:
    console:
      enabled: true
アプリケーションを再起動すればH2のWebコンソールが起動します。
「 http://localhost:8080/h2-console/ 」でコンソールを参照できます。

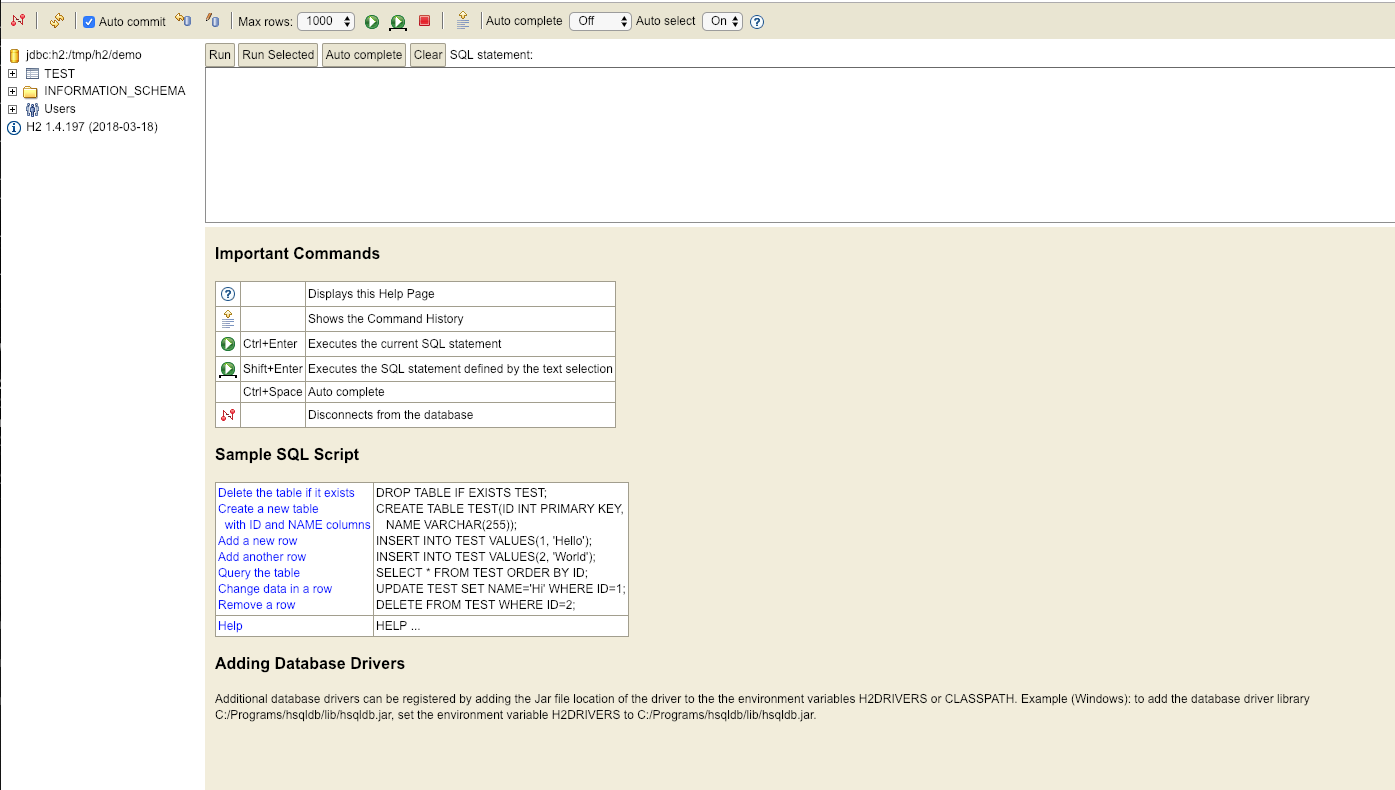
ログインするとSQLを実行できる画面が表示されるので、適当にテーブルとデータを作成、登録してください。
create table test (
  name varchar2(10),
  no int
);

insert into test values ('hoge1', 10);
insert into test values ('hoge2', 20);
insert into test values ('hoge3', 30);
Repository、Service
作成テーブルからデータを取得するRepositoryとServiceを作成します。
data class User(val name: String, val no:Int)
interface DemoRepository {
	fun all(): List<User>
	fun findByName(name: String): User
}
import com.example.demo.repository.DemoRepository
import com.example.demo.repository.User
import org.springframework.jdbc.core.RowMapper
import org.springframework.jdbc.core.namedparam.MapSqlParameterSource
import org.springframework.jdbc.core.namedparam.NamedParameterJdbcTemplate
import org.springframework.stereotype.Repository

@Repository
class JdbcDemoRepository(private val jdbcTemplate: NamedParameterJdbcTemplate) : DemoRepository {

	private val rowMapper = RowMapper<User> { rs, _ ->
		User(
				rs.getString("name"),
				rs.getInt("no")
		)
	}

	override fun all(): List<User> =
		jdbcTemplate.query("select name, no from test", rowMapper)

	override fun findByName(name: String): User {
		val res = jdbcTemplate.query(
				"select name, no from test where name = :targetName",
				MapSqlParameterSource().addValue("targetName", name),
				rowMapper
		)

		return res.requireNoNulls()[0]
	}
}
import com.example.demo.repository.User

interface DemoService {
	fun findUser(name: String): User
}
import com.example.demo.repository.DemoRepository
import com.example.demo.repository.User
import com.example.demo.service.DemoService
import org.springframework.beans.factory.annotation.Autowired
import org.springframework.stereotype.Service

@Service
class DemoServiceImpl(@Autowired var repository: DemoRepository): DemoService {
	override fun findUser(name: String): User = repository.findByName(name)
}
最初に作成したControllerを修正します。
import com.example.demo.service.DemoService
import com.fasterxml.jackson.annotation.JsonProperty
import org.springframework.beans.factory.annotation.Autowired
import org.springframework.http.MediaType
import org.springframework.validation.annotation.Validated
import org.springframework.web.bind.annotation.GetMapping
import org.springframework.web.bind.annotation.PathVariable
import org.springframework.web.bind.annotation.RequestMapping
import org.springframework.web.bind.annotation.RestController
import javax.validation.Valid
import javax.validation.constraints.NotBlank

@Validated
@RestController
@RequestMapping(value = ["/api"])
class DemoRestController {

	@Autowired
	lateinit var service: DemoService

	@GetMapping(
			value = ["/{name}"],
			produces = [MediaType.APPLICATION_JSON_VALUE]
			)
	fun index(@PathVariable("name") @Valid @NotBlank userName: String): IndexJson {
		val user= service.findUser(userName)
		return IndexJson(user.name, user.no)
	}
}

data class IndexJson(
		@JsonProperty(value = "name") val name: String,
		@JsonProperty(value = "no") val no: Int
)
再起動してAPIを呼んでみます。
$ curl http://localhost:8080/api/hoge1
{"name":"hoge1","no":10}
$ curl http://localhost:8080/api/hoge2
{"name":"hoge2","no":20}
所感
ハマり所は、ほぼありませんでした。
SpringといえばDIですが(?)、プロパティ宣言部分をKotlinの場合は、どう書くかで悩んだのと、
コンストラクタの書き方が慣れなかったくらいでした。
これからもKotlinを使っていこうと思いが強くなりました。
Let's Enjoy Kotlin!!