はじめに
前々回のVagrant、前回のChefに続いて、Docker で開発環境を構築してみます。
ただ、まだあまり理解できておらず、、、中途半端な記事になっております。
Dockerについて予備知識ゼロの人は昨日の記事を読んでもらえると良いと思います。
1. インストール
Docker は Linux 上でのみ動作するため、Mac で Docker を利用するには Linux の仮想環境を用意する必要があります。
インストール方法
A. Docker Toolbox でインストール
Docker 社が提供している Docker Toolbox を利用すると、Linux の仮想環境構築に必要な VirtualBox、専用の Linux(Boot2Docker)、Docker のインストールまでを行ってくれます。
Mac への Docker Toolbox のインストール方法は下記のページに説明があります。OS X 10.8(Mountain Lion)以降に対応しているようです。
https://docs.docker.com/mac/step_one/
B. 手動でインストール
すでに Linux の仮想環境がある場合は、ゲスト OS に Docker だけをインストールすればOKです。
手元に Vagrantで用意した CentOS 6 の環境がありますが、Docker が対応しているのは CentOS 7.x 以降のようなので、今回は Docker Toolbox でインストールしてみます。
インストール作業
インストールは下記ページからインストーラをダウンロードし、後はそれにしたがってインストールを進めるだけです。
https://www.docker.com/docker-toolbox
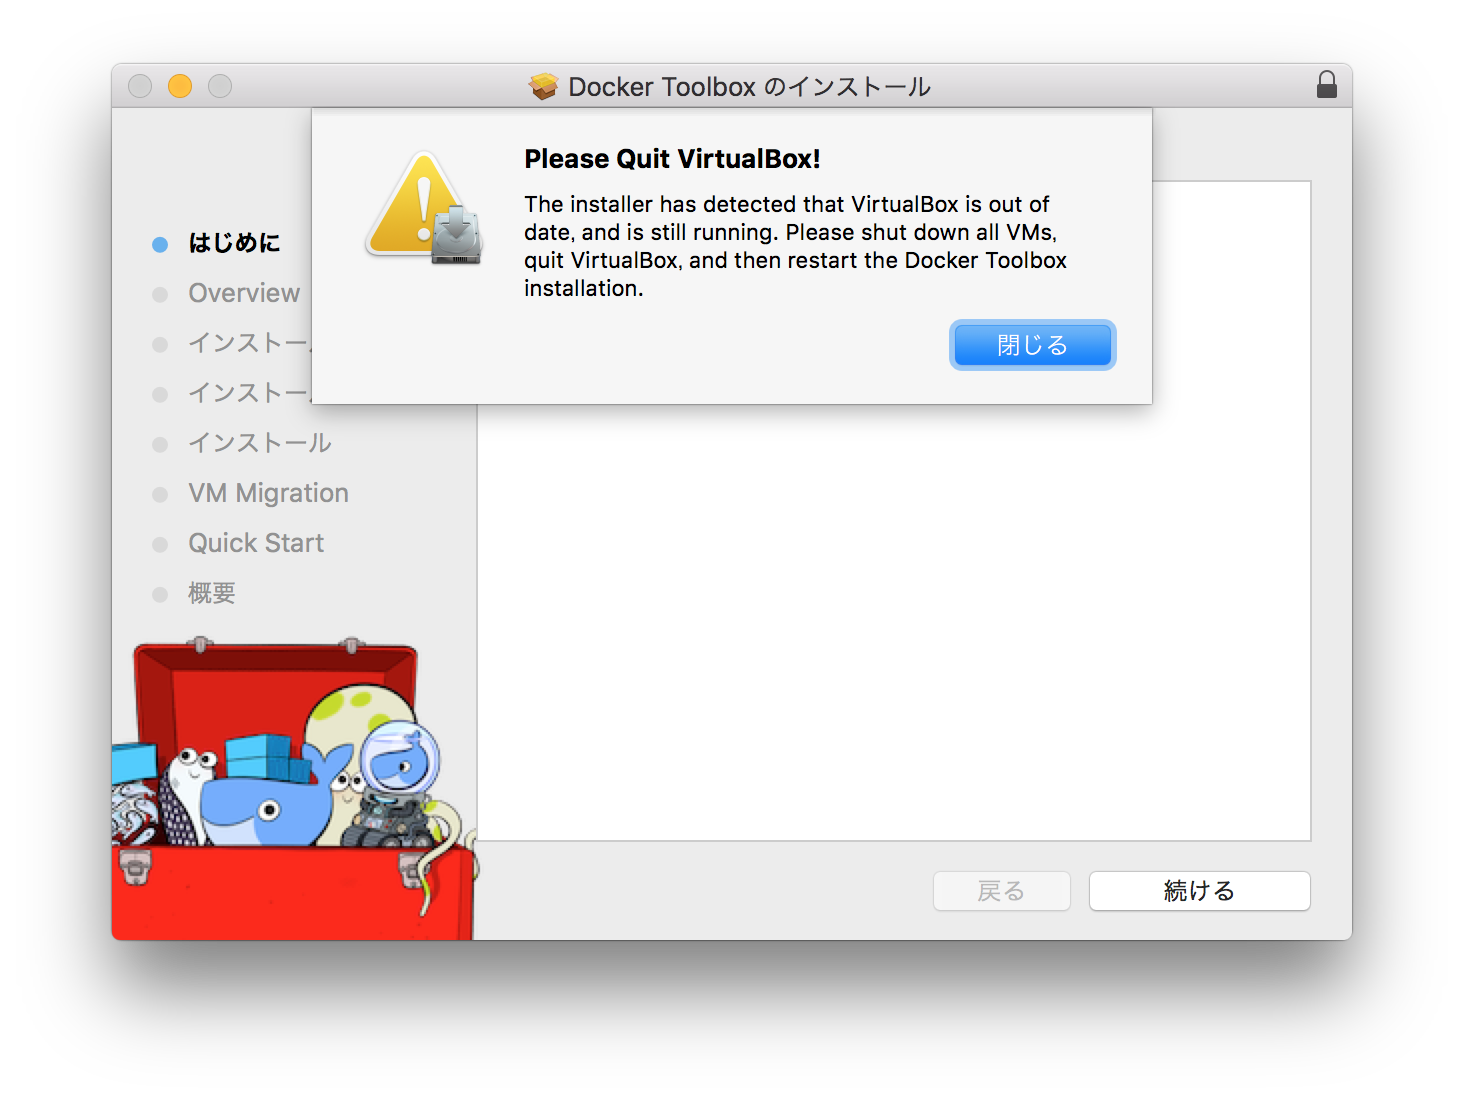
VirtualBox が起動していると下記のような警告が出てインストールが進まないので、起動している VirtualBox の仮想環境はすべて停止しておいてください。

インストールが完了すると下記の状態となります。

左のアイコンはコマンドラインで Docker を起動、右は GUI ツールで起動します。
コマンドラインで起動してみると下記のような結果が表示されました。

Docker Machine名 default で、IPアドレスは 192.168.99.100 で起動しています。
確認作業
インストールが正常に完了しているか確かめるため、下記のコマンドを実行します。
$ docker run hello-world
Unable to find image 'hello-world:latest' locally
latest: Pulling from library/hello-world
b901d36b6f2f: Pull complete
0a6ba66e537a: Pull complete
Digest: sha256:8be990ef2aeb16dbcb9271ddfe2610fa6658d13f6dfb8bc72074cc1ca36966a7
Status: Downloaded newer image for hello-world:latest

Hello from Docker.
This message shows that your installation appears to be working correctly.

To generate this message, Docker took the following steps:
 1. The Docker client contacted the Docker daemon.
 2. The Docker daemon pulled the "hello-world" image from the Docker Hub.
 3. The Docker daemon created a new container from that image which runs the
    executable that produces the output you are currently reading.
 4. The Docker daemon streamed that output to the Docker client, which sent it
    to your terminal.

To try something more ambitious, you can run an Ubuntu container with:
 $ docker run -it ubuntu bash

Share images, automate workflows, and more with a free Docker Hub account:
 https://hub.docker.com

For more examples and ideas, visit:
 https://docs.docker.com/userguide/
内容を読むと、まずローカルに hello-world イメージがあるかを探し、無かったので Docker Hub から
hello-world イメージを取得し、それを元に新しいコンテナを作成していることがわかります。
Docker Hub は Docker イメージの Github のようなものです。公式のイメージ以外に、ユーザーが自分で作成したイメージを公開、取得できるサイトです。
インストールは以上です。
2. Docker のコマンド
仮想サーバのリスト
docker-machine ls
$ docker-machine ls
NAME      ACTIVE   DRIVER       STATE     URL                         SWARM   DOCKER   ERRORS
default   *        virtualbox   Running   tcp://192.168.99.100:2376           v1.9.1
default という仮想環境が稼働してます。
仮想サーバへSSHログイン
docker-machine ssh
$ docker-machine ssh default
                        ##         .
                  ## ## ##        ==
               ## ## ## ## ##    ===
           /"""""""""""""""""\___/ ===
      ~~~ {~~ ~~~~ ~~~ ~~~~ ~~~ ~ /  ===- ~~~
           \______ o           __/
             \    \         __/
              \____\_______/
 _                 _   ____     _            _
| |__   ___   ___ | |_|___ \ __| | ___   ___| | _____ _ __
| '_ \ / _ \ / _ \| __| __) / _` |/ _ \ / __| |/ / _ \ '__|
| |_) | (_) | (_) | |_ / __/ (_| | (_) | (__|   <  __/ |
|_.__/ \___/ \___/ \__|_____\__,_|\___/ \___|_|\_\___|_|
Boot2Docker version 1.9.1, build master : cef800b - Fri Nov 20 19:33:59 UTC 2015
Docker version 1.9.1, build a34a1d5
稼働中のコンテナ一覧
docker ps
$ docker ps -a
CONTAINER ID        IMAGE               COMMAND             CREATED             STATUS                         PORTS               NAMES
b415493bfc37        centos              "/bin/bash"         18 minutes ago      Exited (0) 18 minutes ago                          sample1
01ef9e3cac93        hello-world         "/hello"            About an hour ago   Exited (0) About an hour ago                       tender_fermi
新しいコンテナの作成と起動
docker run
新しいコンテナの作成/削除
docker create|rm
コンテナの起動/停止/再起動
docker start|stop|restart
Docker のバージョン
docker version
仮想環境の情報
docker info
その他の docker コマンドは下記で確認可能です。
docker -h
3. Docker イメージを探す
最初なので Web 上に公開されている Docker イメージを使ってみます。
Docker イメージを調べる
Docker Hub で公式の Docker イメージを見てみましょう。
Apache
PHP
MySQL
コマンドで調べる
コマンドで調べることもできます。
$ docker search httpd
4. 環境を構築する
それでは開発環境を構築してみましょう。
Docker Hub から公式のイメージを取得しますが、PHP と Apache がセットになったものがあるので、そちら使用します。
$ docker pull php:5.6.16-apache
取得済みのイメージは下記のコマンドで確認可能です。
$ docker images
REPOSITORY          TAG                 IMAGE ID            CREATED             VIRTUAL SIZE
php                 5.6.16-apache       cb016a201e95        9 days ago          480.5 MB
では、このイメージを元にコンテナを起動してみます。
$ docker run -d -p 80:80 -v /home/sample:/var/www/html php:5.6.16-apache
2ef3f68868ea4e6363bea92d51b83b10b4c1f3352f73097dcbb853666a740d3b
オプションの説明
-d : コンテナをバックグラウンドで稼働する
-p : コンテナのポートをホストに結びつける
-v : ボリュームをマウントする(ローカルのディレクトリを仮想サーバのディレクトリに同期する)
Vagrant のようにローカルのディレクトリを仮想サーバのディレクトリに同期することができます。
-v で指定したローカル側のディレクトリ /home/sample に index.php を置いて、下記のURLにアクセスしてみます。
作成した index.php が表示されると思います。
今回はここまで。