Luaの基本は前回の記事参照
この記事のAI要約
FactorioのMod開発に関しての基礎から応用までのガイドを要約すると、以下のポイントに集約できます。
Modの設置場所
- FactorioのModsフォルダにzip形式または解凍した状態でModを配置します。
必要なファイルとフォルダ構成
-
info.json:Modの基本情報を記載します。 -
data.lua:アイテムの追加やゲーム内のオブジェクト定義に使用します。 -
control.lua:ゲーム内でのスクリプトの挙動を定義します。ゲームのイベントハンドラを設定できます。 - その他、グラフィックスやサウンド、ローカライゼーション用のフォルダがあります。
VSCodeでの開発
- Factorio Modding Tool KitやLuaの拡張機能をインストールします。
-
settings.jsonにFactorio APIを認識させるための設定を追加します。
Modのサンプル
- 実際にModを作成してみることで、ファイル間の関連や設定方法を理解することが重要です。
読み込み順序
- Factorioは
data.luaを読み込んだ後、control.luaを実行します。これにより、アイテムやレシピなどの静的なデータが最初に読み込まれ、その後ゲーム内での挙動を制御します。
control.luaでのスクリプト基礎
- Factorioのスクリプトはイベント駆動で動作します。ゲームのさまざまなイベント(例えば、ゲーム開始時、プレイヤー作成時など)に対して特定の関数を実行させることができます。
注意点
-
control.luaから読み込まれるイベントは上書きされる可能性があるため、イベントハンドラの管理には注意が必要です。 -
global変数を使用してゲームセッション間でデータを保持することができますが、初期化は慎重に行う必要があります。
デバッグ方法
- Factorioのログファイルや、デバッグ用GUIを利用して開発中のModの挙動を確認します。
- ゲーム開始時に特定のアイテムをプレイヤーに自動的に付与することでテストを容易にします。
このガイドは、Factorio Modの開発を始めるための基本的な構造と、VSCodeでの効率的な開発フローを理解するのに役立ちます。また、実際にModを作成する過程で遭遇する可能性のある一般的な問題点や、デバッグのテクニックについても触れています。
FactorioMod 基礎
どこに入れるか
Desktop\AppData\Roaming\Factorio\mods
形式は zip でも解凍してあってもOK
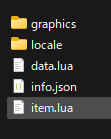
フォルダ構成
MyMod/
├── info.json --Modの情報、フォルダの名前もここで決まる
├── data.lua --アイテムの情報をいれる アイテムを追加するときはここを変える
├── control.lua --スクリプト制御の大本、mainやエントリーポイントに該当
├── Hoge.lua  -- 別のスクリプト
├── migrations/ --つかってない
├── locale/ --日本語で翻訳する場合ここを変える
│   ├── en/
│   │   └── locale.cfg
│   └── ja/
│       └── locale.cfg
├── graphics/ --アイテムのiconのグラフィックをいれる
│   └── icon.png
├── prototypes/ --使ってない
│   ├── item.lua
│   ├── recipe.lua
│   └── entity.lua
└── sounds/ --サウンドあればここ
Factorio公式のグラフィックや音楽を使うと作るのが楽、あとサイズとかがわかりやすい。
Program Files (x86)\Steam\steamapps\common\Factorio\data\core
ここにiconとかあるの自分のModに色を変えて使用するとかできる。
VSCodeの下準備
VSCodeでの開発では以下の拡張機能をいれる。
Factorio Modding Tool Kit
Lua
Factorio Lua API autocomplete
このままだと警告が出るので
settings.jsonに以下を追加
    "Lua.diagnostics.globals": [
        "global",
        "defines",
        "script",
        "game",
        "assembler2pipepictures",
        "pipecoverspictures",
        "amount"
    ],
これはお好みで設定 ライブラリの追加
    "Lua.workspace.userThirdParty": [
        "C:\\Program Files (x86)\\Steam\\steamapps\\common\\Factorio\\data\\core\\lualib",
        "C:\\Program Files (x86)\\Steam\\steamapps\\common\\Factorio\\data\\core\\lualib\\noise"
    ],
    "Lua.workspace.library": [
        "C:\\Program Files (x86)\\Steam\\steamapps\\common\\Factorio\\data\\core\\lualib",
        "C:\\Program Files (x86)\\Steam\\steamapps\\common\\Factorio\\data\\core",
        "C:\\Program Files (x86)\\Steam\\steamapps\\common\\Factorio\\data\\core\\prototypes",
        "C:\\Users\\sebunDesktop\\AppData\\Roaming\\Factorio\\mods\\BlackBox_0.1.0"
    ],
Sampleで確認する
ファイルがどう関係しているかは実際に確認したほうが早い
これDLして見比べながら確認して。
info.json
{
    "name": "YourModName",             // Modの名前
    "version": "0.1.0",                // Modのバージョン。(major.minor.patch)に従うことが推奨されます。
    "factorio_version": "1.1",        // このModが対応しているFactorioのバージョン。Modが正しく動作するために必要なゲームの最低バージョンを示します。
    "title": "Your Mod Title",        // Modの表示名。ゲーム内のModリストやModポータルで表示されます。
    "author": "Your Name",            // Modの作者名。複数の作者がいる場合は、カンマ区切りでリストアップします。
    "description": "This is a simple mod." // Modの説明。Modが何をするのか、どんな特徴があるのかを簡潔に記述します。
}
次、data.lua
data:extend({
    {--アイテムの属性、を決める
      type = "item",
      name = "new-item",
      icon = "__YourModName__/graphics/icon_64x64.png", --__YourModName__はこのModのroodフォルダ、__Base__にするとFactorioのRootフォルダを指す。音とかグラフィックとか流用するときにつかう
      icon_size = 64, -- アイコン画像のサイズ。この場合は64x64ピクセル
      subgroup = "intermediate-product",-- アイテムが属するサブグループ。これにより、インベントリ内でのアイテムの分類が行われます
      order = "a[new-item]", -- GUI内でのアイテムの表示順序を指定
      stack_size = 100-- このアイテムが1スタックにつき何個まで持てるかを指定
    },
    {
      type = "recipe", --レシピを追加
      name = "new-item-recipe",
      enabled = true,  -- これにより、ゲーム開始時からレシピが有効になります。
      ingredients = {-- このレシピで必要とされる材料のリスト
        {"iron-plate", 1},
        {"copper-plate", 1}
      },
      result = "new-item",-- このレシピで作成されるアイテムの名前
      result_count = 1  -- 作成されるアイテムの数量。
    }
  })
これでアイテムの定義ができた
日本語化
[item-name]
new-item=運命の歯車
data.luaの
name = "new-item",
この部分と一致させる。
実行してみる
Vscode F5 lanch.jsonを作成VSCodeを再起動
もう一度F5を押すとFactorioが起動する。

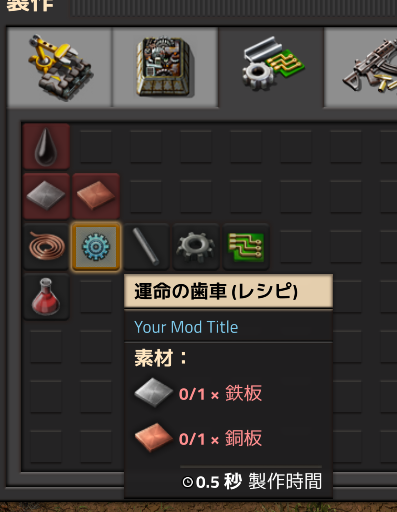
レシピが追加される。
Factorioの読み込み順序 これ割と重要
data.luaを読み込んでcontorl.luaを実行していく
なのでdata.luaで設定してする項目の中にはゲームの実行中に、動的に追加や変更することをできないものがある。
レシピや、アイテムの追加がその一例で、
アイテムの増やしたり、するときはあらかじめ登録しておいてから
レシピをみえなくする。そしてスクリプトによって有効にするなど工夫が必要になる。
そのほかmining(アイテムを解体できるか)も後から設定できない。
control.luaを使ったスクリプト基礎知識
ここからはFactorioにおけるスクリプト基礎を書いていく。
Factorioはイベントを通して実行される。
ゲーム起動時、プレイヤー作成時、クリック時など様々なイベントが用意されている。
まずは
起動時
script.on_init(function()
end)
とこれ 新しいプレイヤーオブジェクトが作成されたとき
script.on_event(defines.events.on_player_created, function(event)
起動時は新しくゲームを始めた時、しかもプレイヤーがまだいない時なのでここでprintなどのデバッグ出力してもゲーム画面上出力されていないようになるのが注意。
もう一度いうが、起動時は新しくゲームを始めた時、だ。
つつきから始めるはちがうイベントがよばれる。
script.on_event(defines.events.on_player_created, function(event)
これについては
プレイヤーが作成された時によばれる。
ここでプレイヤーごとの初期化するとよい。初期化については後述。
-- control.lua
-- このファイルの責務:
-- - MODの主要なイベントハンドラーの初期化
-- - ゲームの起動と設定変更時のグローバルテーブルの初期化
local Initialize = require("initialize")
local Black_box_debug = require("black_box_debug")

-- 新しいゲームが始まるとき、MODがアップデートされたときに実行される
script.on_init(function()

end)
-- 設定変更時に実行
script.on_configuration_changed(function()

end)

-- 新しいプレイヤーオブジェクトが作成されたとき
script.on_event(defines.events.on_player_created, function(event)

    local player = game.players[event.player_index]
    if not player then
        return
    end
    Initialize.global_tables()
    Black_box_debug.open_debug_custom_gui(player)

    --5秒後にイベント発火
    global.give_items_next_tick = global.give_items_next_tick or {}
    global.give_items_next_tick[event.player_index] = game.tick + (60 * 3)
end)


-- ゲームがロードされるたびに実行されるイベントは、globalテーブルの変更を行わないようにします
script.on_load(function()
    -- ここではglobalテーブルに変更を加えず、必要に応じて関数の参照を復元するなどの処理を行います
    -- 例: グローバルな関数の参照をローカルな変数に割り当てるなど
    -- この例では具体的な処理は不要ですが、必要に応じて追加してください
end)
まずは起動時はこのイベントが呼ばれるのだなと理解しておけばOK
control.luaの注意点 ここ重要
control.luaから読み込まれるeventは上書きされる。それとcontrol.luaで読み込まないとeventとして実行されない。
-- control.lua
-- このファイルの責務:
-- - MODの主要なイベントハンドラーの初期化
-- - ゲームの起動と設定変更時のグローバルテーブルの初期化
local Initialize = require("initialize")
local Events = require("events")
local Events = require("events")
これを記述しないといくらevents.luaでeventを書いても実行されない。
またeventは複数同じものがあると上書きされ初めの方が実行されないくなる。
つまり、control.luaとevents.luaでscript.on_init(function()を書いてあったらevents.luaのほうだけが
実行される。
初期化について
初期はファイル別にすると扱いやすい

function Initialize.global_tables()
    global.is_counting = global.is_counting or {}
end
global.
とつけることでこの値はゲームが終了しても保持される。
= global.is_counting or {}
これはもし値があれはそれを引き続き使用し、なければ初期化するというものになる。
luaでは何かしら値を入れた時点でメモリが用意される。
構造体を作るには以下
        global.item_count[player_index] = {
            measurementTime = nil,
            iriguti = {  -- 入口チェスト情報
                beforeBoxCount = nil,  -- テレポート前カウント用
                afterBoxCount = nil,   -- テレポート後カウント用
            },
            deguti = {  -- 出口チェスト情報
                beforeBoxCount = nil,  -- テレポート前カウント用
                afterBoxCount = nil,   -- テレポート後カウント用
            },
        }
player_indexとあるがこれはファクトリの基礎概念。プレイヤーごとの情報であればこのindexから要素にアクセスしていく。
すべてのプレイヤー共通する変数を利用数ならこれはいらない。
各ファイルのInit関数を作りここで呼び出すとスマート。
    Blackbox.BlackboxInit()
    Black_box_debug.Init()
以下全文
-- initialize.lua
-- このファイルの責務:
-- - グローバルテーブルの初期化
local Black_box_debug = require("black_box_debug")
local Blackbox = require("blackbox")
local Initialize = {}

function Initialize.global_tables()
    global.is_counting = global.is_counting or {}
    global.material_count = global.material_count or {}
    global.last_item_count = global.last_item_count or {}
    global.countdowns = global.countdowns or {}
    global.black_boxes = global.black_boxes or {}
    global.item_count = global.item_count or {}
    global.player_positions = global.player_positions or {"before"}
    global.blackBoxRecipeList = global.blackBoxRecipeList or {}
    global.blackBoxRelatedEntities = global.blackBoxRelatedEntities or {} --ブラックボックスに関連するエンティティを保存。意図せず解体られないように使用
    -- #TODO プレイヤーがどのブラックボックでどのレシピを選択したかを判断できるようにする。現状一つのレイシしか選択できないため、
    global.selected_recipe = global.selected_recipe or {}
    global.debug_print_counter = 0
    global.makeTime = global.makeTime or {}
    global.last_touched_entity = {} --プレイヤーが最後に触れたエンティティ

    for _, player in pairs(game.players) do
        local player_index = player.index
        -- 各プレイヤーのブラックボックス情報を初期化
        global.black_boxes[player_index] = {
            surface = {  -- テレポート先のサーフェス情報
                return_positions = nil,
                return_surfaces = nil,
            },
            in_black_box = nil,    --テレポートして、中に入っているブラックボックスのエンティティ
            black_Box_entities = {  -- black_Box_entityを複数持つためのリスト
            -- 各エンティティはテーブルとして定義
                {
                    black_box_number = nil,                   --ユニークナンバー
                    black_Box_entity = nil,
                    setRecipe = nil,                --設定しているレシピ
                    electricityConsumption = nil,   --使用電力
                    assemblyPartsBox = nil,     --製造用パーツを入れるボックス
                    black_boxes_surface = nil,      --テレポート先のサーフェス
                    iriguti = {  -- 入口チェスト情報
                        beforeBox = nil,  -- テレポート前チェスト情報
                        afterBox = nil,   -- テレポート後チェスト情報
                        beforeRamp = nil,  -- テレポート前ランプ情報(テレポートスイッチ)
                        afterRamp = nil,   -- テレポート後ランプ情報(テレポートスイッチ)
                    },
                    deguti = {  -- 出口チェスト情報
                        beforeBox = nil,  -- テレポート前チェスト情報
                        afterBox = nil,   -- テレポート後チェスト情報
                        beforeRamp = nil,  -- テレポート前ランプ情報(テレポートスイッチ)
                        afterRamp = nil,   -- テレポート後ランプ情報(テレポートスイッチ)
                    },
                    specialCountBox = nil,
                },
            -- 必要に応じてさらにエンティティを追加
            },
        }
        global.item_count[player_index] = {
            measurementTime = nil,
            iriguti = {  -- 入口チェスト情報
                beforeBoxCount = nil,  -- テレポート前カウント用
                afterBoxCount = nil,   -- テレポート後カウント用
            },
            deguti = {  -- 出口チェスト情報
                beforeBoxCount = nil,  -- テレポート前カウント用
                afterBoxCount = nil,   -- テレポート後カウント用
            },
        }
    end
    -- デバッグメッセージを全プレイヤーのコンソールに出力
    for _, player in pairs(game.players) do
        player.print("Initialize.global_tables() が呼び出されました。")
    end

    Blackbox.BlackboxInit()
    Black_box_debug.Init()
end

return Initialize
ファイル構造
まずファイルを別にし使用するための変数を作る
local Blackbox = {}
--ファイルの中身
return Blackbox
使用箇所
local Blackbox = require("blackbox")
Blackbox.BlackboxInit()
別に決まりはないが、こうすると管理しやすいおすすめの構成
- import
- 別ファイルで使用するための構文
- プロトタイプ宣言
- ローカル変数
- グローバル関数
- init()
- グローバル変数
- Update()
- init()
- ローカル関数
以下例
--import
local Black_box_debug = require("black_box_debug")
--別ファイルで使用するための構文
local Utilities = {}
--プロトタイプ宣言
local localFunction


-- グローバル関数の定義
function Utilities.init(player_index)
    -- グローバル変数の宣言
    global.en_black_box_entity_st = global.en_black_box_entity_st or {}
    game.players[player_index].print("Mod initialized")
end

function Utilities.update(player_index)
    game.players[player_index].print("Update called")
end

-- ローカル関数の定義
localFunction = function localFunction(player_index)
    game.players[player_index].print("This is a local function")
end

function Utilities.printGlobalVar(player_index)
    game.players[player_index].print(globalVar)
end

return Utilities
グローバル変数はinit関数内で宣言を行うかinitialize.luaで行うとよい。
updateはtick毎(fpsのようなもの)に呼ばれるイベントがあるのでそこに定義すると一定間隔でよばれる。
私はevent.luaでイベントをまとめている
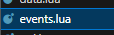
-- 一定間隔のイベント
script.on_event(defines.events.on_tick, function(event)
    --初期化イベント
    if not global.give_items_next_tick then
        return
    end

    -- 定期的な同期処理を実行(例: 1秒ごと)
    if event.tick % 60 == 0 then
        for _, player in pairs(game.players) do
            if player.connected then  -- 接続中のプレイヤーのみ対象
                Blackbox.Update(player.index)

            end
        end
    end
end)
デバック方法
実行時のエラーログは
\AppData\Roaming\Factorio\factorio-current.log
これを確認するとよい。
Mod起動が上手くいかない場合どこでエラーになったログが確認できる。
またデバッグ用のGUIを作成すると確認が楽。
処理が抽象化されていれわかりにくとおもうが、やっていることはGUI毎チック毎に更新している。
これがデバッグ用のファイル。
--Black_box_debug.lua

local Black_box_debug = {}

local addLabelList = {}

local debug_flow


function Black_box_debug.Init()
    addLabelList = addLabelList or {}
end
--初期アイテムの設定
function Black_box_debug.give_initial_items(player)
    -- Initial items to give to the player
    local initial_items = {
        ["black-box-assembler"] = 10,
        ["small-electric-pole"] = 100,
        ["transport-belt"] = 50,
        ["fast-transport-belt"] = 50,
        ["express-transport-belt"] = 50,
        ["iron-ore"] = 200
    }

    for item_name, item_count in pairs(initial_items) do
        player.insert({name = item_name, count = item_count})
    end
end

--1秒に1一度呼ばれる
function Black_box_debug.cycle(player)
    Black_box_debug.open_debug_custom_gui(player)

    if not addLabelList then
        return
    end

    -- リスト内の関数を実行
    for _, func in ipairs(addLabelList) do
        func()  -- 関数を呼び出し
    end

end
function Black_box_debug.SetGuiNum(setNumFunc)
    table.insert(addLabelList, setNumFunc)
end
local function tableToString(tbl, indentLevel)
    indentLevel = indentLevel or 0
    local indent = string.rep("  ", indentLevel)  -- インデントを生成
    local result = ""

    for key, value in pairs(tbl) do
        if type(value) == "table" then
            result = result .. indent .. tostring(key) .. ":\n" .. tableToString(value, indentLevel + 1)  -- 再帰的に処理
        else
            result = result .. indent .. tostring(key) .. ": " .. tostring(value) .. "\n"
        end
    end

    return result
end
local function updateOrAddLabel(parent, name, value,en_open_table)
    local label_name = "label_" .. name
    local caption

    if type(value) == "table" then
        if next(value) == nil then
            caption = name .. " : {}"
        else
            if en_open_table then
                caption = name .. " : " .. tableToString(value)
            else
                caption = name .. " : " .. tostring(value.name or "table")
            end
        end
    elseif value == nil then
        caption = name .. " : NULL"
    else
        caption = name .. " : " .. tostring(value)
    end

    if parent[label_name] then
        parent[label_name].caption = caption
    else
        parent.add{type="label", name=label_name, caption=caption}
    end
end
--デバッグ用のGUIにラベルを追加en_open_tableはテーブルだった場合、中身を確認するか否か
function Black_box_debug.AddLabel(name, value,en_open_table)
    if not debug_flow then
        return
    end
    updateOrAddLabel(debug_flow, name, value,en_open_table)
end

--デバッグ用のGUIにラベルを追加en_open_tableはテーブルだった場合、中身を確認するか否か
function Black_box_debug.AddText(text)
    if not debug_flow then
        return
    end
    if not text then
        return
    end
    updateOrAddLabel(debug_flow,text,"",false)
end

local function debug_print_global_variables_to_gui(player_index, parent)
    local player = game.players[player_index]
    local black_box_info = global.black_boxes[player_index]

    updateOrAddLabel(parent, "Debug Print Call # :", global.debug_print_counter,false)
    -- 各変数をGUIに表示または更新
    updateOrAddLabel(parent, "global.is_counting :", global.is_counting,false)

    -- black_Box_entitiesの情報をGUIに表示または更新
    if black_box_info and black_box_info.black_Box_entities then
        for index, entity_info in ipairs(black_box_info.black_Box_entities) do
            updateOrAddLabel(parent, "Black_Box_Entity index#" .. index, "",false)
            updateOrAddLabel(parent, "  Number", entity_info.black_box_number,false)
            updateOrAddLabel(parent, "  Set Recipe", entity_info.setRecipe,false)
            updateOrAddLabel(parent, "  Electricity Consumption", entity_info.electricityConsumption,false)
            updateOrAddLabel(parent, "  AssemblyPartsBox", entity_info.assemblyPartsBox,false)
            updateOrAddLabel(parent, "  Black Boxes Surface", entity_info.black_boxes_surface,false)
            if entity_info.iriguti then
                updateOrAddLabel(parent, "  Iriguti Before Box", entity_info.iriguti.beforeBox,false)
                updateOrAddLabel(parent, "  Iriguti After Box", entity_info.iriguti.afterBox,false)
            end
            if entity_info.deguti then
                updateOrAddLabel(parent, "  Deguti Before Box", entity_info.deguti.beforeBox,false)
                updateOrAddLabel(parent, "  Deguti After Box", entity_info.deguti.afterBox,false)
            end
            if entity_info.specialCountBox then
                updateOrAddLabel(parent, "  Special Count Box", entity_info.specialCountBox,false)
            end
        end
    end
    if global.selected_recipe and global.selected_recipe[player_index] then
        updateOrAddLabel(parent, "  Selected Recipe", global.selected_recipe[player_index],false)
    end
end
function Black_box_debug.open_debug_custom_gui(player)
    global.debug_print_counter = (global.debug_print_counter) + 1

    if not player.gui.left.debug_custom_gui_frame then
        local debug_frame = player.gui.left.add{type="frame", name="debug_custom_gui_frame", caption="Debug Custom GUI"}
        debug_flow = debug_frame.add{type="flow", name="debug_flow", direction="vertical"}
        debug_print_global_variables_to_gui(player.index, debug_flow)
    else
        debug_flow = player.gui.left.debug_custom_gui_frame.debug_flow
        debug_print_global_variables_to_gui(player.index, debug_flow)
    end
    --player.print("Debug Custom GUIを更新または作成しました。")
end


return Black_box_debug
これをevent.luaでチック毎に呼び出す
-- 一定間隔のイベント
script.on_event(defines.events.on_tick, function(event)
    --初期化イベント
    if not global.give_items_next_tick then
        return
    end


    -- 定期的な同期処理を実行(例: 1秒ごと)
    if event.tick % 60 == 0 then
        for _, player in pairs(game.players) do
            if player.connected then  -- 接続中のプレイヤーのみ対象

                Black_box_debug.cycle(player)


            end
        end

end)
実行時のグローバル変数の変化が確認できる。
さらに初期アイテムの設定を使って起動時にアイテムが自動的に追加されるようにするとデバックが楽になる。
--初期アイテムの設定
function Black_box_debug.give_initial_items(player)
    -- Initial items to give to the player
    local initial_items = {
        ["black-box-assembler"] = 10,
        ["small-electric-pole"] = 100,
        ["transport-belt"] = 50,
        ["fast-transport-belt"] = 50,
        ["express-transport-belt"] = 50,
        ["iron-ore"] = 200
    }

    for item_name, item_count in pairs(initial_items) do
        player.insert({name = item_name, count = item_count})
    end
end
ただ注意点としてこれも起動すぐに実行するとアイテムが更新されないこともあるので私は起動3秒後にアイテム追加するように設定している。
主なイベント
-- エンティティが解体された際のイベントリスナー
local function on_entity_removed(event)
-- エンティティが建設されたときのイベントリスナー
script.on_event(defines.events.on_built_entity, function(event)
-- GUI内のボタンがクリックされた際のイベントリスナー
script.on_event(defines.events.on_gui_click, function(event)
--GUIのレシピを選択したときのイベントハンドラ
script.on_event(defines.events.on_gui_selection_state_changed, function(event)
-- プレイヤーによるエンティティの解体時
script.on_event(defines.events.on_pre_player_mined_item, function(event)
-- エンティティをクリックしたとき
script.on_event(defines.events.on_gui_opened, function(event)
-- エンティティの上をマウスオーバーしたとき
script.on_event(defines.events.on_selected_entity_changed, function(event)
-- 一定間隔のイベント
script.on_event(defines.events.on_tick, function(event)
詳しくは公式参照
Modの概要
ここまでのことを踏まえたうえでまだ未完成ではあるがModを公開する。参考にして
また完成したら解説しようと思う。
簡単Modとしての解説
このModはFactorioでモジュール化を実現するためのModです。
モジュール化した特別なブラックボックス組み立て機でレシピを選択し、材料を入れることで製品が作られれます。
処理をスクリプト上で行うため処理の軽量化が行えます。(検証していないので本当に軽くなるかは不明)
モジュール化のモジュール化で工場の圧縮もできる。
レシピを選択し製品を作り出すまでは完成している。
参考サイト