2018年のアドベントカレンダーは終わってしまったが埋めネタを書かねばならぬ...!
この記事ではJavaScriptでMLTをgifっぽく表示するページを作ったのでその方法の紹介です。
MLTって何という方はこちらの記事を参照。
GolangでMLTを画像に変換する
完成したサイトはこちら。
https://b.aahub.org/player-converter
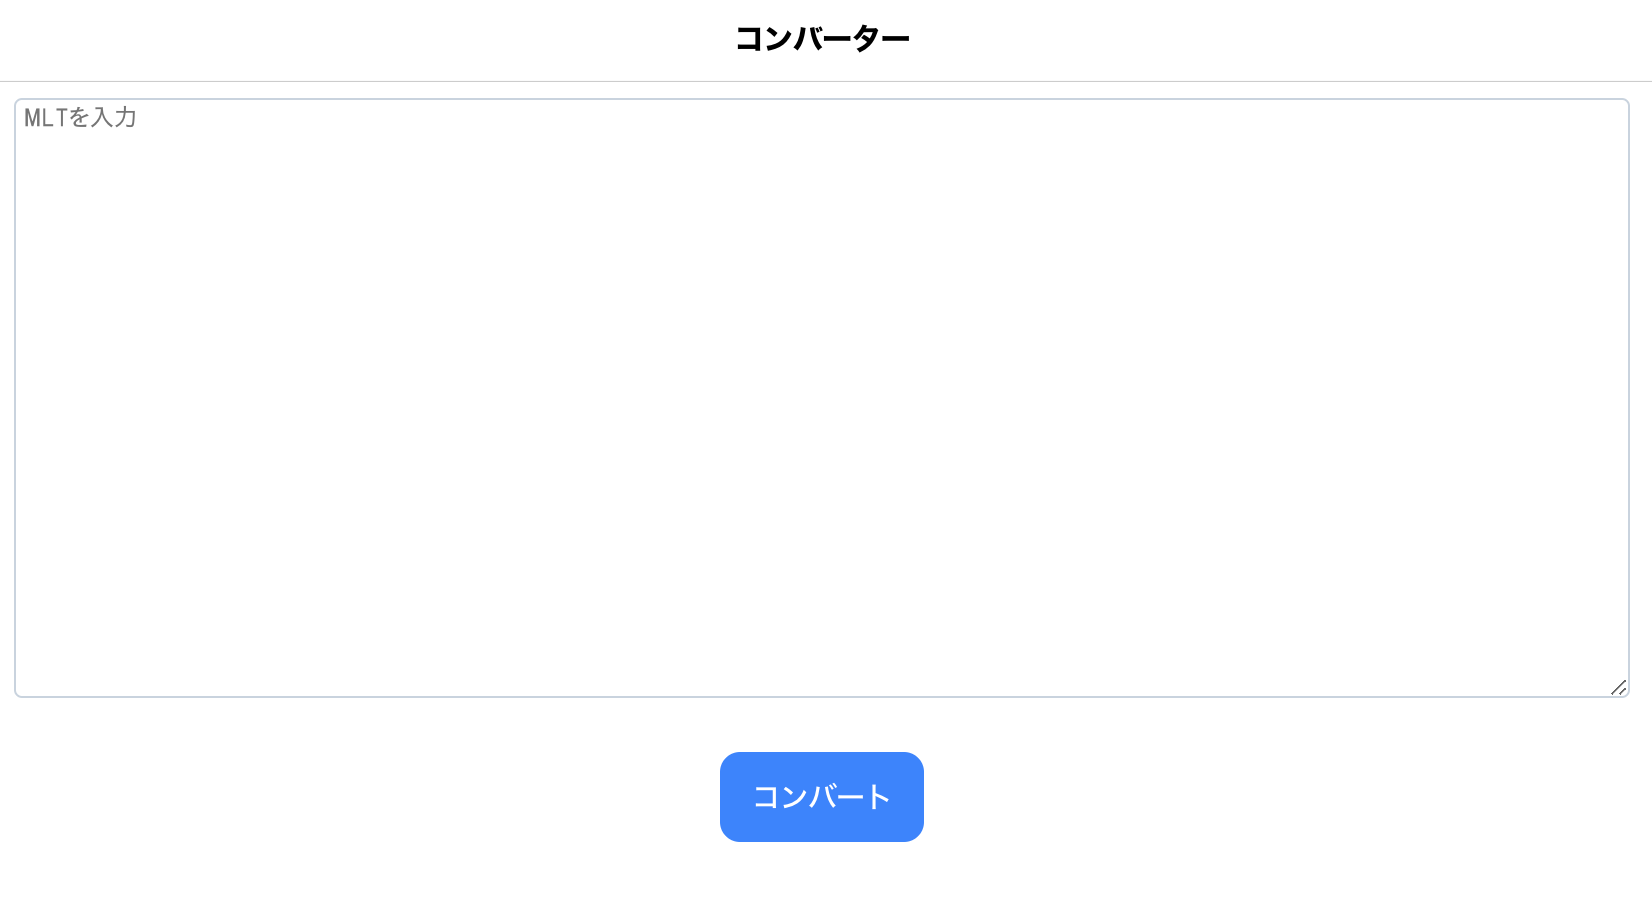
実装しなきゃいけないのは以下のとおりです。
- MLTを分割
- 配列に入ったテキストを順番に表示
ちょっとプログラミングの心得がある方なら瞬間で実装が思いつくんじゃないかと思いますが、記事にしておきます。
あと、毎度のことながらStenciljsを使ってます。だって使いやすいんだもの。
Stencil
ソースコード
GitHub
GitHubにソースコードあげてあります。
1. MLTを分割
MLTが何かというとざっくりAAを[SPLIT]という文字で区切ったものです。それ以外は普通のテキストと変わりません。
   (~)
 γ´⌒`ヽ
  {i:i:i:i:i:i:i:i:}   このセーター
 ( ´・ω・)  しまむらで買ったんだ。
  (:::::::::::::)
   し─J
[SPLIT]
   (~)
 γ´⌒`ヽ
  {i:i:i:i:i:i:i:i:}
 (・ω・` )  左向き
  (:::::::::::::)
   し─J
[SPLIT]
ということで、MLを分割する方法はJavaScriptならsplitを使えばよいだけです。簡単ですね。
let mlt = text.split("[SPLIT]");
というわけで残りのcomponents部分も書いてみます。作るのはtextareaに入力したMLTを分割して次のPlayerPageに渡すページです。
import { Component, Element, State } from "@stencil/core";

@Component({
  tag: "aa-player-converter",
  styleUrl: "aa-player-converter.css"
})
export class PlayerConverterPage {
  @State() src: string = "";

  @Element() el: HTMLElement;

  textInput(el) {
    this.src = el.srcElement.value;
  }

  async convert() {
    const mlt = this.src.split("[SPLIT]");
    (this.el.closest("ion-nav") as any).push("aa-player", { mlt: mlt });
  }

  render() {
    return [
      <ion-header>
        <ion-toolbar>
          <ion-title>コンバーター</ion-title>
        </ion-toolbar>
      </ion-header>,
      <ion-content>
        <div class="input-aa-wrapper">
          <textarea
            id="aa-textarea"
            class="input-aa"
            placeholder="MLTを入力"
            onInput={e => this.textInput(e)}
          />
        </div>
        <div class="convert-button-wrapper">
          <ion-button class="u-mt16" onClick={() => this.convert()}>
            コンバート
          </ion-button>
        </div>
        <div class="is-center footer u-mt40 u-mb20">
          <nav-footer />
        </div>
      </ion-content>
    ];
  }
}
2. 配列に入ったテキストを順番に表示
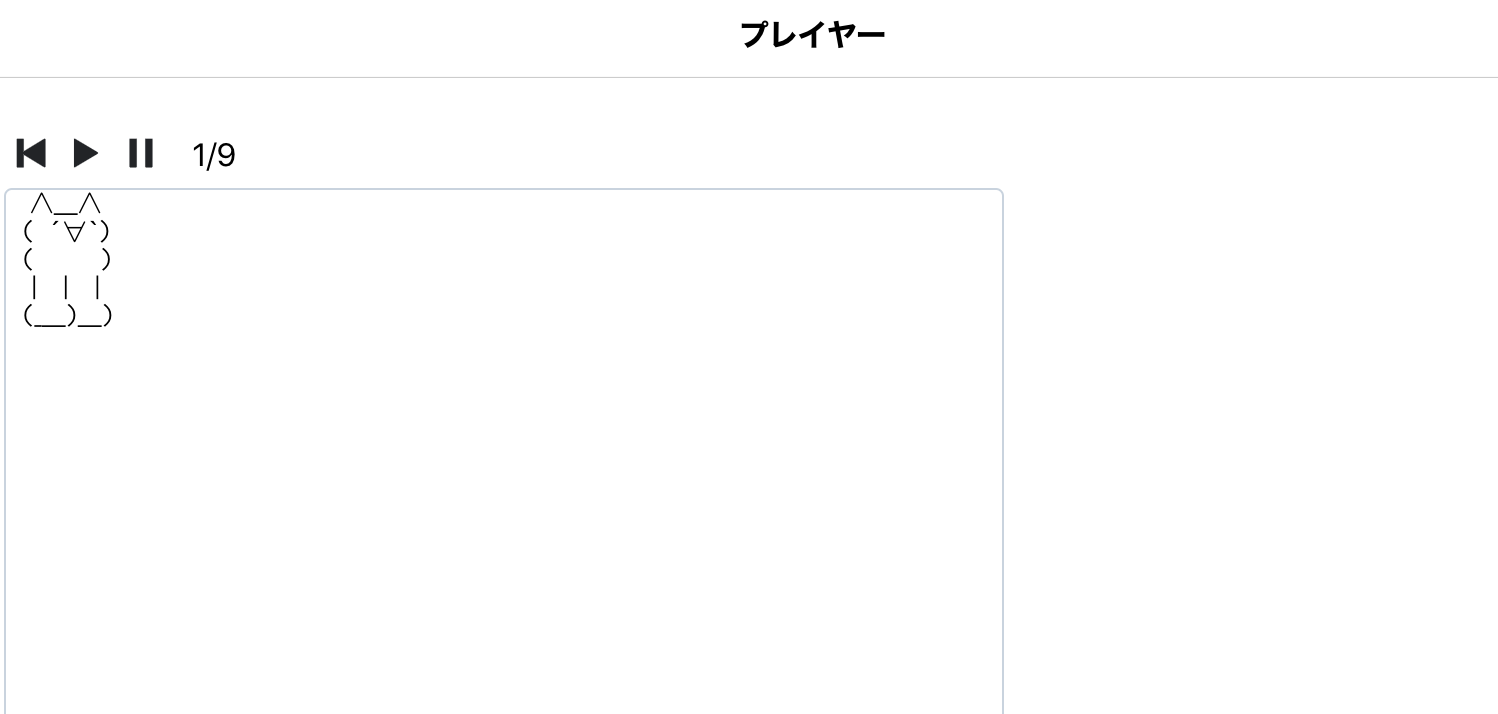
さて、前項でMLT形式のテキストを分割して文字列配列にすることはできました。残りは、その文字列を順番の表示することです。これはJavaScriptのSetIntervalを使えばできます。SetIntervalでindexをカウントしていけばOKです。
 <!-- this.mltが前項で分割した文字列配列 -->
 <div class="preview-wrapper">{this.mlt[this.idx]}</div>
    // idxが端まできたら最初に戻す
    setInterval(async () => {
      if (this.idx + 1 < this.mlt.length) {
        this.idx = this.idx + 1;
      } else {
        this.idx = 0;
      }
    }, 100);
上記の処理を行えば、配列の中のAAを順番に表示することができます。
import { Component, State, Prop } from "@stencil/core";

@Component({
  tag: "aa-player",
  styleUrl: "aa-player.css"
})
export class PlayerPage {
  @Prop() mlt: string[] = [];
  @State() idx: number = 0;
  isPlay: boolean = false;
  playingId: any;

  play() {
    if (this.isPlay) {
      return;
    }
    this.isPlay = true;
    this.playingId = setInterval(async () => {
      if (this.idx + 1 < this.mlt.length) {
        this.idx = this.idx + 1;
      } else {
        this.idx = 0;
      }
    }, 100);
  }

  refresh() {
    this.idx = 0;
    this.isPlay = false;
    clearInterval(this.playingId);
  }

  pause() {
    this.isPlay = false;
    clearInterval(this.playingId);
  }


  render() {
    return [
      <ion-header>
        <ion-toolbar>
          <ion-title>プレイヤー</ion-title>
        </ion-toolbar>
      </ion-header>,
      <ion-content>
        <div class="mlt-preview-wrapper">
          <div class="controller-wrapper">
            <ion-button
              color="dark"
              size="small"
              fill="clear"
              onClick={() => this.refresh()}
            >
              <ion-icon slot="icon-only" name="skip-backward"></ion-icon>
            </ion-button>
            <ion-button
              color="dark"
              size="small"
              fill="clear"
              onClick={() => this.play()}
            >
              <ion-icon slot="icon-only" name="play" />
            </ion-button>
            <ion-button
              color="dark"
              size="small"
              fill="clear"
              onClick={() => this.pause()}
            >
              <ion-icon slot="icon-only" name="pause" />
            </ion-button>
            <div class="index">
              {this.idx + 1}/{this.mlt.length}
            </div>
          </div>
          <div class="preview-wrapper">{this.mlt[this.idx]}</div>
        </div>
        <div class="is-center footer u-mt40 u-mb20">
          <nav-footer />
        </div>
      </ion-content>
    ];
  }
}
これで、以下のような画面になり、再生ボタンを押すと配列の中のAAを順番に表示するようになります。

まとめ
以上、MLTをgifっぽく表示する内容でした。
興味持った方は下にあるソースコードをぜひ動かしてみてください。
GitHub
それでは、

