テキストの内容に合わせてtextareaの高さを自動で調節するDirectiveの作成方法です。
Ionicフォーラムに作り方があったので、それを少し改造したものになります。
Ionicフォーラムはこちら
ちなみに「elasitc」は伸縮自在という意味だそうです。この単語が思い浮かばず、なかなか検索でたどりつけなかったです。
概要
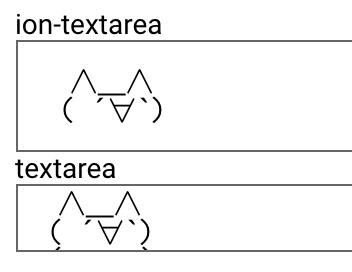
入力内容に合わせて高さが変化してますね。
チャットやTwitterでよく見るUIです。
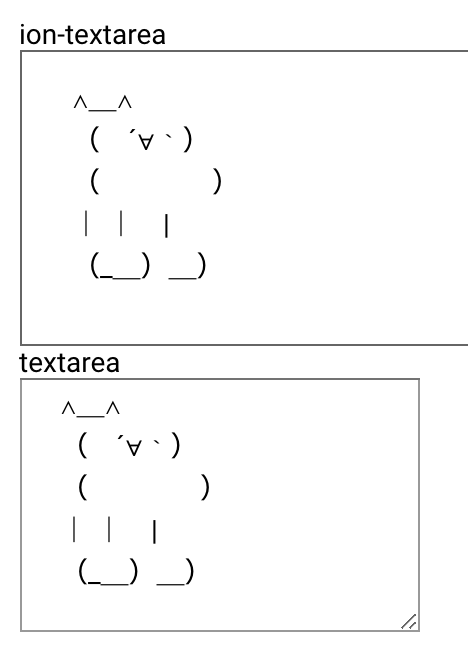
今回は、ion-textareaとtextareaの両方に対応しています。
ソースコード
もし本ディレクティブを使うなら「elastic」フォルダを丸ごとコピーすればOKです。
・Directive
Githubはこちら
import { Input, OnChanges, Directive, ElementRef, HostListener, OnInit } from '@angular/core';
@Directive({
    selector: '[elastic]' // Attribute selector
})
export class ElasticDirective implements OnInit, OnChanges{
    @Input("text") text;
    constructor(private el: ElementRef) {
    }
    public ngOnInit() {
        setTimeout(() => {
            this.adjust()
        }, 30);
    }

    @HostListener('input', ['$event.target'])
    public onInput() {
        this.adjust();
    }

    ngOnChanges(changes:any) {
        if(changes["text"]){
            setTimeout(() => {
                this.adjust();
            }, 30);
        }
    }
    private adjust(): void {
        let ta = this.el.nativeElement.querySelector('textarea');
        if(!ta){
            ta = this.el.nativeElement;
        }
        if (ta) {
            let overflow = ta.style.overflow;
            ta.style.height = 'auto';
            ta.style.height = ta.scrollHeight + 'px';

            if (overflow !== ta.style.overflow) {
                ta.style.overflow = overflow;
            }
        }
    }
}
・HTML
Githubはこちら
<ion-header>
  <ion-navbar>
    <ion-title>elastic-textarea</ion-title>
  </ion-navbar>
</ion-header>

<ion-content padding>
  <ng-container *ngIf="loaded">
    <div class="title">ion-textarea</div>
    <ion-textarea elastic [(ngModel)]="text"></ion-textarea>
    <div class="title">textarea</div>
    <textarea elastic [(ngModel)]="text2"></textarea>
  </ng-container>
</ion-content>
・TypeScript
Githubはこちら
import { Component } from '@angular/core';
import { IonicPage, NavController, NavParams } from 'ionic-angular';

@IonicPage({
    name:'elastic-textarea',
    segment:'elastic-textarea'
})
@Component({
    selector: 'page-elastic-textarea',
    templateUrl: 'elastic-textarea.html',
})
export class ElasticTextareaPage {
    text = "Lorem ipsum dolor sit amet,\nconsectetur adipiscing elit,\nsed do eiusmod tempor incididunt ut labore\net dolore magna aliqua. Ut enim ad minim veniam,";
    text2 = "Lorem ipsum dolor sit amet,\nconsectetur adipiscing elit,\nsed do eiusmod tempor incididunt ut labore\net dolore magna aliqua. Ut enim ad minim veniam,";

    loaded:boolean = false;
    constructor(public navCtrl: NavController, public navParams: NavParams) {
    }

    ionViewDidLoad() {
        console.log('ionViewDidLoad ElasticTextareaPage');
        this.loaded = true;
    }

}
elasticディレクティブについて
以下、elasticディレクティブについて解説します。
変更検知
以下、変更検知の箇所を抜粋します。
import { Input, OnChanges, Directive, ElementRef, HostListener, OnInit } from '@angular/core';
@Directive({
    selector: '[elastic]' // Attribute selector
})
export class ElasticDirective implements OnInit, OnChanges{
    @Input("text") text;
    constructor(private el: ElementRef) {
    }
    // 1.初期値用
    public ngOnInit() {
        setTimeout(() => {
            this.adjust()
        }, 30);
    }

    // 2.入力用
    @HostListener('input', ['$event.target'])
    public onInput() {
        this.adjust();
    }

    // 3.TypeScriptで値変更した時用
    ngOnChanges(changes:any) {
        if(changes["text"]){
            setTimeout(() => {
                this.adjust();
            }, 30);
        }
    }
 〜〜〜省略〜〜〜
1.初期値用
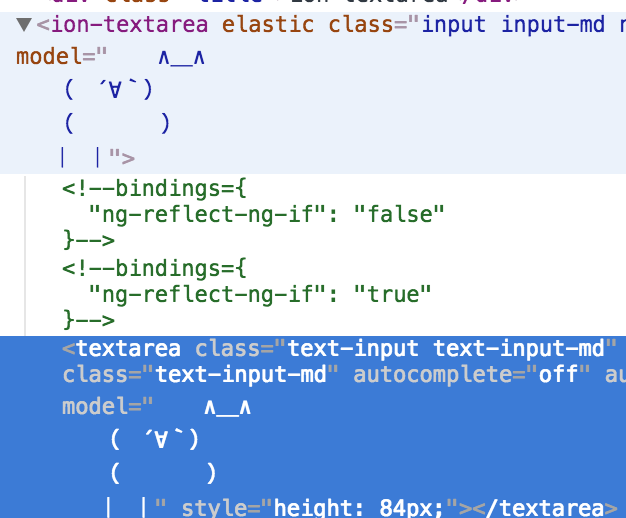
textareaに初期値で入力されている値に対して高さ調節を行う用です。
これがないと以下の画像のようになります。
また、setTimeout()があるのはレンダリング待ちです。
2.入力用
キーボード&スマホからのテキスト入力時の変更検知です。
3.TypeScriptで値変更した時用
JavaScript側でtextareaの内容を変更した時の変更検知です。
デモのソースコードでは使っていませんが、使う時はディレクティブにInputとして渡すようにします。若干気持ち悪い方法ですが、他の方法が思いつきませんでした・・・。
<ion-content padding>
  <ng-container *ngIf="loaded">
    <div class="title">ion-textarea</div>
    <ion-textarea elastic [(ngModel)]="text" [text]="text"></ion-textarea>
    <div class="title">textarea</div>
    <textarea elastic [(ngModel)]="text2" [text]="text2"></textarea>
  </ng-container>
</ion-content>
また、ここでもsetTimeout()でレンダリング待ちをしています。
高さ調節
以下、高さ調節の箇所を抜粋します。
 〜〜〜省略〜〜
     private adjust(): void {
       // 1.HTMLElementの取得
        let ta = this.el.nativeElement.querySelector('textarea');
        if(!ta){
            ta = this.el.nativeElement;
        }
        if (ta) {
            let overflow = ta.style.overflow;
            // 2.高さ調節
            ta.style.height = 'auto';
            ta.style.height = ta.scrollHeight + 'px';

            if (overflow !== ta.style.overflow) {
                ta.style.overflow = overflow;
            }
        }
    }
}
1.HTMLElementの取得
まず、textareaのHTMLElementを取得しています。
ion-textareaはcomponentでtextarea自体はquerySelector('textarea')で取得する必要があります。
ちなみに、取得できなかった時は、textarea自体にelasticディレクティブが記述されているものとして処理しています。
2.高さ調節
textareaの高さにtextareaのscrollHeightの値をつっこんでいます。これで、通常では通常overflow:scrollで隠れてしまうtextareaの領域も表示されるようになり、動的に高さが調節されるtextareaが完成します。
elasticディレクティブの説明は以上です。
注意点
以下、注意点を2点ほど・・・
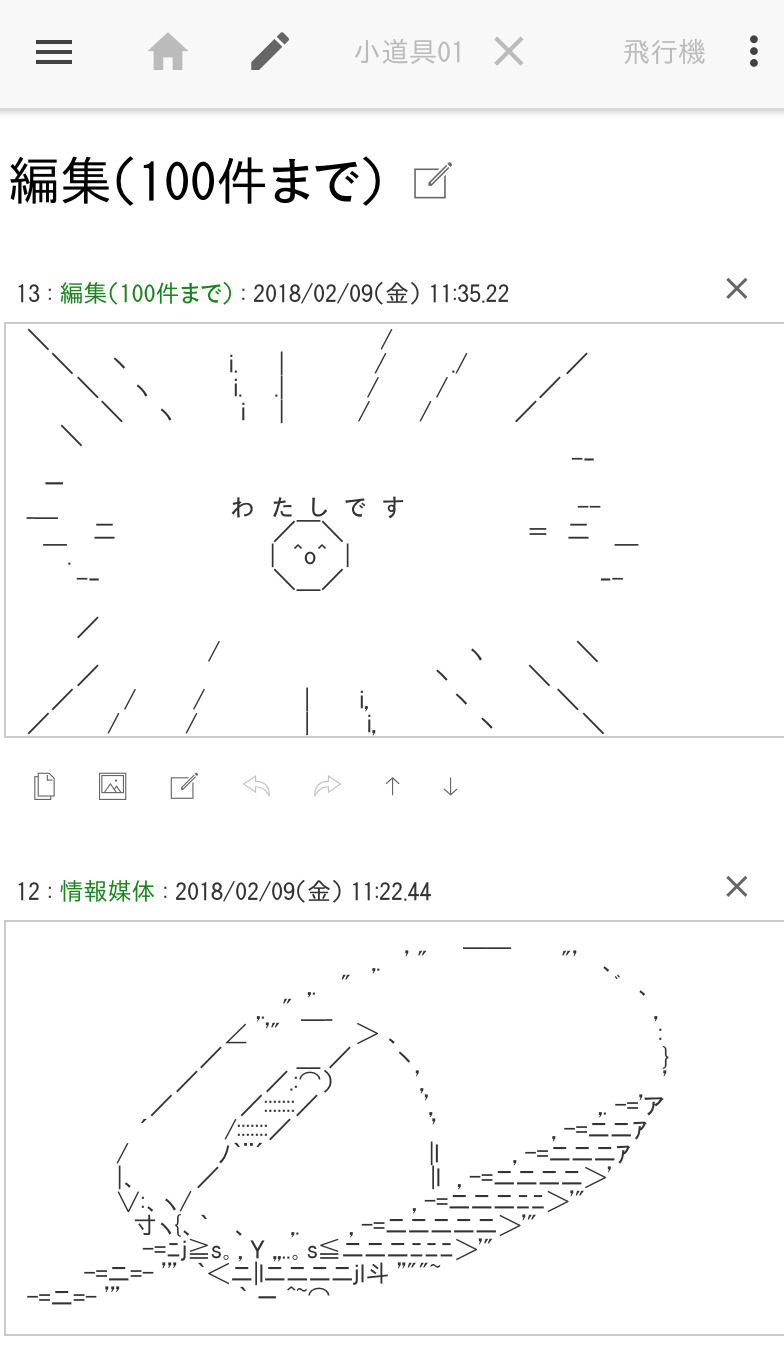
カスタムフォントを使っている場合
DEMO(モナー版)にアクセスするとtextareaの高さが通常より大きくなる場合があります。
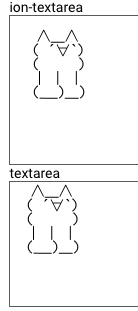
これは、カスタムフォントの読み込み前に高さ調節をしてしまってるせいです。
カスタムフォント読み込み前のモナーはこんな感じなのです。
この状態で、textareaの高さ調節処理が走るため、少しtextareaのサイズが大きくなってしまうのです。ぶっちゃけレアケースではあります。
WebViewじゃないとion-textareaが反応しない?
原因究明できていませんが、ion-textareaがPWAだと反応しません。
・iOS・・・まったく反応なし
・Android・・・入力はできるがタップでカーソル移動できない
・PC・・・問題なく使用可能
ちなみに、WebViewだと大丈夫です。
なぜだろう・・・。
まあ、ion-textareaを使いたい時は少ないから大丈夫ですけどね・・・。
手が空いたら原因を調査してみます。
まとめ
というわけで動的なtextareaの高さ調節です。
手前味噌ですが、私も自分のサイト「aahub.org」で使ってます。
スマホ対応のAAビューアー
それにしても相変わらずIonicフォーラムの知見のたまり具合は凄いですね。
コミュニティの力って強力です。