1 Tạo project
-
Tạo project với SingleViewApplication
-
Tạo 2 tableView được 2 tableviewController quản lý như hình dưới.
-
Thiết lập
StoryboardID = nextViewcho instantiateViewController(màn hình màu vàng)
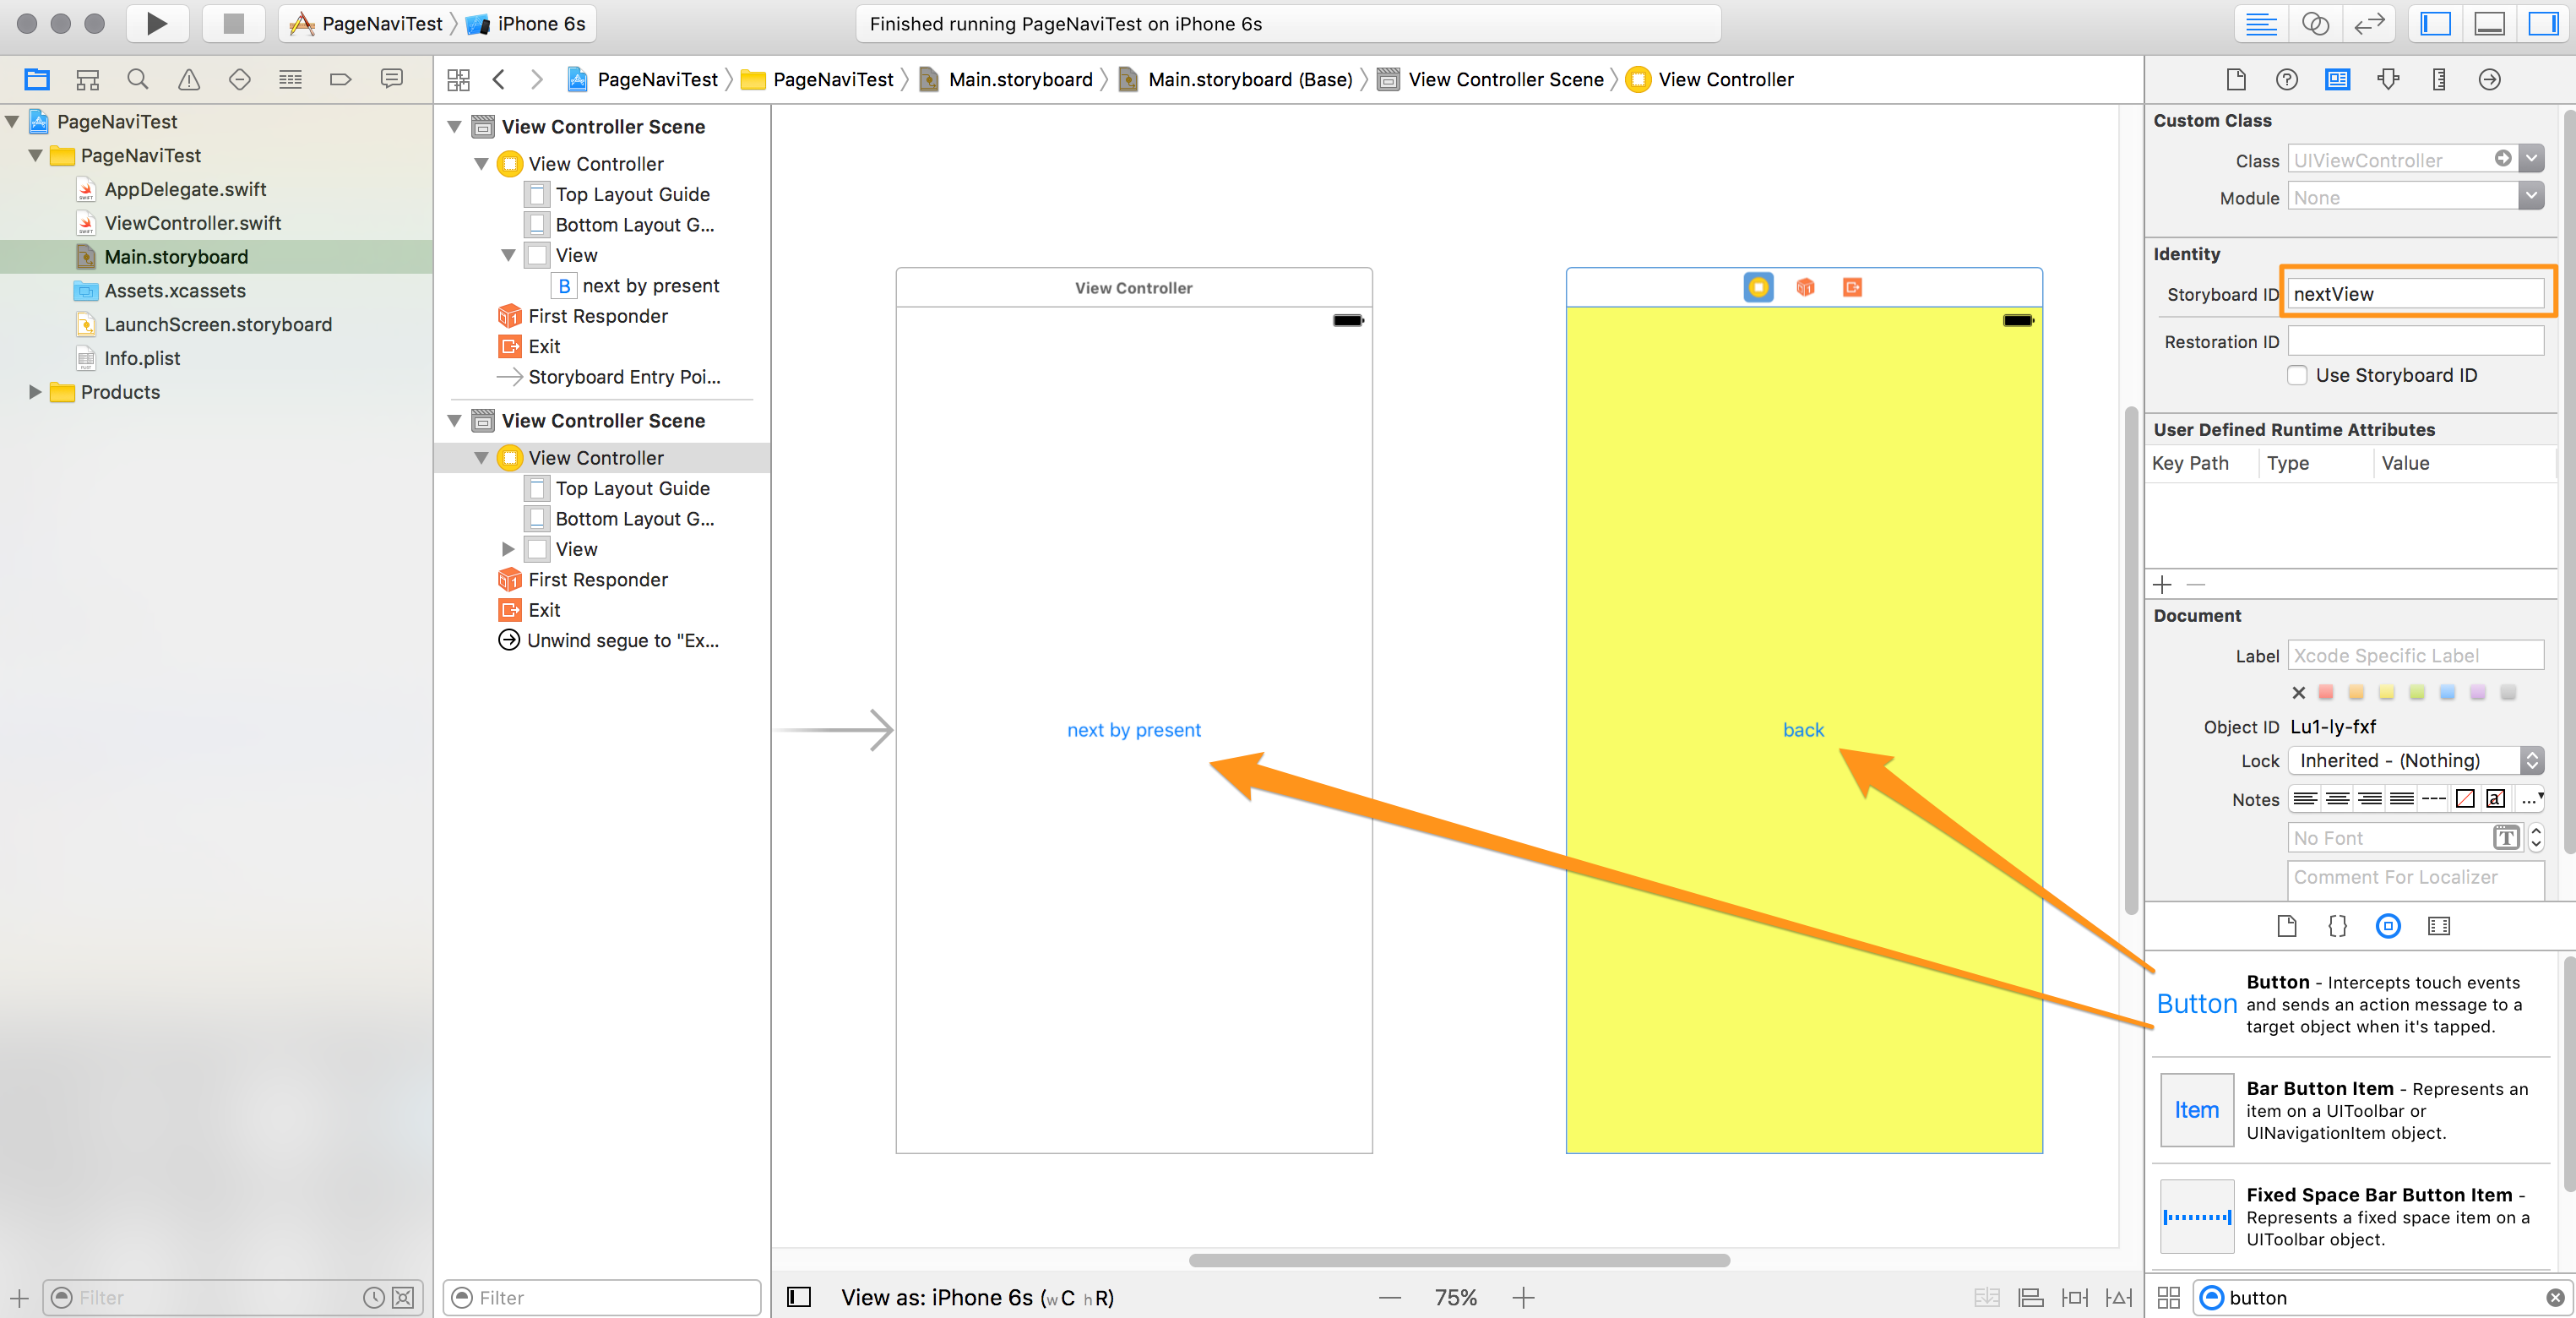
-
tại table 2, vào storyboard id đặt tên nextView.
-
tạo 2 button đặt tên là next by present và back.
2 tạo hành độngh chuyển đổi giữa màn hình
- màn hình chuyển đổi đặt là goNext(), màn hình quay lại là goBack()
- tham số truyền vào cho hàm (パラメタ) là phương thức UIstoryboardSegue
@IBAction func goBack(_ segue:UIStoryboardSegue) {}

    @IBAction func goNext(_ sender:UIButton) {
        let next = storyboard!.instantiateViewController(withIdentifier: "nextView")
        self.present(next,animated: true, completion: nil)
    }

    override func viewDidLoad() {
        super.viewDidLoad()
    }

    override func didReceiveMemoryWarning() {
        super.didReceiveMemoryWarning()
    }
3 truyền code vào phần trên UIstoryboard
- ấn vào nút back sẽ điều khiển việc thoát khỏi = trượt màn hình xuống, chọn nút goBack
- chú ý tạo chuyển đổi goBack() ở ViewController

4 build và kiểm tra
performSegueメソッドによる遷移
5 tạo segue
- kiểm tra chuyển đổi segue
- tạo button tại màn hình 1 và đặt tên next by segue
- màn hình 1 tạo thêm nút, bấm giữ control kéo thả từ icon phía trên ViewController vào View màn hình 2
- chọn loại popup cho segue chọn show
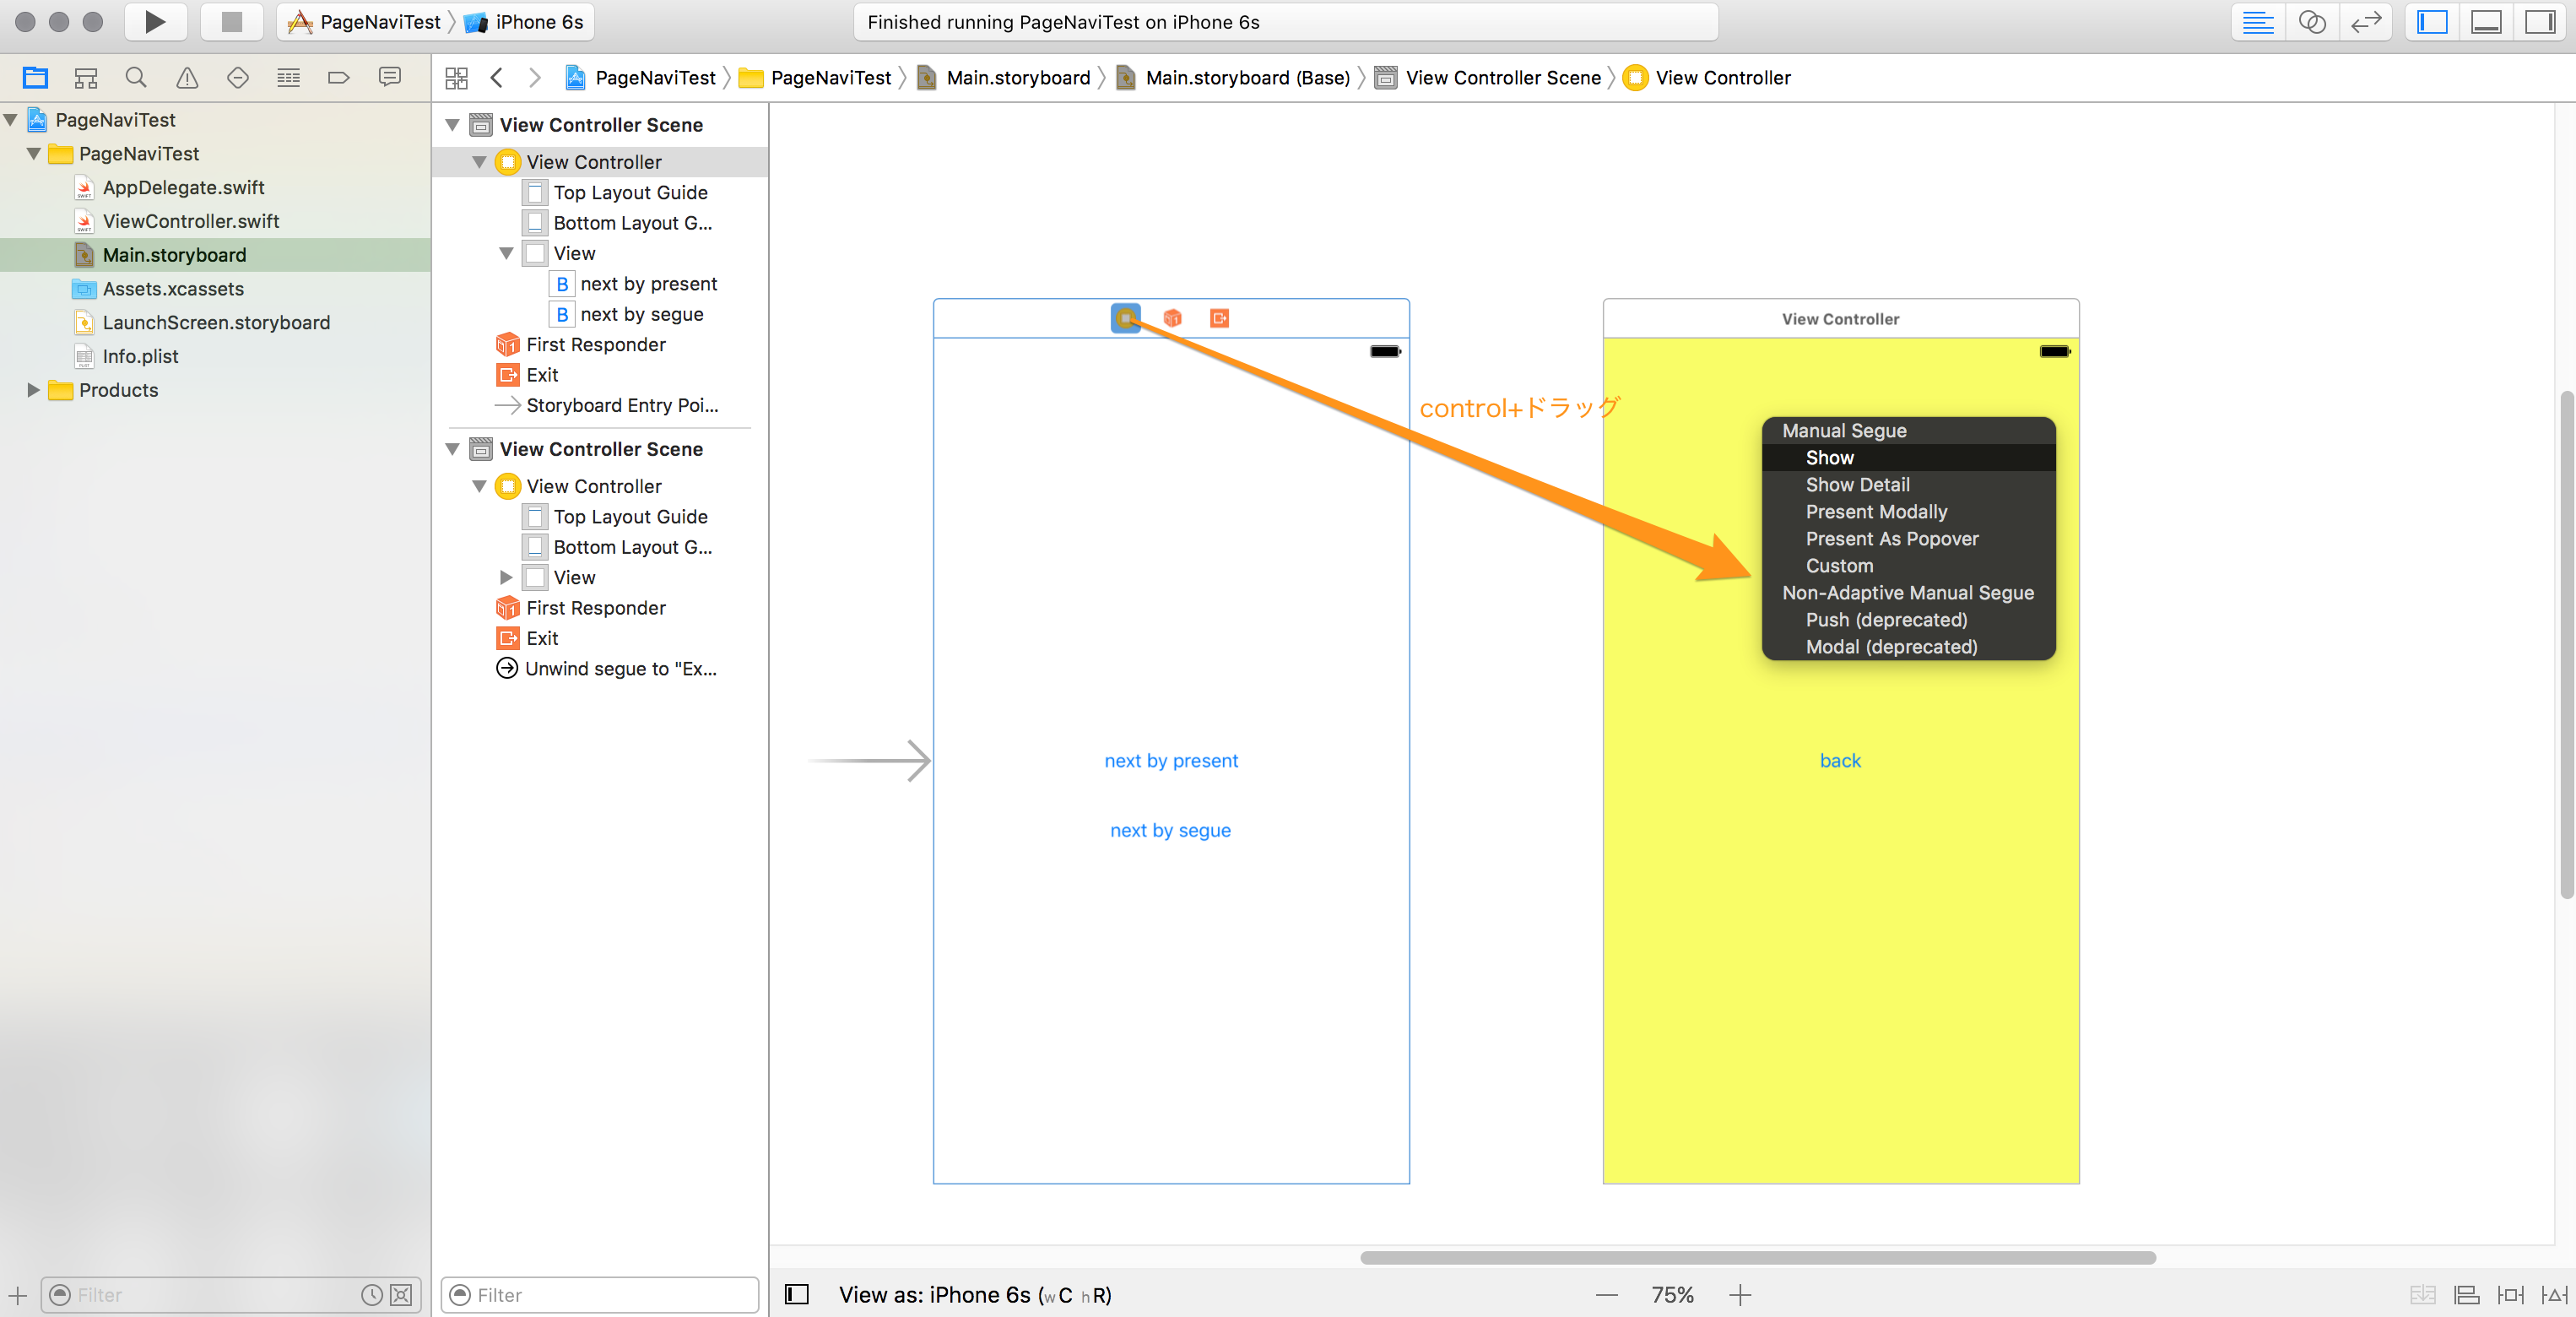
- tại giữa 2 màn hình xuât hiện icon segue khi click vào, cài đặt identifier(Storyboard) đặt tên
nextSegue

6 thêm chuyển động chuyển đổi segue
import UIKit

class ViewController: UIViewController {

    @IBAction func goBack(_ segue:UIStoryboardSegue) {}

    @IBAction func goNext(_ sender:UIButton) {
        let next = storyboard!.instantiateViewController(withIdentifier: "nextView")
        self.present(next,animated: true, completion: nil)
    }

    // セグエ遷移用に追加 ↓↓↓
    @IBAction func goNextBySegue(_ sender:UIButton) {
        performSegue(withIdentifier: "nextSegue", sender: nil)
    }

    override func viewDidLoad() {
        super.viewDidLoad()
        // Do any additional setup after loading the view, typically from a nib.
    }

    override func didReceiveMemoryWarning() {
        super.didReceiveMemoryWarning()
        // Dispose of any resources that can be recreated.
    }
}
7 phần trên storyboard và điều kiện source

8 chèn thêm navigation controller
- thêm vào navigation controller
- tại màn hình viewcontroller 1 phía trên storyboard -> menu -> Editor -> Embed In -> Navigation Controller
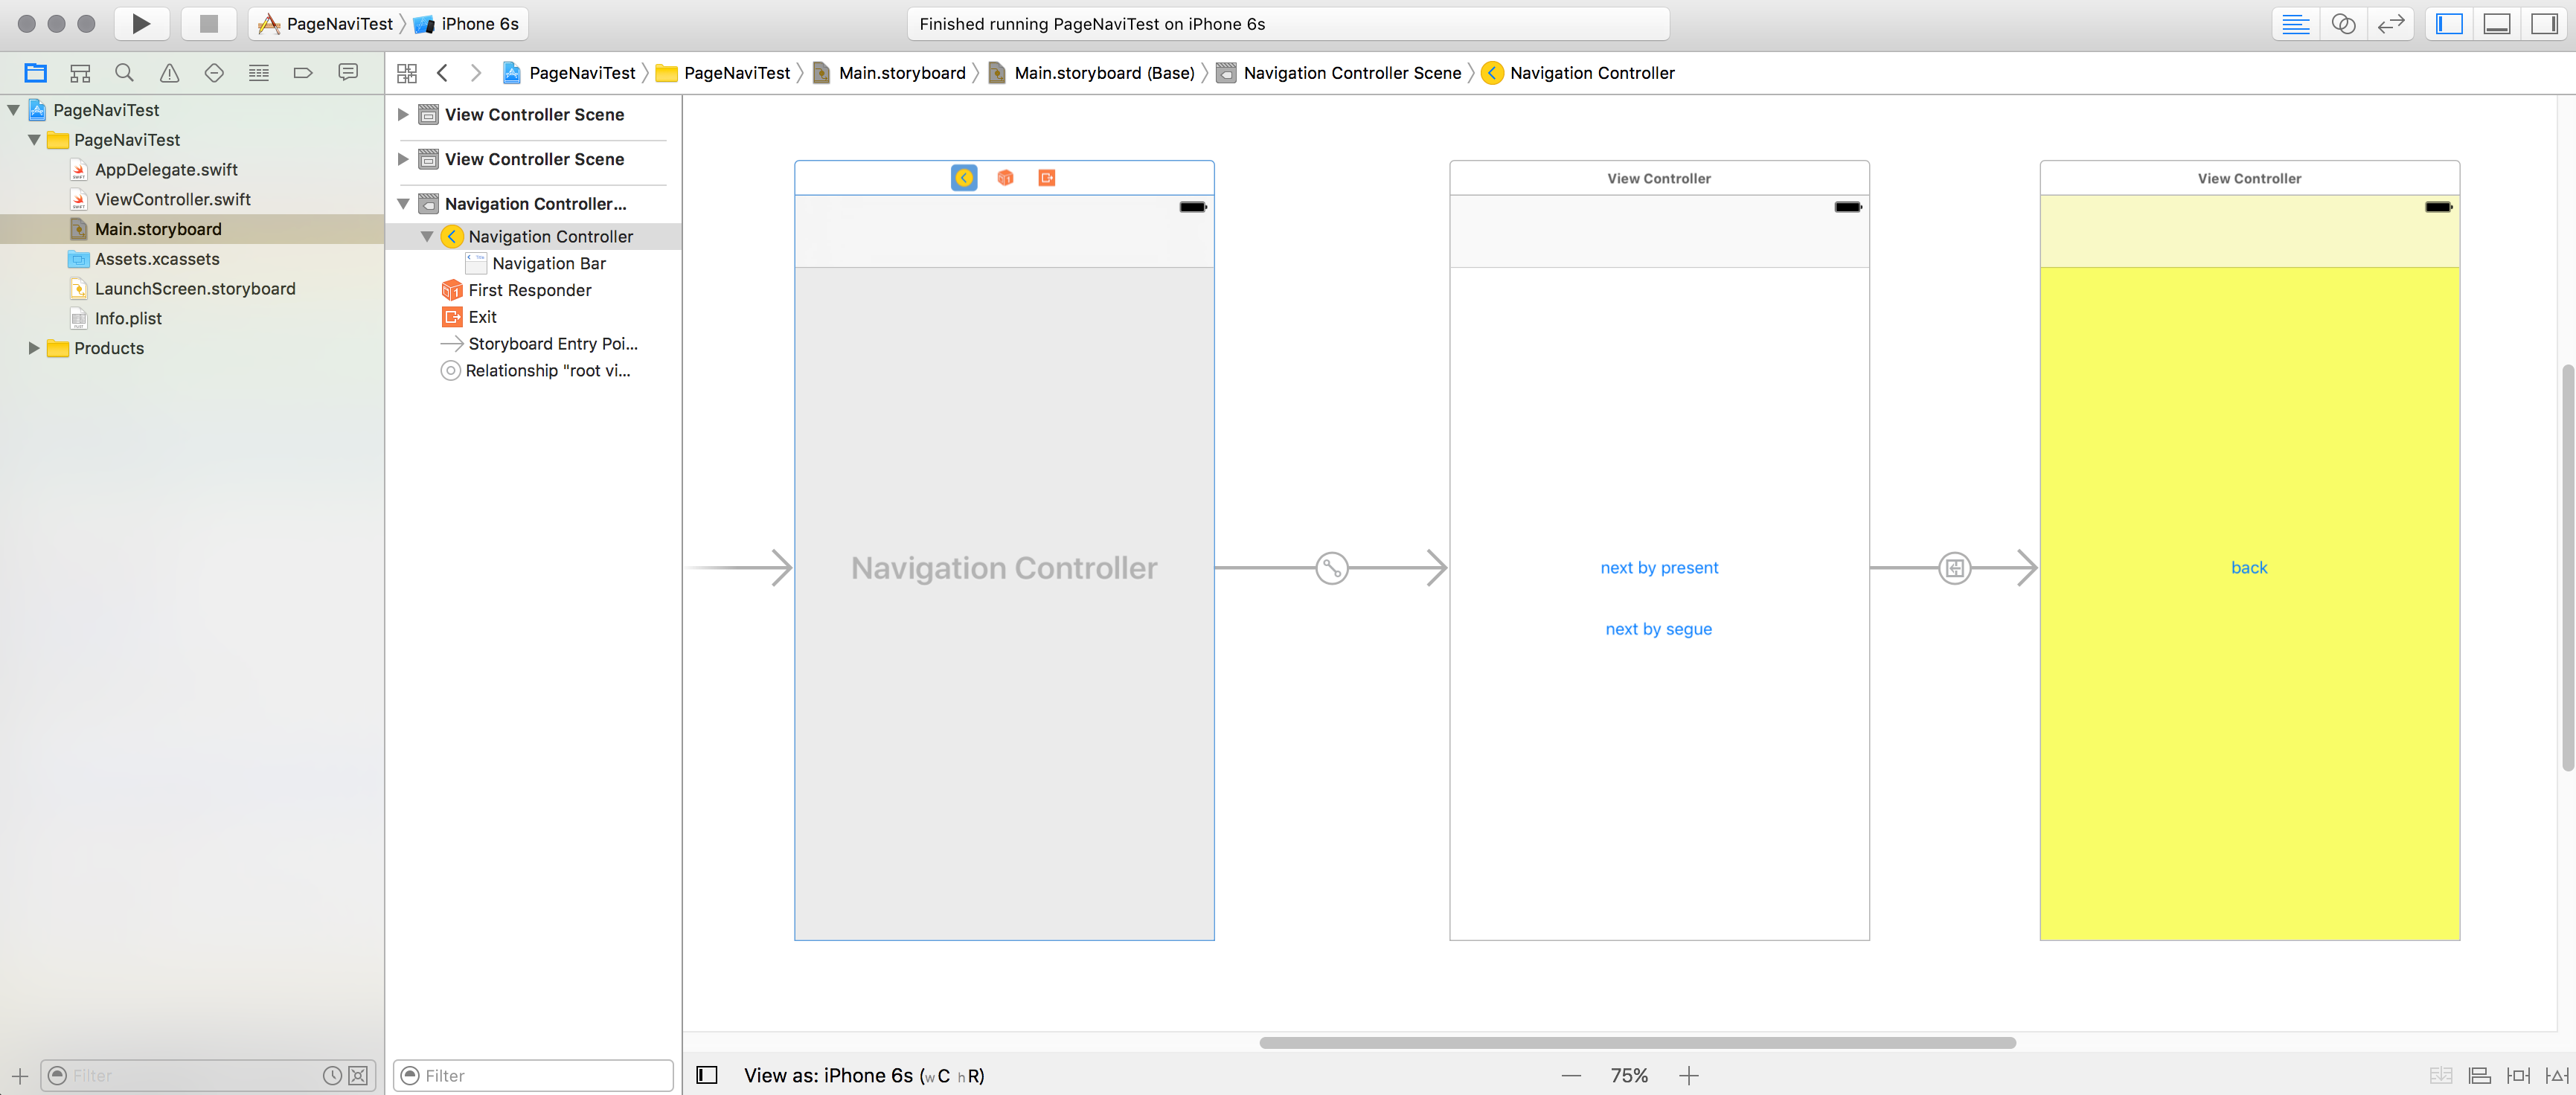
- không thay đổi zì thêm source check navigation controller có bị ảnh hưởng zì k?