はじめに
科学・技術計算を駆使する研究でスカラー関数の等値面を調べることがしばしばある。
これをmatplotlib利用による標準的なプロットだけで行うことは簡単ではないと思われる(かおそらく現時点では不可能か)。
一方,mayaviを使うと手っ取り早く等値面を描くことができる。mayaviは,プレゼンテーション・学会発表・論文への使用にもたえられる優れた3次元可視化ライブラリとして知られている(らしい)[1]。
ここではmayaviを用いた等値面の描画の一例として,3変数関数$f(x,y,z)=\frac{\sin(xyz)}{(xyz)} \tag 1$の等値面を描いてみる[1,2]。
mayaviの公式サイトに多くの情報が掲載されており,本記事もそれに準じている。
なお,私はmiyaviをほとんど使ったことがないため,誤った説明をしている部分があるかもしれません。その場合はその箇所をご指摘いただければ幸いです。。
内容
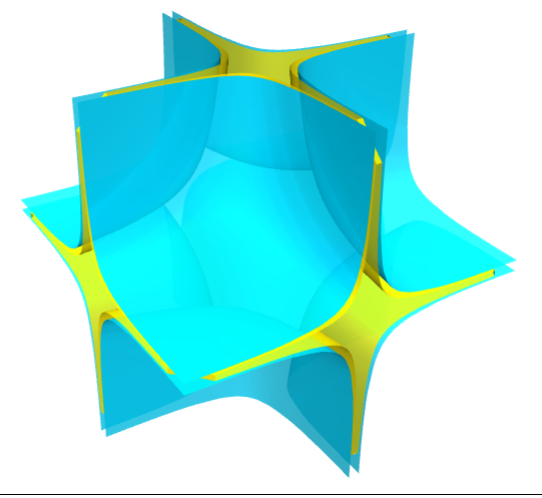
(1) fの取り得る値を4等分した4つの等値面を描く。
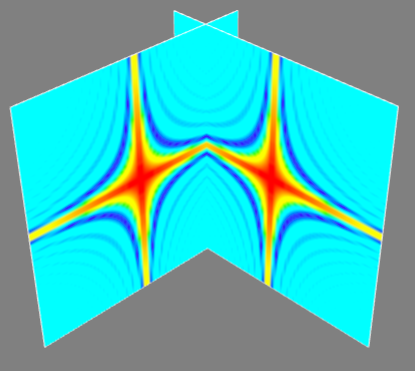
(2) 等値面の断面を描く。
コード(1) 等値面を描く
"""
mayaviを用いて3D等値面を描く: iso-surface
30 Aug. 2017
"""
import numpy as np
from mayavi import mlab
mlab.init_notebook()  # ノートブックの初期化。必ず入れること。

x, y, z = np.ogrid[-5:5:64j, -5:5:64j, -5:5:64j]
scalar = np.sin(x*y*z)/(x*y*z)  # 関数の設定

# 描画領域の生成
mlab.figure(1, bgcolor=(1, 1, 1), fgcolor=(0, 0, 0), size=(600, 400)) # 背景色,サイズ等を設定
mlab.clf()

# 3D等値面を描く。colormapをjetと設定,contoursが分割数, line_widthが線の太さ, opacityが不透明度(デフォルトは1.0)
obj=mlab.contour3d(scalar,colormap='jet',\
                   contours=4,line_width=1.3,opacity=0.8)

mlab.show()

obj   #最後に描画オブジェクトを実行すること!これをしないと何もおこらない。
結果
コード(2) 等値面の断面を描く
"""
mayaviを用いて3D等値面の断面を描く:
"""
import numpy as np
from mayavi import mlab
mlab.init_notebook()

x, y, z = np.ogrid[-5:5:64j, -5:5:64j, -5:5:64j]
scalar = np.sin(x*y*z)/(x*y*z)

# 断面の設定: x軸とy軸とに平行な断面のオブジェクトをss1とss2という名前で作る
ss1=mlab.pipeline.image_plane_widget(mlab.pipeline.scalar_field(scalar),plane_orientation='x_axes',slice_index=10,)
ss2=mlab.pipeline.image_plane_widget(mlab.pipeline.scalar_field(scalar),plane_orientation='y_axes',slice_index=10,)

mlab.show()

ss1
ss2
結果(2): 等値面の断面図
補遺:
(1) condaを利用したmayaviのインストール ([3]を参考)
筆者のマシン環境: macOS Sierra 10.12.6
ターミナルを起動し,
- conda install -c menpo mayavi=4.5.0
- jupyter nbextension install --py mayavi --user
- conda install pyQT
とした。
(2) macOS + Jupyter利用時
Jupyter-notebook 5.0以降 を起動するときは,iopub_data_rate_limitを大きめに設定しておかないと,mayaviを用いた描画に必要なメモリが足りなくなる。
そこで, jupyter起動時に, jupyter-notebook --NotebookApp.iopub_data_rate_limit=10000000000などとする必要があるようだ[4]。
参考文献
[1] miyaviのチュートリアル (英語): http://docs.enthought.com/mayavi/mayavi/auto/mlab_helper_functions.html
[2] contour3dについて (英語) http://mdns.esy.es/2017/06/17/contour3d/
[3] 2dod様のQiita記事,Jupyter notebookでMayaviを使う時の設定
[4] iopub_data_rate_limitに関すること(英語): https://github.com/jupyter/notebook/issues/2287

