(2018/6/19 Conversation -> Assistant の変更他、最新の情報にUpdate)
Watson Assistant(以降Assistant)の Dialog ノードから IBM Cloud Functions (以降ICF)の Actionを直接呼び出せるようになったので、設定手順を記載します。
- 2018年6月現在この機能はβ版での提供となります。
- 米国南部、ドイツのAssistant及びICFのインスタンスが前提となります。
概要
例えば天気予報を教えてくれるチャットボットを作成する場合、これまでの実装では下図のようにAssistantで抽出されたIntentやEntityに基づき、ユーザーアプリケーションが外部のサービス(ここではWeather Company Data)を呼び出す必要がありました。
ICFを使用するとAssistantのDialogノードからICFで定義したActionを直接呼び出すことができるようになります。ICFが外部サービスを呼び出し、応答の内容を生成することができるため、結果Assistantからの応答内容を動的に変化させることができるようになります。
以降では前述の天気予報チャットボットを題材に、AssistantとICFの連携手順を記載します。
Weather Company Dataインスタンスの作成
IBM Cloudにログインし、Weather Company Dataサービスのインスタンスを作成します。

作成したサービスの資格情報は後ほど必要になるので保存しておきます。

ICFのActionの作成
「アクション名」「ランタイム」を指定して、「作成」ボタンをクリックします。
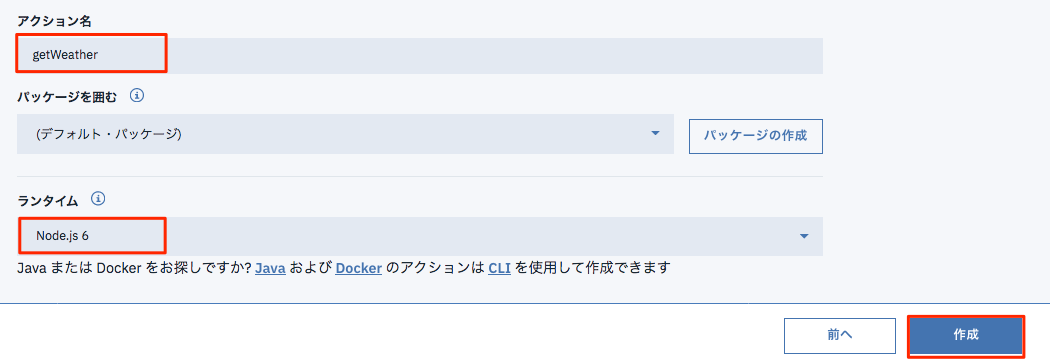
ランタイムはNode.js、Python、PHP等、好みのものを指定できます。今回はNode.jsを使用します。
開いたエディターでNode.jsのコードを作成します。
var request = require('request');

var main = function(params){
    var options = {
        json:true,
        auth:{
            'user':'aaaaaa',
            'password':'bbbbbb'
        }
    }

    return new Promise(function(resolve, reject) {
        options.url = 'https://twcservice.mybluemix.net/api/weather/v3/location/search?query=' + encodeURI(params.location) + '&language=ja-JP';
        request.get(options, function (error, response, body) {
            if (!error && response.statusCode == 200) {
                var lat = body.location.latitude[0];
                var lng = body.location.longitude[0];

                options.url = 'https://twcservice.mybluemix.net/api/weather/v1/geocode/' + lat + '/' + lng + '/forecast/daily/3day.json?language=ja-JP';
                request.get(options, function (error, response, body) {
                    if (!error && response.statusCode == 200) {
                        var forecast = body.forecasts[0].narrative;
                        resolve({"forecast":forecast});
                    }else{
                        reject();
                    }
                })
            } else {
                reject();
            }
        })
    })
}
コードの解説
- user、passwordには前述の手順で保存した Weather Company Data の資格情報を使用します。
- 1つ目の request.get で入力のlocation名の緯度、経度を取得します。
- 2つ目の request.get で入力の緯度、経度の地点の天気予報を取得します。
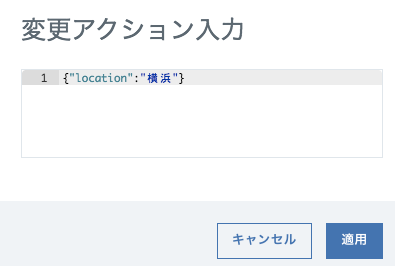
作成したコードはこの画面でテストすることができます。コードを保存したら、「入力の変更」ボタンをクリックし、Actionへの入力値を指定します。今回の例では以下のようにlocationの名前を入力とします。
「起動」ボタンをクリックし、結果が正常に返ってくることを確認します。

Assistant設定に必要な情報の取得
Namespace名、Action名の取得
画面左側の「エンドポイント」を選択し、表示されるHTTPメソッドからNamespace名、Action名を保存しておきます。

一般的にNamespace名は「組織名_スペース名」という形式になります。
API キーの取得
以下の手順でAssistantからICFのActionを呼び出すために必要なAPIキーを取得します。
「開始」セクションの「APIキー」を選択し、右側の画面で  をクリックして、伏字で表示されたキーを保存しておきます。

APIキーは xxxxxx:yyyyyy のようにコロン(:)で区切られた2つのフィールドから成っており、1番目のフィールドが user、2番目のフィールドが password となります。
AssistantのDialogフローの作成
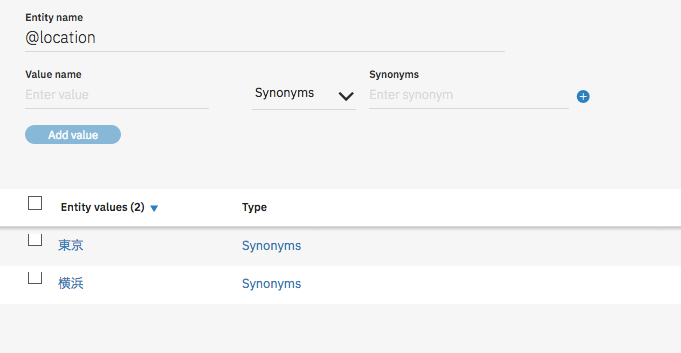
Assistantのワークスペースを作成し、Intent、Entityを定義します。簡単のため、Intentは#weather、Entityは@location のみ作成します。(詳細な手順は省略)
Dialogフローにノードを追加し、条件式(If bot recognizes)は #weather 及び @location を設定します。
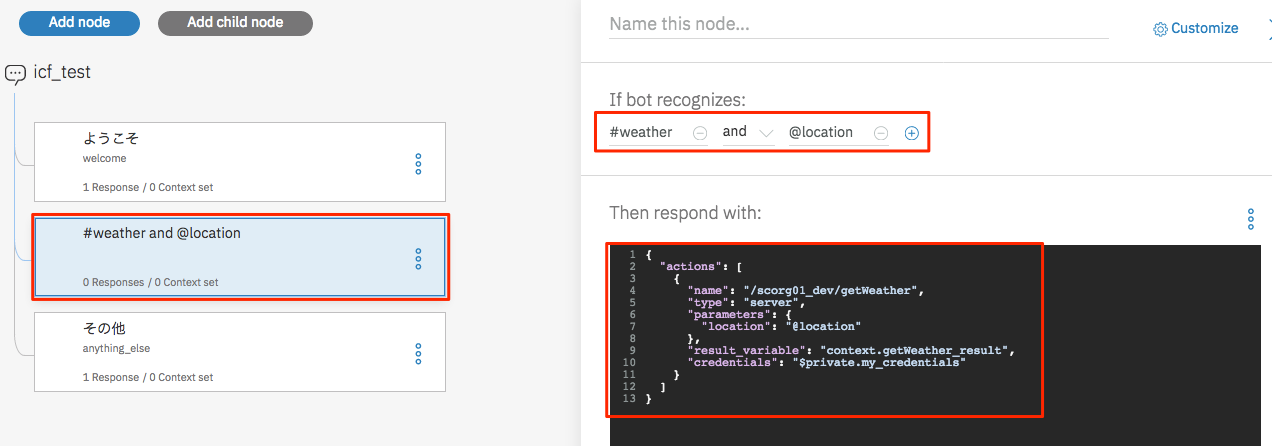
JSON editorには以下のように ICF の Action を呼び出すための JSON を定義をします。
{
  "actions": [
    {
      "name": "/scorg01_dev/getWeather",
      "type": "server",
      "parameters": {
        "location": "@location"
      },
      "credentials": "$private.my_credentials",
      "result_variable": "context.getWeather_result"
    }
  ]
}
JSONの解説
- name には前述の手順で確認した /Namespace名/Action名 を設定します。
- parameters は Action への入力となります。
- credentials は ICF を呼び出すための APIキーになります。
- Action からの出力は result_variable に指定した変数に格納されます。
作成したノードに子ノードを追加し、条件式(If bot recognizes)は true、応答(Then response with)は $getWeather_result.forecast を設定します。

親ノードで「Skip user input」を選択し、子ノードへのユーザー入力をスキップします。

Dialog フローのテスト
Try it outパネルから「Manage Context」を選択し、context変数 $private.my_credentials を設定します。
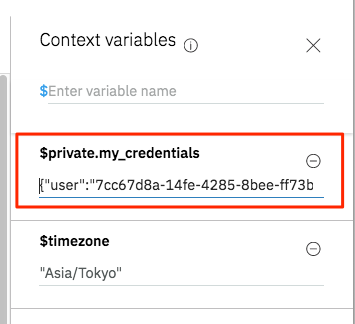
設定値は前述の手順で確認した、ICFのAPIキーに含まれるuser及びパスワードになります。
{"user":"xxxxxx","password":"yyyyyy"}
Try it out パネルから天気を聞くと応答が @location の値に従って変わることが確認できます。


