はじめに
この記事では、3Dモデルをファイルから読み込んで表示させてみましょう。ライティングが有効になると、複雑な3Dモデルを読み込んで表示させることができるようになります。
これまでは手書きで頂点データを編集してきましたが、3Dモデルのファイルからデータを読み込めるようになると、表現力が一気に増します。手書きだと、せいぜい10個〜100個くらいの頂点データしか扱えませんが、3Dモデルから読み込むようにすると、何千・何万といった頂点データを扱えるようになります。
こうなるとこちらのもので、Maya や Blender といった DCC (Digital Content Creation)ツールを使って、思い通りのキャラクタを自分のゲームの中に表示できるようになるのです。Wavefront OBJ(拡張子 .obj)は基本的なフォーマットですから、あらゆるDCCツールがOBJファイルの書き出しに対応しています。
それでは、張り切っていきましょう。
1. 3Dモデルファイルを用意する
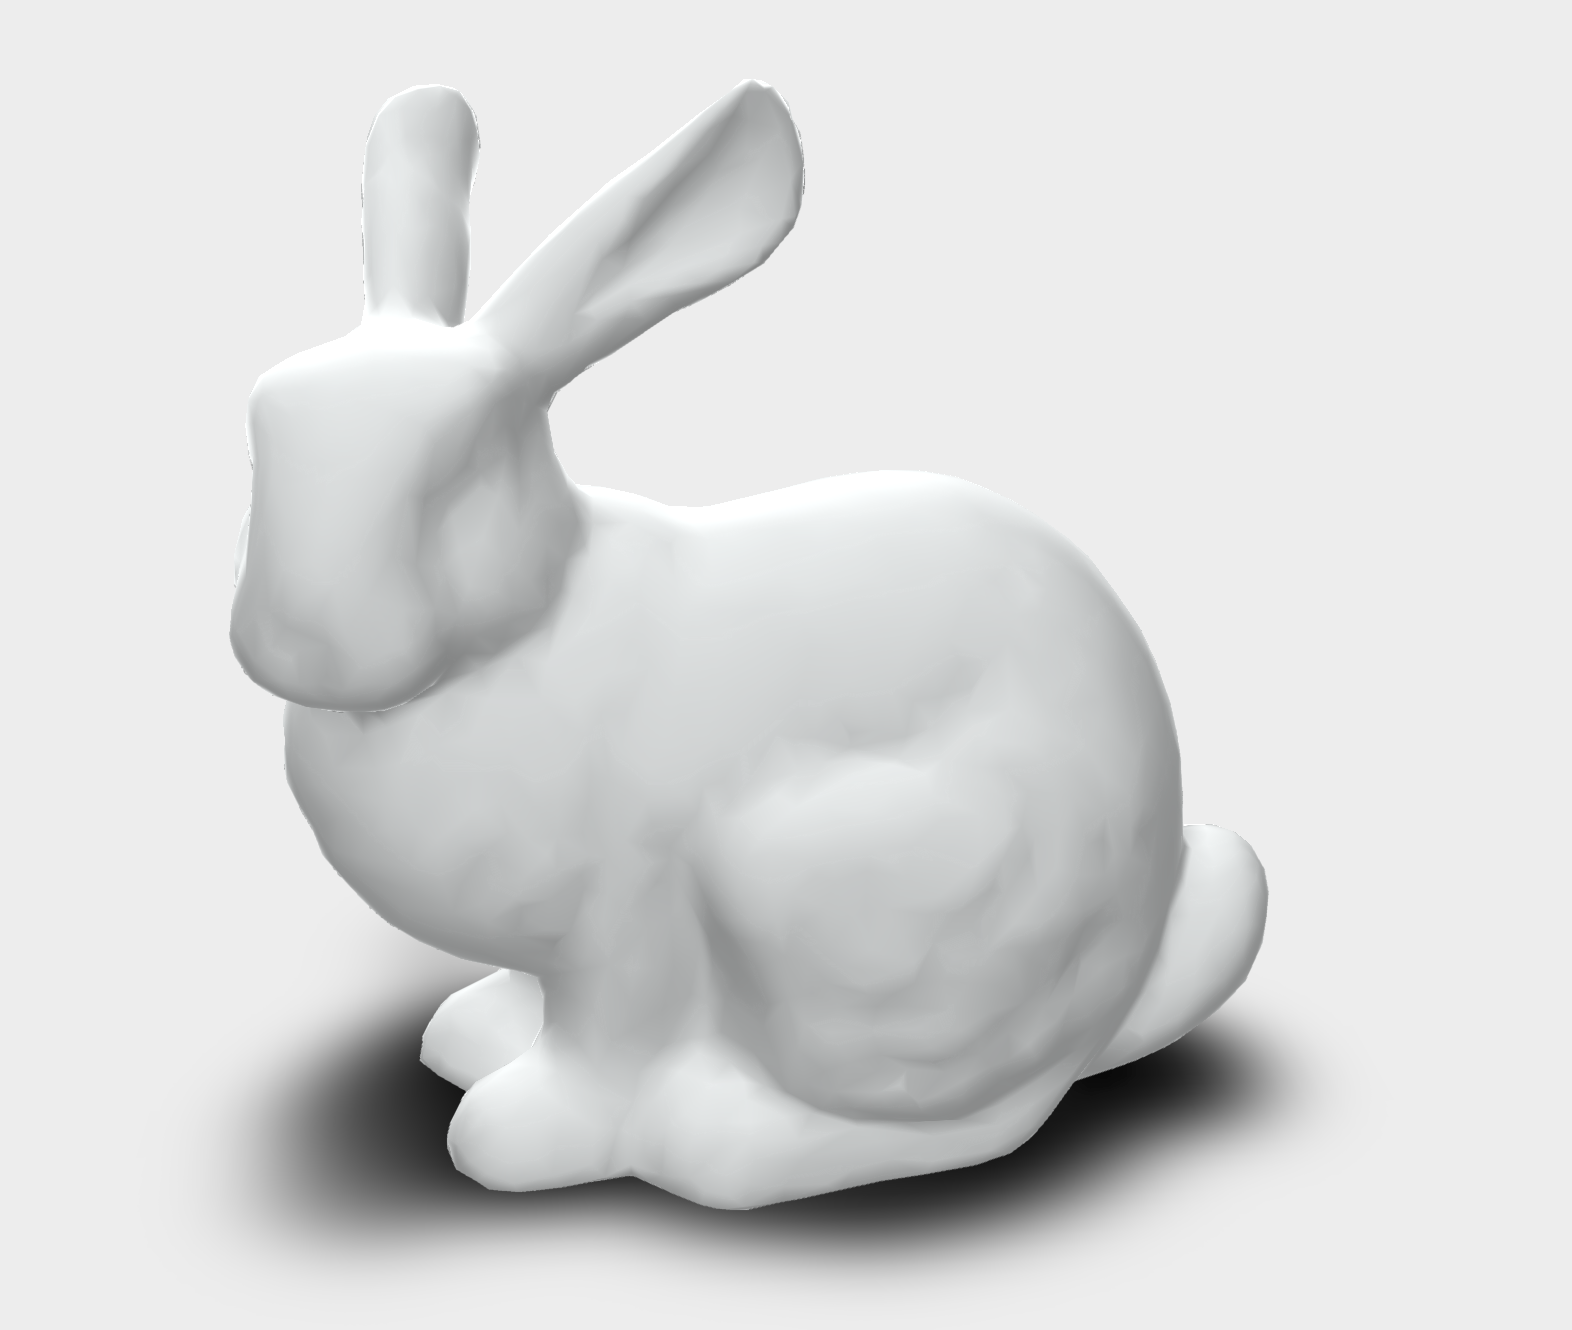
今回は「Stanford Bunny」と呼ばれる有名なウサギの3Dモデルのデータを使ってみましょう。OpenGLで3Dモデルと言えば、このウサギとティーポットが有名です。
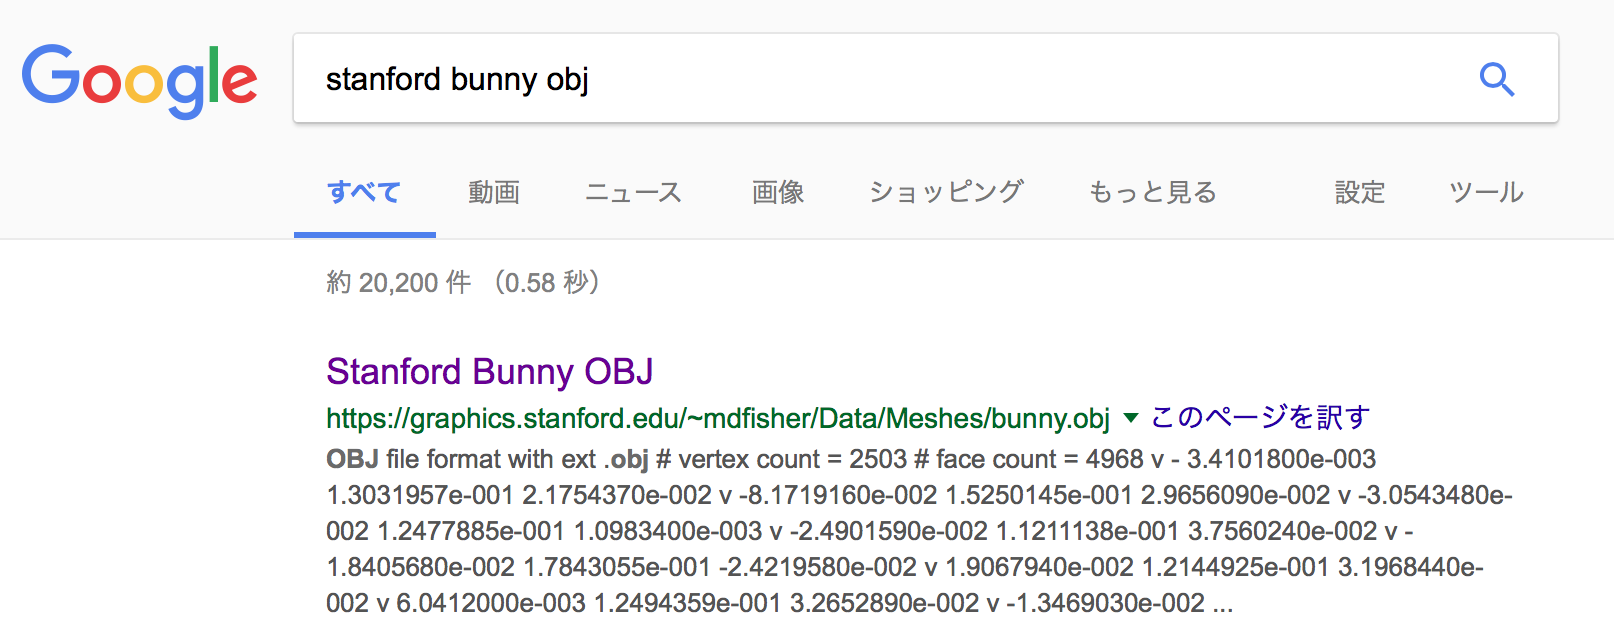
「Stanford Bunny obj」でGoogle検索すれば、graphics.stanford.edu 以下のドメインにあるファイルが一番にヒットします。このデータは、2503個の頂点データと、それを使った4968個のポリゴンメッシュからできています。
OBJファイルはテキスト形式のフォーマットですので、そのままテキストとして保存して、名前を「bunny.obj」としておきましょう。
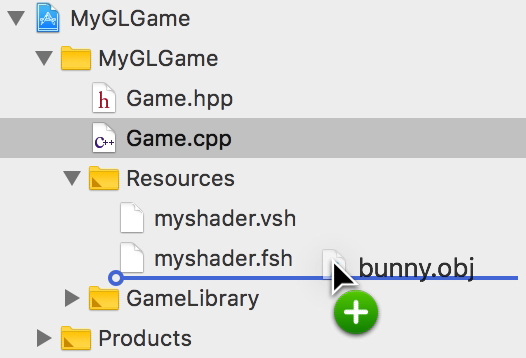
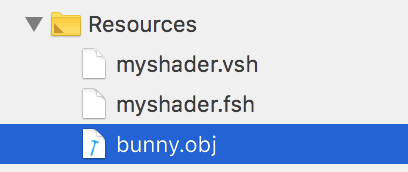
この「bunny.obj」ファイルを、Xcodeのプロジェクトの「Resources」グループにドラッグ&ドロップで追加します。
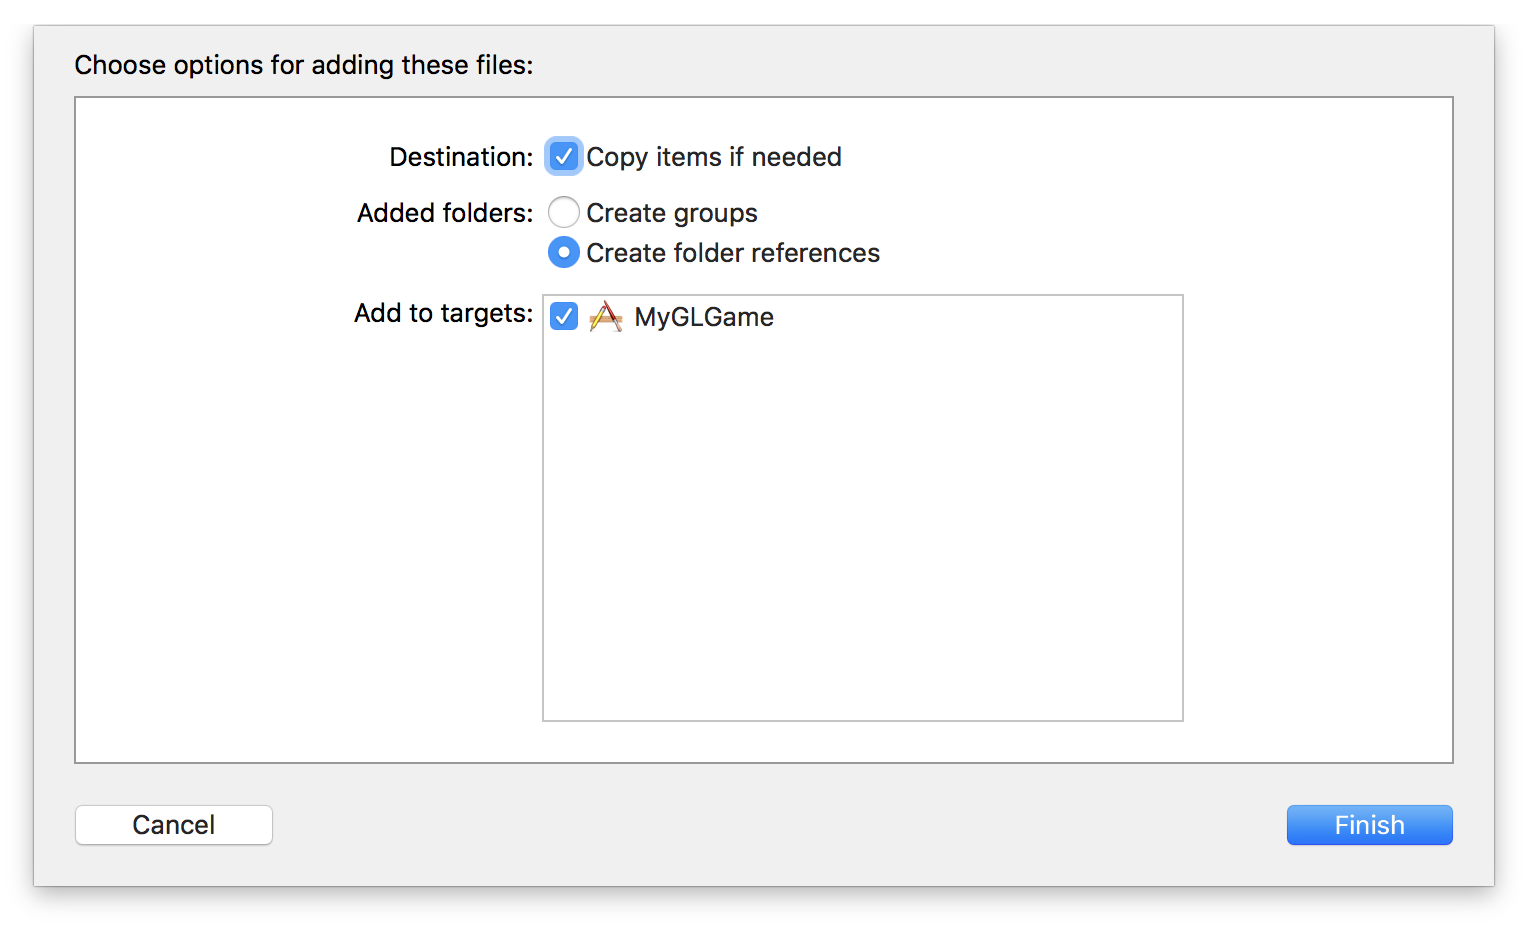
ファイルの追加ダイアログが表示されますので、必ず「Copy items if needed」と「Add to targets」の2箇所のチェックボックスがチェックされている状態にして、「Finish」ボタンを押してください。
以上で3Dモデルのファイルが追加できました。
2. Wavefront OBJファイルのフォーマット
今回利用する拡張子が「.obj」のファイルは、「Wavefront OBJファイル」と呼ばれる、3Dモデルの頂点データを格納するためのファイルです。
フォーマットの詳しい解説は「hiramine.com OBJファイルフォーマット」にあります。どんなOBJファイルにも対応できるようにするのは先送りにして、ここでは「Stanford Bunny」を読み込むのに必要な知識だけを確認しておきたいと思います。
bunny.obj ファイルの中身を見てみましょう。次のようになっています。
# OBJ file format with ext .obj
# vertex count = 2503
# face count = 4968
v -3.4101800e-003 1.3031957e-001 2.1754370e-002
v -8.1719160e-002 1.5250145e-001 2.9656090e-002
...
f 1069 1647 1578
f 1058 909 939
...
これを見ると、このファイルは主に3種類の行から構成されていることが分かります。「#」から始まる行と、「v」から始まる行と、「f」から始まる行です。
「#」から始まる行はコメント行ですので、無視します。
「v」から始まる行には、頂点の位置座標がスペース区切りで書かれています。
「f」から始まる行には、三角メッシュポリゴンを構成する3頂点のインデックス番号が書いてあります(ただしインデックス番号は1から始まりますので、配列のインデックスとして使う場合には-1する必要があります)。
3. 文字列処理の関数を追加する
OBJファイルの中身を処理しやすいように、StringSupport.hpp と StringSupport.mm に文字列処理の関数を追加しましょう。
まずはStringSupport.hppに関数の宣言を追加します。今回はこの中の Split() 関数しか使いませんが、いずれあると便利な StartsWith() 関数(プリフィックス文字列のチェック)や EndsWith() 関数(サフィックス文字列のチェック)、そして文字列の前後から空白文字を取り除くための Trim() 関数も追加しておきます。
/*! 与えられた文字列strを、separatorを区切り文字として分割します。 */
std::vector<std::string> Split(const std::string& str, const std::string& separator);

/*! 与えられた文字列strを、separatorを区切り文字として分割します。(空文字挿入のオプションあり) */
std::vector<std::string> Split(const std::string& str, const std::string& separator, bool ignoreEmptyString);

/*! 文字列strが、文字列valueで始まる文字列かどうかをチェックします。 */
bool StartsWith(const std::string& str, const std::string& value);

/*! 文字列strが、文字列valueで始まる文字列かどうかをチェックします。(大文字・小文字の区別オプションあり) */
bool StartsWith(const std::string& str, const std::string& value, bool ignoreCase);

/*! 文字列strが、文字列valueで終わる文字列かどうかをチェックします。 */
bool EndsWith(const std::string& str, const std::string& value);

/*! 文字列strが、文字列valueで終わる文字列かどうかをチェックします。(大文字・小文字の区別オプションあり) */
bool EndsWith(const std::string& str, const std::string& value, bool ignoreCase);

/*! 文字列の先頭および末尾にある空白文字(タブ文字, 改行文字, 空白文字)をすべて削除します。 */
std::string Trim(const std::string& str);

/*! 文字列の先頭および末尾から、指定された文字セットをすべて削除します。 */
std::string Trim(const std::string& str, const std::string& trimChars);
次に、StringSupport.mmに関数の実装を追加します。
std::vector<std::string> Split(const std::string& str, const std::string& separator)
{
    return Split(str, separator, false);
}

std::vector<std::string> Split(const std::string& str, const std::string& separator, bool ignoreEmptyString)
{
    std::vector<std::string> ret;

    std::string::size_type pos = 0;
    std::string::size_type length = str.length();
    if (length == 0) {
        if (!ignoreEmptyString) {
            ret.push_back("");
        }
        return ret;
    }

    while (pos < length) {
        std::string::size_type p = str.find_first_of(separator, pos);
        if (p == std::string::npos) {
            std::string::size_type len = length - pos;
            if (!ignoreEmptyString || len > 0) {
                std::string part = str.substr(pos, len);
                ret.push_back(part);
            }
            break;
        }
        std::string::size_type len = p - pos;
        if (!ignoreEmptyString || len > 0) {
            std::string part = str.substr(pos, len);
            ret.push_back(part);
        }
        pos = p + 1;
        if (pos >= length && !ignoreEmptyString) {
            ret.push_back("");
        }
    }
    return ret;
}

bool StartsWith(const std::string& str, const std::string& value)
{
    return StartsWith(str, value, true);
}

bool StartsWith(const std::string& str, const std::string& value, bool ignoreCase)
{
    auto length = value.size();
    if (str.length() < length) {
        return false;
    }

    std::string sub = str.substr(0, length);
    if (ignoreCase) {
        return (strncasecmp(sub.c_str(), value.c_str(), length) == 0);
    } else {
        return (sub == value);
    }
}

bool EndsWith(const std::string& str, const std::string& value)
{
    return EndsWith(str, value, true);
}

bool EndsWith(const std::string& str, const std::string& value, bool ignoreCase)
{
    auto length = value.size();
    if (str.length() < length) {
        return false;
    }

    std::string sub = str.substr(str.length()-length, length);
    if (ignoreCase) {
        return (strncasecmp(sub.c_str(), value.c_str(), length) == 0);
    } else {
        return (sub == value);
    }
}

std::string Trim(const std::string& str)
{
    return Trim(str, "\t\r\n ");
}

std::string Trim(const std::string& str, const std::string& trimChars)
{
    std::string::size_type left = str.find_first_not_of(trimChars);

    if (left == std::string::npos) {
        return str;
    }
    std::string::size_type right = str.find_last_not_of(trimChars);
    return str.substr(left, right - left + 1);
}
4. 頂点データを読み込む
ファイル読み込みのために、Game.hppの先頭に、C++のファイル操作APIであるfstreamのインクルード文を追加しておきましょう。また3節で追加した文字列処理の関数を使用しますので、StringSupport.hppのインクルード文も追加します。
# ifndef Game_hpp
# define Game_hpp

# include <OpenGL/OpenGL.h>
# include <OpenGL/gl3.h>
# include <GLKit/GLKMath.h>
# include <fstream>
# include <vector>
# include "Time.hpp"
# include "Input.hpp"
# include "Shader.hpp"
# include "Texture.hpp"
# include "StringSupport.hpp"
それでは、これまで vector<VertexData> 型の data 変数に手書きでデータを追加していたところを、3Dファイルからデータを読み込むように書き換えましょう。
Game::Game()
{
    glEnable(GL_DEPTH_TEST);

    program = new ShaderProgram("myshader.vsh", "myshader.fsh");

    // 3Dモデルの読み込み
    std::vector<GLKVector3> vertices;
    std::string modelFilepath = GetFilepath("bunny.obj");
    std::ifstream ifs(modelFilepath);
    std::string line;
    int lineCount = 0;
    while (ifs && getline(ifs, line)) {
        lineCount++;
        if (line.length() > 0 && line[0] == '#') {
            continue;
        }
        std::vector<std::string> parts = Split(line, " ");
        if (parts.size() > 0) {
            if (parts[0] == "v") {
                if (parts.size() < 4) {
                    throw GameError("Invalid obj file format (v): [line=%d] %s", lineCount, line.c_str());
                }
                float x = atof(parts[1].c_str());
                float y = atof(parts[2].c_str());
                float z = atof(parts[3].c_str());
                vertices.push_back(GLKVector3Make(x, y, z));
            } else if (parts[0] == "f") {
                if (parts.size() < 4) {
                    throw GameError("Invalid obj file format (f): [line=%d] %s", lineCount, line.c_str());
                }
                int index0 = atoi(parts[1].c_str()) - 1;
                int index1 = atoi(parts[2].c_str()) - 1;
                int index2 = atoi(parts[3].c_str()) - 1;
                if (index0 >= vertices.size() || index1 >= vertices.size() || index2 >= vertices.size()) {
                    throw GameError("Invalid index value (f): [line=%d] %s", lineCount, line.c_str());
                }
                GLKVector3& v0 = vertices[index0];
                GLKVector3& v1 = vertices[index1];
                GLKVector3& v2 = vertices[index2];
                GLKVector3 cross = GLKVector3CrossProduct(GLKVector3Subtract(v1, v0),
                                                          GLKVector3Subtract(v2, v0));
                GLKVector3 normal = GLKVector3Normalize(cross);
                GLKVector4 color = GLKVector4Make(1.0f, 1.0f, 1.0f, 1.0f);
                data.push_back( VertexData{ v0, normal, color } );
                data.push_back( VertexData{ v1, normal, color } );
                data.push_back( VertexData{ v2, normal, color } );
            }
        }
    }
    // 以下、続く
}
その他の箇所は変更していません。インデックス・リストの作成方法や、VBO・VAO・IBO の作成のためのコードはこれまでとまったく同じです。
それでは実行してみましょう。次のように Stanford Bunny が表示されれば成功です。
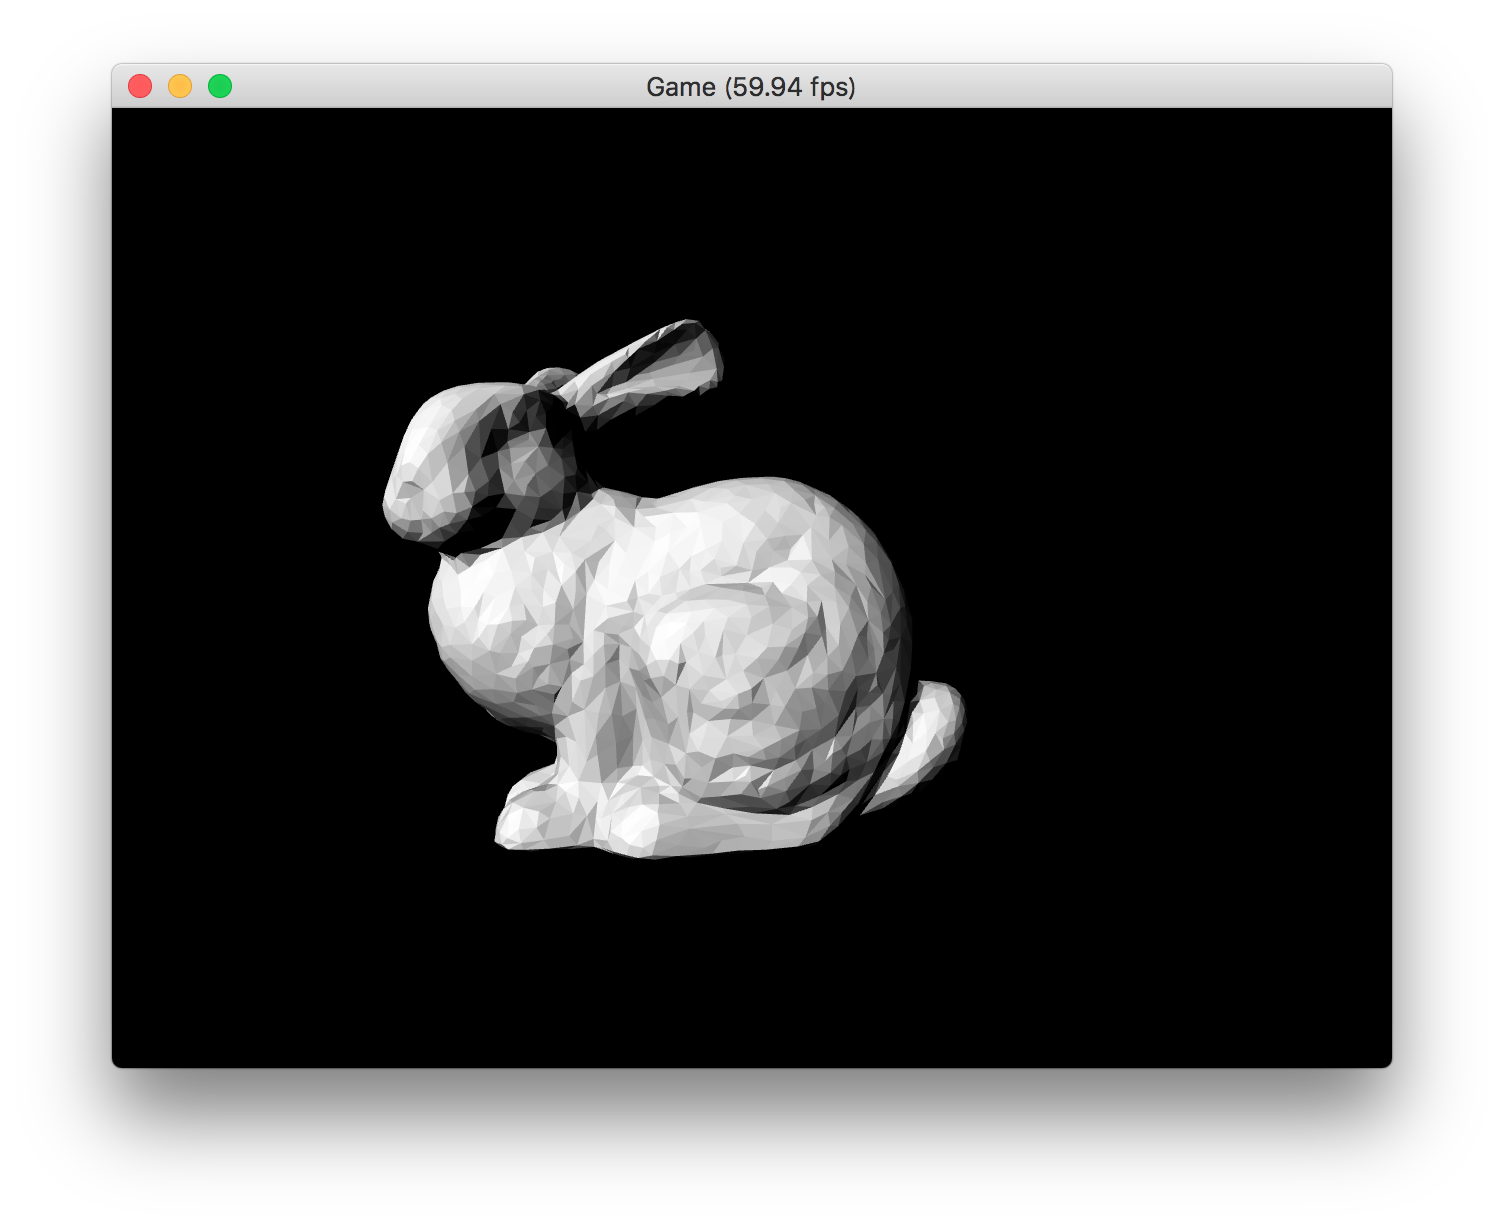
ここまでのプロジェクト:MyGLGame_step4-2.zip
5. 3Dモデルを読み込むコードの解説
(※ この節はあとでより詳しく説明を書き直しますが、まずは各箇所にざっくりとコメントをつけておきます(1月7日 15:00 現在)。)
5-1. ファイル読み込みはC++標準の方法で
ファイルパスを取得して、ifstreamクラスのオブジェクトを作る。
std::string modelFilepath = GetFilepath("bunny.obj");
std::ifstream ifs(modelFilepath);
1行ずつ読み込むためのifstreamクラスの使い方。読み込みに問題があった時に、問題の箇所を特定しやすくするために、lineCount変数を用意して、何行目を処理しているか分かるようにしておくのが重要(パーサなどを作る際の基本)。
int lineCount = 0;
while (ifs && getline(ifs, line)) {
    lineCount++;
}
コメント行を無視する処理
if (line.length() > 0 && line[0] == '#') {
    continue;
}
空白文字で切り分ける処理。
std::vector<std::string> parts = Split(line, " ");
if (parts.size() > 0) {
    if (parts[0] == "v") {
        ...
    } else if (parts[0] == "f") {
        ...
    }
}
頂点データの処理。指数表現になっている文字列も、一般的な小数点表現の文字列も、atof() 関数で float 値に変換できる。空白文字で区切った要素の個数を確認し、問題があったら例外をスローしてエラーを報告する。X座標, Y座標, Z座標を変換したら、頂点座標だけを格納しておくためのvectorにpush_back()で追加する。
if (parts[0] == "v") {
    if (parts.size() < 4) {
        throw GameError("Invalid obj file format (v): [line=%d] %s", lineCount, line.c_str());
    }
    float x = atof(parts[1].c_str());
    float y = atof(parts[2].c_str());
    float z = atof(parts[3].c_str());
    vertices.push_back(GLKVector3Make(x, y, z));
三角ポリゴンメッシュのデータ読み込み。頂点データと同様に要素の個数を確認して、問題があったら例外をスローする。atoi() 関数で文字列からint型の数値に変換し、OBJファイルではインデックス番号が1始まりなのを、配列に合わせて0始まりになるようにする。こうして取得したインデックスが、頂点データの個数を超えないことを必ずチェックする。今回使用する Stanford Bunny のOBJファイルには法線ベクトルのデータが含まれていないので、3頂点の座標を元に、外積を使って法線ベクトルを計算する。
} else if (parts[0] == "f") {
    if (parts.size() < 4) {
        throw GameError("Invalid obj file format (f): [line=%d] %s", lineCount, line.c_str());
    }
    int index0 = atoi(parts[1].c_str()) - 1;
    int index1 = atoi(parts[2].c_str()) - 1;
    int index2 = atoi(parts[3].c_str()) - 1;
    if (index0 >= vertices.size() || index1 >= vertices.size() || index2 >= vertices.size()) {
        throw GameError("Invalid index value (f): [line=%d] %s", lineCount, line.c_str());
    }
    GLKVector3& v0 = vertices[index0];
    GLKVector3& v1 = vertices[index1];
    GLKVector3& v2 = vertices[index2];
    GLKVector3 cross = GLKVector3CrossProduct(GLKVector3Subtract(v1, v0),
                                              GLKVector3Subtract(v2, v0));
    GLKVector3 normal = GLKVector3Normalize(cross);
    GLKVector4 color = GLKVector4Make(1.0f, 0.75f, 0.0f, 1.0f);
    data.push_back( VertexData{ v0, normal, color } );
    data.push_back( VertexData{ v1, normal, color } );
    data.push_back( VertexData{ v2, normal, color } );
}
6. まとめ
この記事では、3DモデルのファイルフォーマットであるOBJファイルを読み込めるようにし、これまでとは段違いに複雑な本格的な3Dデータを画面に表示できるようにしました。
ただし、今回は比較的単純なOBJファイルである Stanford Bunny を読み込めるようにしただけなので、あらゆるOBJファイルを読み込めるようにするには、もう少し手直しが必要です。今後の記事では、それも修正していきましょう。
