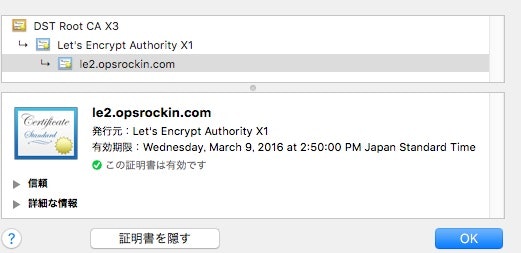
RubyのACME-CLIENTがあったので、証明書発行をスクリプトで書いてみた。身内向けのメモだったけど一部削って公開でいいや。
といってもこれをなぞっって少し解説と軽い検証を入れただけです。 https://github.com/unixcharles/acme-client
以下、Let's EncryptはLEと呼称します。
環境
- さくらのクラウドにDebian8 (kitchen-driver-sakuracloud使用で作成)
- aptでruby入れただけ
- WebサーバにNginx
- Nginxのrootは
/var/www/html;、ここにHTTPチャレンジ用のファイルを置けば良いのだ。
- Nginxのrootは
最後のコード以外はPryで実行してます。
ステップ 秘密鍵
今回でてくる秘密鍵は認証とサーバ鍵ペア(正確にはCSR作成用)の2通りがある。まずは認証用。
> require 'openssl'
=> true

> private_key = OpenSSL::PKey::RSA.new(2048)
=> #<OpenSSL::PKey::RSA:0x000000028f5a28>
LE側の管理は鍵単位になるので、一度作ったものを持ちまわるよりは申請ごとに認証鍵を作成し、都度発行で十分そう。
ステップ ACMEのエンドポイント
これはLEをつかうので、LEで。ACMEを話せるCAならなんでも利用は可能だ。
> endpoint = 'https://acme-v01.api.letsencrypt.org/'
=> "https://acme-v01.api.letsencrypt.org/"
ステップ ACMEクライアントの初期化
さっきのprivate_keyでクライアントを作成する。
> require 'acme-client'
=> true

> client = Acme::Client.new(private_key: private_key, endpoint: endpoint)
=> #<Acme::Client:0x00000003a0b538
 @directory_uri=nil,
 @endpoint="https://acme-v01.api.letsencrypt.org/",
 @nonces=[],
 @operation_endpoints={"new-authz"=>"/acme/new-authz", "new-cert"=>"/acme/new-cert", "new-reg"=>"/acme/new-reg", "revoke-cert"=>"/acme/revoke-cert"},
 @private_key=#<OpenSSL::PKey::RSA:0x000000028f5a28>>
operation_endpointsで、できる操作とメソッドがわかるね。
ステップ CAへの公開鍵登録(初回)
CA側に公開鍵が登録されていない場合は、一旦レジストレーションが必要だ。
この時に使用するcontact: が発行される証明書に記載される...と思って後で見たが見当たらない。
> registration = client.register(contact: 'mailto:test@example.com')

=> #<Acme::Resources::Registration:0x00000003aeb1b0
 @client=
  #<Acme::Client:0x00000003a0b538
   @connection=
    #<Faraday::Connection:0x00000003d8ed40

... # 長いのでレスポンスBodyだけ

           method=:post,
           body=
            {"id"=>67672,
             "key"=>
              {"kty"=>"RSA",
               "n"=>
                "nRbHq2AcRPZ(略)",
               "e"=>"AQAB"},
             "contact"=>["mailto:test@example.com"],
             "initialIp"=>"153.120.168.246",
             "createdAt"=>"2015-12-10T05:31:45.639166719Z"},
まあいいか。
ちなみに同じ秘密鍵で再度レジストはできない
client.register(contact: 'mailto:test@example.com').body
Acme::Error::Malformed: Registration key is already in use
client.register(contact: 'mailto:test2@example.com') # アドレス変えても駄目
Acme::Error::Malformed: Registration key is already in use
鍵の単位で管理するのね。


## ステップ registration オブジェクトをつかって利用条件に同意

登録した鍵に対して、LEでは利用条件に同意することが必要だ。

```ruby
> ls registration
Acme::Resources::Registration#methods: agree_terms  contact  get_terms  id  key  next_uri  recover_uri  term_of_service_uri  uri
instance variables: @client  @contact  @id  @key  @next_uri  @recover_uri  @term_of_service_uri  @uri
利用条件を確認しようとおもえば、#get_termsでは生のPDFファイルが来るのでできないこともない。
> registration.get_terms
=> "%PDF-1.3\n%\xC4\xE5\xF2\xE5\xEB\xA7\xF3\xA0\xD0\xC4\xC6\n4 0 obj\n<< /Length 5 0 R /Filter /FlateDecode >>\nstream\nx\x01\xCD\x9D[s\x1C\xB7\x95\xC7\xDF\xE7S\xF4#Y%\x8F\xA7{\xEE\x8F\x8E\xACr)vv\xB5\
x167\xA9\xAD8\x0F\xBA\xD0\xA2b\x9B\x94)\
...


# PDFのURIだけ確認
> registration.term_of_service_uri
=> "https://letsencrypt.org/documents/LE-SA-v1.0.1-July-27-2015.pdf"
同意する
#agree_terms でしれっと利用条件に同意可能。
> registration.agree_terms
=> true
それだけだ。
ステップ ドメインのチャレンジを申請する
まず一度このクライアントでLE側にドメインを押さえる?ようリクエストする必要がある。
authorization = client.authorize(domain: 'le2.opsrockin.com')

... ## ここもBodyだけ載せておく。

             body=
              {"identifier"=>{"type"=>"dns", "value"=>"le2.opsrockin.com"},
               "status"=>"pending",
               "expires"=>"2015-12-17T06:08:43.266689936Z",
               "challenges"=>
                [{"type"=>"http-01",
                  "status"=>"pending",
                  "uri"=>"https://acme-v01.api.letsencrypt.org/acme/challenge/f_x71jrKndEe_bo7W7yUCp8bXULfwlkDfd7DExxxxx/14795xx",
                  "token"=>"u73GJj-pi9Z_ac_kN6p4_H7vCsGU186CXwNFTxxxxxw"},
                 {"type"=>"tls-sni-01",
                  "status"=>"pending",
                  "uri"=>"https://acme-v01.api.letsencrypt.org/acme/challenge/f_x71jrKndEe_bo7W7yUCp8bXULfwlkDfd7DExxxxx/14795xx",
                  "token"=>"9W00llweMUDvr7nohcy4qVGekAKes85aKL9TCxxxxxo"}],
               "combinations"=>[[0], [1]]},
"status"=>"pending",となった。他所で同時に押えられるかは未確認。
追記: Subject Alternative Nameを使う場合
CSR作成前にauthorizationからchallenge=>validまでをSANに含めるホスト名すべてで回しておこう。
ステップ http01タイプでチャレンジする
#http01でチャレンジ内容を受け取ろう。
> challenge = authorization.http01

> ls challenge
Acme::Resources::Challenges::Base#methods: client  error  status  token  uri  verify_status
Acme::Resources::Challenges::HTTP01#methods: content_type  file_content  filename  request_verification
instance variables: @client  @status  @token  @uri
チャレンジの内訳を確認する。
> challenge.filename
=> ".well-known/acme-challenge/tQZUjb4U-qAMP8K3df1Hlzau3Up_DxxxxxxxxxxxxxxxN2zwPsI"

> challenge.file_content
=> "tQZUjb4U-qAMP8K3df1Hlzau3Up_DeDwvdl2N2zwPsI.4gOs-zxxxxxxxxxxxxxelUCeJ0QfxDLGeMQ"

> challenge.content_type
=> "text/plain"
チャレンジのレスポンスを設置しよう
レスポンスを返すため、ディレクトリを作成してファイルを設置する。
> www_root = '/var/www/html'
=> "/var/www/html"

> FileUtils.mkdir_p( File.join( www_root , File.dirname( challenge.filename ) ) )
=> ["/var/www/html/.well-known/acme-challenge"]

> File.write( File.join( www_root, challenge.filename), challenge.file_content )
=> 87
curlでちょっと確認する。
あ、Content-Type: application/octet-streamだ。
必須なのか実は確認してないけど、nginxのデフォルトを変えてきます。
$ curl -i http://le2.opsrockin.com/.well-known/acme-challenge/GP_AD5A_RR_cSeWLyiDVbgKTwfxxxxxxxxa4
HTTP/1.1 200 OK
Server: nginx/1.6.2
Date: Thu, 10 Dec 2015 06:26:35 GMT
Content-Type: application/octet-stream
Content-Length: 87
Last-Modified: Thu, 10 Dec 2015 06:24:46 GMT
Connection: keep-alive
ETag: "56691aae-57"
Accept-Ranges: bytes
default_typeでいいよね。
nginx.conf:     default_type application/octet-stream;
=> nginx.conf:     default_type text/plain;
はいOK。
$ curl -i http://le2.opsrockin.com/.well-known/acme-challenge/GP_AD5A_RR_cSeWLyiDVbgKTwfmrxxxxxxxxxxzXUua4
HTTP/1.1 200 OK
Server: nginx/1.6.2
Date: Thu, 10 Dec 2015 06:30:35 GMT
Content-Type: text/plain
Content-Length: 87
Last-Modified: Thu, 10 Dec 2015 06:24:46 GMT
Connection: keep-alive
ETag: "56691aae-57"
Accept-Ranges: bytes
チャレンジ対応OKをLEに通知
#request_verificationするだけだ。数秒とかからずにvalidとなる。
> challenge.verify_status
=> "pending"

> challenge.request_verification
=> true

> challenge.verify_status
=> "valid"
ステップ CSRを作成する
CSR作成用の鍵はAcme::Client::CertificateRequestの作成時、ついでに作ってくれる。
csr = Acme::Client::CertificateRequest.new(names: %w[le2.opsrockin.com])
=> #<Acme::CertificateRequest:0x00000003b3c8f8
 @common_name="le2.opsrockin.com",
 @csr=#<OpenSSL::X509::Request:0x00000003b3c588>,
 @digest=#<OpenSSL::Digest::SHA256: e3b0c44298fc1c149afbf4c8996fb92427ae41e4649b934ca495991b7852b855>,
 @names=["le2.opsrockin.com"],
 @private_key=#<OpenSSL::PKey::RSA:0x00000003b3c8a8>,
 @subject={"CN"=>"le2.opsrockin.com"}>
追記 Subject Alternative Name時のCSR
このようにCSRを作成しましょう。
csr = Acme::Client::CertificateRequest.new(common_name: @domain, names: all_domains)
ステップ CSRから証明書発行を申請する
これは特に言うこともなく。
> certificate = client.new_certificate(csr)
=> #<Acme::Certificate:0x00000003cd2690
 @request=
  #<Acme::CertificateRequest:0x00000003b3c8f8
   @common_name="le2.opsrockin.com",
   @csr=#<OpenSSL::X509::Request:0x00000003b3c588>,
   @digest=#<OpenSSL::Digest::SHA256: e3b0c44298fc1c149afbf4c8996fb92427ae41e4649b934ca495991b7852b855>,
   @names=["le2.opsrockin.com"],
   @private_key=#<OpenSSL::PKey::RSA:0x00000003b3c8a8>,
   @subject={"CN"=>"le2.opsrockin.com"}>,
 @x509=
  #<OpenSSL::X509::Certificate subject=#<OpenSSL::X509::Name:0x00000003cc7830>, issuer=#<OpenSSL::X509::Name:0x00000003cc77b8>, serial=#<OpenSSL::BN:0x00000003cc7740>, not_before=2015-12-10 05:35:00 UTC, not_after=2016-03-09 05:35:00 UTC>,
 @x509_chain=
  [#<OpenSSL::X509::Certificate subject=#<OpenSSL::X509::Name:0x00000003c6f950>, issuer=#<OpenSSL::X509::Name:0x00000003c6f8d8>, serial=#<OpenSSL::BN:0x00000003c6f860>, not_before=2015-10-19 22:33:36 UTC, not_after=2020-10-19 22:33:36 UTC>]>
ステップ 作られた証明書を確認しよう
certificateにもろもろとしまわれる。
> ls certificate
Acme::Certificate#methods: chain_to_pem  common_name  fullchain_to_pem  request  to_der  to_pem  x509  x509_chain  x509_fullchain
instance variables: @request  @x509  @x509_chain
適当にメソッド。
> certificate.common_name
=> "le2.opsrockin.com"

> puts certificate.fullchain_to_pem
-----BEGIN CERTIFICATE-----
MIIFBjCCA+6gAwIBAgISAc04ag6Lc50CXERQXuZf8oaLMA0GCSqGSIb3DQEBCwUA
MEoxCzAJBgNVBAYTAlVTMRYwFAYDVQQKEw1MZXQncyBFbmNyeXB0MSMwIQYDVQQD

# -- snip
期限もOKだ。
> certificate.x509.not_after
=> 2016-03-09 05:35:00 UTC
ファイルに書き出す
とりあえず手元に確保しておわりと。
File.write("privkey.pem", certificate.request.private_key.to_pem)
File.write("cert.pem", certificate.to_pem)
File.write("chain.pem", certificate.chain_to_pem)
File.write("fullchain.pem", certificate.fullchain_to_pem)
最後に通してやってみよう
ここまでの手順を1つのRubyスクリプトファイルにしたらこのくらいの分量。
require 'openssl'

private_key = OpenSSL::PKey::RSA.new(2048)
endpoint = 'https://acme-v01.api.letsencrypt.org/'

require 'acme-client'

client = Acme::Client.new(private_key: private_key, endpoint: endpoint)
registration = client.register(contact: 'mailto:test@example.com')
registration.agree_terms


authorization = client.authorize(domain: 'le2.opsrockin.com')
challenge = authorization.http01

www_root = '/var/www/html'
FileUtils.mkdir_p( File.join( www_root , File.dirname( challenge.filename ) ) )
File.write( File.join( www_root, challenge.filename), challenge.file_content )


challenge.request_verification

until challenge.verify_status == "valid" do
  print "."
  sleep 1
end
puts ""

csr = Acme::Client::CertificateRequest.new(names: %w[le2.opsrockin.com])
## SAN時
# csr = Acme::Client::CertificateRequest.new(common_name: 'le2.opsrockin.com', names: %w[le2.opsrockin.com www.lele2.opsrockin.com mail.le2.opsrockin.com])

certificate = client.new_certificate(csr)


puts certificate.common_name
puts certificate.x509.not_after


File.write("privkey.pem", certificate.request.private_key.to_pem)
File.write("cert.pem", certificate.to_pem)
File.write("chain.pem", certificate.chain_to_pem)
File.write("fullchain.pem", certificate.fullchain_to_pem)
実行して、問題なし。
$ ruby ./le.rb
.
le2.opsrockin.com
2016-03-09 05:50:00 UTC
再作成など
これを10連発くらいしたらToo many certificatesで止められた。
同じドメインでの申請に対して、レジストする鍵が毎回違ってもよいことが確認できたのでよしとする。
Error creating new cert :: Too many certificates already issued for: opsrockin.com (Acme::Error)
対象がopsrockin.comとなっていることから、TLD+1階層で制限がかかるのかな。属性型は持ってないので試せないな。
ちなみにIaaSベンダ(例えばAmazonのEC2)で割り当てられるパブリックホスト名は、ドメインごとブラックリストの模様(そりゃそーか)。
TLSにしたぞ。
追記: DNSでチャレンジ
この記事を書いた時には無かった気がする、StagingでDNSチャレンジができるようになっていた。
Stagingのエンドポイントを使うには、こっち。
endpoint = 'https://acme-staging.api.letsencrypt.org'
> ls authorization
Acme::Resources::Authorization#methods: dns01  domain  http01  status
instance variables: @client  @dns01  @domain  @http01  @status
おお。
> challenge = authorization.dns01

> ls challenge
Acme::Resources::Challenges::Base#methods: client  error  status  token  uri  verify_status
Acme::Resources::Challenges::DNS01#methods: record_content  record_name  record_type  request_verification
instance variables: @client  @status  @token  @uri
TXTレコードに設定すべき内容が取得できた。
> challenge.record_name
=> "_acme-challenge"

> challenge.record_content
=> "b882d484905b48bff678b520b9263d9345e7e11e67f67d95d7bbd36e65c3ea43"
レコードを設置したら、あとはHTTPと同様に、#request_verificationしてstatusの更新をまてばよいはず。
追記: Revokeは?
いま実装中。Revokeには申請時の秘密鍵と、証明書用の秘密鍵の両方が使える。
申請時の秘密鍵を使う場合、クライアントのインスタンスから。
certificate = OpenSSL::X509::Certificate.new File.read('mycert.pem')
@client.revoke_certificate(certificate)
証明書用の秘密鍵の場合、クラスメソッドで。
certificate = OpenSSL::X509::Certificate.new File.read('mycert.pem')
Acme::Client.revoke_certificate(certificate, private_key: private_key, endpoint: endpoint)
