この記事について
この記事は、Processing(プロセッシング)のPython(パイソン)モードを使ってプログラミングの基本を学ぶシリーズの第2回です。第1回は以下です。まだ読んでいない方はまずはそちらから読んでください。
完成図
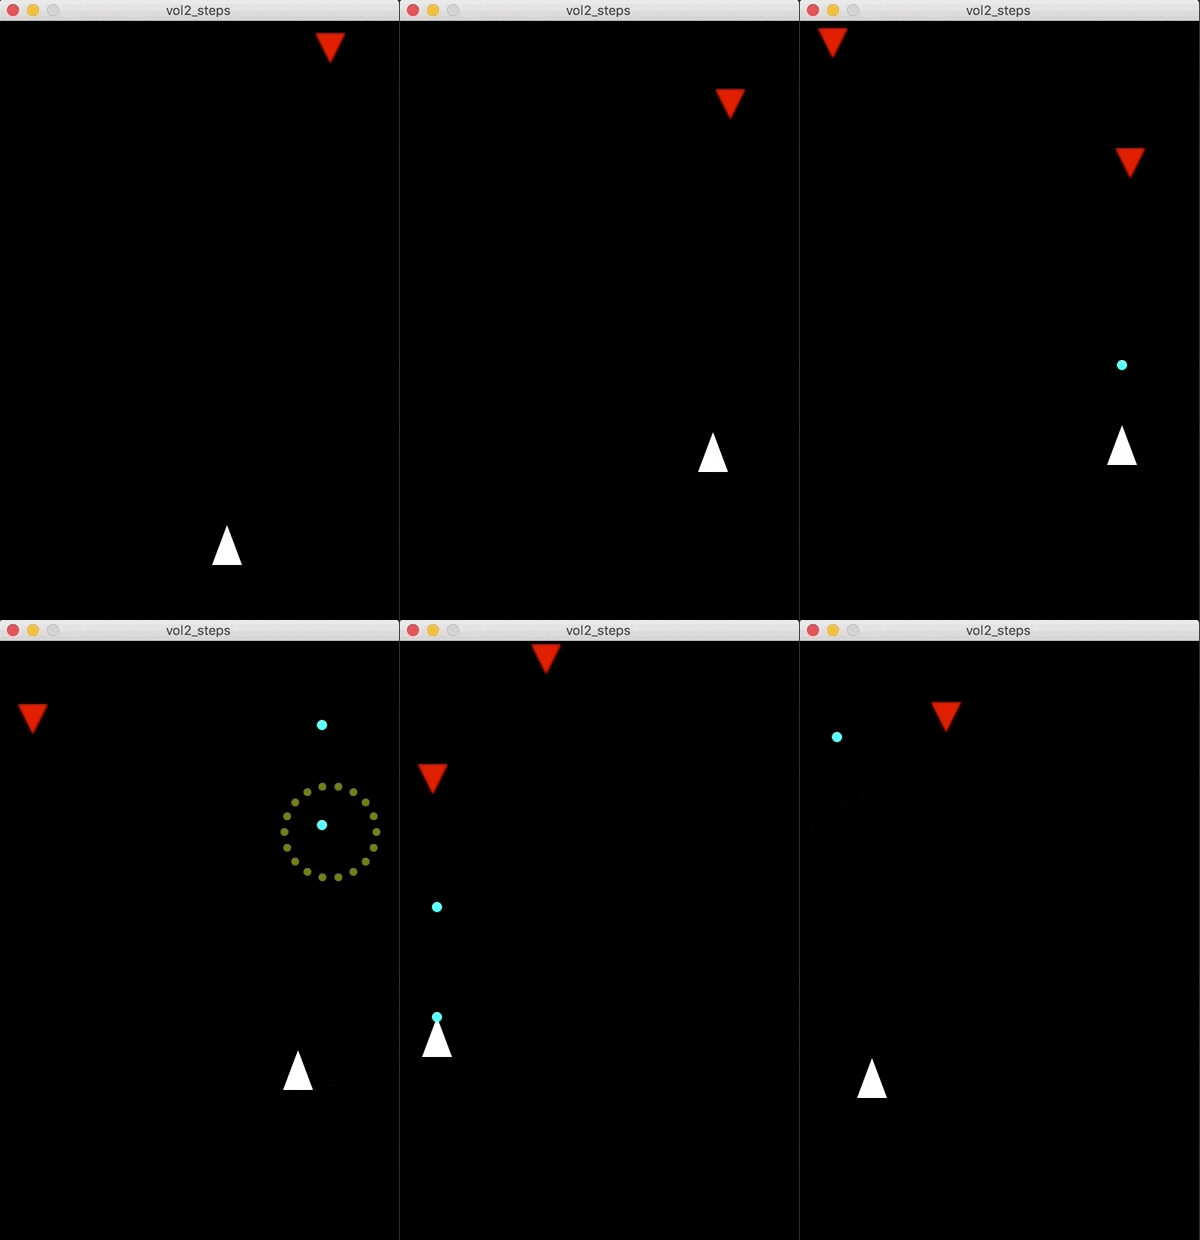
今回はかんたんなシューティングゲームを作ります。
ゲームのルール
- マウスの操作で機体(白い三角形)を動かす
- クリックするとビームを発射
- 敵はランダムに上から出てくる
- 敵(赤い三角形)に3発当てると倒せる
- 敵を1機倒すとスコアが10点増える
- 敵を倒した時に爆発がおきる
- 敵に機体が当たると機体が爆発してゲームオーバー
- 背景にはゆっくり星(小さいドット)が流れてる
今回おぼえるPythonのポイント
今回はひとつのひとつの処理を関数にまとめていきます。Pythonの関数は以下のようにdefにつづけて関数名を宣言します。
def 関数名():
   関数の中で行う処理その1
   その2
   ....
関数の中で行う処理は関数宣言の下にインデント(行の先頭に数文字分あけること)をおいて書いていきます。Pythonではインデントの深さがプログラムのまとまりを表します。
インデントさせる場合はタブキー ( →|キー)を押します。逆にインデントを下げる場合は、シフトキー( ⇧キー)を押しながらタブキー ( →|キー)を押します。
関数を実行する時に値を渡す場合は、以下のように引数(ひきすう)という形で関数宣言に定義しておきます。
def 関数名(引数1, 引数2, ..):
   関数の中で行う処理その1
   その2
   ....
例えば以下のように定義した関数は
def sayhello(name):
   print("Hello " + name)
以下のように名前を渡すと、 "Hello Takeshi" と表示されます。 ('name='の部分は省略可能ですが、今後のために書いておきます)。
sayhello(name="Takeshi")
今回の例では処理を細かく関数に分けていきます。そうすることでプログラム全体が見やすくなります。
例えば、敵を新たに追加する関数、敵を表示する関数、ビームを新たに追加する関数、ビームを表示する関数、ビームと敵が当たったかをチェックする関数、などです。
かんたんシューティングゲームを作る
では実際に作っていきましょう。
ステップ1: 機体を描く
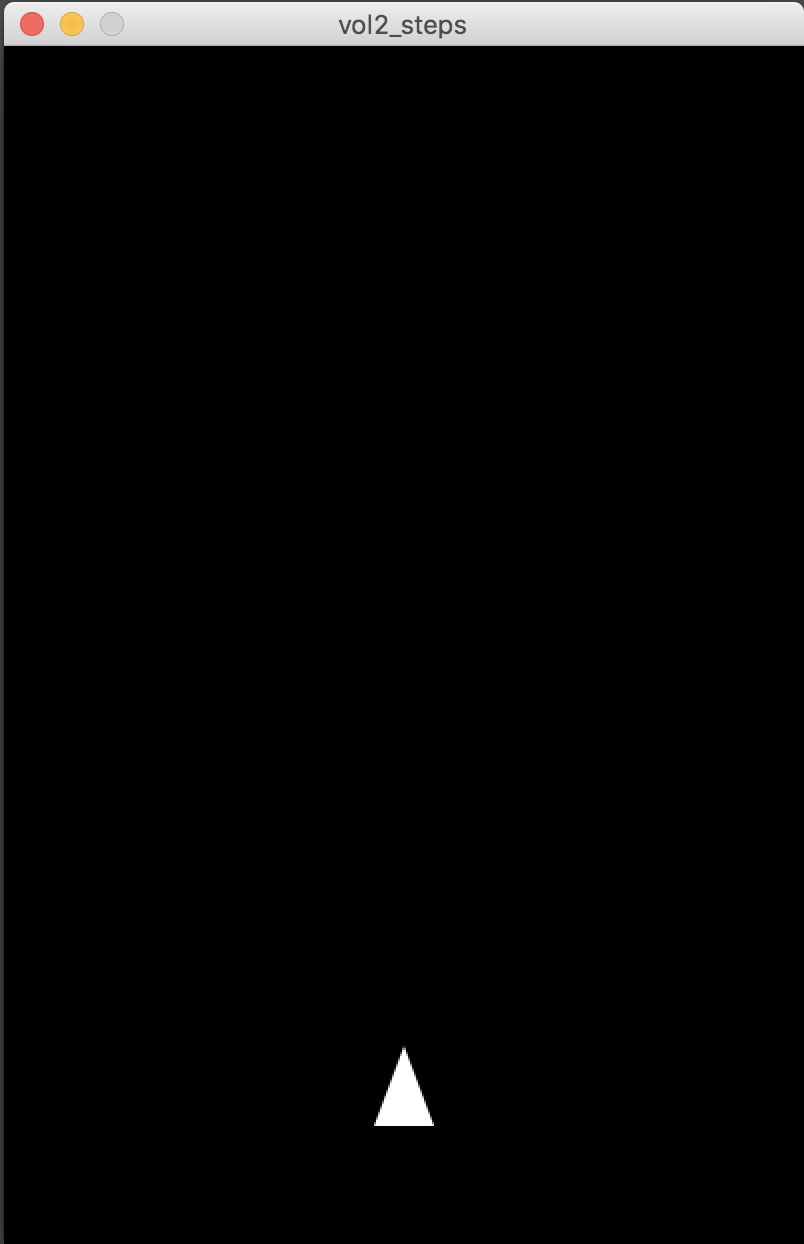
まずは400x600(横400ピクセル、縦600ピクセル)の黒い画面の上に白い三角形を描きます。最初の位置はx座標=200、y座標=500の位置にしましょう
x = 200
y = 500

def setup():
    size(400, 600)

def draw():
    background(0)
    showShip()

def showShip():
    fill(255)
    w = 30 #機体の幅
    h = 40 #機体の高さ
    noStroke()
    triangle(x, y, x + (w/2), y + h, x - (w/2) , y + h)
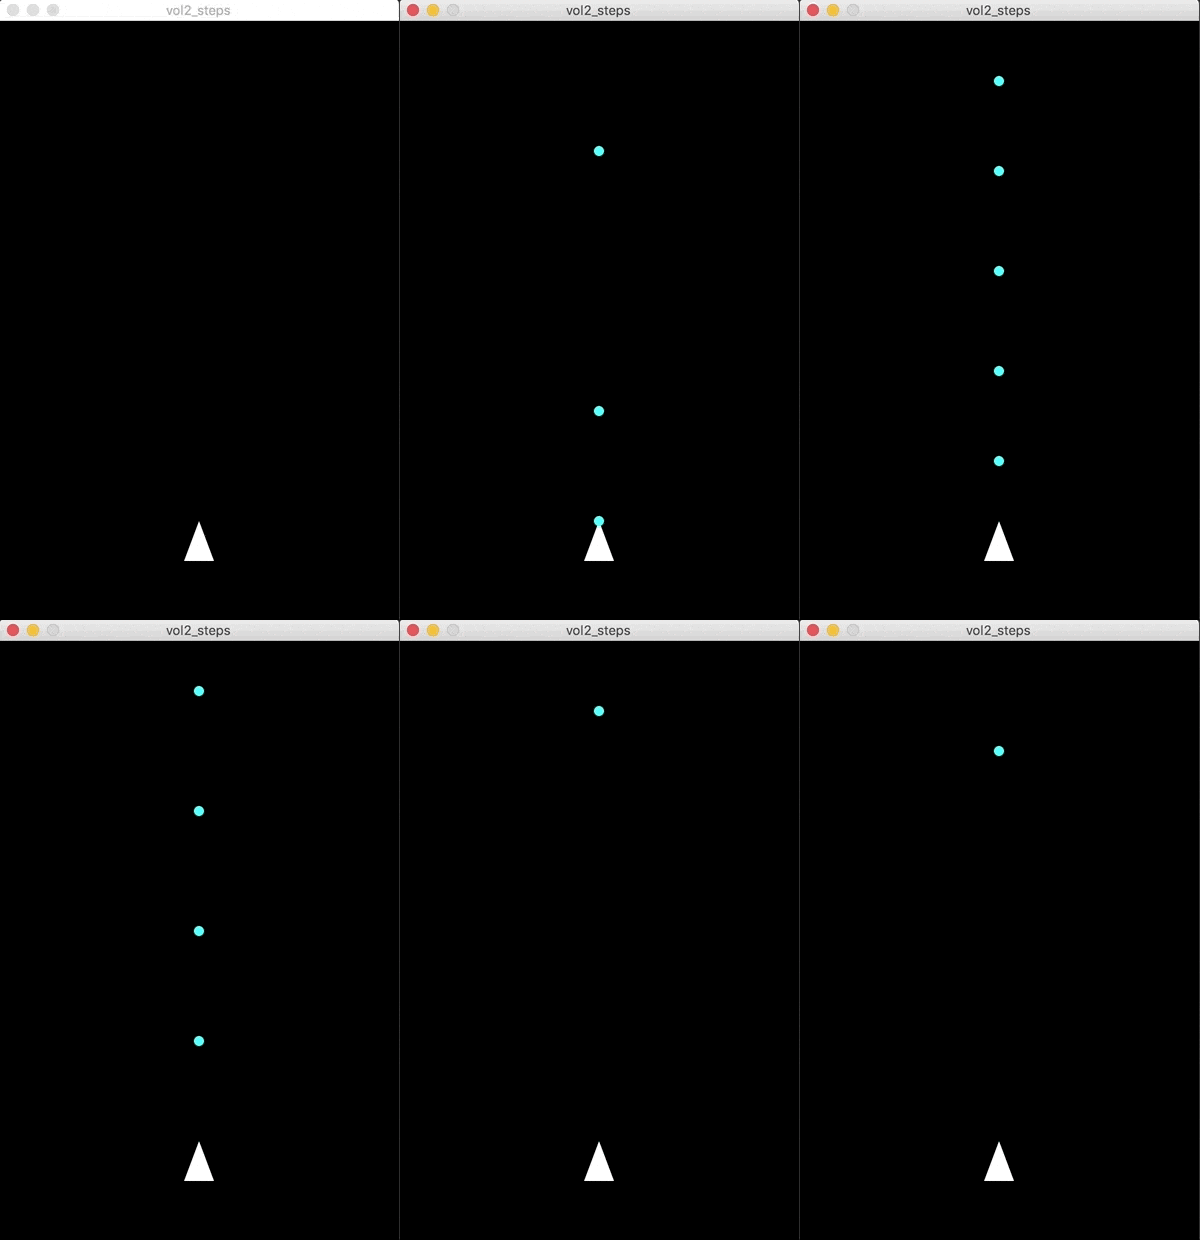
下のような感じに表示されます
ポイント
- 機体の位置を表す変数(xとy)はあとからマウスで操作するのでグローバル変数(プログラム全体で使う変数)として最初に宣言しています
- 機体を表示するプログラミングは関数
showShip()にまとめておき、draw()関数の中から毎回よびだされるようにしています。 - 三角形は
triangle()関数で描きます。これはProcessingを使っているから使える関数です。関数にわたすそれぞれの値はtriangle(1個めのx座標, 1個めのy座標, 2個めのx座標, 2個めのy座標, 3個めのx座標, 3個めのy座標)を意味しています。 - 今回は1個の点を
xとyの値で、2個めと3個めはそれに機体の幅と高さを足し引きすることで作っています。
ステップ2:ビームを打つ
クリックしたらビームが発射されるようにします
考え方
- photonsというリストにビームの1発1発を入れます
- ビームの最初の位置は機体の x座標、y座標で、クリックしたらリストにディクショナリを追加します
-
draw()が実行されるごとに縦に移動します - 上端に到達したビームはリストからとりのぞきます
x = 200
y = 500
photons = []

def setup():
    size(400, 600)

def draw():
    background(0)
    showShip()
    showPhotons()

def showShip():
    fill(255)
    w = 30 #機体の幅
    h = 40 #機体の高さ
    noStroke() #図形のまわりに線を表示しない
    triangle(x, y, x + (w/2), y + h, x - (w/2) , y + h)

def shootPhoton():
    global photons
    photon = { 'x': x, 'y': y}
    photons.append(photon)

def showPhotons():
    global photons
    speed = 10
    photoncolor = color(0, 255, 255)
    fill(photoncolor)
    for p in photons:
        ellipse( p['x'], p['y'], 10, 10)
        p['y'] -= speed
    photons = [ p for p in photons if p['y'] > 0 ]

def mouseClicked():
    shootPhoton()
ポイント
- ビームの色を青くするため
photoncolor = color(0, 255, 255)の部分で、「青い色」を変数に入れて、次のfill()で塗り色として指定しています。color()もProcessingだから使える関数です -
mouseClicked()はマウスがクリックされた時に実行されます。今回はビームを打つshootPhoton()関数を実行します -
shootPhoton()関数ではリストに新たにディクショナリを追加します。表示はdraw()関数の中でよびだされるshowPhotons()でおこないます -
showPhotons()の中では、リストの中のディクショナリをそれぞれ円として表示し、y座標を徐々に小さくしていくことで、ビームの動きを表現しています -
photons = [ p for p in photons if p['y'] > 0 ]の部分は、画面の上端を超えたディクショナリをリストからとりのぞくため、リストの中身をy座標が0より大きいものだけにまるっと入れ替えています。この書き方はリスト内包表記(ないほうひょうき)といいますが、いまはこういう書き方ができる、ととりあえず理解をしておいてください
ステップ3:マウスで機体を動かす
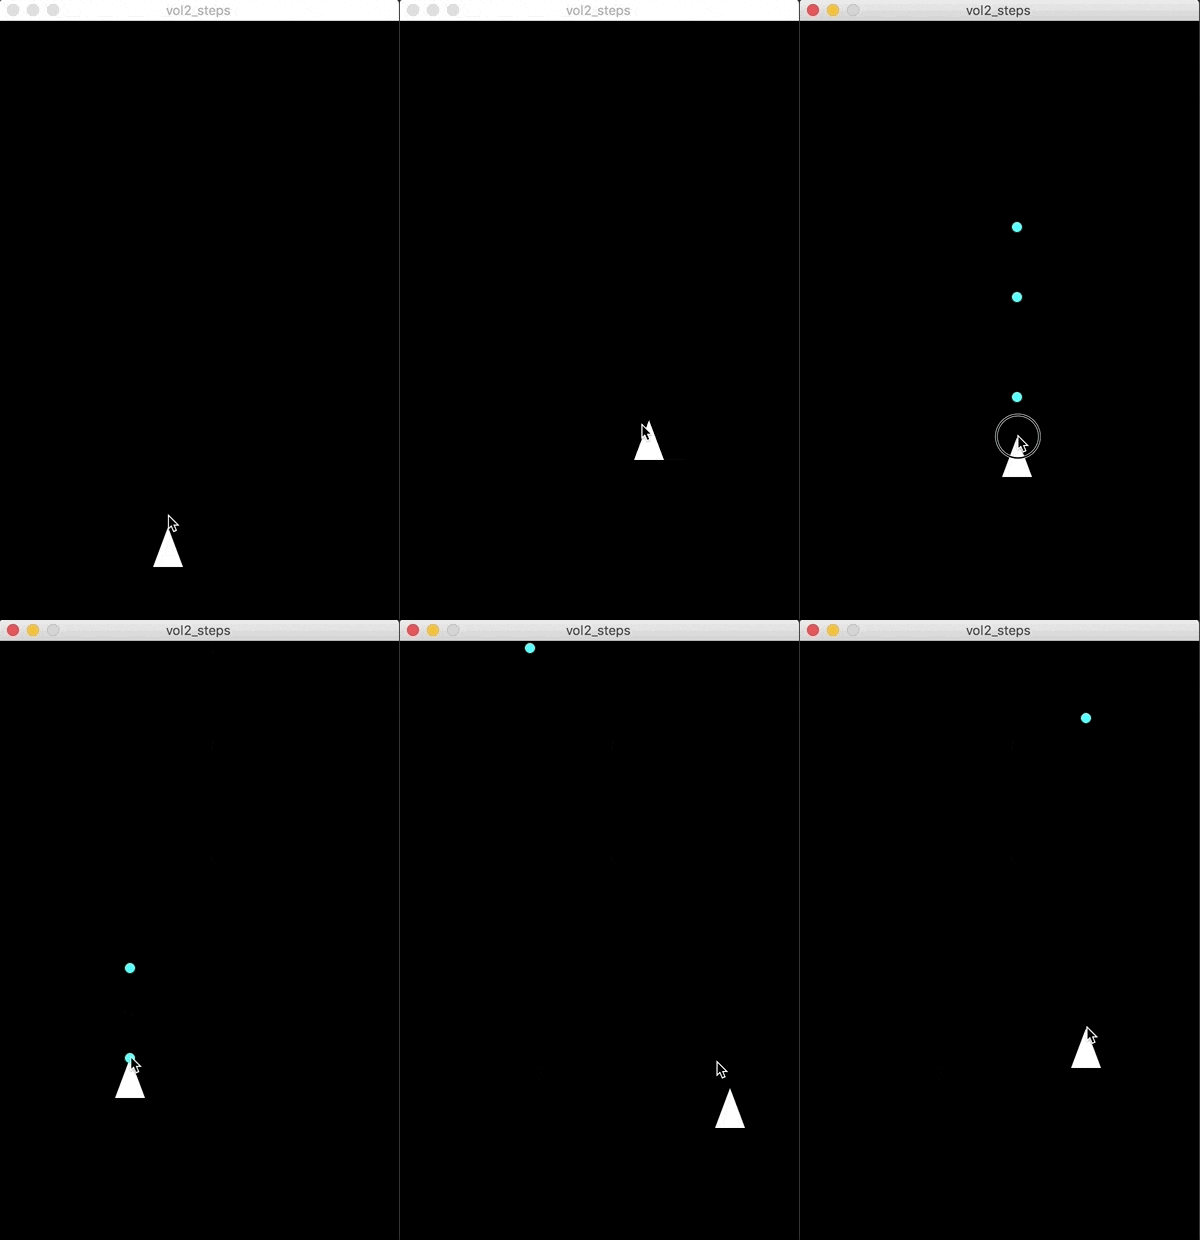
マウスの動きに機体がついていくようにします。
考え方
- Processingの
mouseMoved()関数の中で機体のx座標、y座標を更新します
x = 200
y = 500
photons = []

def setup():
    size(400, 600)

def draw():
    background(0)
    showShip()
    showPhotons()

# ... 省略 ....

def mouseMoved():
    global x, y
    x  = mouseX
    y = mouseY
ポイント
- 今回追加したのは
def mouseMoved():の部分のみです
ステップ4: 敵を表示する
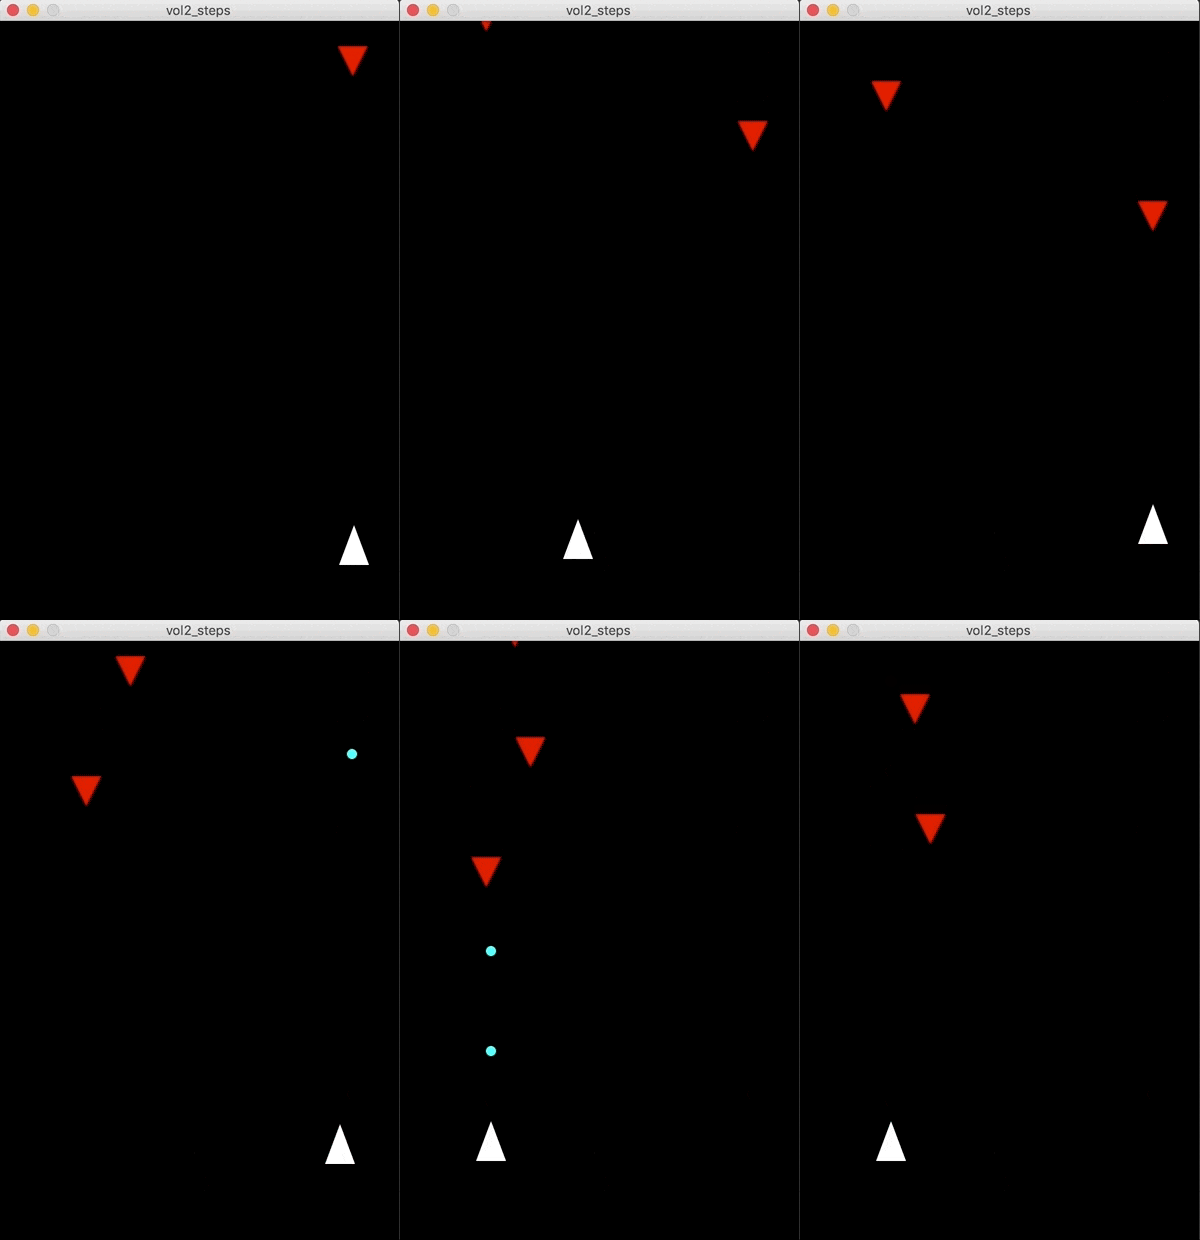
敵を表示します。
考え方
- ビームと同じように敵の1機をディクショナリとして管理し、全体をリストに入れておきます
- 最初の位置は y座標は0、x座標はランダムに画面の幅の中のどこかになるようにします
- 約2秒の間隔をあけて敵が現れるようにします
import random

x = 200
y = 500
photons = []
enemies = []
timer = 0

def setup():
    size(400, 600)

def draw():
    global timer
    background(0)
    showShip()
    showPhotons()
    if timer % 120 == 0:
        addEnemy()
    showEnemies()
    timer += 1

# ...省略...

def addEnemy():
    global enemies
    x = random.random() * width
    enemy = {'x': x, 'y': 0, 'life': 3}
    enemies.append(enemy)

def showEnemies():
    global enemies
    speed = 1
    red = color(255, 0, 0)
    fill(red)
    w = 30
    h = 30
    for e in enemies:
        triangle( e['x'], e['y'], e['x'] + (w/2), e['y'] - h,   e['x'] - (w/2), e['y'] - h)
        e['y'] += speed
    enemies = [e for e in enemies if e['y'] < height and e['life'] > 0]
この段階ではまだビームが当たっても倒せませんし、機体にぶつかってもゲームオーバーにはなりません
ポイント
- 敵の位置をランダムに指定するために
import randomで randomというモジュールを読み込んでいます。 -
def addEnemy()の中のx = random.random() * widthの部分で、画面幅のどこかの値になるようにx座標を計算しています。random.random()は 0〜1の範囲の少数の値を返します。そこに画面幅を表すwidthをかけることで、画面幅のうちのどこか、になるようにしています -
draw()関数は1秒間に60回実行されます(この回数は変更できますが、基本は60回です)。なので、2秒に1度の間隔で敵を表示するために、変数timerでdrawが実行された回数を数え、以下の部分で2秒に一回、敵を作るためのaddEnemy()関数をよんでいます
    if timer % 120 == 0:
        addEnemy()
- 敵は
enemy = {'x': x, 'y': 0, 'life': 3}というディクショナリで表現しています。lifeは敵のライフを示しています。あとで3回当たったら、倒せるようにするため3を入れています
ステップ5:ビームが敵に当たったら
ビームが敵にあったら敵のライフが減って、ライフ0になったら敵が消えるようにします
考え方
- 敵とビームのそれぞれが接しているかをチェックし、接していたら敵のライフを減らし、ビームが当たったことにします
- 当たったビームはビームのリストからとりのぞかれるようにします
- ライフが0の敵は敵のリストからとりのぞかれるようにします
import random

x = 200
y = 500
photons = []
enemies = []
timer = 0

def setup():
    size(400, 600)

def draw():
    global timer
    background(0)
    showShip()
    showPhotons()
    calcPhotonCollision()
    if timer % 120 == 0:
        addEnemy()
    showEnemies()
    timer += 1

def showShip():
# ...変更なし 省略.....

def shootPhoton():
    global photons
    photon = { 'x': x, 'y': y, 'hit': False}
    photons.append(photon)

def showPhotons():
    global photons
    speed = 10
    photoncolor = color(0, 255, 255)
    fill(photoncolor)
    for p in photons:
        ellipse( p['x'], p['y'], 10, 10)
        p['y'] -= speed
    photons = [ p for p in photons if p['y'] > 0 and p['hit'] == False]

def mouseClicked():
# ...変更なし 省略.....

def mouseMoved():
# ...変更なし 省略.....

def addEnemy():
# ...変更なし 省略.....

def showEnemies():
# ...変更なし 省略.....

def calcPhotonCollision():
    global photons, enemies
    for e in enemies:
        for p in photons:
            if p['x']  > e['x'] -20 and p['x'] < e['x'] + 20 and p['y'] > e['y'] - 30 and p['y'] < e['y']:
                e['life'] -= 1
                p['hit'] = True
ポイント
- ビームを表すディクショナリに
hitという項目が追加されています。これは敵にあたったかどうかを意味しています - ビームを表示する
def showPhotons()関数の中のphotons = [ p for p in photons if p['y'] > 0 and p['hit'] == False]の部分でリスト全体をy座標が0より大きく、hitが False であるもの、つまり敵に当たってないもののみになるようにしています -
def calcPhotonCollision()が敵とビームが衝突したかをチェックしている部分です。if p['x'] > e['x'] -20 and p['x'] < e['x'] + 20 and p['y'] > e['y'] - 30 and p['y'] < e['y']:でビームの中心の位置が敵の範囲の中にあるかをチェックしています。正確には敵は三角形なのでもうちょっと複雑なのですが、プログラムを簡単にするために敵の頂点の位置から四角形の範囲でチェックしています。
ステップ6: 爆発させる
敵を倒した時に爆発が表示されるようにします
考え方
- 爆発全体をリストで管理する
- それぞれの爆発は、中心の点と、火の粉を表す円ひとつひとつとの距離を使って管理し、中心から円が散らばっていくように、距離を徐々に長くする
- 円の位置は、三角関数サイン、コサインを使って計算する(※三角関数は高校の数学で習います)
- 距離がある一定の長さになったら消える
import random

x = 200
y = 500
photons = []
enemies = []
timer = 0
explosions = []

def setup():
    size(400, 600)

def draw():
    global timer
    background(0)
    showShip()
    showPhotons()
    calcPhotonCollision()
    showExplotions()
    if timer % 120 == 0:
        addEnemy()
    showEnemies()
    timer += 1

def showShip():
# ...変更なし 省略....

def shootPhoton():
# ...変更なし 省略....

def showPhotons():
# ...変更なし 省略....

def mouseClicked():
# ...変更なし 省略....

def mouseMoved():
# ...変更なし 省略....

def addEnemy():
# ...変更なし 省略....

def showEnemies():
# ...変更なし 省略....

def calcPhotonCollision():
    global photons, enemies
    for e in enemies:
        for p in photons:
            if p['x']  > e['x'] -20 and p['x'] < e['x'] + 20 and p['y'] > e['y'] - 30 and p['y'] < e['y']:
                e['life'] -= 1
                p['hit'] = True
                if e['life'] == 0:
                    addExplosion(x=e['x'], y=e['y'])

def addExplosion(x, y):
    global explosions
    explosion = {'x': x, 'y': y, 'r': 0}
    explosions.append(explosion)

def showExplotions():
    global explosions
    speed = 2
    for ex in explosions:
        ex['r'] += speed
        c = color(255,255,0, 120)
        fill(c)
        for angle in range(0, 360, 20):
            rad = radians(angle)
            x = ex['x'] +  ex['r'] * cos(rad)
            y = ex['y'] +  ex['r'] * sin(rad)
            ellipse(x, y, 8, 8)
        if ex['r'] > 50:
            explosions.remove(ex)
ポイント
-
def addExplosion(x, y):は爆発の位置を指定するために xとyという2つの引数(ひきすう)をうけとります。calcPhotonCollision()関数の中のaddExplosion(x=e['x'], y=e['y'])という部分で、敵の座標を渡しています。こうすることで、敵がビームにあたって位置が爆発の中心点となります。 -
def showExplotions():関数の中のc = color(255,255,0, 120)は半透明の黄色という色を変数に入れています。爆発の火の粉ひとつひとつをその色にするためです -
for angle in range(0, 360, 20):のところは0から360までの数字を20ごとに、angle 変数に入れてその下の部分を実行します。これは0度から360度まで円形に、20度ごとに火の粉を飛ばすためです -
rad = radians(angle)は角度をラジアンという角度表現に変換しています。次で三角関数サインとコサインを使うのですが、0〜360の角度ではなくラジアンと単位で指定する必要があるためです。(※三角関数やラジアンは高校の数学で習います) -
x = ex['x'] + ex['r'] * cos(rad)という部分で、中心位置と角度と三角関数と距離を使って、火の粉ひとつひとつの位置をもとめています - 以下の部分は中心からの距離が50ピクセルを超えたら爆発全体を表すリストからとりのぞく、という意味です
    if ex['r'] > 50:
        explosions.remove(ex)
完成版のコード
星の動きやスコアの表示については、解説を省略しますが、それらを盛り込んで完成したコードは以下のようになります。
# ランダムな値をえるために必要なモジュール
import random

# 機体の位置
x = 200
y = 500
# ビームのリスト
photons = []
# 敵のリスト
enemies = []
# drawが何回呼ばれたかを数える
timer = 0
# スコア
score = 0
# 爆発のリスト
explosions = []
# 背景を流れる星
stars = []
# ゲームオーバーになったかどうか
is_gameover = False
# 敵が登場ずる間隔
enemySpan = 60 * 5

def setup():
    size(400, 600)
    createStars()

def draw():
    global timer, enemySpan
    background(0)
    showStars()
    showShip()
    showPhotons()
    calcPhotonCollision()
    calcShipCollision()
    showScore()
    showExplotions()
    showGameover()
    if timer % enemySpan == 0:
        addEnemy()
        shortenEnemySpan()
    showEnemies()
    timer += 1

def addEnemy():
    """敵を追加する"""
    global enemies
    x = random.random() * width
    enemy = {'x': x, 'y': 0, 'life': 3}
    enemies.append(enemy)

def shortenEnemySpan():
    """敵が登場する間隔を短くする"""
    global enemySpan
    # 10%ずつ間隔を短くしている。0になるのを避けるために10を足す
    enemySpan = int(enemySpan * 0.9) + 10

def showEnemies():
    """敵を表示する"""
    global enemies
    speed = 1
    red = color(255, 0, 0)
    fill(red)
    w = 30
    h = 30
    for e in enemies:
        triangle( e['x'], e['y'], e['x'] + (w/2), e['y'] - h,   e['x'] - (w/2), e['y'] - h)
        e['y'] += speed
    enemies = [e for e in enemies if e['y'] < height and e['life'] > 0]

def showShip():
    """プレイヤーの機体を表示する"""
    if is_gameover:
        # ゲームオーバーになっていたら表示させない
        return
    fill(255)
    w = 30
    h = 40
    noStroke()
    triangle(x, y, x + (w/2), y + h, x - (w/2) , y + h)

def showPhotons():
    """ビームを表示する"""
    global photons
    speed = 10
    photoncolor = color(0, 255, 255)
    fill(photoncolor)
    for p in photons:
        ellipse( p['x'], p['y'], 10, 10)
        p['y'] -= speed
    photons = [ p for p in photons if p['y'] > 0 and p['hit'] == False]

def showScore():
    """スコアを表示する"""
    fill(255)
    textSize(16)
    scoretext = "Score: {}".format(score)
    text(scoretext, 0,20)

def shootPhoton():
    """ビームを追加する"""
    global photons
    photon = { 'x': x, 'y': y, 'hit': False}
    photons.append(photon)


def addExplosion(x, y):
    """爆発を追加する"""
    global explosions
    explosion = {'x': x, 'y': y, 'r': 0}
    explosions.append(explosion)

def showExplotions():
    """爆発を表示する"""
    global explosions
    speed = 2
    for ex in explosions:
        ex['r'] += speed
        c = color(255,255,0, 120)
        fill(c)
        for angle in range(0, 360, 20): # 20度ずつ0~360度まで
            rad = radians(angle) #角度をラジアンに変換
            x = ex['x'] +  ex['r'] * cos(rad)
            y = ex['y'] +  ex['r'] * sin(rad)
            ellipse(x, y, 8, 8)
        if ex['r'] > 50:
            explosions.remove(ex)

def calcPhotonCollision():
    """ビームが敵に当たったかどうか"""
    global photons, enemies, score
    for e in enemies:
        for p in photons:
            if p['x']  > e['x'] -20 and p['x'] < e['x'] + 20 and p['y'] > e['y'] - 30 and p['y'] < e['y']:
                e['life'] -= 1
                p['hit'] = True
                if e['life'] == 0:
                    score += 10
                    addExplosion(x=e['x'], y=e['y'])

def calcShipCollision():
    """プレイヤーの機体が敵に当たったかどうか"""
    global is_gameover
    for e in enemies:
         if x  > e['x'] -15 and x < e['x'] + 15 and y > e['y'] - 30 and y < e['y'] and is_gameover == False:
             # 当たったらゲームオーバー
             is_gameover = True
             addExplosion(x=x, y=y)

def showGameover():
    """ゲームオーバーになっていたらゲームオーバーと表示"""
    if is_gameover:
        fill(255)
        textSize(40)
        text("Game Over", 100, 300)

def createStars():
    """背景の星を作る"""
    global stars
    for i in range(0,30):
        x = random.random() * width
        y = random.random() * height
        stars.append({'x': x, 'y': y})

def showStars():
    """星を表示する"""
    global stars
    speed = 0.5 # 敵の半分の速度で動く
    fill(255)
    for star in stars:
        ellipse(star['x'], star['y'], 3, 3)
        star['y'] += speed
        if star['y'] > height:
            #星が画面の下までいったらy座標を0にする
            star['y'] = 0

def mouseClicked():
    """マウスがクリックされた時"""
    if not is_gameover:
        # ゲームオーバーになっていなければビームを打つ
        shootPhoton()

def mouseMoved():
    """マウスが動いた時"""
    global x, y
    x  = mouseX
    y = mouseY
次回はまたもうちょっと高度なプログラムに挑戦します。こうご期待。

