ESP32でのmicropythonを使ったAWS IoTへの接続について解説します。
参考サイト
Amazon Web Services ブログ MicroPython を使って AWS IoT Core を始める
このページを参考にとりあえずesp32からAWS IoTへの接続をやってみたのですが、
この手順をそのままやってもうまくいかなかったので、うまくいく方法を、忘備のため記事にします。
IoT ポリシーを作成する
Amazon Web Services ブログ MicroPython を使って AWS IoT Core を始める
ステップ1: IoT ポリシーを作成するのとおりポリシーを作成します。
👇ポリシードキュメントはこんな感じです。
    {
      "Version": "2012-10-17",
      "Statement": [
        {
          "Effect": "Allow",
          "Action": "iot:Connect",
          "Resource": "arn:aws:iot:ap-northeast-1:0000000000000:client/BlogClient"
        },
        {
          "Effect": "Allow",
          "Action": "iot:Publish",
          "Resource": "arn:aws:iot:ap-northeast-1:0000000000000:topic/$aws/things/BlogThing/shadow/update"
        },
        {
          "Effect": "Allow",
          "Action": "iot:Subscribe",
          "Resource": "arn:aws:iot:ap-northeast-1:0000000000000:topicfilter/$aws/things/BlogThing/shadow/update/delta"
        },
        {
          "Effect": "Allow",
          "Action": "iot:Receive",
          "Resource": "arn:aws:iot:ap-northeast-1:0000000000000:topic/$aws/things/BlogThing/shadow/update/delta"
        }
      ]
}
AWS IoT のモノを作成する
Amazon Web Services ブログ MicroPython を使って AWS IoT Core を始める
ステップ2: AWS IoT のモノを作成するのとおりモノを作成します。
でもさ、「モノを作成する」って・・・
デバイス証明書とキーファイルをダウンロード
Amazon Web Services ブログ MicroPython を使って AWS IoT Core を始める
ステップ2: AWS IoT のモノを作成するの最後の手順「デバイス証明書とキーファイル」をダウンロードします。
マイクロコントローラ用のファイルを準備する
Amazon Web Services ブログ MicroPython を使って AWS IoT Core を始める
ステップ3: マイクロコントローラ用のファイルを準備する
ここは注意が必要です
1.デバイス証明書と鍵のファイルをダウンロードしたローカルディスクに移動します。
👆これはこのままでOK
2.デバイス証明書は、-certificate.pem.crt で終わるファイルです。この証明書のファイル名を cert.pem.crt に変更します。
👆これもこのままでOK
3.秘密鍵は、-private.pem.key で終わるファイルです。このファイル名を private.pem.key に変更します。
👆これもこのままでOK
4.次に、MQTT に必要なライブラリーをダウンロードします。GitHub のリポジトリの内容をローカルディスクにダウンロードします。
👆この手順は不要(MQTTは最新のmicropythonでは標準で組み込まれてます。)
5.ファイルを整理するために、getting-started-micropython-esp32 というフォルダを作成します。証明書と秘密鍵のファイルをこのフォルダーに移動します。
👆これもこのままでOK
6.micropython-lib GitHub リポジトリの micropython/umqtt.simple/umqtt/simple.py というファイルを、ローカルディスクの getting-started-micropython-esp32 フォルダの umqtt フォルダにコピーします。
👆この手順は不要(MQTTは最新のmicropythonでは標準で組み込まれてます。)
7.getting-started-micropython-esp32 フォルダには、以下のファイルがあるはずです。
※ umqtt/simple.pyは不要です。
MicroPython を使用して AWS IoT に接続する
Amazon Web Services ブログ MicroPython を使って AWS IoT Core を始める
ステップ4: MicroPython を使用して AWS IoT に接続する
ここがひっかけポイントです!
1.getting-started-micropython-esp32 フォルダに、main.py というファイルを新規に作成します。
👆これはこのままでOK
2.GitHub の aws-iot-core-getting-started-micropython リポジトリから main.py のコードをコピーします。
👆これもこのままでOK
3.以下のコードを入力します。
a. wifi_ssid をお使いのワイヤレスネットワーク名に置き換えてください。
b. wifi_password をお使いのワイヤレスネットワークのパスワードに置き換えてください。
c. aws_endpoint を お使いの AWS アカウントの AWS IoT のエンドポイントに置き換えてください。AWS IoT Core コンソールの設定ページで確認することができます。
👆これもこのままでOK
追加で以下の編集が必要です
デバイス証明書とキーファイルは、読み込んだ文字列ではなく、ファイルを指定するようにssl_paramsを編集する。
#ssl_params = {"key":key, "cert":cert, "server_side":False}
ssl_params = {"key":private_key, "cert":private_cert, "server_side":False}
main.pyのサンプルコード
main.pyのサンプルコードを付けておきます。
とりあえずAWSとの接続が目的だったので、いらないところは全て削除しました。
import os
import time
import ujson
import machine
import network
from umqtt.simple import MQTTClient

#Enter your wifi SSID and password below.
wifi_ssid = "SSID*******"
wifi_password = "************"

#Enter your AWS IoT endpoint. You can find it in the Settings page of
#your AWS IoT Core console.
#https://docs.aws.amazon.com/iot/latest/developerguide/iot-connect-devices.html
aws_endpoint = b'********-ats.iot.ap-northeast-1.amazonaws.com'

#If you followed the blog, these names are already set.
thing_name = "BlogThing"
client_id = "BlogClient"
private_key = "private.pem.key"
private_cert = "cert.pem.crt"

#Read the files used to authenticate to AWS IoT Core
#with open(private_key, 'r') as f:
#    key = f.read()
#with open(private_cert, 'r') as f:
#    cert = f.read()

#These are the topics we will subscribe to. We will publish updates to /update.
#We will subscribe to the /update/delta topic to look for changes in the device shadow.
topic_pub = "$aws/things/" + thing_name + "/shadow/update"
topic_sub = "$aws/things/" + thing_name + "/shadow/update/delta"

#ssl_params = {"key":key, "cert":cert, "server_side":False}
ssl_params = {"key":private_key, "cert":private_cert, "server_side":False}

#Define pins for LED and light sensor. In this example we are using a FeatherS2.
#The sensor and LED are built into the board, and no external connections are required.
#light_sensor = machine.ADC(machine.Pin(4))
#light_sensor.atten(machine.ADC.ATTN_11DB)
#led = machine.Pin(13, machine.Pin.OUT)
info = os.uname()

#Connect to the wireless network
wlan = network.WLAN(network.STA_IF)
wlan.active(True)
if not wlan.isconnected():
    print('Connecting to network...')
    wlan.connect(wifi_ssid, wifi_password)
    while not wlan.isconnected():
        pass

    print('Connection successful')
    print('Network config:', wlan.ifconfig())

def mqtt_connect(client=client_id, endpoint=aws_endpoint, sslp=ssl_params):
    mqtt = MQTTClient(client_id=client, server=endpoint, port=8883, keepalive=1200, ssl=True, ssl_params=sslp)
    print("Connecting to AWS IoT...")
    mqtt.connect()
    print("Done")
    return mqtt

def mqtt_publish(client, topic=topic_pub, message=''):
    print("Publishing message...")
    client.publish(topic, message)
    print(message)

def mqtt_subscribe(topic, msg):
    print("Message received...")
    message = ujson.loads(msg)
    print(topic, message)
    # if message['state']['led']:
    #     led_state(message)
    print("Done")

#def led_state(message):
#    led.value(message['state']['led']['onboard'])

#We use our helper function to connect to AWS IoT Core.
#The callback function mqtt_subscribe is what will be called if we
#get a new message on topic_sub.
try:
    mqtt = mqtt_connect()
    mqtt.set_callback(mqtt_subscribe)
    mqtt.subscribe(topic_sub)
except:
    print("Unable to connect to MQTT.")


while True:
    try:
        mqtt.check_msg()
    except:
        print("Unable to check for messages.")

    mesg = ujson.dumps({
        "state":{
            "reported": {
                "device": {
                    "client": client_id,
                    "uptime": time.ticks_ms(),
                    "hardware": info[0],
                    "firmware": info[2]
                },
#                "sensors": {
#                    "light": light_sensor.read()
#                },
#                "led": {
#                    "onboard": led.value()
#                }
            }
        }
    })

#Using the message above, the device shadow is updated.
    try:
        mqtt_publish(client=mqtt, message=mesg)
    except:
        print("Unable to publish message.")

#Wait for 10 seconds before checking for messages and publishing a new update.
    print("Sleep for 10 seconds")
    time.sleep(10)
マイクロコントローラにファイルをコピーする
私はTonnyを使ってファイルをコピーしました。
main.py実行
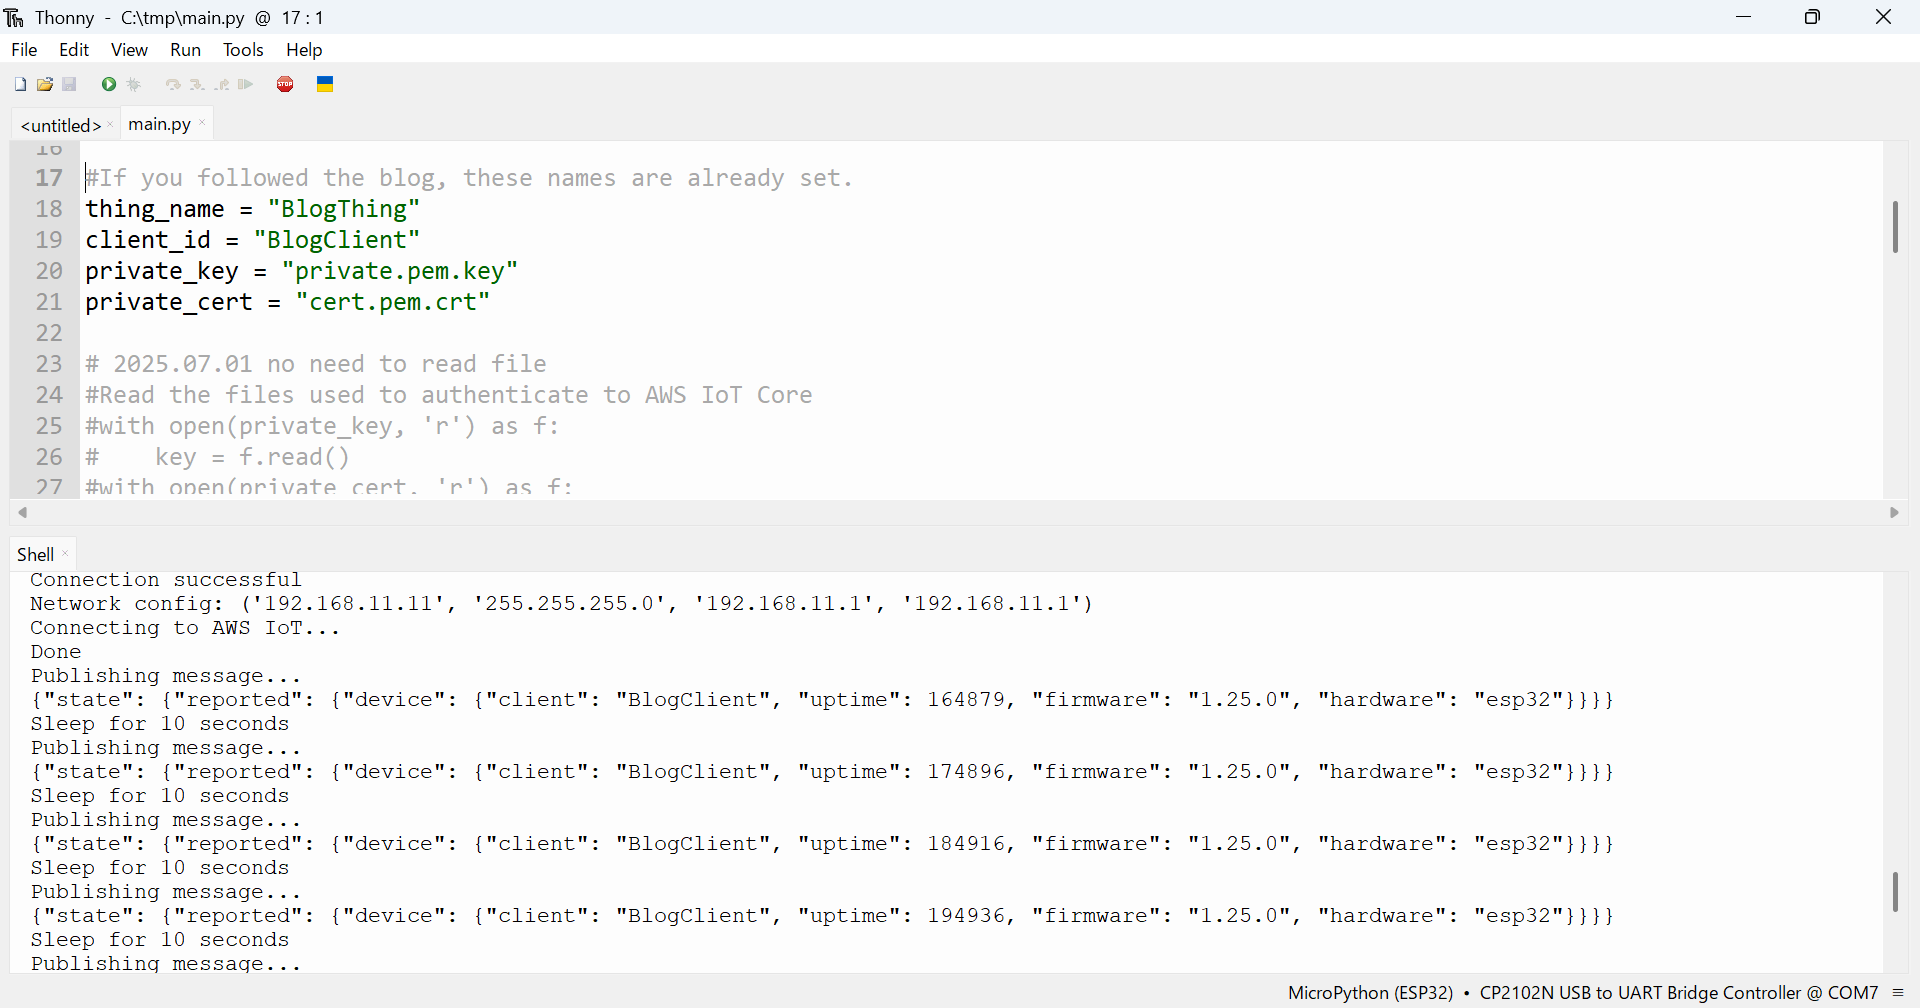
👆実行するとこんな感じになります。
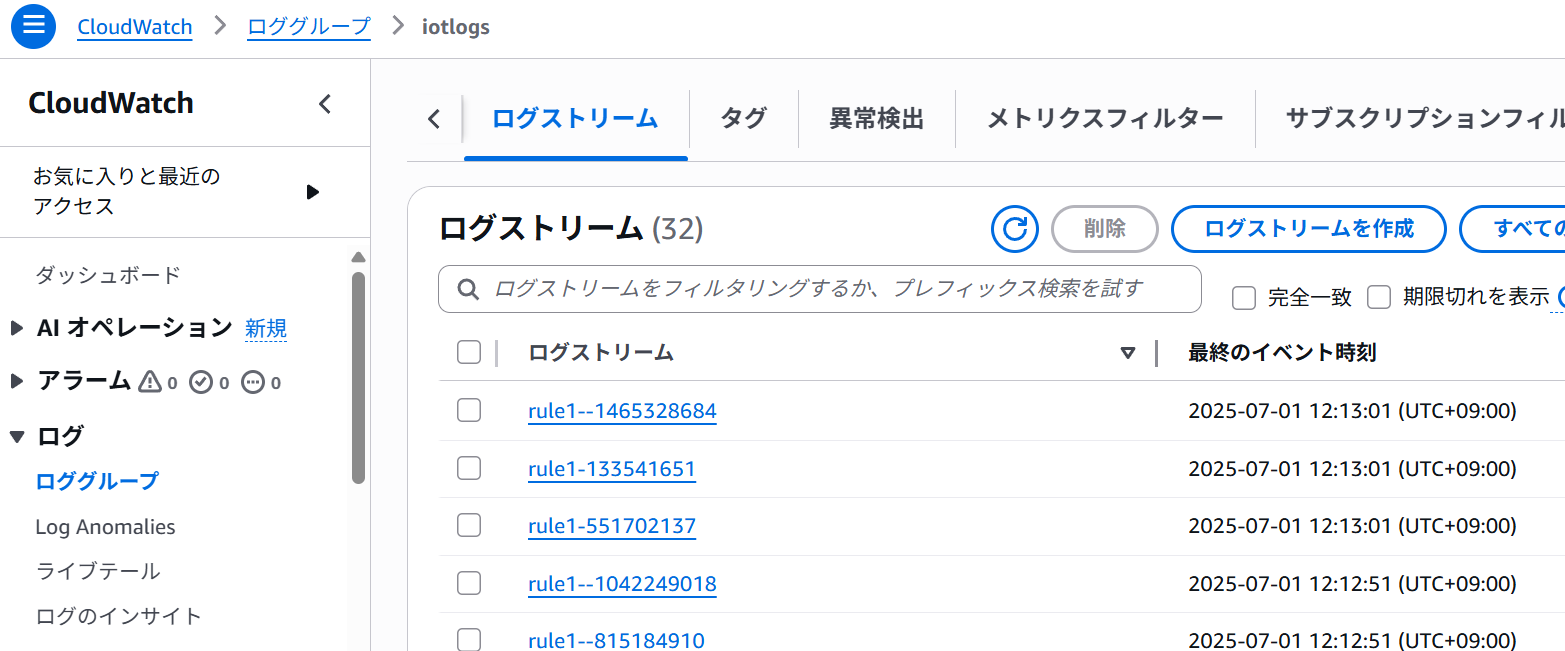
メッセージのルーティング

👆SQL ステートメントでSELECT * FROM '#'を指定して、アクションにCloudWatchを指定すれば
CloudWatchログで出力を確認できます。
👇関連記事
👇参考URL
Amazon Web Services ブログ MicroPython を使って AWS IoT Core を始める
本記事へのリンク
https://docs.saurus12.com/device/esp32_mqtt
[keywords]
ESP32 micropython mqtt AWS IoT
ESP32でのmicropythonを使ったAWS IoTへの接続
更新日:2025年07月01日