XBeeを使った自宅状態遠隔見守りサービス実現方法の紹介
第2章 XBee受信側(コーディネータ)の接続から設定までを解説します。
XBeeの接続


👆XBee USBアダプターを使ってPCと接続します。
XCTUによる設定
- XCTUをインストールして起動します。
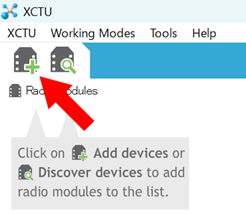
👆デバイス追加ボタンをクリックします。


👆ウィンドウを大きくして、USB Serial Portを選択してFinishをクリックします。

👆デバイスが表示されるので、ダブルクリックします。

👆右側に設定が表示されます。

👆Serial Number High と Serial Number Low を控えます。
※ 後でXBee送信側に設定します。
Serial Number High:13A200
Serial Number Low:421DAAE3
(Serial Number High は全デバイスで固定らしいです。)
(Serial Number Low はデバイス固有値らしいです。)
その他の値を下記のとおり設定します。

👆CE(Device Role)に1を設定します。(これによりこのデバイスはコーディネータ[coodinator]と位置づけられます)
👆ID(PAN ID)に任意の値を設定します。この値は送信側と一致させる必要があります。ここでは例として222を設定します。

👆DH(Destination Address High)に13A200、DL(Destination Address Low)にFFFFを設定します。
FFFFはブロードキャストの意味です。

👆AP(API Enable)に1を設定します。
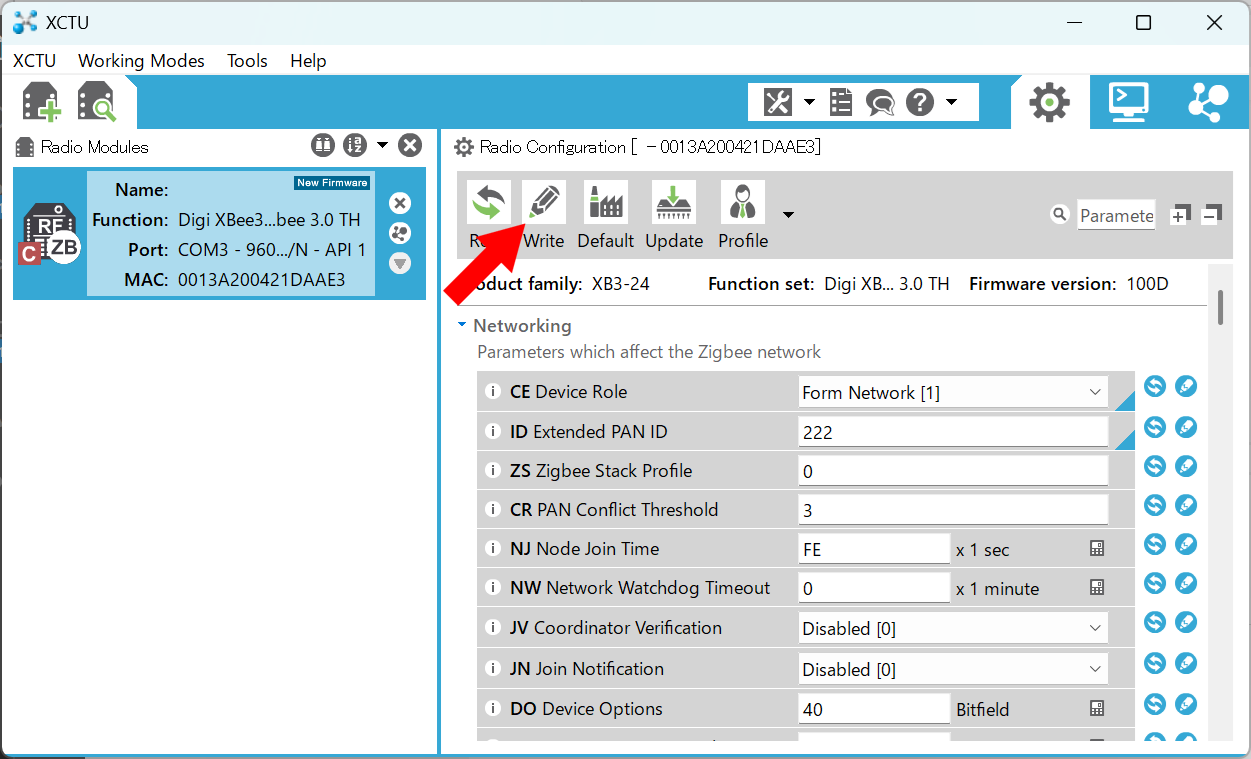
👆最後にWriteをクリックします。
以上でXBee受信側の設定は完了です。
コンソールの表示
XBee送信側からの受信確認のため、コンソール表示方法を説明します。

👆このボタン(Switch to Console working mode)をクリックします。

👆Openをクリックします。

👆この状態でデータを受信すると画面右側へ表示されます。
XBee受信側の設定はとりあえず以上です。
用品一覧
上記の解説で使う用品とリンクです。


👆XBee USBアダプター
私の持っているのはSwitch Scienceで買ったのですが、売り切れていたのでAmazonのリンクを付けておきます。
<<(前の記事) 1 . XBeeを使った自宅状態遠隔見守りサービス実現方法の紹介
>>(次の記事) 3. XBee送信側の接続と設定
👇関連記事
- 1 . XBeeを使った自宅状態遠隔見守りサービス実現方法の紹介
- 2 . XBee受信側の接続と設定
- 3 . XBee送信側の接続と設定
- 4 . XBee接続確認とセンサーの接続
- 5 . ESP32マイコンのツール設定と接続
- ESP32-C3-WROOM-02-N4 設定方法解説
本記事へのリンク

https://docs.saurus12.com/device/xbee_setting_1
[keywords]
XBee XCTU Coodinator
更新日:2025年05月25日