Background
CDNのみでReactを動かそうとしたのですが、CDNが非対応のライブラリが多そうと思いました。それで、webpackを使ってひとつのjsファイルを出力してみようと思います。
Motivation
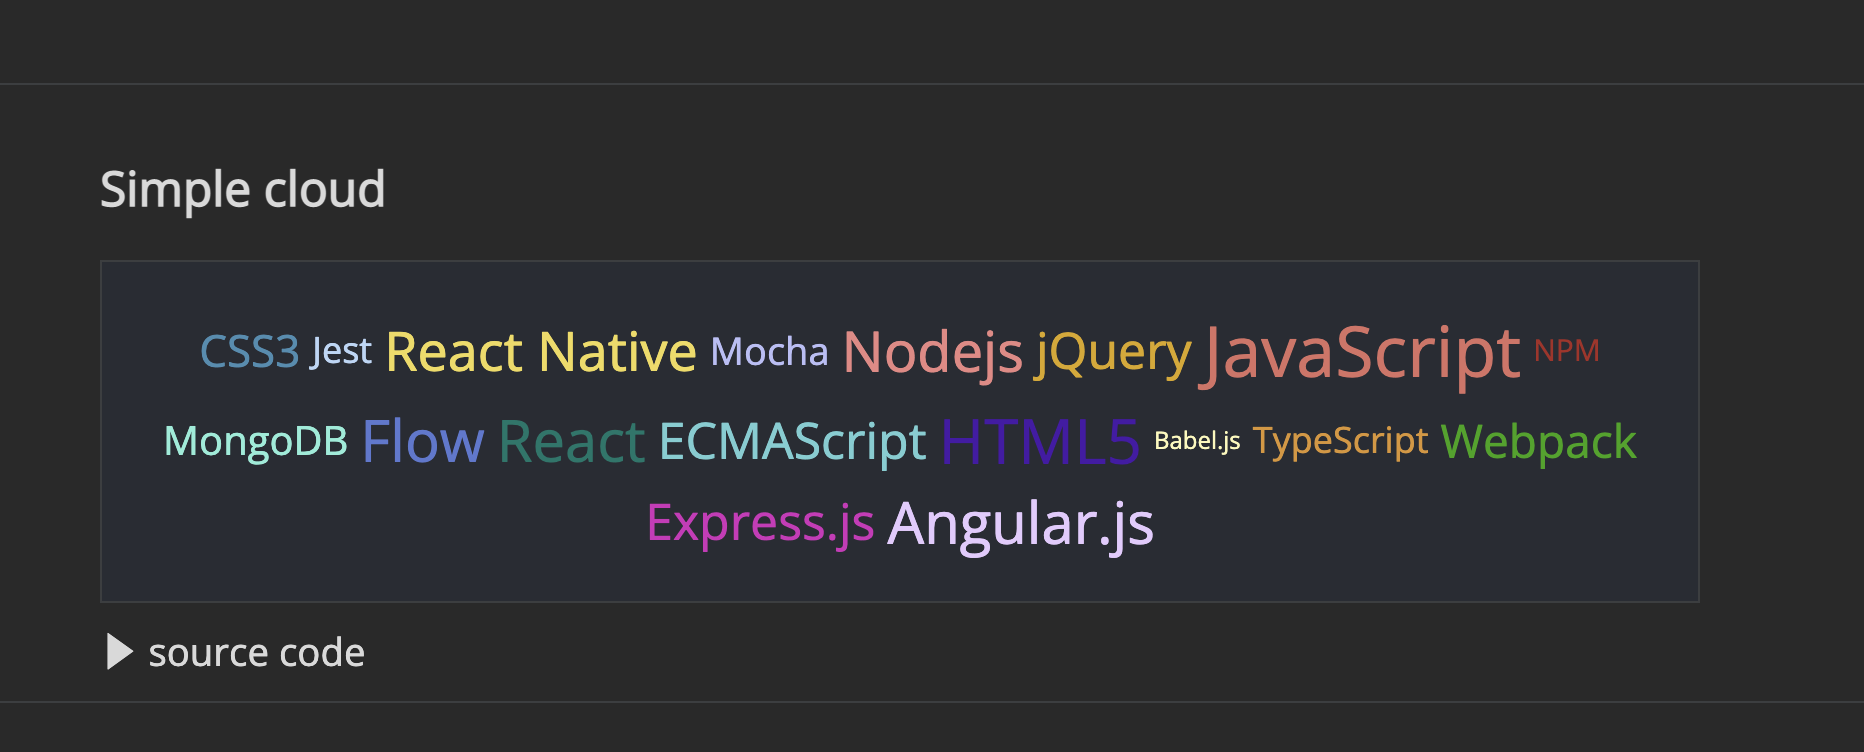
WordCloudを表示させたい!!
react-tagcloudのパッケージを使います。
Demoページはここ。
慣れてくれば他のvisualize用のライブラリを使ってみようと思ってます。
Method
- プロジェクトを作成
- 必要なパッケージをインストール
- webpackの設定
-
package.jsonにwebpackの実行コマンドを追加 - 出力先フォルダを作成
Compose Environment
プロジェクトを作成
mkdir frontend
cd frontend
必要なパッケージをインストール
package.json を作成
touch package.json
{
  "name": "react-editor",
  "version": "1.0.0",
  "scripts": {
    "start": "echo 'Hello! package.json'"
  }
}
npm init で package.json を作成できるみたいですが。 必要最低限の内容として name version scripts だけで良いみたいです。
この状態で package.json 直下で npm start とコマンドすると Hello! package.json が出力されると思います。
$ npm start

> react-editor@1.0.0 start
> echo 'Hello! package.json'

Hello! package.json
インストール
追加するのは webpack react babelの3つです。
あとはお好みでreactのライブラリをインストールします。
npm install webpack
npm install @babel/core @babel/preset-env @babel/preset-react babel-loader
npm install react react-dom
npm install react-tagcloud
webpackの設定
webpackの設定には webpack.config.js が必要です。 touch で空のファイルを作成します。
touch webpack.config.js
const path = require('path')

module.exports = {
  entry: './src/index.js',
  output: {
    path: path.resolve(__dirname, 'dst'),
    filename: 'react_index.js',
  },
  resolve: {
    extensions: ['.js', '.ts', '.jsx']
  },
  module: {
    rules: [{
      test: /\.(js|mjs|jsx)$/,
      exclude: /node_modules/,
      use: [
        {
          loader: 'babel-loader',
          options: {
            presets: [
              '@babel/preset-env',
              '@babel/preset-react',
            ]
          }
        }
      ]
    }]
  }
}
entry で最初に読み込むファイルを設定し、 outputで出力先のフォルダパスとファイル名を設定します。 resolve はここに拡張子を書いておくと実行読み込み時にimport文を簡略化することができます。例えば ./components/WordCloud.jsxをインポートしたい場合、 resolve に extensions: ['.jsx'] と
設定しておくと import {SimpleCloud} from './components/WordCloud.jsx' と書かずに .jsxを省略して import {SimpleCloud} from './components/WordCloud' と書くことができます。 module.rules は 最新版のJavaScriptの記述に変換するためにBabelLoaderを設定しています。React の環境構築(セットアップ) を丸パクリして設定してます![]() 。 (webpackでbabel-loaderを使う方法を紹介を参照)
。 (webpackでbabel-loaderを使う方法を紹介を参照)
package.json にwebpackの実行コマンドを追加
package.json の scripts に build のコマンドを追加します。
{
  ...
  "scripts": {
    "start": "echo 'Hello! package.json'",
    "build": "webpack --mode=production"
  }
  ...
}
出力先フォルダを作成
出力先のフォルダを作成します。
mkdir dst
これで npm run build すれば dst フォルダにjsファイルが出力できると思います。
Folder Structure
フォルダ構成は下記の通りとなります。
frontend(プロジェクトのディレクトリ)
├── dst  //出力先(output)フォルダ
│   └── react_index.js
└── src
    ├── components
    │       └── WordCloud.jsx
    ├── App.js
    └── index.js  //エントリポイント
Development
詳しいReactの開発については割愛します。 コードのみを掲載します。
import React from 'react';
import ReactDOM from 'react-dom';
import App from './App';

let dom = document.querySelector("#root");
ReactDOM.render(<App />, dom);
import React from 'react'
import {SimpleCloud} from './components/WordCloud.jsx'

const App = () => {
  return (
    <>
      <div className="App">
        <h1>
          Hello, React!!!
        </h1>
      </div>
      <div>
        <SimpleCloud />
      </div>
    </>
  )
}

export default App;
import React from 'react'
import { TagCloud } from 'react-tagcloud'

const data = [
  { value: 'JavaScript', count: 38 },
  { value: 'React', count: 30 },
  { value: 'Nodejs', count: 28 },
  { value: 'Express.js', count: 25 },
  { value: 'HTML5', count: 33 },
  { value: 'MongoDB', count: 18 },
  { value: 'CSS3', count: 20 },
  { value: 'Django', count: 40 },
  { value: 'Python', count: 55 },
]

const SimpleCloud = () => (
  <TagCloud
    minSize={12}
    maxSize={35}
    tags={data}
    onClick={tag => alert(`'${tag.value}' was selected!`)}
  />
)

export {SimpleCloud};
Launcher
プロジェクト直下で下記のコマンドで実行します。成功すれば dstフォルダにjsファイルが出力されます。
$ npm run build

$ ls dst
react_index.js
Preview
あとは表示したいページにscriptタグを追加すれば完了です。
Djangoベースで書いています。出力したjsファイルはどこかに格納してください。
<div id="root"></div> はないと表示されません。
...
<div id="root"></div>
<script type="text/javascript" src="{% static 'js/react_frontend/react_index.js' %}"></script>
...
Consequence
PostScript
忘れそうなので書いてみたった。
グラフ表示ライブラリは何を使えばいいか悩む。
Reference
- CDNオンリーでReactを動かしてみた
- React × TypeScript で手を動かながら学ぶ!モダンなフロントエンド開発入門 : npm でプロジェクトを作成する
- React × TypeScript で手を動かながら学ぶ!モダンなフロントエンド開発入門 : webpack を導入してビルドができるようにする
- react-tagcloud
- 脱 create-react-app! webpackでReact ×TypeScrip開発環境構築からHello World!まで
- React の環境構築(セットアップ)
- webpack + TypeScript/Babel(JavaScript)の環境でReactを導入する
- 【React】Webpack を使って実行可能htmlを作成する
- React & Webpack
- React+Typescript+Webpackの環境構築
- webpackでbabel-loaderを使う方法を紹介