11
13

Delete article

Deleted articles cannot be recovered.

Draft of this article would be also deleted.

Are you sure you want to delete this article?

More than 3 years have passed since last update.

VScode上でRailsのステップデバックする方法

Last updated at Posted at 2020-03-21

初めに

今までbinding.pryでデバックしていたのですが、下記の手順を踏むのでデバックに時間がかかる。

  1. 処理を止めたい所にbinding.pryを打ち込む
  2. 処理を止める。
  3. 確認後binding.pryを消す。
  4. 次の処理を見たい時はこれを繰り返す。

VScodeでデバックすると

  1. 止めたい処理の所にブレイクポイントを貼る(複数貼る事が出来る。)
  2. デバックの開始ボタンを押す。
    3.処理を止める。

となり、binding.pryを書かない事、複数箇所ブレイクポイントを貼る事が出来るので、効率化を測れる。

インストール

下記を記述してインストール

  • ruby-debug-ide
  • debase
Gemfile
group :development do
  gem 'ruby-debug-ide'
  gem 'debase'
end
ターミナル
bundle install

VScode上で設定

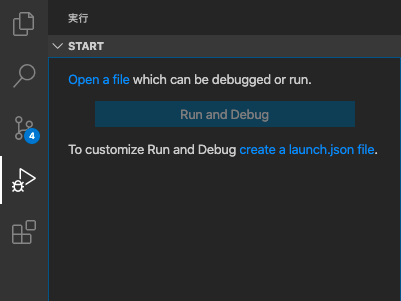
  1. VScodeの左にあるてんとう虫みたいなアイコンをクリック。
  2. 右下にcreata alaunch.json file.

Image from Gyazo

3.下記の画面になるのでRubyを選択
Image from Gyazo

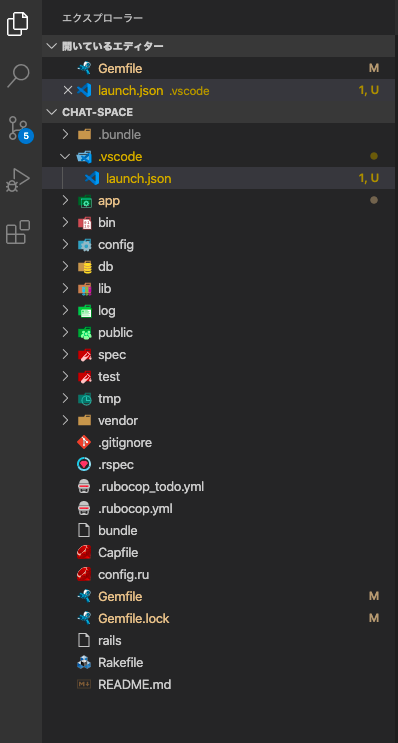
4.選択したら.vscodeディレクトリが現れる。
Image from Gyazo

5 .vscode/launch.jsonに下記を記述

.vscode/launch.json
{
  "version": "0.2.0",
  "configurations": [
    {
      "name": "Rails server",
      "type": "Ruby",
      "request": "launch",
      "program": "${workspaceRoot}/bin/rails",
      "args": [
        "server"
      ],
      "useBundler": true,
    }
  ]
}

使い方

  1. 見たい処理の所にブレイクポイントを貼る
    Image from Gyazo

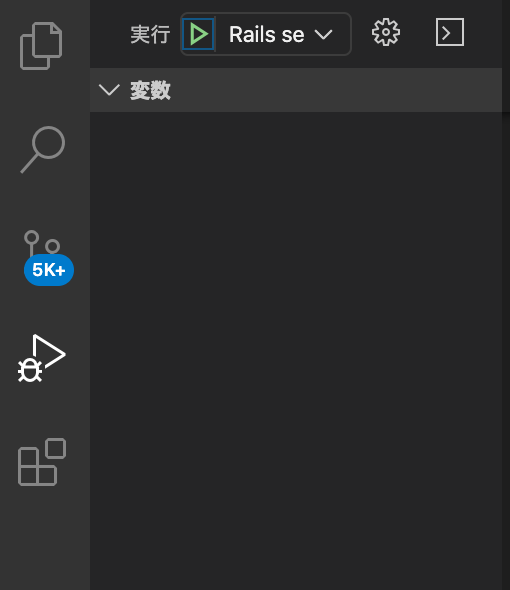
  2. 実行をクリックするとデバックコンソールが立ち上がる
    Image from Gyazo

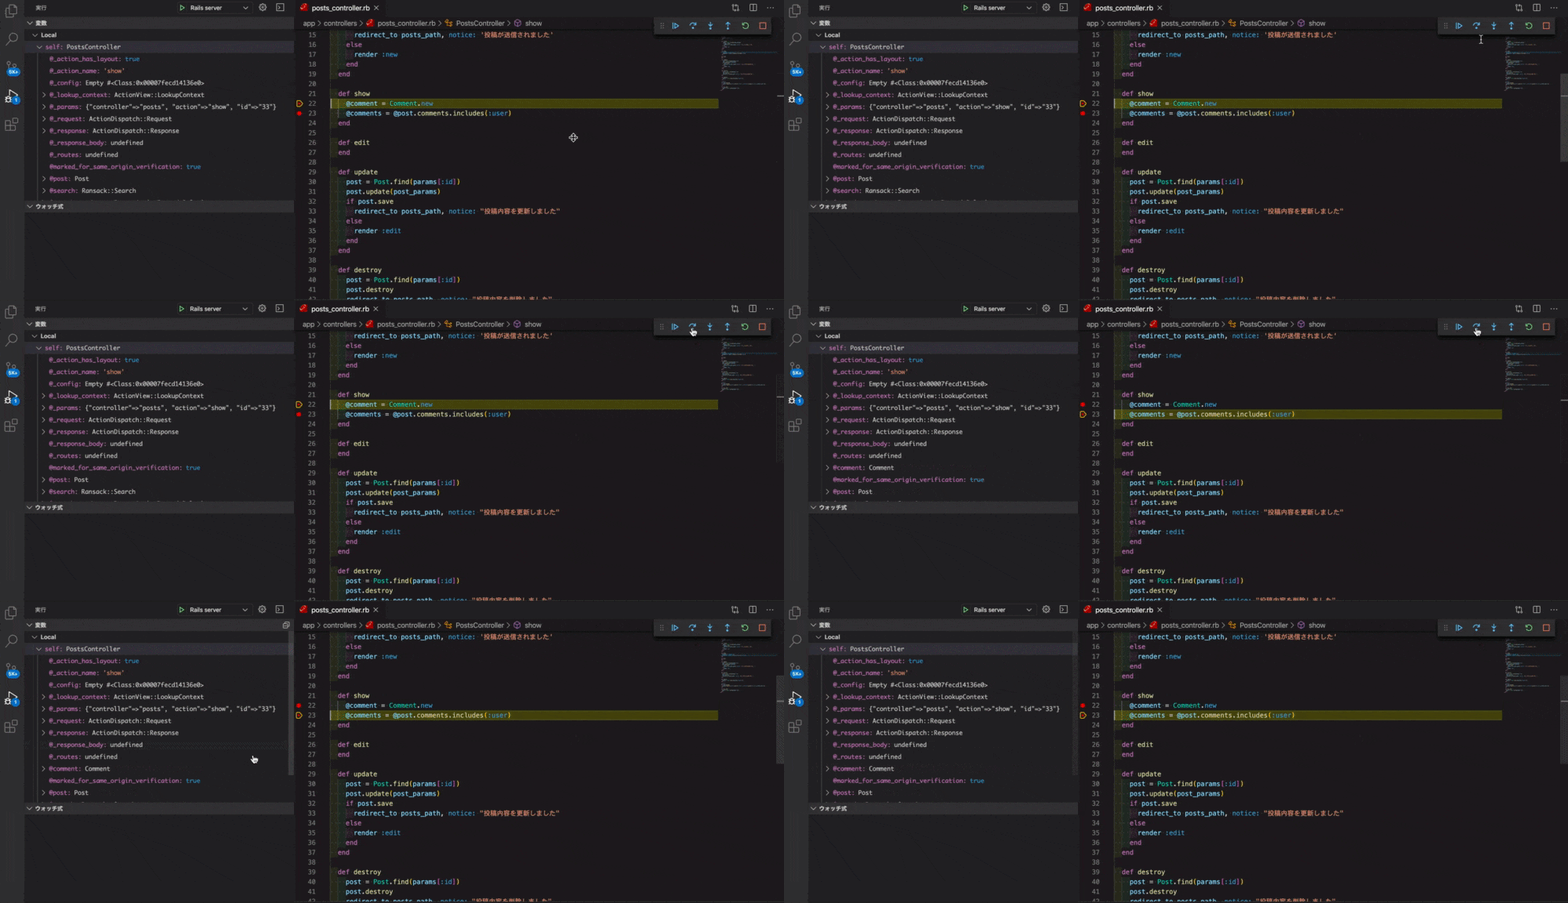
3.処理を止めて値を確認。
左に飛んできている値を見る事が出来て、右上のスッテプオーバーをクリックすると次の処理の値を確認出来る。
Image from Gyazo

Image from Gyazo

参考記事

Visual Studio Code の デバッガ で Rails のデバッグをする

11
13
0

Register as a new user and use Qiita more conveniently

  1. You get articles that match your needs
  2. You can efficiently read back useful information
  3. You can use dark theme
What you can do with signing up
11
13

Delete article

Deleted articles cannot be recovered.

Draft of this article would be also deleted.

Are you sure you want to delete this article?