これは MIERUNE AdventCalendar 2022 18日目の記事です。
昨日は @Kanahiro さんによる THREE.jsでGPGPUにより頂点を操作しパーティクルをアニメーションする でした。
↓こんな感じにMaplibre GL JSで地図上に魔法陣が出現する演出を作りたいと思います。
See the Pen Magic circle by satoshi7190 (@satoshi7190) on CodePen.
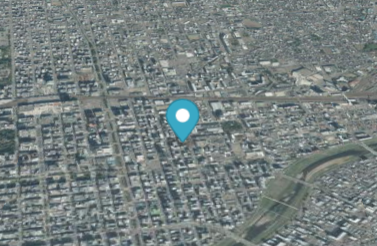
地図とマーカーを用意する
まずは、地図を生成して中心にマーカーを設置します。
map = new maplibregl.Map({
  container: "map",
  style: {
    version: 8,
    sources: {
      real: {
        type: "raster",
        tiles: [
          "https://cyberjapandata.gsi.go.jp/xyz/seamlessphoto/{z}/{x}/{y}.jpg"
        ],
        tileSize: 256,
        attribution:
          "地図の出典:<a href='https://www.gsi.go.jp/' target='_blank'>国土地理院</a>"
      }
    },
    layers: [
      {
        id: "real",
        type: "raster",
        source: "real",
        minzoom: 0,
        maxzoom: 24,
        paint: {
          "raster-brightness-max": 1
        }
      }
    ]
  },
  center: [141.361, 43.064],
  zoom: 13,
  pitch: 60
});

map.on("load", () => {
    //マーカー設置
  new maplibregl.Marker()
      .setLngLat([141.361, 43.064])
      .addTo(map);
});
魔法陣を描くのに必要なdiv要素を作る
次に、魔法陣に必要なパーツ(div要素)をJavascriptで生成します。
//魔法陣のパーツごとの要素の生成
const customMarker = document.createElement("div");
const space = document.createElement("div");
const magic = document.createElement("div");
const magicFirstcircle = document.createElement("div");
const magicText = document.createElement("div");
const magicSecondcircle = document.createElement("div");
const magicLine = document.createElement("div");
const magicEmblem = document.createElement("div");

//魔法陣に呪文のテキストを書き込む
const magicTextData = [
  "m",
  "a",
  "p",
  "l",
  "i",
  "b",
  "r",
  "e",
  "m",
  "a",
  "p",
  "b",
  "o",
  "x",
  "g",
  "l",
  "j",
  "s"
];
magicTextData.map((text) => {
  const textElement = document.createElement("span");
  textElement.textContent = text;
  magicText.appendChild(textElement);
});

//魔法陣の中のライン生成
for (i = 0; i < 16; i++) {
  const magicLineChild = document.createElement("p");
  magicLine.appendChild(magicLineChild);
}

//クラスを定義
customMarker.className = "marker";
space.className = "space";
magic.className = "magic";
magicFirstcircle.className = "magic-firstcircle";
magicText.className = "magic-text";
magicSecondcircle.className = "magic-secondcircle";
magicLine.className = "magic-line";
magicEmblem.className = "magic-emblem";

//魔法陣のパーツを組み立てる
magic.appendChild(magicFirstcircle);
magic.appendChild(magicText);
magic.appendChild(magicSecondcircle);
magic.appendChild(magicLine);
magic.appendChild(magicEmblem);
space.appendChild(magic);
customMarker.appendChild(space);
上記のJavaScriptで生成されたdiv要素の構造が下記の通りになります。
<div class="space">
    <div class="magic">
        <div class="magic-firstcircle"></div>
        <div class="magic-text">
            <span>m</span><span>a</span><span>p</span><span>l</span><span>i</span><span>b</span><span>r</span><span>e</span><span>m</span><span>a</span><span>p</span><span>b</span><span>o</span
            ><span>x</span><span>g</span><span>l</span><span>j</span><span>s</span>
        </div>
        <div class="magic-secondcircle"></div>
        <div class="magic-line">
            <p></p>
            <p></p>
            <p></p>
            <p></p>
            <p></p>
            <p></p>
            <p></p>
            <p></p>
            <p></p>
            <p></p>
            <p></p>
            <p></p>
            <p></p>
            <p></p>
            <p></p>
            <p></p>
        </div>
        <div class="magic-emblem"></div>
    </div>
</div>
そして、このjavascriptで生成したdiv要素を格納した変数customMarkerをマーカーのインスタンス生成時のnew maplibregl.Marker()の引数にすることで、先ほどのdiv要素をマーカーとして地図の上に表示させることができます。
//マーカー設置
- new maplibregl.Marker()
+ new maplibregl.Marker(customMarker)
.setLngLat([141.361, 43.064])
.addTo(map);
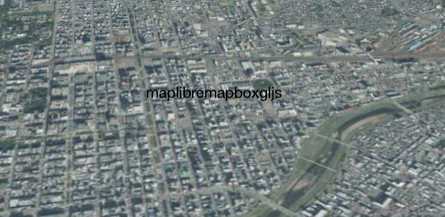
CSSで何もスタイリングしてないので、div要素の中のテキストが表示されただけです。
魔法陣をCSSで描く
ここからCSSでスタイリングして魔法陣を描きます。
今回はかなり記述が長くなるのでSassで書きました。
/* 魔法陣を形成する空間 */
.space {
  transform: scale(1.5);
}

/* 魔法陣の色 */
$color: #00ffd0;

@mixin size($value) {
  width: $value;
  height: $value;
}

@mixin center {
  position: absolute;
  margin: auto;
  inset: 0;
}

/* 魔法陣本体 */
.magic {
  position: relative;
  @include size(200px);
  /* 魔法陣 外側の円 */
  &-firstcircle {
    @include center;
    @include size(95%);
    border: 2px solid $color {
      radius: 50%;
    }
  }
  /* 魔法陣 文字 全体位置 */
  &-text {
    @include center;
    @include size(98%);
    /* 魔法陣 各文字 */
    span {
      position: absolute;
      top: 50%;
      bottom: 0;
      left: 48%;
      color: $color;
      padding-top: 41%;
      transform-origin: top center;
      /* 魔法陣の各文字を回転させる */
      @for $i from 1 through 17 {
        &:nth-of-type(#{$i * 1}) {
          transform: rotate(20deg * $i);
        }
      }
    }
  }
  /* 魔法陣 内側の円 */
  &-secondcircle {
    @include center;
    @include size(83%);
    border: 2px solid $color {
      radius: 50%;
    }
  }

  /* 魔法陣 空間  */
  &-line {
    @include center;
    @include size(83%);
    /* 魔法陣  */
    p {
      @include center;
      width: 86%;
      height: 50%;
      border: 1px solid $color;
      transform-origin: center;
      /* 魔法陣 各ライン*/
      @for $i from 1 through 16 {
        &:nth-of-type(#{$i * 1}) {
          transform: rotate(20deg * $i);
        }
      }
    }
  }

  /* 魔法陣の紋章 */
  &-emblem {
    @include size(25%);
    @include center;
    padding: auto;
    border: 2px solid $color;
    border-radius: 50%;

    @mixin emblem($value) {
      content: "";
      @include size(100%);
      position: absolute;
      border: 2px solid $color;
      transform: translate3d(-2px, -2px, 0) rotate($value);
    }
    &::before {
      @include emblem(0deg);
    }
    &::after {
      @include emblem(45deg);
    }
  }
}
このように書くとマーカーが魔法陣に変身します。
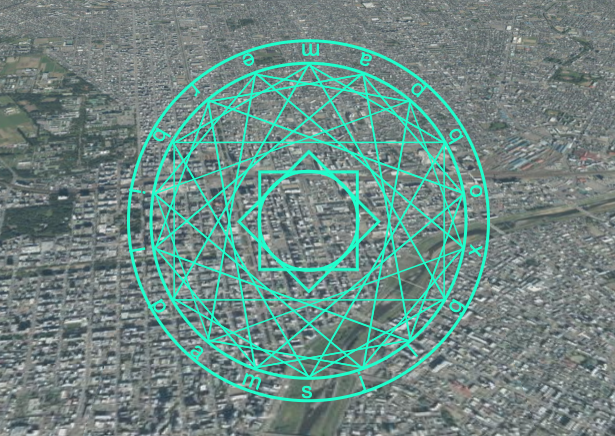
魔法陣がそのまま画面に表示されているだけで違和感があり、地図の上に出ているように見えません。
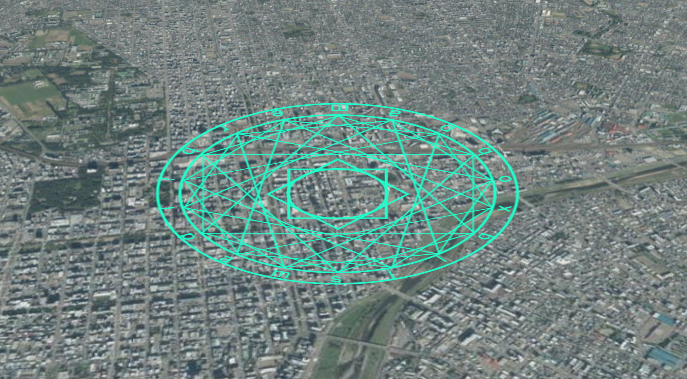
マーカーのオプションにrotationAlignment: "map"とpitchAlignment: "map"を記述することで、マーカーを地図の平面に合わせことができます。(地図にマーカを直接貼り付けるようなイメージです。)これで魔法陣が地図の上に乗っかります。
//マーカー設置
- new maplibregl.Marker(customMarker)
+ new maplibregl.Marker(customMarker, {
+    rotationAlignment: "map",
+    pitchAlignment: "map"
+ })
.setLngLat([141.361, 43.064])
.addTo(map);
アニメーション効果を加える
あとは、アニメーションの演出をCSSで書き加えます。
先ほどのSassに@keyframesのアニメーションを付け足していきます。
/* 魔法陣を形成する空間 */
.space {
  transform: scale(1.5);
+ animation: scale 3s;
+ /* 魔法陣の呼び出し */
+ @keyframes scale {
+   0% {
+     filter: brightness(20);
+     transform: rotate(-720deg) scale(0);
+   }
+   50% {
+     filter: brightness(20);
+     transform: rotate(0deg) scale(1.5);
+   }
+   100% {
+     filter: brightness(1);
+     transform: rotate(0deg) scale(1.5);
+   }
+ }
}

/* 魔法陣の色 */
$color: #00ffd0;

@mixin size($value) {
  width: $value;
  height: $value;
}

@mixin center {
  position: absolute;
  margin: auto;
  inset: 0;
}

/* 魔法陣本体 */
.magic {
  position: relative;
  @include size(200px);
+ animation: rotation 5s linear infinite;
+ /* 魔法陣の回転 */
+ @keyframes rotation {
+   100% {
+     transform: rotate(360deg);
+   }
+ }
  /* 魔法陣 外側の円 */
  &-firstcircle {
    @include center;
    @include size(95%);
    border: 2px solid $color {
      radius: 50%;
    }
+   animation: energy 2s linear alternate infinite;
  }
  /* 魔法陣 文字 全体位置 */
  &-text {
    @include center;
    @include size(98%);
    /* 魔法陣 各文字 */
    span {
      position: absolute;
      top: 50%;
      bottom: 0;
      left: 48%;
      color: $color;
      padding-top: 41%;
      transform-origin: top center;
      /* 魔法陣の各文字を回転させる */
      @for $i from 1 through 17 {
        &:nth-of-type(#{$i * 1}) {
          transform: rotate(20deg * $i);
        }
      }
    }
  }
  /* 魔法陣 内側の円 */
  &-secondcircle {
    @include center;
    @include size(83%);
    border: 2px solid $color {
      radius: 50%;
    }
+   animation: energy 2s linear alternate infinite;
+   /* 魔法陣のグロー効果 */
+   @keyframes energy {
+     100% {
+       box-shadow: $color 0px 0px 20px;
+     }
+   }
  }

  /* 魔法陣 空間 */
  &-line {
    @include center;
    @include size(83%);
    /* 魔法陣 */
    p {
      @include center;
      width: 86%;
      height: 50%;
      border: 1px solid $color;
      transform-origin: center;
      /* 魔法陣 六芒星 各ライン*/
      @for $i from 1 through 16 {
        &:nth-of-type(#{$i * 1}) {
          transform: rotate(20deg * $i);
        }
      }
+     animation: energy 2s linear alternate infinite, drawline 2s;
+     @keyframes drawline {
+       0% {
+         width: 20%;
+         opacity: 0;
+       }
+       50% {
+         width: 20%;
+         opacity: 0;
+       }
+       100% {
+         width: 86%;
+       }
+     }
    }
  }

  /* 魔法陣の紋章 */
  &-emblem {
    @include size(25%);
    @include center;
    padding: auto;
    border: 2px solid $color;
    border-radius: 50%;
+   animation: flashing 2s linear alternate infinite, fadein 2s;

    @mixin emblem($value) {
      content: "";
      @include size(100%);
      position: absolute;
      border: 2px solid $color;
      transform: translate3d(-2px, -2px, 0) rotate($value);
+     animation: flashing 2s linear alternate infinite;
    }
    &::before {
      @include emblem(0deg);
    }
    &::after {
      @include emblem(45deg);
    }
+   /* 紋章の出現 */
+   @keyframes fadein {
+     0% {
+       opacity: 0;
+     }
+     50% {
+       opacity: 0;
+     }
+     100% {
+       opacity: 1;
+     }
+   }

+   /* 紋章のグロー効果 */
+   @keyframes flashing {
+     0% {
+       filter: drop-shadow(0px 0px 0px $color);
+     }
+     100% {
+       filter: drop-shadow(0px 0px 12px $color);
+     }
+   }
  }
}
そして、魔法陣が出現する時に背景の地図が暗くなる演出をJavaScriptのほうに加えます。(個人的な好みで魔法陣を出すタイミングと地図を暗くする演出をsetTimeoutで0.5秒遅らせてます。)
map.on("load", () => {
+ setTimeout(() => {
+   map.setPaintProperty("real", "raster-brightness-max", 0.4);
    //マーカー設置
    new maplibregl.Marker(customMarker, {
      rotationAlignment: "map",
      pitchAlignment: "map"
    })
      .setLngLat([141.361, 43.064])
      .addTo(map);
+ }, 500);
});
地図上に魔法陣が出現する演出が出来上がりました。
魔法陣が出現する時の表現はtransform:のrotateで回転させながらscaleで全体を膨張させ、filter:のbrightnessで魔法陣の色を一瞬明るくすることで表現しています。
魔法陣の中の複数のラインは、少しタイミングをずらしてから円の中心から円の端に広がるように動かしてます。ちなみにこのラインは複数のアウトラインの長方形を少しずつ回転させながら重ね合わせてるだけです。
その後のグロー効果はbox-shadowやfilter:のdrop-shadowの値をアニメーションで変動させることで表現しています。
参考記事
明日は@northprintさんにです!お楽しみにー