Core ML Toolsで.mlmodelへの変換を試してみた。
ドキュメント
公式のDocumentへのリンクいろいろ
Converting Trained Models to Core ML
https://developer.apple.com/documentation/coreml/converting_trained_models_to_core_ml
Core ML Tools Python Package Index (PyPI)
https://pypi.python.org/pypi/coremltools
Core ML Tools Package Documentation
https://apple.github.io/coremltools/
Core ML Model Format Specification
https://apple.github.io/coremltools/coremlspecification/
準備
Macに標準でインストールされているPythonでは、依存関係の問題が面倒なので、virtualenvを使って仮装環境で行う。仮装環境の作成、起動と終了手順は以下の通り。
pipインストール
sudo easy_install pip
virtualenvインストール
sudo pip install virtualenv
仮装環境の作成
mkdir CoreMlTest

virtualenv --no-site-packages CoreMLTools
cd CoreMLTools
仮装環境の起動
source bin/activate
仮装環境の終了
deactivate
Keras modelからの変換
Appleが変換済みのModelがあるが、これと同じものを作成してみる。
ResNet50
https://developer.apple.com/machine-learning/model-details/ResNet50.txt
準備
変換元のModelなどをダウンロードする。
Model (Source Code)をダウンロードする。
https://github.com/fchollet/deep-learning-models/blob/master/resnet50.py
https://github.com/fchollet/deep-learning-models/raw/master/resnet50.py
解析結果として表示させるLabelのテキストをダウンロードする(imagenet1000_clsid_to_human.txtとして保存する)。
https://gist.github.com/yrevar/942d3a0ac09ec9e5eb3a
環境
- Keras 2.0.6 (※2.1.xだとエラーになったので、Downgrade)
- TensorFlow 1.4.0
pip install --upgrade tensorflow==1.4.0
sudo pip install keras==2.0.6
pip install h5py
pip install pillow
動作確認
まずは、動作確認のため、象の画像を用意してを同じフォルダにelephant.jpgという名前で置いて、実行する。
python resnet50.py
正しく解析できていることを確認する。
Using TensorFlow backend.
2017-11-18 11:27:32.428010: I tensorflow/core/platform/cpu_feature_guard.cc:137] Your CPU supports instructions that this TensorFlow binary was not compiled to use: SSE4.1 SSE4.2 AVX
Input image shape: (1, 224, 224, 3)
Predicted: [[(u'n02504458', u'African_elephant', 0.42468691), (u'n01871265', u'tusker', 0.31053072), (u'n02437312', u'Arabian_camel', 0.12811288), (u'n02504013', u'Indian_elephant', 0.028190181), (u'n03967562', u'plow', 0.026222868)]]
Core ML modelへの変換
Core ML modelへ変換するscriptを作成する。
import coremltools
from resnet50 import ResNet50
model = ResNet50(include_top=True, weights='imagenet')
coreml_model = coremltools.converters.keras.convert(model,
input_names = 'image',
output_names = ['classLabelProbs', 'classLabel'],
image_input_names = 'image',
class_labels = 'imagenet1000_clsid_to_human.txt')
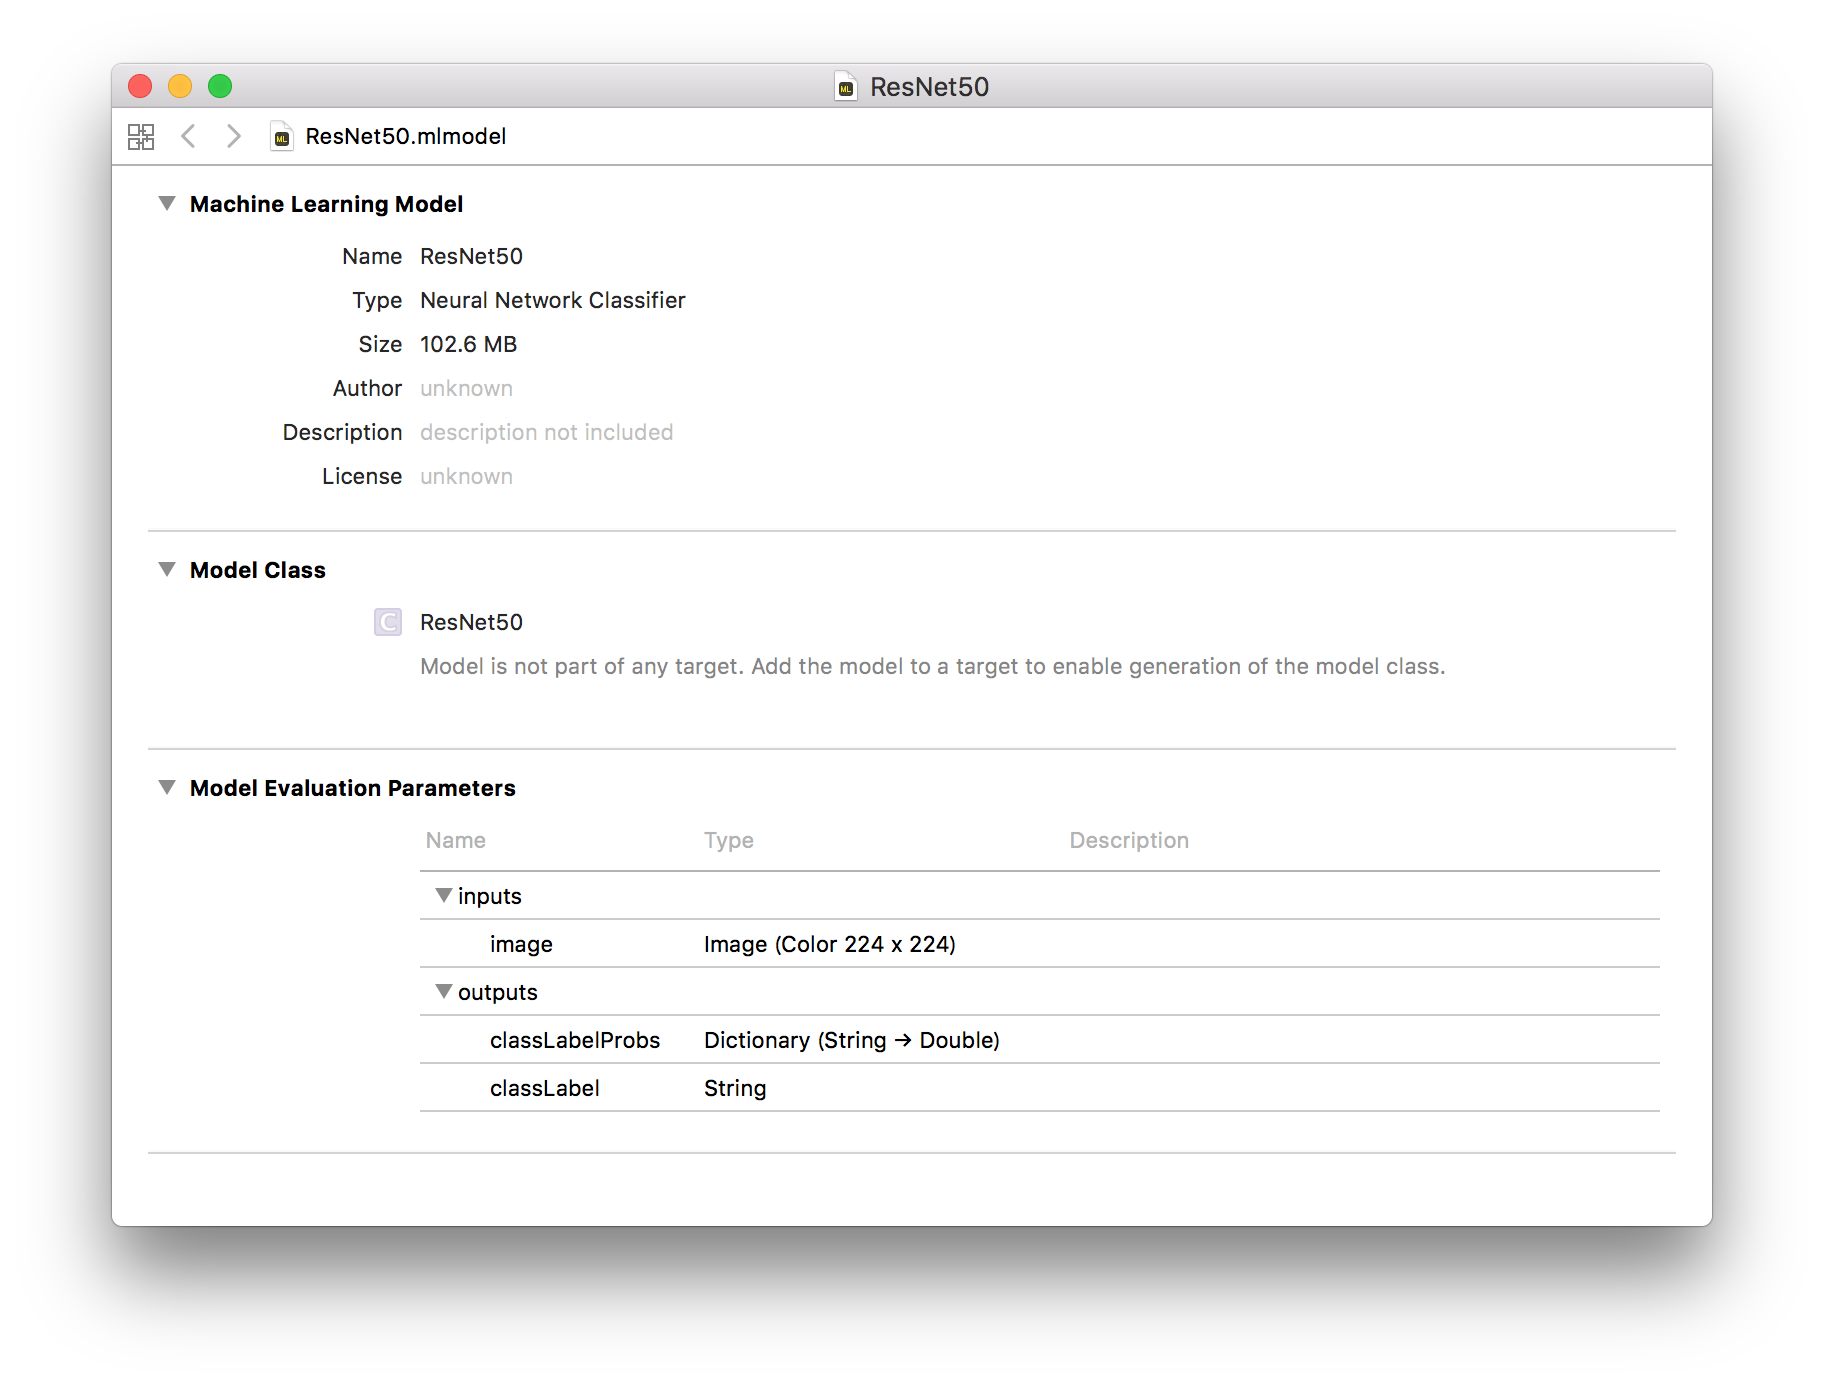
coreml_model.save('ResNet50.mlmodel')
作成したscriptを実行する。
python convert.py
生成されたResNet50.mlmodelをXcodeで開いて、Inputs, Outputsなどを確認する。
Vision + Core MLのサンプルのmodelを入れ替えて動作確認。
Classifying Images with Vision and Core ML
https://developer.apple.com/documentation/vision/classifying_images_with_vision_and_core_ml
Caffe modelからの変換
Appleが変換済みのModelがあるが、これと同じものを作成してみる。
SqueezeNet
https://developer.apple.com/machine-learning/model-details/SqueezeNet.txt
準備
変換元のModelなどをダウンロードする。
Model (.caffemodel, .prototext)をダウンロードする。
https://github.com/DeepScale/SqueezeNet/blob/master/SqueezeNet_v1.1/squeezenet_v1.1.caffemodel
wget https://github.com/DeepScale/SqueezeNet/raw/master/SqueezeNet_v1.1/squeezenet_v1.1.caffemodel
https://github.com/DeepScale/SqueezeNet/raw/master/SqueezeNet_v1.1/deploy.prototxt
解析結果として表示させるLabelのテキストをダウンロードする(imagenet1000_clsid_to_human.txtとして保存する)。
https://gist.github.com/yrevar/942d3a0ac09ec9e5eb3a
Inputs, Outputsの修正
Core ML modelのInputs, OutputsのName, Typeに合わせてdeploy.prototxtを修正する。
layer {
  name: "data"
  type: "Input"
  top: "data"
  input_param { shape: { dim: 10 dim: 3 dim: 227 dim: 227 } }
}
layer {
  name: "conv1"
  type: "Convolution"
  bottom: "data"
  top: "conv1"
  convolution_param {
    num_output: 64
    kernel_size: 3
    stride: 2
  }
}
:
input: "image"
input_dim: 1
input_dim: 3
input_dim: 227
input_dim: 227

layer {
  name: "conv1"
  type: "Convolution"
  bottom: "image"
  top: "conv1"
  convolution_param {
    num_output: 64
    kernel_size: 3
    stride: 2
  }
}
:
:
layer {
  name: "prob"
  type: "Softmax"
  bottom: "pool10"
  top: "prob"
}
:
layer {
  name: "classLabelProbs"
  type: "Softmax"
  bottom: "pool10"
  top: "classLabelProbs"
}
Core ML modelへの変換
Core ML modelへ変換するscriptを作成する。
import coremltools
coreml_model = coremltools.converters.caffe.convert(
('squeezenet_v1.1.caffemodel', 'deploy.prototxt'),
image_input_names = 'image',
class_labels = 'imagenet1000_clsid_to_human.txt')
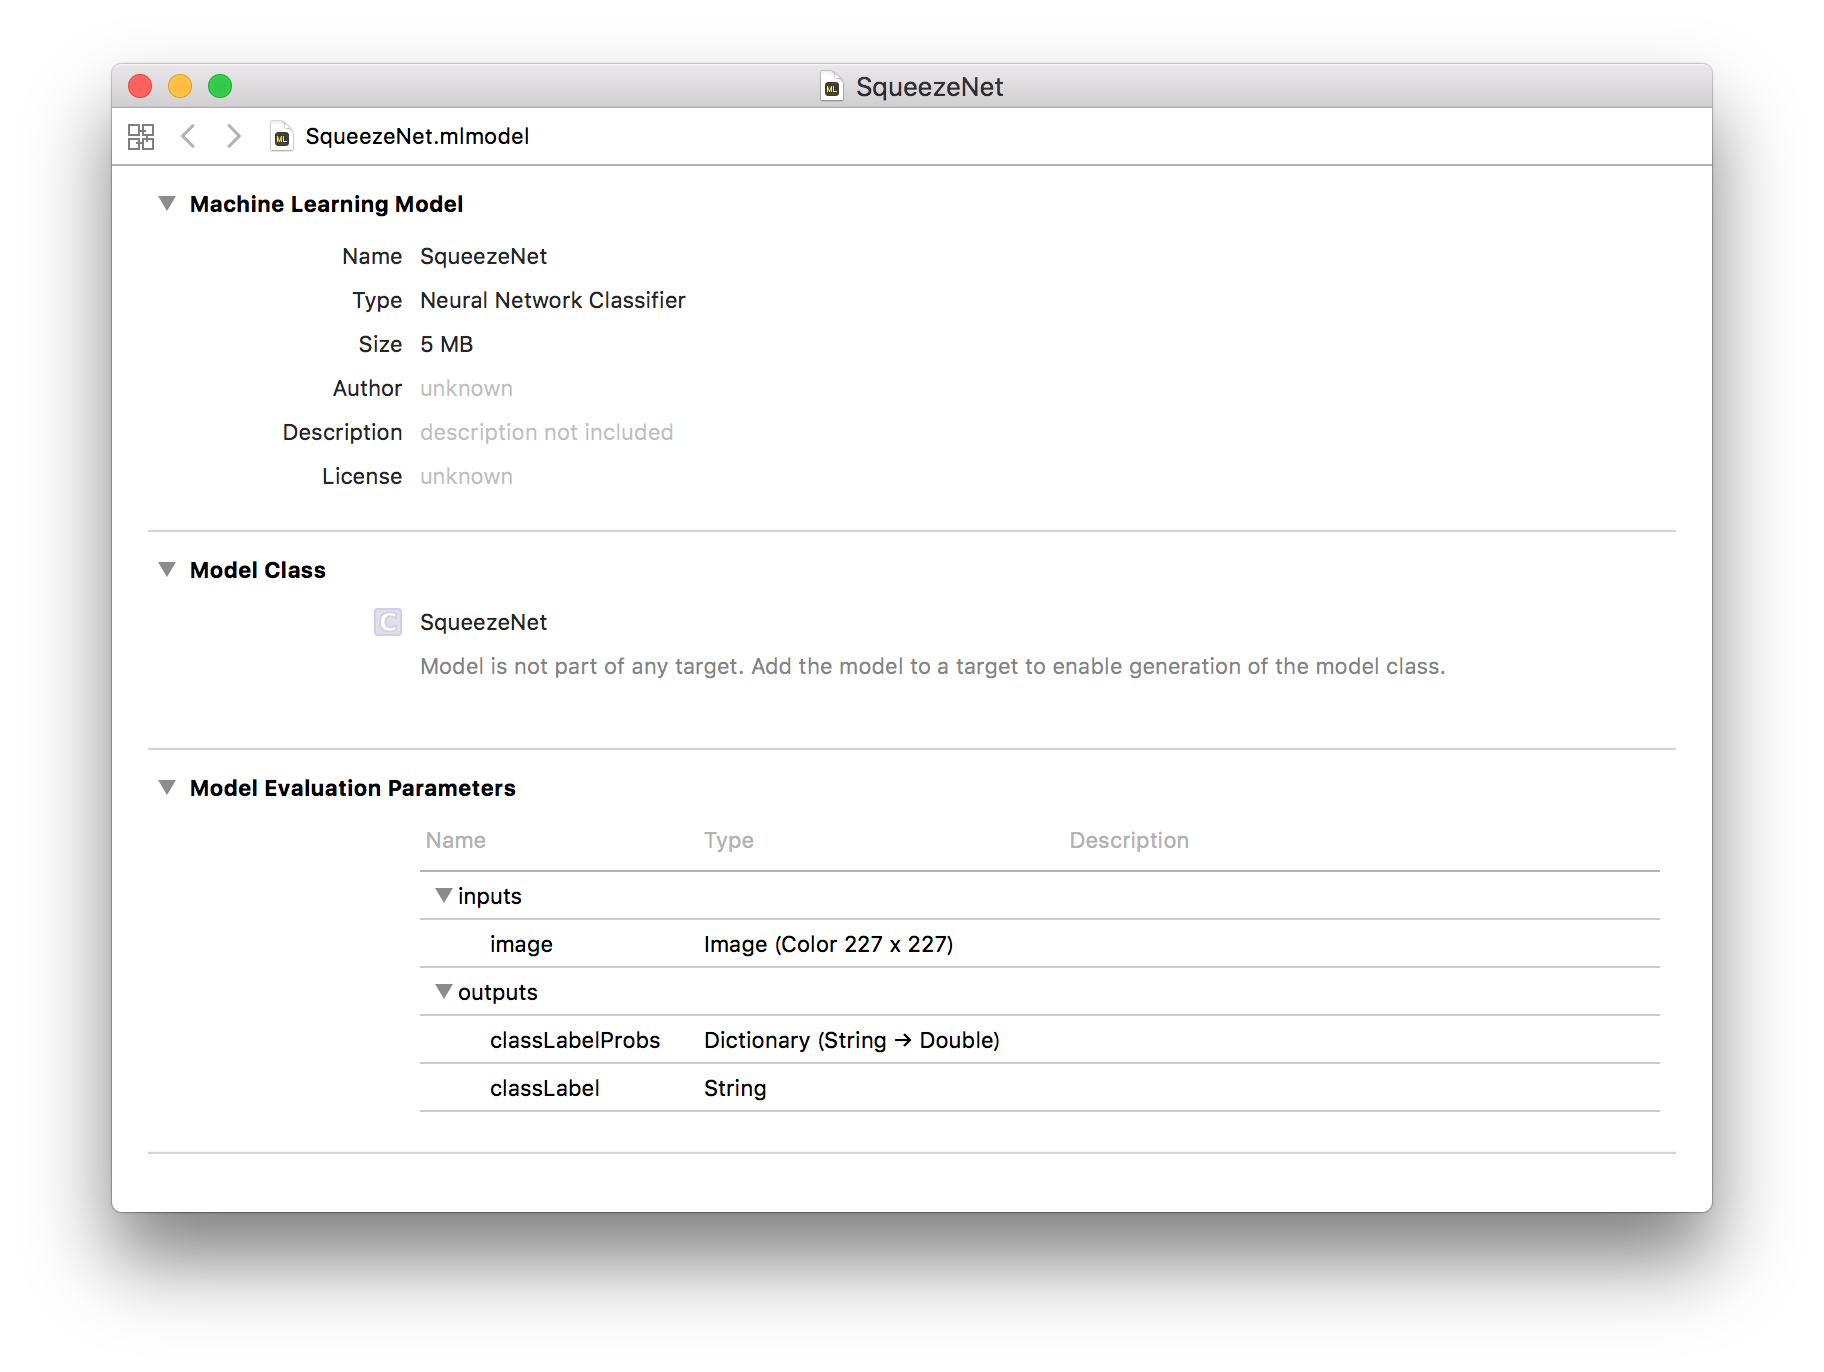
coreml_model.save('SqueezeNet.mlmodel')
作成したscriptを実行する。
python convert.py
生成されたSqueezeNet.mlmodelをXcodeで開いて、Inputs, Outputsなどを確認する。
Vision + Core MLのサンプルのmodelを入れ替えて動作確認。
Classifying Images with Vision and Core ML
https://developer.apple.com/documentation/vision/classifying_images_with_vision_and_core_ml