2016/4/15更新 CMDBuild 2.4対応に修正
2018/1/15更新 CMDBuild 2.5対応に修正
CMDBuildとは
CMDBuildは、クラウド環境に最適なITIL V.3準拠のオープンソース構成管理システム(CMDB)です。
仮想化環境での論理構成と物理構成の複雑化、変更の高頻度・高速化による構成情報の爆発に対して、強力な自動化機能、外部システム連携機能を備え、運用管理自動化基盤を実現します。
詳細はこちらを参照下さい。
https://www.ossl.co.jp/?page_id=152
稼働条件
CMDBuild 2.5.0 (2018/1現在)
- メモリ4GB< (8GB推奨)、ディスク空き容量120GB以上
- Postgres 9.0-9.4 (9.3<推奨)
- OracleJDK 1.8 (openJDKは未サポート)
- Tomcat 6< (7.068推奨)
- オプション:Alfresco Community 3.4<
詳細はこちらを参照
http://www.cmdbuild.org/en/diffusione/news/download/ultima-versione-en
インストール手順(CentOS7)
本手順は、CMDBuildの機能確認を目的とした検証環境の構築の手順です。
実業務では使用しないで下さい。
(CentOS6での手順は、こちらです)
http://qiita.com/satoruf/items/9fb1da46b49da3079e57
Ansible Playbook
本手順のAnsible Playbookを公開しています。(CentOS6/7共通)
https://github.com/oss-laboratries/ansible-cmdbuild
playbook実行後、以下の設定が必要です。
6.cmdbuildインストールのWEBセットアップ
7.shark(ワークフローエンジン)インストールのWEBセットアップ
8.Alfrescoインストール(オプション)のWEBセットアップ
12.CMDBuildのOCSinventory設定(オプション)
インストール環境
- CentOS 7.x 64bit minimalインストール、標準レポジトリのみ
- SELinuxはdisabled、Firewallは停止されていること
# yum groupinstall -y minimal
1.JAVAインストール
下記からOracleJDK1.8をダウンロード
http://www.oracle.com/technetwork/java/javase/downloads/index.html
# rpm -ivh jdk-8u77-linux-x64.rpm
# alternatives --install /usr/bin/java java /usr/java/jdk1.8.0_77/bin/java 300
# alternatives --config java
# java -version
java version "1.8.0_77"
Java(TM) SE Runtime Environment (build 1.8.0_77-b03)
Java HotSpot(TM) 64-Bit Server VM (build 25.77-b03, mixed mode)
2.Postgres9.4インストール
# rpm -ivh  http://yum.postgresql.org/9.4/redhat/rhel-7-x86_64/pgdg-centos94-9.4-2.noarch.rpm
# yum --disableplugin=priorities install -y postgresql94-server postgresql94-devel
# /usr/pgsql-9.4/bin/initdb --encoding=UTF-8 --no-locale -D /var/lib/pgsql/9.4/data/
# vi /var/lib/pgsql/9.4/data/pg_hba.conf
下記のように修正
# "local" is for Unix domain socket connections only
local   all             all                                     trust  # <- 変更
# IPv4 local connections:
host    all             all             127.0.0.1/32            trust  # <- 変更
# IPv6 local connections:
host    all             all             ::1/128                 trust  # <- 変更
# systemctl enable postgresql-9.4.service
# systemctl start postgresql-9.4.service
# systemctl status postgresql-9.4
3.Tomcat8 インストール
以下のサイトで最新のものを確認してダウンロードしてください。
# curl -OL http://ftp.riken.jp/net/apache/tomcat/tomcat-8/v8.0.33/bin/apache-tomcat-8.0.33.tar.gz
# tar zxvf apache-tomcat-8.0.33.tar.gz
# mv apache-tomcat-8.0.33 /opt/tomcat
# useradd -M -d /opt/tomcat tomcat
# chown -R tomcat. /opt/tomcat
4.Tomcatの設定
setenv.shを作成します。
# vi /opt/tomcat/bin/setenv.sh
下記を設定してファイルを保存します。
JAVA_HOME=/usr/java/default
JAVA_OPTS="-Dfile.encoding=UTF-8 -Xms256m -Xmx1024m -XX:MaxPermSize=256M -server"
LANG="ja_JP.UTF-8"
Systemd 設定ファイルを作成します。
# vi /usr/lib/systemd/system/tomcat.service
下記を設定してファイルを保存します。
[Unit]
Description=Apache Tomcat
After=network.target
[Service]
Type=oneshot
ExecStart=/opt/tomcat/bin/startup.sh
ExecStop=/opt/tomcat/bin/shutdown.sh
RemainAfterExit=yes
User=root
[Install]
WantedBy=multi-user.target
Serviceを自動起動登録しておきます。
# systemctl daemon-reload
# systemctl enable tomcat.service
5.Postgres9.4/jdk8用jdbcdriver インストール
以下のサイトで最新のjdk8用jdbc42を確認してダウンロードしてください。
# curl -OL https://jdbc.postgresql.org/download/postgresql-9.4.1208.jar
# cp postgresql-9.4.1208.jar /opt/tomcat/lib/
# systemctl start tomcat.service
http://IPアドレス:8080
にアクセスし動作確認(下記画面が表示されればOK)

6.cmdbuildインストール
# curl -OL http://sourceforge.net/projects/cmdbuild/files/2.5.0/cmdbuild-2.5.0.zip
# unzip cmdbuild-2.5.0.zip
# cd cmdbuild-2.5.0
# cp cmdbuild-2.5.0.war /opt/tomcat/webapps/cmdbuild.war
http://IPアドレス:8080/cmdbuild
にアクセスするとGUI設定画面が開始するので、まず言語を選択
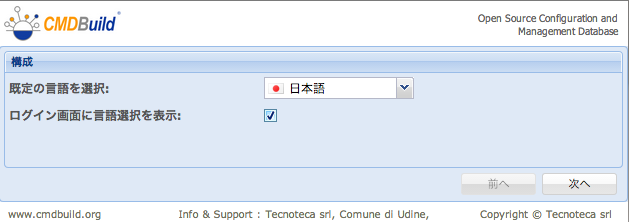
次へをクリック
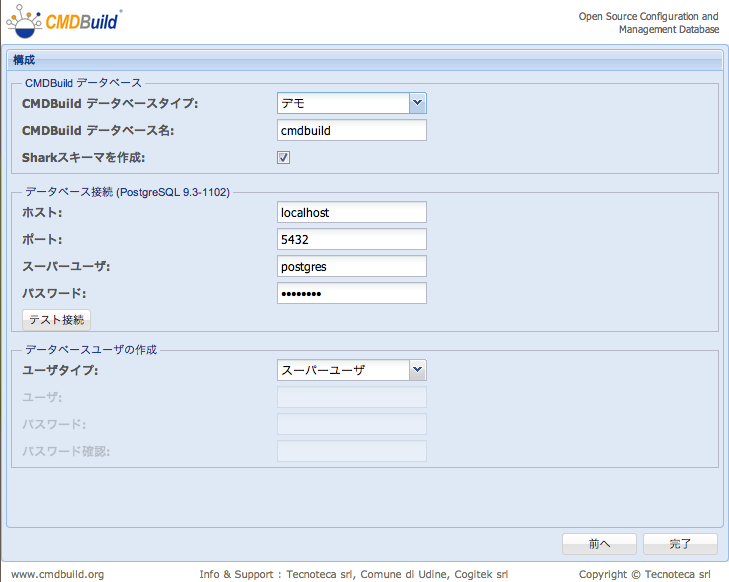
データベース設定を入力、タイプを「デモ」とするとデモ用データが設定される
デフォルトのデータベース接続のユーザ/パスワードは、postgres/postgres
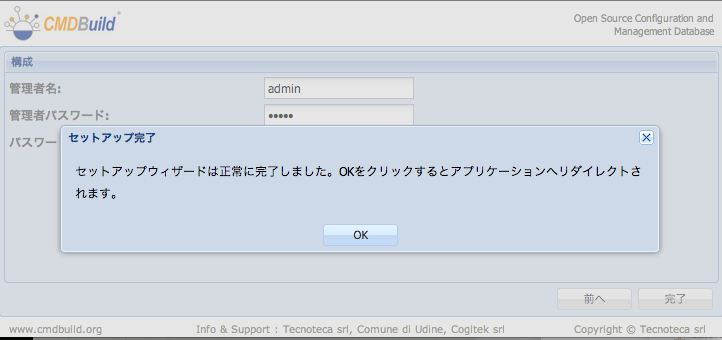
OKをクリックし
デフォルトの管理者情報、admin/adminでログイン

画面上部のアドミニストレーションモジュールをクリック

7.shark(ワークフローエンジン)インストール
# systemctl stop tomcat
# curl -OL https://sourceforge.net/projects/cmdbuild/files/2.5.0/shark-cmdbuild-2.5.0.zip
# unzip shark-cmdbuild-2.5.0.zip
# cp shark-cmdbuild-2.5.0/cmdbuild-shark-server-2.5.0.war /opt/tomcat/webapps/shark.war
# vi /opt/tomcat/webapps/shark/META-INF/context.xml
下記に変更
url="jdbc:postgresql://localhost/cmdbuild"
username="shark"
password="shark"
Tomcatを起動
# sytemctl start tomcat
下記でログ確認
# tail -f /opt/tomcat/logs/catalina.out
/opt/tomcat/logs/shark.logに、リレーションがありませんと出たら、SQLを手動実行
# su - postgres
-bash-4.1$ psql cmdbuild -f /opt/tomcat/webapps/cmdbuild/WEB-INF/sql/shark_schema/01_shark_user.sql
-bash-4.1$ psql cmdbuild -f /opt/tomcat/webapps/cmdbuild/WEB-INF/sql/shark_schema/02_shark_emptydb.sql
ワークフローの設定
アドミニストレーションモジュール > 一般オプション > ワークフローを選択し
有効、Enable "Add attachment" on closed activities、Disable syncronizaton of missing variablesにチェック、
ユーザー名/パスワードに、shark/sharkを入力し、保存をクリック

デモワークフローの登録
解凍した下記ファイルをローカルPCにダウンロードし
cmdbuild-2.5.0/extras/workflow/RFC/RequestForChange.xpdl
cmdbuild のWEBコンソールから アドミニストレーションモジュール > プロセス > Request For Changeの画面でXPDLファイルのアップロードを選択、予めダウンロードしておいた上記XPDLファイルをアップロードし、

セットアップ > サーバ管理で、キャッシュのクリアとサービス同期化をクリックして完了

8.Alfrescoインストール(オプション)
文書管理機能を使用する場合、ALfrescoをインストールする
最新版は5.1e
最初にDB作成
# su - postgres
-bash-4.1$ createdb -U postgres --encoding=UTF-8 alfresco
依存パッケージのインストール
# yum install -y fontconfig libSM libICE libXrender libXext cups-libs libGLU
インストーラをダウンロードして実行
# curl -OL http://dl.alfresco.com/release/community/201602-build-00005/alfresco-community-installer-201602-linux-x64.bin
# chmod +x alfresco-community-installer-201602-linux-x64.bin
#  ./alfresco-community-installer-201602-linux-x64.bin \
--unattendedmodeui none --mode unattended \
--enable-components libreofficecomponent,alfrescosolr,alfrescosolr4,aosmodule,alfrescowcmqs,alfrescogoogledocs \
--disable-components javaalfresco,postgres \
--installer-language ja \
--jdbc_username postgres --jdbc_password postgres \
--tomcat_server_port 10080 --tomcat_server_shutdown_port 10005 \
--tomcat_server_ajp_port 10009 --alfresco_ftp_port 1121 \
--alfresco_admin_password admin \
--alfrescocustomstack_services_startup demand
Postgres9.4用jdbcdriverをコピーし、Alfrescoを起動
# cp /opt/tomcat/lib/postgresql-9.4.1208.jar /opt/alfresco-community/tomcat/lib/
# service alfresco restart
Usservice alfresco start
Using CATALINA_BASE:   /opt/alfresco-community/tomcat
Using CATALINA_HOME:   /opt/alfresco-community/tomcat
Using CATALINA_TMPDIR: /opt/alfresco-community/tomcat/temp
Using JRE_HOME:        /usr
Using CLASSPATH:       /opt/alfresco-community/tomcat/bin/bootstrap.jar:/opt/alfresco-community/tomcat/bin/tomcat-juli.jar
Using CATALINA_PID:    /opt/alfresco-community/tomcat/temp/catalina.pid
Tomcat started.
/opt/alfresco-community/tomcat/scripts/ctl.sh : tomcat started
# chkconfig alfresco on

# tail -f /opt/alfresco-community/tomcat/logs/catalina.out
でログを確認、最初は初期化に数分かかるので、ログに
'INFO: Server startup in XXXXXX ms'
とでたら、下記にアクセス
http://IPアドレス:10080/share

Alfrescoの設定
ログイン後、

ダッシュボード上部のマイファイルをクリックし、作成をクリック、フォルダを選択

名前とタイトル、説明を入力し保存をクリック

CMDBuildの設定
アドミニストレーションモジュール > 一般オプション > DMSを選択

有効とCMISをチェックし、
Webサービスへのパスは、Alfrescoで作成したフォルダへのパス(/cmdbuild)を入力
ユーザー名とパスワードは、Alfrescoのユーザー名とパスワードを入力
Presetsは、Alfrescoと入力し、保存をクリック
アドミニストレーションモジュール > 一般オプション > サーバ管理を選択し、キャッシュのクリアをクリックして終了
9.OCSinventoryのインストール(オプション)
参考[[http://www.io-architect.com/archives/803/]]
EPELレポジトリが必要なので、登録
# yum install -y epel-release
# yum update -y
必要なパッケージをインストール
# yum install -y ocsinventory ocsinventory-agent ocsinventory-ipdiscover
MySQL/httpd初期設定
# systemctl enable mariadb
# systemctl start mariadb
# systemctl status mariadb
# /usr/bin/mysql_secure_installation
# systemctl enable httpd
# systemctl start httpd
# systemctl status httpd
下記にアクセスするとインストーラが開始
http://IPアドレス/ocsreports
WEBユーザ/パスワードは、admin/admin
mysqlユーザは、root、パスワードは、# /usr/bin/mysql_secure_installationで設定したパスワード
10.OCSinventoryエージェントを設定(オプション)
参考[[http://tsunokawa.hatenablog.com/entry/20130817/p1]]
依存モジュールをインストール
# yum install -y perl-LWP-Protocol-https
設定ファイルを修正
# vi /etc/ocsinventory/ocsinventory-agent.cfg
下記に変更
# server = your.ocsserver.name server = http://localhost/ocsinventory
下記をコメントアウト
local = /var/lib/ocsinventory-agent
# vim /etc/sysconfig/ocsinventory-agent
下記に変更し、cronに登録
#OCSMODE[0]=none OCSMODE[0]=cron
下記で即時実行
# /usr/sbin/ocsinventory-agent
11.CMDBuild basic-connectorをインストール(オプション)
参考[[http://www.cmdbuild.org/file/manuali/connectors-manual-in-english]]
# curl -OL https://sourceforge.net/projects/cmdbuild/files/2.4.0/basic-connector-1.5.0.zip
# unzip basic-connector-1.5.0.zip
# cd basic-connector-1.5.0/
OCSInventoryのDBにCMDBuildのカタログviewを作成
# mysql -uroot -p
mysql> use ocsweb;
mysql> source ocs-views.sql;
mysql> exit
プログラムを配置
# chmod +x basic-connector/bin/connector.sh
# cp -R basic-connector /opt/
# cd /opt/basic-connector/
コンフィグレーションを編集
# vim conf/configuration.xml
<?xml version="1.0" encoding="UTF-8"?>
<configuration>
        <cmdbuild>
                <ServerAddress>127.0.0.1</ServerAddress>
                <ServerContext>cmdbuild</ServerContext>
                <ServerPort>8080</ServerPort>
                <Username>inventory</Username>
                <Password>inventory</Password>
        </cmdbuild>
        <inventory>
                <DbType>mysql</DbType>
                <DbAddress>127.0.0.1</DbAddress>
                <DbPort>3306</DbPort>
                <DbName>ocsweb</DbName>
                <DbUser>root</DbUser>
                <DbPassword>password</DbPassword>
        </inventory>
</configuration>
12.CMDBuildのOCSinventory設定(オプション)
アドミニストレーションモジュール > ユーザとグループ
からinventory/inventoryをgroup(normal)で追加
inventory group権限は全てのクラスに書き込み可と設定
新規プロセス(ワークフロー)"ImportAsset"をアドミニストレーションモジュール> プロセスから追加し、以下の2つの属性を作成する
- actionList - type TEXT (editing: hidden)
- actionDetail - type TEXT (editing: editable)
最後に xpdl (ImportAsset_Shark4.4.xpdl)をアップロード
コンソールから、
# ./opt/basic-connector/bin/connector.sh &
を実行