Liquibaseの導入手順を書いていく。テーブルを新規作成をするところまで行う。
Liquibaseに関して
DBマイグレーションツールである。他にはFlyway等が挙げられる。
環境
- Eclipse Oxygen Release (4.7.0)
- Gradle 3.5
- 10.2.7-MariaDB
build.gradleの設定
LiquibaseにはGradleのプラグインが用意されているのでその設定を行う。
build.gradleの設定は以下。対象のデータベースは「sample」とする。
buildscript {
    repositories {
        mavenCentral()
    }
    dependencies {
        classpath 'mysql:mysql-connector-java:6.0.6'
    }
}

plugins {
  id 'org.liquibase.gradle' version '1.2.4'
}

def changeLog = "$projectDir/src/main/db/changelogs.xml"

liquibase {
  activities {
    main {
      changeLogFile changeLog
      url 'jdbc:mysql://localhost:3306/sample?nullNamePatternMatchesAll=true'
      username 'root'
      password 'root'

    }
  }
}
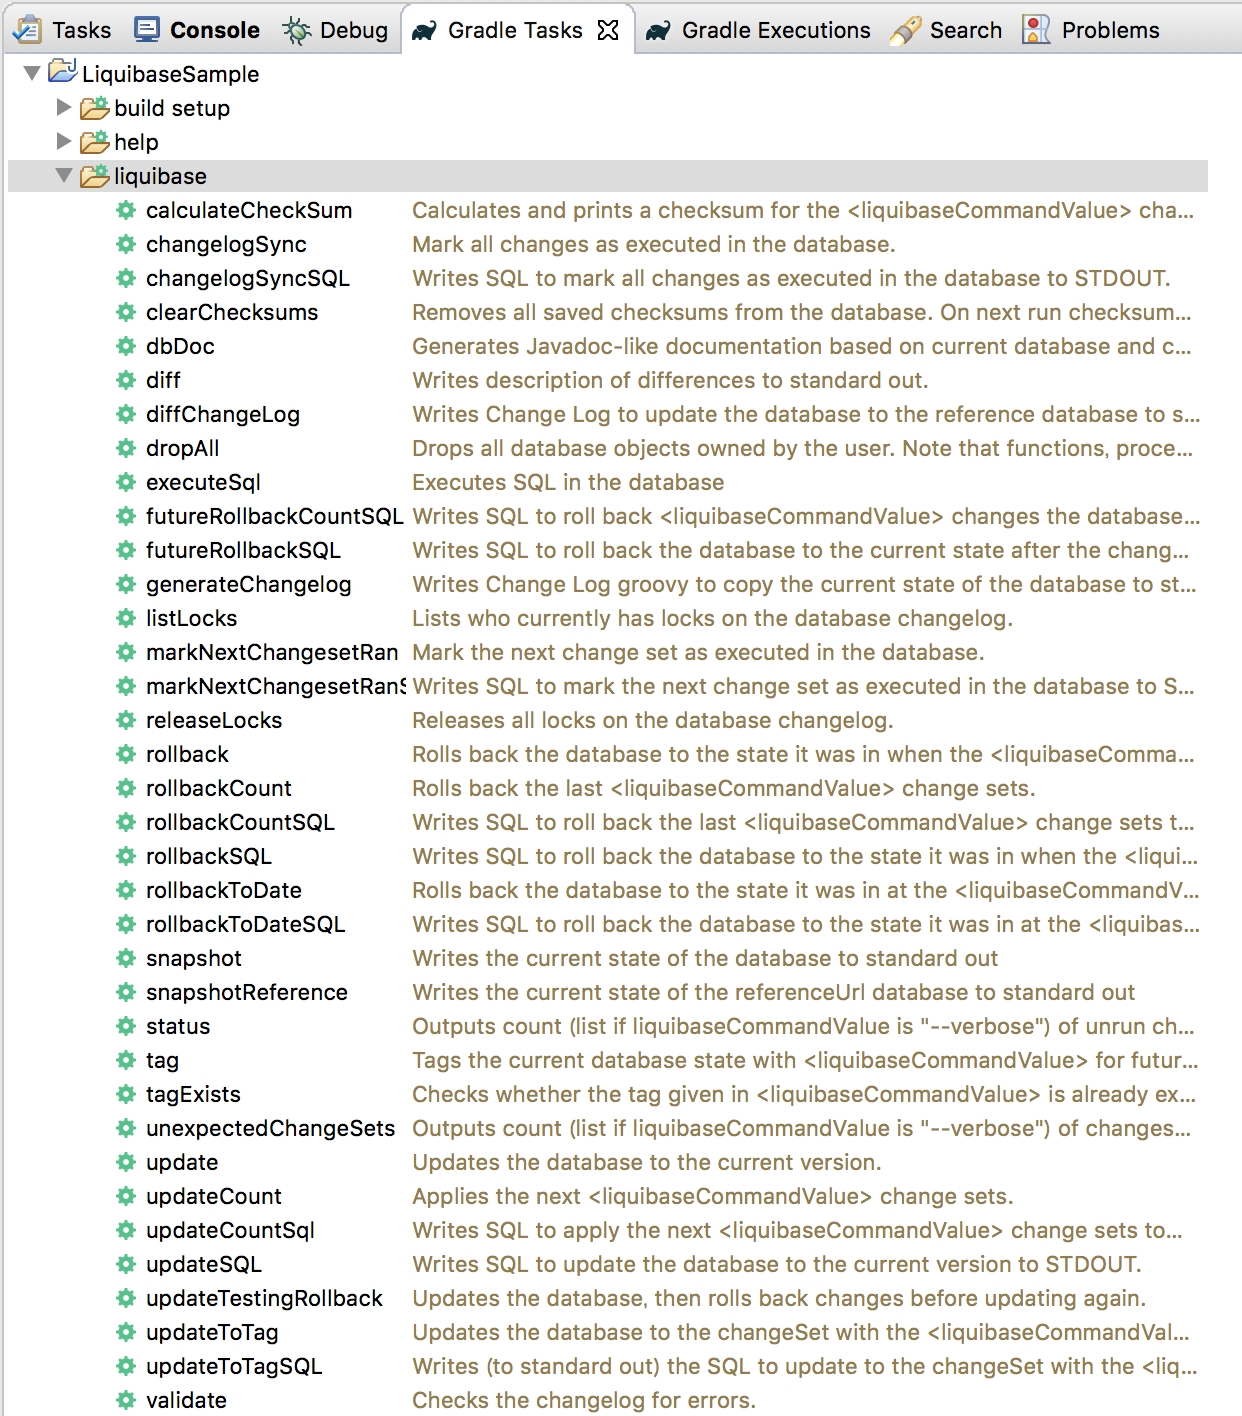
この設定でGradle Taskを更新すると以下のようにLiquibaseのタスクが表示されるようになる。
DatabaseChangeLogの設定
LiquibaseではDatabaseChangeLogというXMLファイルでデータベースの更新履歴を管理する。サンプルは以下。
これをもとにXMLファイルにテーブル情報を記載していく。公式サイトのDOCUMENTATION→CHANGES/REFACTARINGSに記載例があるので参考にすると良い。
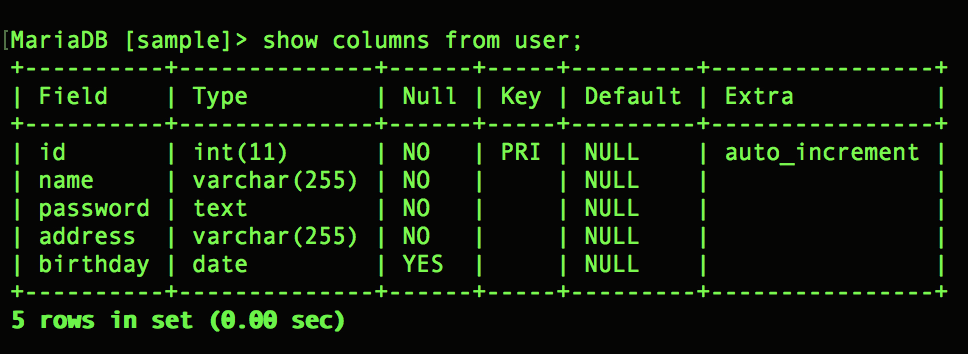
今回は「User」というテーブルを作成する。構成は以下。
| Field | Type | Null | Key | Default | Extra |
|---|---|---|---|---|---|
| id | int(11) | NO | PRI | NULL | auto_increment |
| name | varchar(255) | NO | NULL | ||
| password | text | NO | NULL | ||
| address | varchar(255) | NO | NULL | ||
| birthday | date | YES | NULL |
DatabaseChangeLogはchangelogs.xmlという名で作成する。上記テーブルを作成する場合は以下のようになる。ファイルの配置場所はbuild.xmlに記載されている。
<databaseChangeLog
    xmlns="http://www.liquibase.org/xml/ns/dbchangelog"
    xmlns:xsi="http://www.w3.org/2001/XMLSchema-instance"
    xmlns:ext="http://www.liquibase.org/xml/ns/dbchangelog-ext"
    xsi:schemaLocation="http://www.liquibase.org/xml/ns/dbchangelog http://www.liquibase.org/xml/ns/dbchangelog/dbchangelog-3.1.xsd
    http://www.liquibase.org/xml/ns/dbchangelog-ext http://www.liquibase.org/xml/ns/dbchangelog/dbchangelog-ext.xsd">

<changeSet author="sato" id="create-user">
     <createTable catalogName="sample"
            remarks="ユーザ情報"
            schemaName="public"
            tableName="user">
            <column name="id" type="int(11)">
                <constraints primaryKey="true" nullable="false"/>
            </column>
            <column name="name" type="varchar(255)">
                <constraints nullable="false"/>
            </column>
            <column name="password" type="text">
                <constraints nullable="false"/>
            </column>
            <column name="address" type="varchar(255)">
                <constraints nullable="false"/>
            </column>
        <column name="birthday" type="date"/>
    </createTable>
    <addAutoIncrement catalogName="sample"
        columnDataType="int"
        columnName="id"
        incrementBy="1"
        schemaName="public"
        startWith="100"
        tableName="user"/>
    <rollback>
        <dropTable tableName="user"/>
    </rollback>
</changeSet>
</databaseChangeLog>
gradle update実行するとテーブルが作成される。