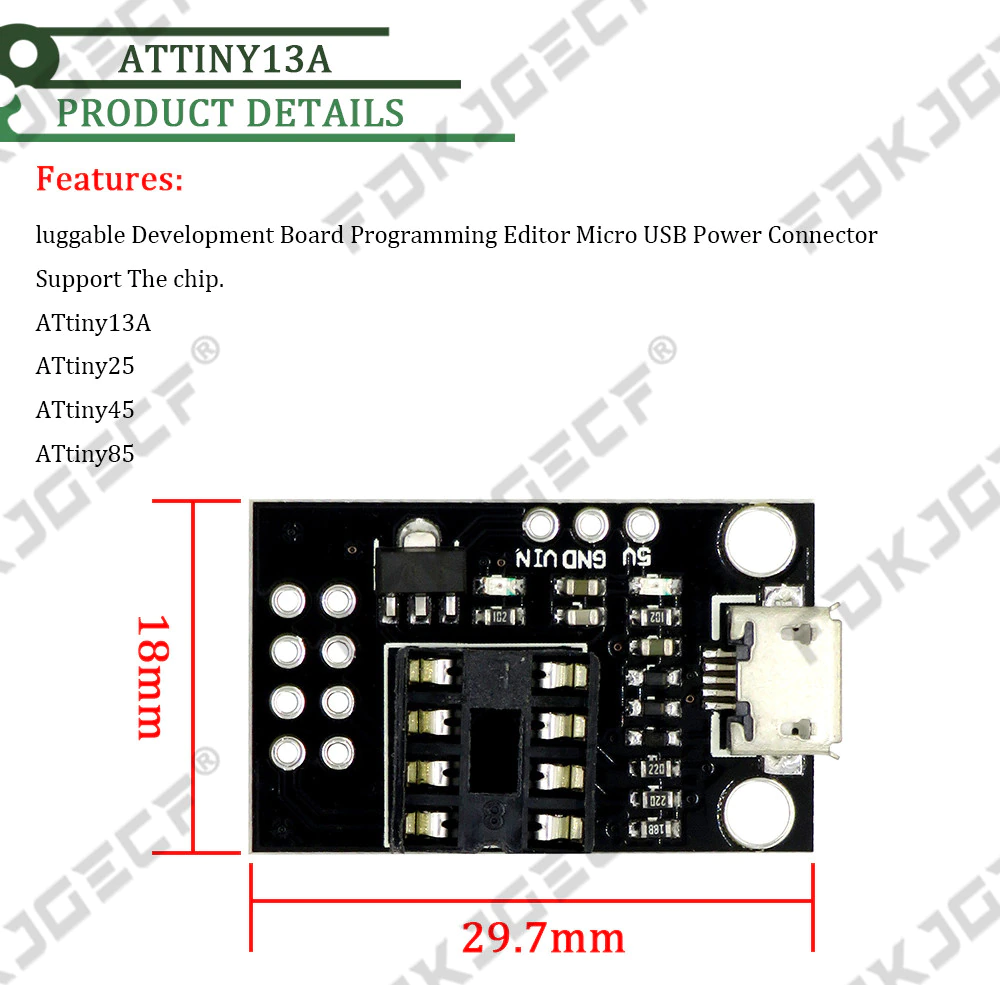
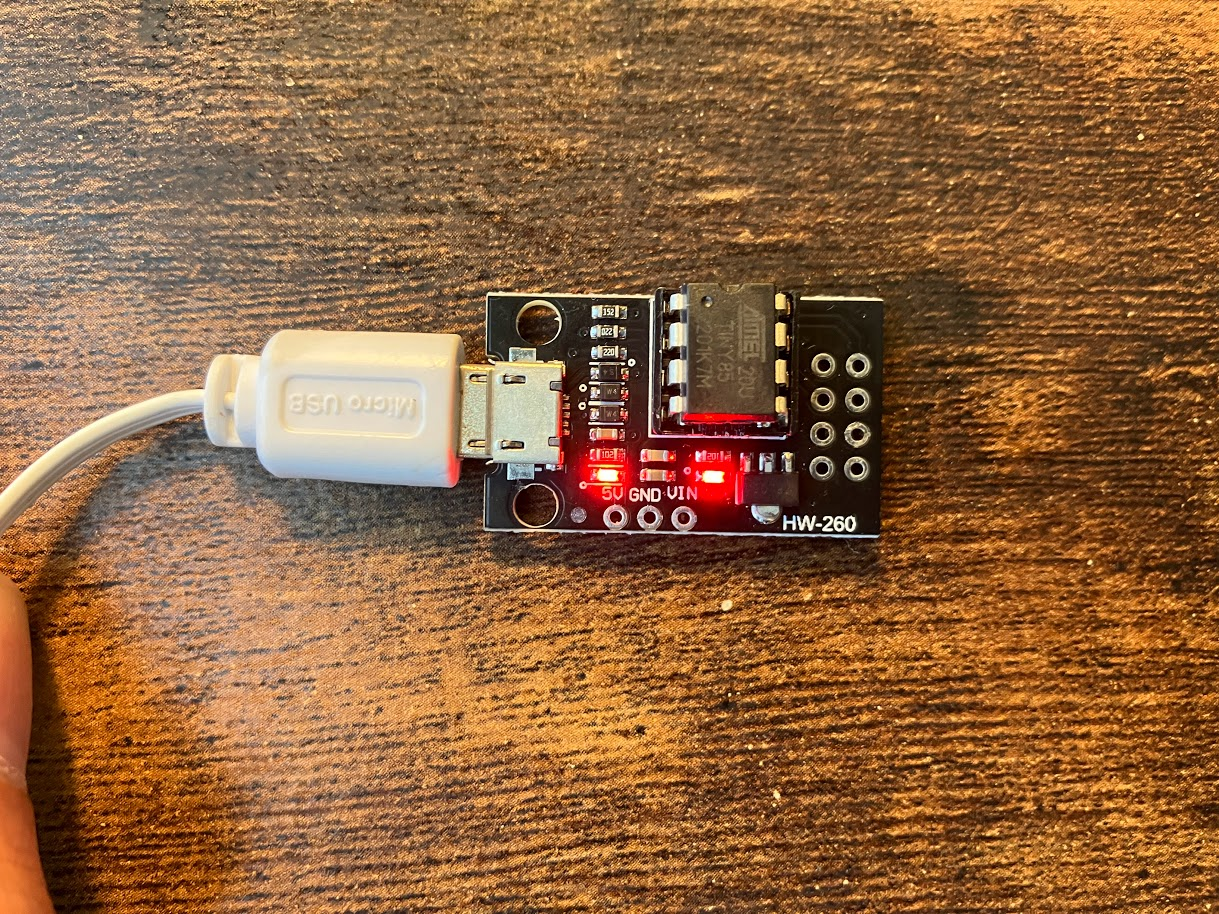
Aliexpressでこんなものを買いました。
ATtinyなど8pin用のDev boardというものです。
秋月でATtiny85が200円なので安くAruduino互換機が出来るのではと思いやってみました。
ブートローダ書き込み
秋月で売ってるATtiny85は生の状態なので、Arduinoとして利用するためにはブートローダの書き込みが必要です。
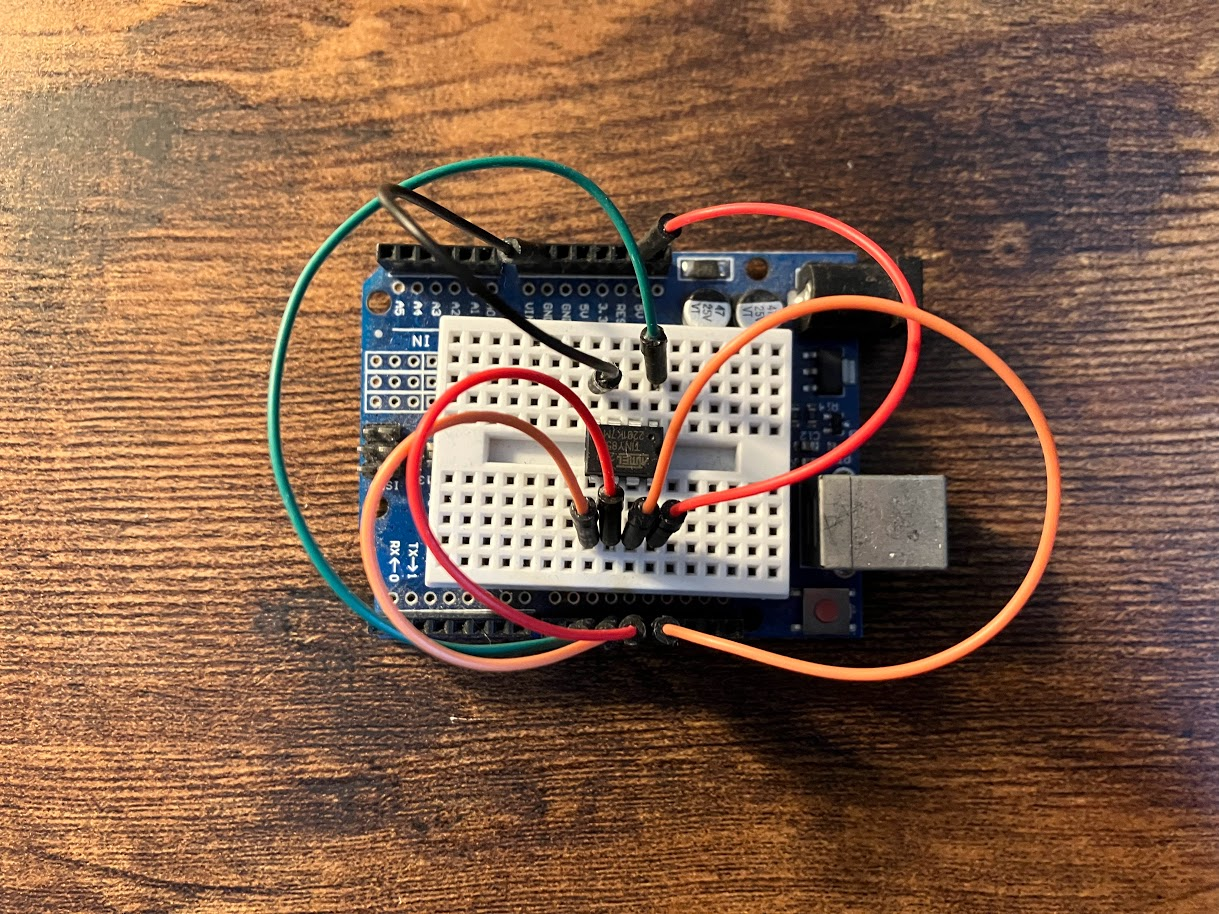
Arduino自体を書き込み機にするので、こんな感じで配線します。
ブートローダは以下にあるものを使用します。
USBブートローダなのでDigisparkと同じように、dev boardをPCに挿して使えるようにします。
gitから手元にcloneすると、\firmware\releases フォルダに入っている t85_default.hex を生のATtiny85に書き込むことになります。
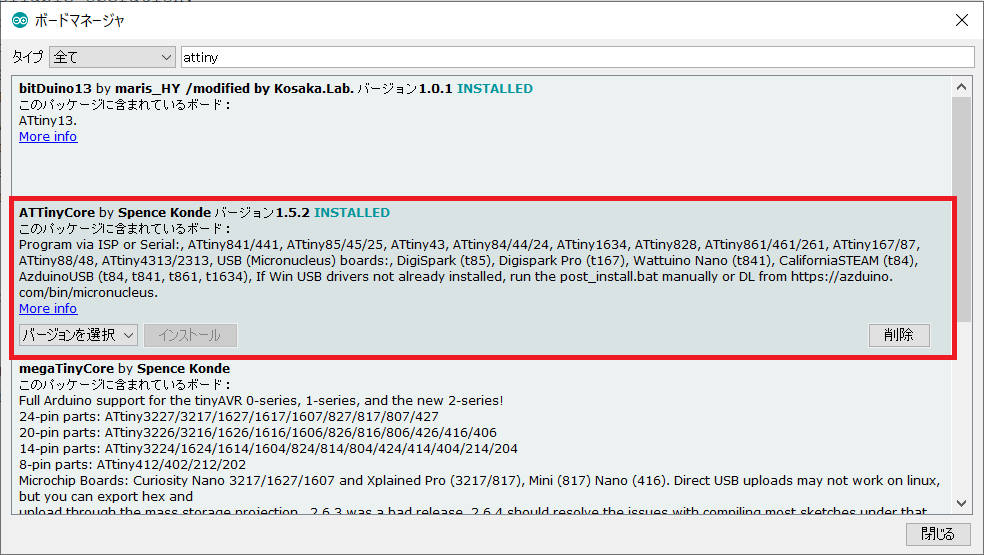
Arduinoにボードを追加しておきましょう。
環境設定から以下のURLを追加して、
http://drazzy.com/package_drazzy.com_index.json
ボートマネージャから ATTiny をインストールします。
Arduinoで空のスケッチを新規作成して、Arduino経由で書き込みをします。
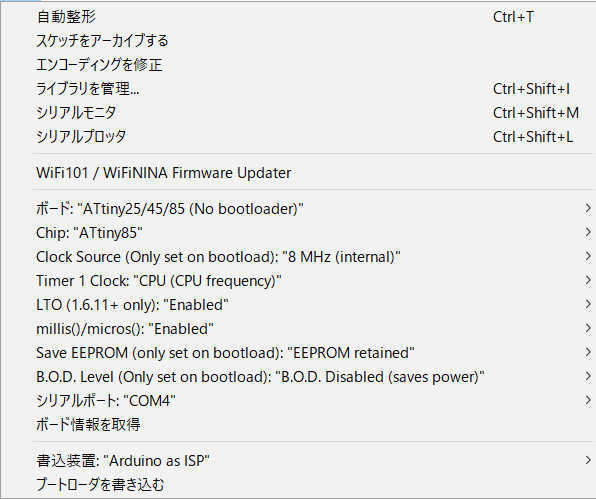
ボードはATtiny85のNo bootloader, 書き込み装置にArduino as ISPを指定します。
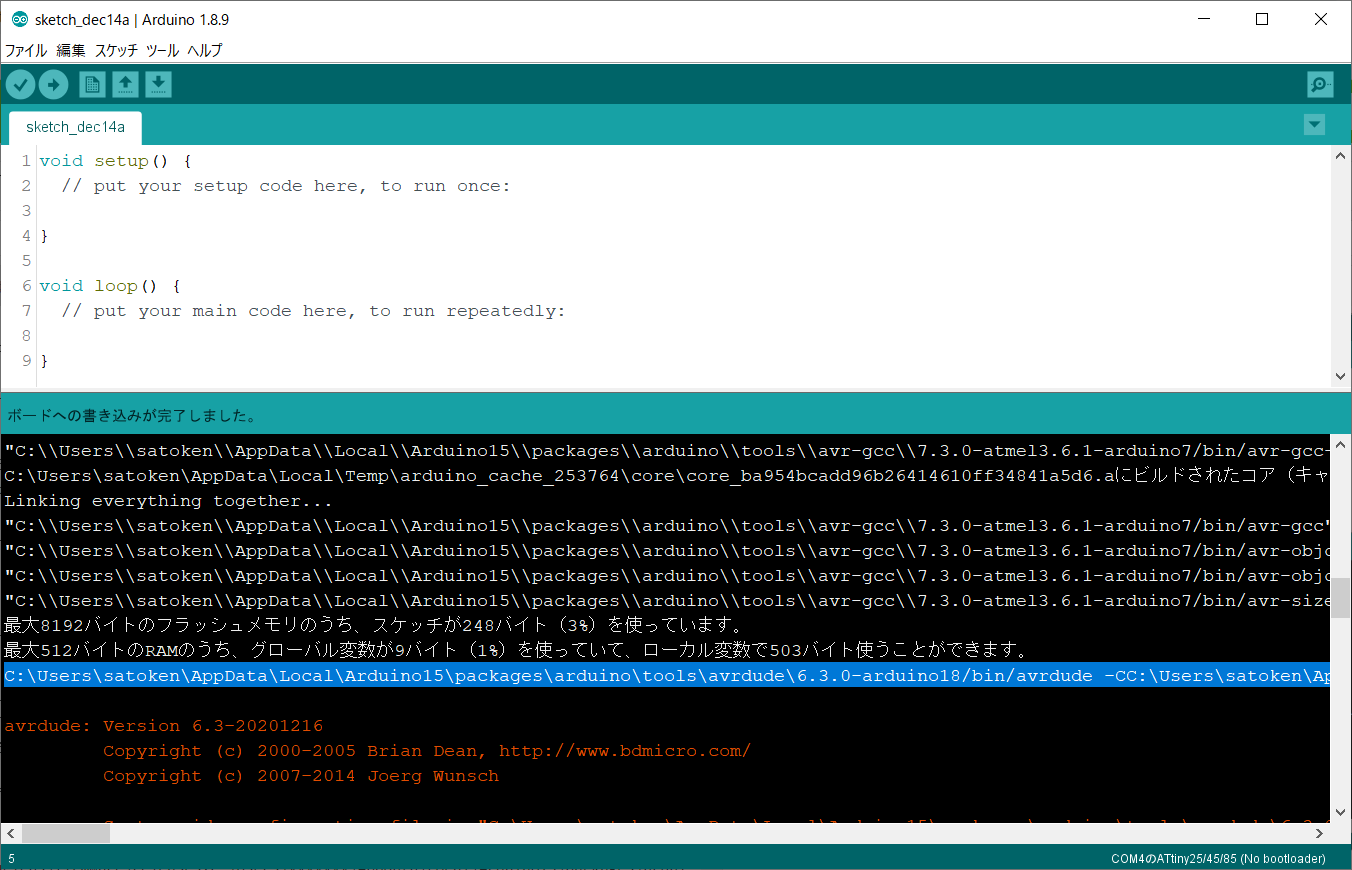
空スケッチを書き込むと、Arduinoのログの書き込みコマンドが出力されます。
この書き込みコマンドをコピーして、-Uflash で指定されているhexファイルを先ほどgitからcloneしてきた、micronucleusのブートローダの t85_default.hex に置き換えます。
さらに最後に -U lfuse:w:0xe1:m -U hfuse:w:0xdd:m -U efuse:w:0xfe:m を付け足します。
コマンドプロンプトから書き込みコマンドを実行します。
C:\work>C:\Users\xxxxxxx\AppData\Local\Arduino15\packages\arduino\tools\avrdude\6.3.0-arduino18/bin/avrdude -CC:\Users\xxxxxxx\AppData\Local\Arduino15\packages\arduino\tools\avrdude\6.3.0-arduino18/etc/avrdude.conf -v -pattiny85 -carduino -PCOM8 -b19200 -Uflash:w:C:\work\mysketch\micronucleus\firmware\releases\t85_default.hex:i -U lfuse:w:0xe1:m -U hfuse:w:0xdd:m -U efuse:w:0xfe:m

avrdude: Version 6.3-20201216
         Copyright (c) 2000-2005 Brian Dean, http://www.bdmicro.com/
         Copyright (c) 2007-2014 Joerg Wunsch

         System wide configuration file is "C:\Users\xxxxxxx\AppData\Local\Arduino15\packages\arduino\tools\avrdude\6.3.0-arduino18/etc/avrdude.conf"

         Using Port                    : COM8
         Using Programmer              : arduino
         Overriding Baud Rate          : 19200
         AVR Part                      : ATtiny85
         Chip Erase delay              : 400000 us
         PAGEL                         : P00
         BS2                           : P00
         RESET disposition             : possible i/o
         RETRY pulse                   : SCK
         serial program mode           : yes
         parallel program mode         : yes
         Timeout                       : 200
         StabDelay                     : 100
         CmdexeDelay                   : 25
         SyncLoops                     : 32
         ByteDelay                     : 0
         PollIndex                     : 3
         PollValue                     : 0x53
         Memory Detail                 :

                                  Block Poll               Page                       Polled
           Memory Type Mode Delay Size  Indx Paged  Size   Size #Pages MinW  MaxW   ReadBack
           ----------- ---- ----- ----- ---- ------ ------ ---- ------ ----- ----- ---------
           eeprom        65    12     4    0 no        512    4      0  4000  4500 0xff 0xff
           flash         65     6    32    0 yes      8192   64    128 30000 30000 0xff 0xff
           signature      0     0     0    0 no          3    0      0     0     0 0x00 0x00
           lock           0     0     0    0 no          1    0      0  9000  9000 0x00 0x00
           lfuse          0     0     0    0 no          1    0      0  9000  9000 0x00 0x00
           hfuse          0     0     0    0 no          1    0      0  9000  9000 0x00 0x00
           efuse          0     0     0    0 no          1    0      0  9000  9000 0x00 0x00
           calibration    0     0     0    0 no          1    0      0     0     0 0x00 0x00

         Programmer Type : Arduino
         Description     : Arduino
         Hardware Version: 2
         Firmware Version: 1.18
         Topcard         : Unknown
         Vtarget         : 0.0 V
         Varef           : 0.0 V
         Oscillator      : Off
         SCK period      : 0.1 us

avrdude: AVR device initialized and ready to accept instructions

Reading | ################################################## | 100% 0.03s

avrdude: Device signature = 0x1e930b (probably t85)
avrdude: safemode: lfuse reads as E1
avrdude: safemode: hfuse reads as DD
avrdude: safemode: efuse reads as FE
avrdude: NOTE: "flash" memory has been specified, an erase cycle will be performed
         To disable this feature, specify the -D option.
avrdude: erasing chip
avrdude: reading input file "C:\work\mysketch\micronucleus\firmware\releases\t85_default.hex"
avrdude: writing flash (8170 bytes):

Writing | ################################################## | 100% 0.14s

avrdude: 8170 bytes of flash written
avrdude: verifying flash memory against C:\work\mysketch\micronucleus\firmware\releases\t85_default.hex:
avrdude: load data flash data from input file C:\work\mysketch\micronucleus\firmware\releases\t85_default.hex:
avrdude: input file C:\work\mysketch\micronucleus\firmware\releases\t85_default.hex contains 8170 bytes
avrdude: reading on-chip flash data:

Reading | ################################################## | 100% 0.14s

avrdude: verifying ...
avrdude: 8170 bytes of flash verified
avrdude: reading input file "0xe1"
avrdude: writing lfuse (1 bytes):

Writing | ################################################## | 100% 0.02s

avrdude: 1 bytes of lfuse written
avrdude: verifying lfuse memory against 0xe1:
avrdude: load data lfuse data from input file 0xe1:
avrdude: input file 0xe1 contains 1 bytes
avrdude: reading on-chip lfuse data:

Reading | ################################################## | 100% 0.02s

avrdude: verifying ...
avrdude: 1 bytes of lfuse verified
avrdude: reading input file "0xdd"
avrdude: writing hfuse (1 bytes):

Writing | ################################################## | 100% 0.02s

avrdude: 1 bytes of hfuse written
avrdude: verifying hfuse memory against 0xdd:
avrdude: load data hfuse data from input file 0xdd:
avrdude: input file 0xdd contains 1 bytes
avrdude: reading on-chip hfuse data:

Reading | ################################################## | 100% 0.02s

avrdude: verifying ...
avrdude: 1 bytes of hfuse verified
avrdude: reading input file "0xfe"
avrdude: writing efuse (1 bytes):

Writing | ################################################## | 100% 0.02s

avrdude: 1 bytes of efuse written
avrdude: verifying efuse memory against 0xfe:
avrdude: load data efuse data from input file 0xfe:
avrdude: input file 0xfe contains 1 bytes
avrdude: reading on-chip efuse data:

Reading | ################################################## | 100% 0.02s

avrdude: verifying ...
avrdude: 1 bytes of efuse verified

avrdude: safemode: lfuse reads as E1
avrdude: safemode: hfuse reads as DD
avrdude: safemode: efuse reads as FE
avrdude: safemode: Fuses OK (E:FE, H:DD, L:E1)

avrdude done.  Thank you.


C:\work>
これで生のATtiny85にブートローダを書き込めました。
dev boardにAttinyを挿してPCに接続します。
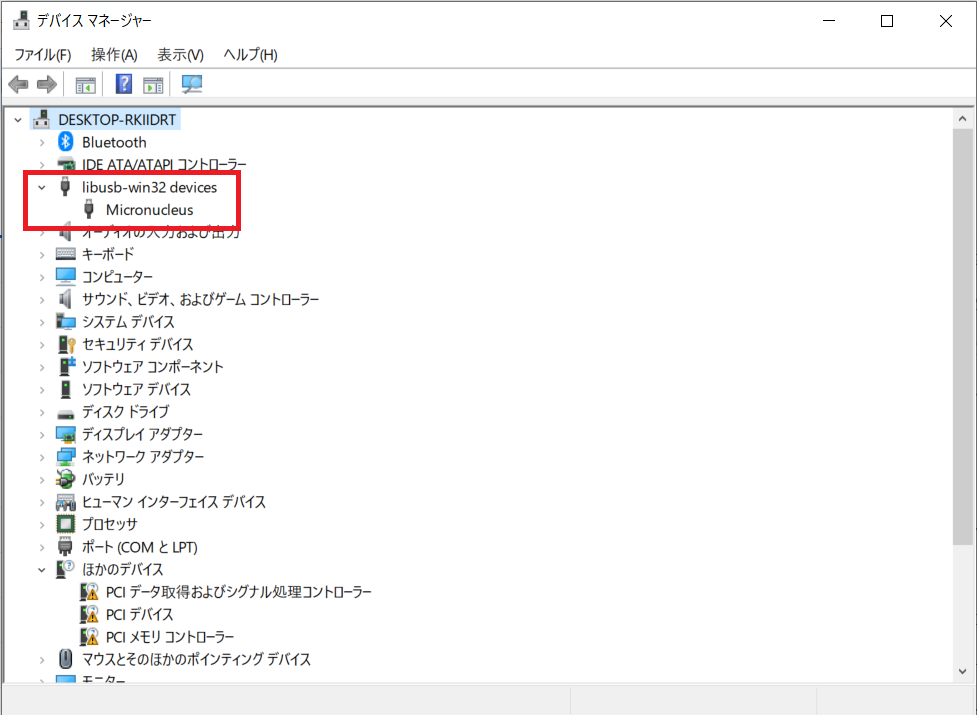
デバイスマネージャーを開き、libusb-win32 device で Micronucleus と表示されたらOKです。
Lチカ
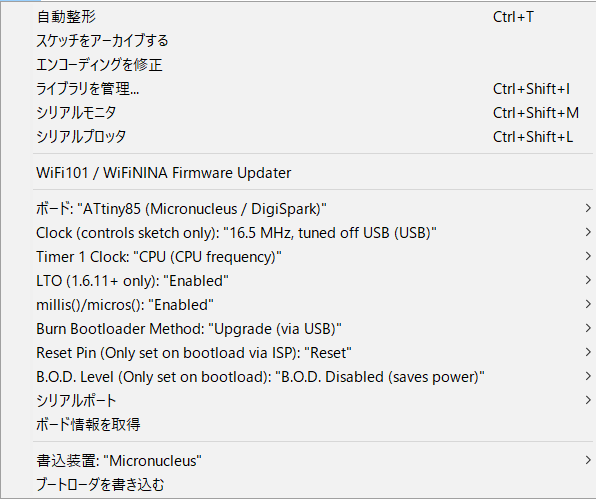
ボードで ATtiny85(Micronucleus/Digispark), 書き込み装置に micronucleus を選択してスケッチを書きます。
スケッチを書いたらdev boardをPCから外した状態で、書き込みを実行します。
スケッチのコンパイルが終わると、Arduinoに Please plug in the device (will time out in 60 seconds) と
出たら、dev boardをPCに挿します。
dev boardがPCに認識されると書き込みが実行されます。
> Please plug in the device (will time out in 60 seconds) ...
> Device is found!
connecting: 16% complete
connecting: 22% complete
connecting: 28% complete
connecting: 33% complete
> Device has firmware version 2.6
> Device signature: 0x1e930b
> Available space for user applications: 6650 bytes
> Suggested sleep time between sending pages: 7ms
> Whole page count: 104  page size: 64
> Erase function sleep duration: 728ms
parsing: 50% complete
> Erasing the memory ...
erasing: 55% complete
erasing: 60% complete
erasing: 65% complete
> Starting to upload ...
writing: 70% complete
writing: 75% complete
writing: 80% complete
> Starting the user app ...
running: 100% complete
>> Micronucleus done. Thank you!
1番ピンを指定したら、Attiny直下のLEDが点滅しました。
その他
最初はdev boardがユニバーサルシリアルバスで認識されていました。
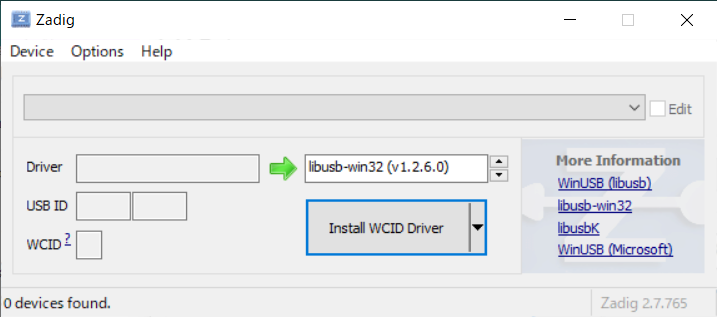
その時はZadigツールでlibusb-win32として認識させるように変更したら、libusb-win32 deviceとして認識されるようになり、スケッチを書き込めるようになりました。
参考
